Categories
Flooring Renovation

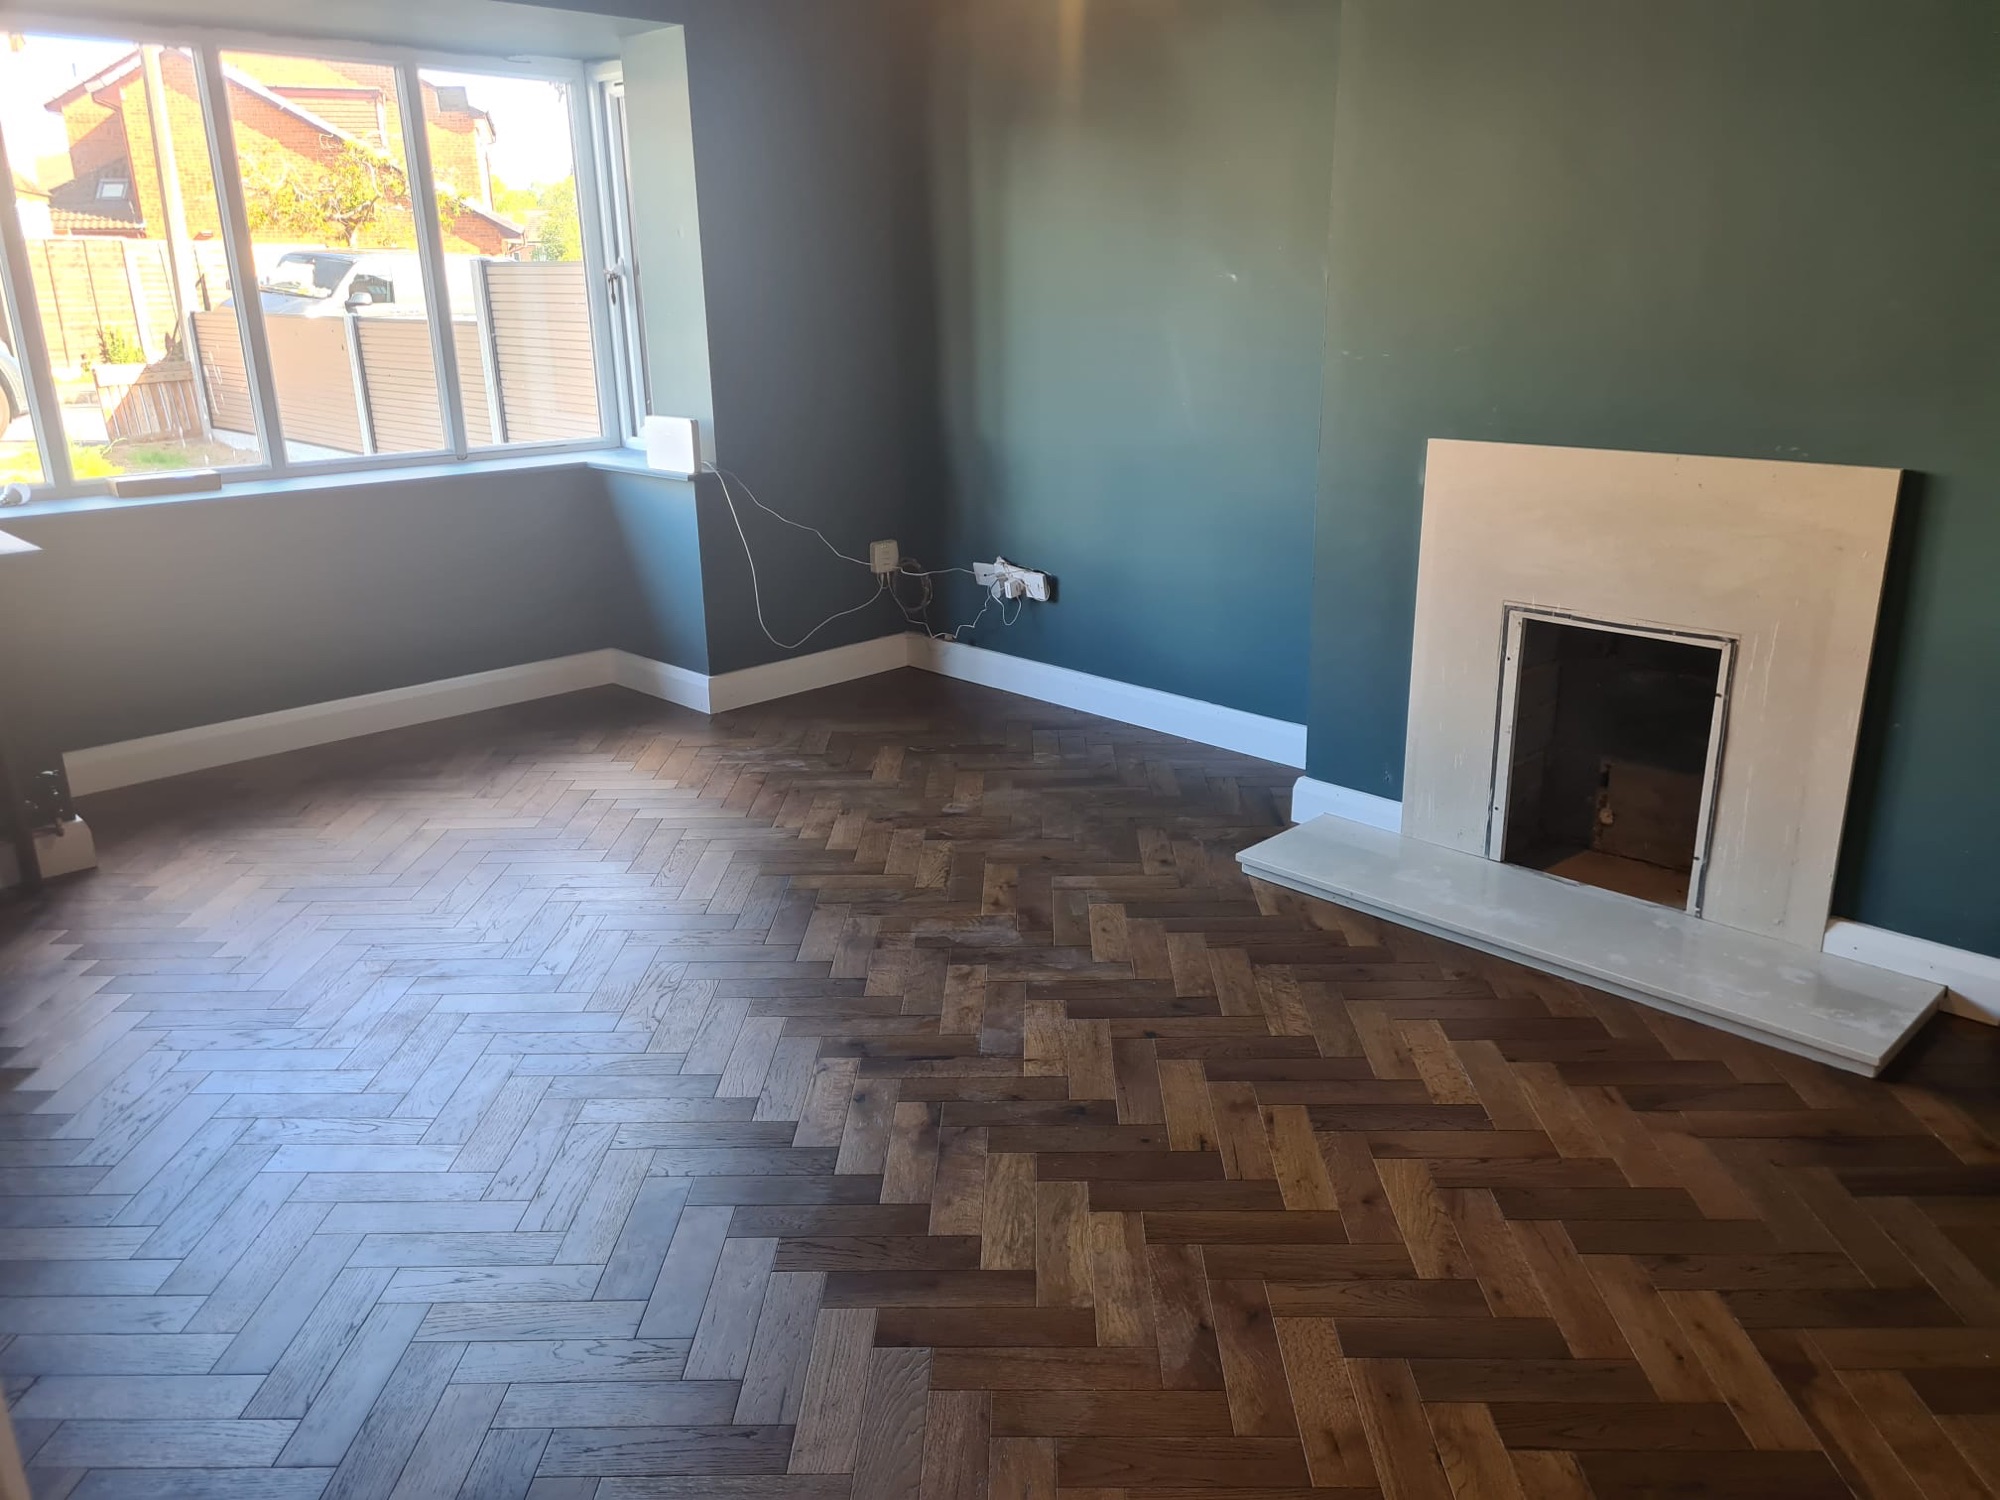
Herringbone Oak parquet floor, Watnall, Nottingham

Installing Herringbone Oak Parquet Flooring

We recently completed the installation of a beautiful Herringbone Oak floor sourced from Stories Flooring. Our second from them in as many months. This project highlights our approach to subfloor preparation, a critical factor in achieving a lasting, high-quality finish.

img_6111
previous arrow
next arrow

A key consideration during preparation was the existing subfloor, which contained original tiles potentially dating from the 1980s. To ensure compliance and safety—and specifically to mitigate the risk associated with disturbing potential asbestos-containing materials (ACMs)—we opted for a non-intrusive overlay solution. This professional decision avoided complex and costly remediation.

We applied F. Ball Stopgap P131 primer and self-levelling compound. This choice allowed us to achieve a perfectly smooth and stable surface with minimal build-up, creating the ideal base for the new parquet system. Precision Installation Technique

Our method for installing this type of parquet flooring is rooted in precision and patience. The most effective technique is a staged adhesive application to manage the elasticity of the glue and ensure optimal alignment:

  1. We initially lay and fix the central key column or the first two rows of the product.
  2. We allow this central element time to fully cure and stabilize before proceeding with the remainder of the floor.

By allowing the adhesive to cure completely in these crucial early stages, we prevent movement and ensure the long-term integrity and alignment of the entire floor.


Cost Guide: Herringbone Parquet Flooring

For full transparency, here is a breakdown of the typical costs per square metre (m²) for a high-quality Herringbone Parquet installation:

  • Preparation (Self-levelling compound): £15
  • Flooring Material: £50
  • Adhesive: £10
  • Professional Labour: £90 – £150

These costs are excluding VAT, this job needed 15% wastage so make sure you allow for it otherwise you’ll need an emergency trip to Leeds to pick up an extra box

Categories
External Fencing Groundwork

Hedge removal and new fence installation.

We removed a conifer hedge back in February for the customer before the start of the bird nesting season. Pruning trees or bushes after the 1st of April without appropriate ecological supervision could get a builder like ourselves into trouble.

The customer chose composite fence panels from Charles and Ivy.

We installed these into concrete posts and gravel boards for longevity.

The last eight weeks have been very dry. It is is very important to water newly laid turf regularly if it is not raining frequently. Here is a guide to looking after your new turf.

The first few weeks after laying new turf are crucial for root establishment. Here is detailed advice for caring for your new lawn, focusing on watering, traffic, and mowing:1. Watering (The Most Critical Step)The first few weeks after laying new turf are crucial for root establishment. Here is detailed advice for caring for your new lawn, focusing on watering, traffic, and mowing:
 
1. Watering (The Most Critical Step)
  • Initial Watering (First 1-3 Weeks): New turf is a living plant that needs consistent moisture to root deeply.
    • Frequency: Water the entire lawn evenly and thoroughly every day, especially during hot or dry weather. Some advice suggests watering at least twice a day for the first seven days.
    • Technique: Use a sprinkler to ensure even coverage. The water must soak down through the turf to moisten the soil below.
    • Timing: Water early in the morning or early evening to allow the water to reach the roots before the sun causes it to evaporate.
    • Watch for Edges: Concrete edging, posts, and paving slabs absorb water quickly, so be sure to water areas near them more often.
  • Avoid Overwatering: While the turf needs water, ensure the ground is moist but not waterlogged or soggy, as this can starve the roots of oxygen and make the grass turn yellow or die.
  • Reducing Frequency: As the turf starts to knit together (around 3 to 4 weeks), reduce watering frequency. It is better to water thoroughly every two to three days than to water a little bit every day.
2. Traffic and Compaction
  • Keep Off: Avoid walking on the new turf as much as possible for the first few weeks, ideally three to four weeks. Walking on it can cause soil compaction, create dents and divots, and disrupt root formation.
  • Necessary Access: If you must cross the lawn (e.g., for watering), place wooden planks or boards down to use as a walkway to distribute your weight.
  • Pets and Play: Keep pets and children’s play equipment off the lawn until it is fully established and settled.
  • Frost: Avoid walking on the lawn during frosty weather as this can damage the grass blades.
3. Mowing
  • When to Start: Do not mow until the turf has rooted well and the blades of grass are at least 25mm high. This is typically around three weeks after laying.
  • Check Rooting: To check if it’s ready, gently tug on a few blades of grass. If the turf lifts, wait a few more days. If the turf feels stuck, the roots have started to take and it is ready for its first cut.
  • First Cut: Use the highest setting on your lawnmower and ensure the blades are sharp for a clean cut. Only cut off about a quarter to no more than one-third of the grass length at one time.
  • Ongoing Mowing: When the grass is growing, cut “a little and often” rather than cutting it once a week, as frequent light trimming prevents the coarse grass from dominating the lawn.
4. Fertilising and General Care
  • Fertiliser: Your new turf is usually pre-fertilised, so it generally will not require additional fertiliser for at least three months, or a minimum of six weeks after laying. Phosphorous is considered the most crucial nutrient during this establishment phase to encourage root growth.
  • Cuttings: Collect the clippings using a grass box or rake them up and remove them to ensure sunlight reaches the turf.
  • Brown Patches: If your turf is turning yellow or brown, it is likely due to insufficient water during a dry or hot spell. Increasing your watering will usually return the lawn to a healthy state.