Categories
Brickwork Groundwork Resin bound gravel

Accessible Resin bonded ramp in Langley Mill, Derbyshire

The Challenge

Our client, who has limited mobility, required a solution to gain independent access to their property with a mobility scooter. The existing front wall of the property created a significant physical barrier, preventing this access with the limited turning circle.

img_6974
previous arrow
next arrow

Our Approach

We prioritised a practical, site-led approach to find the best solution:

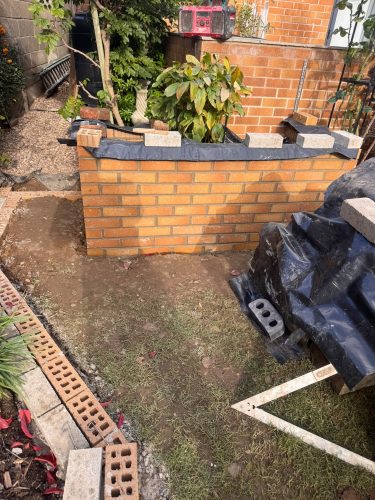
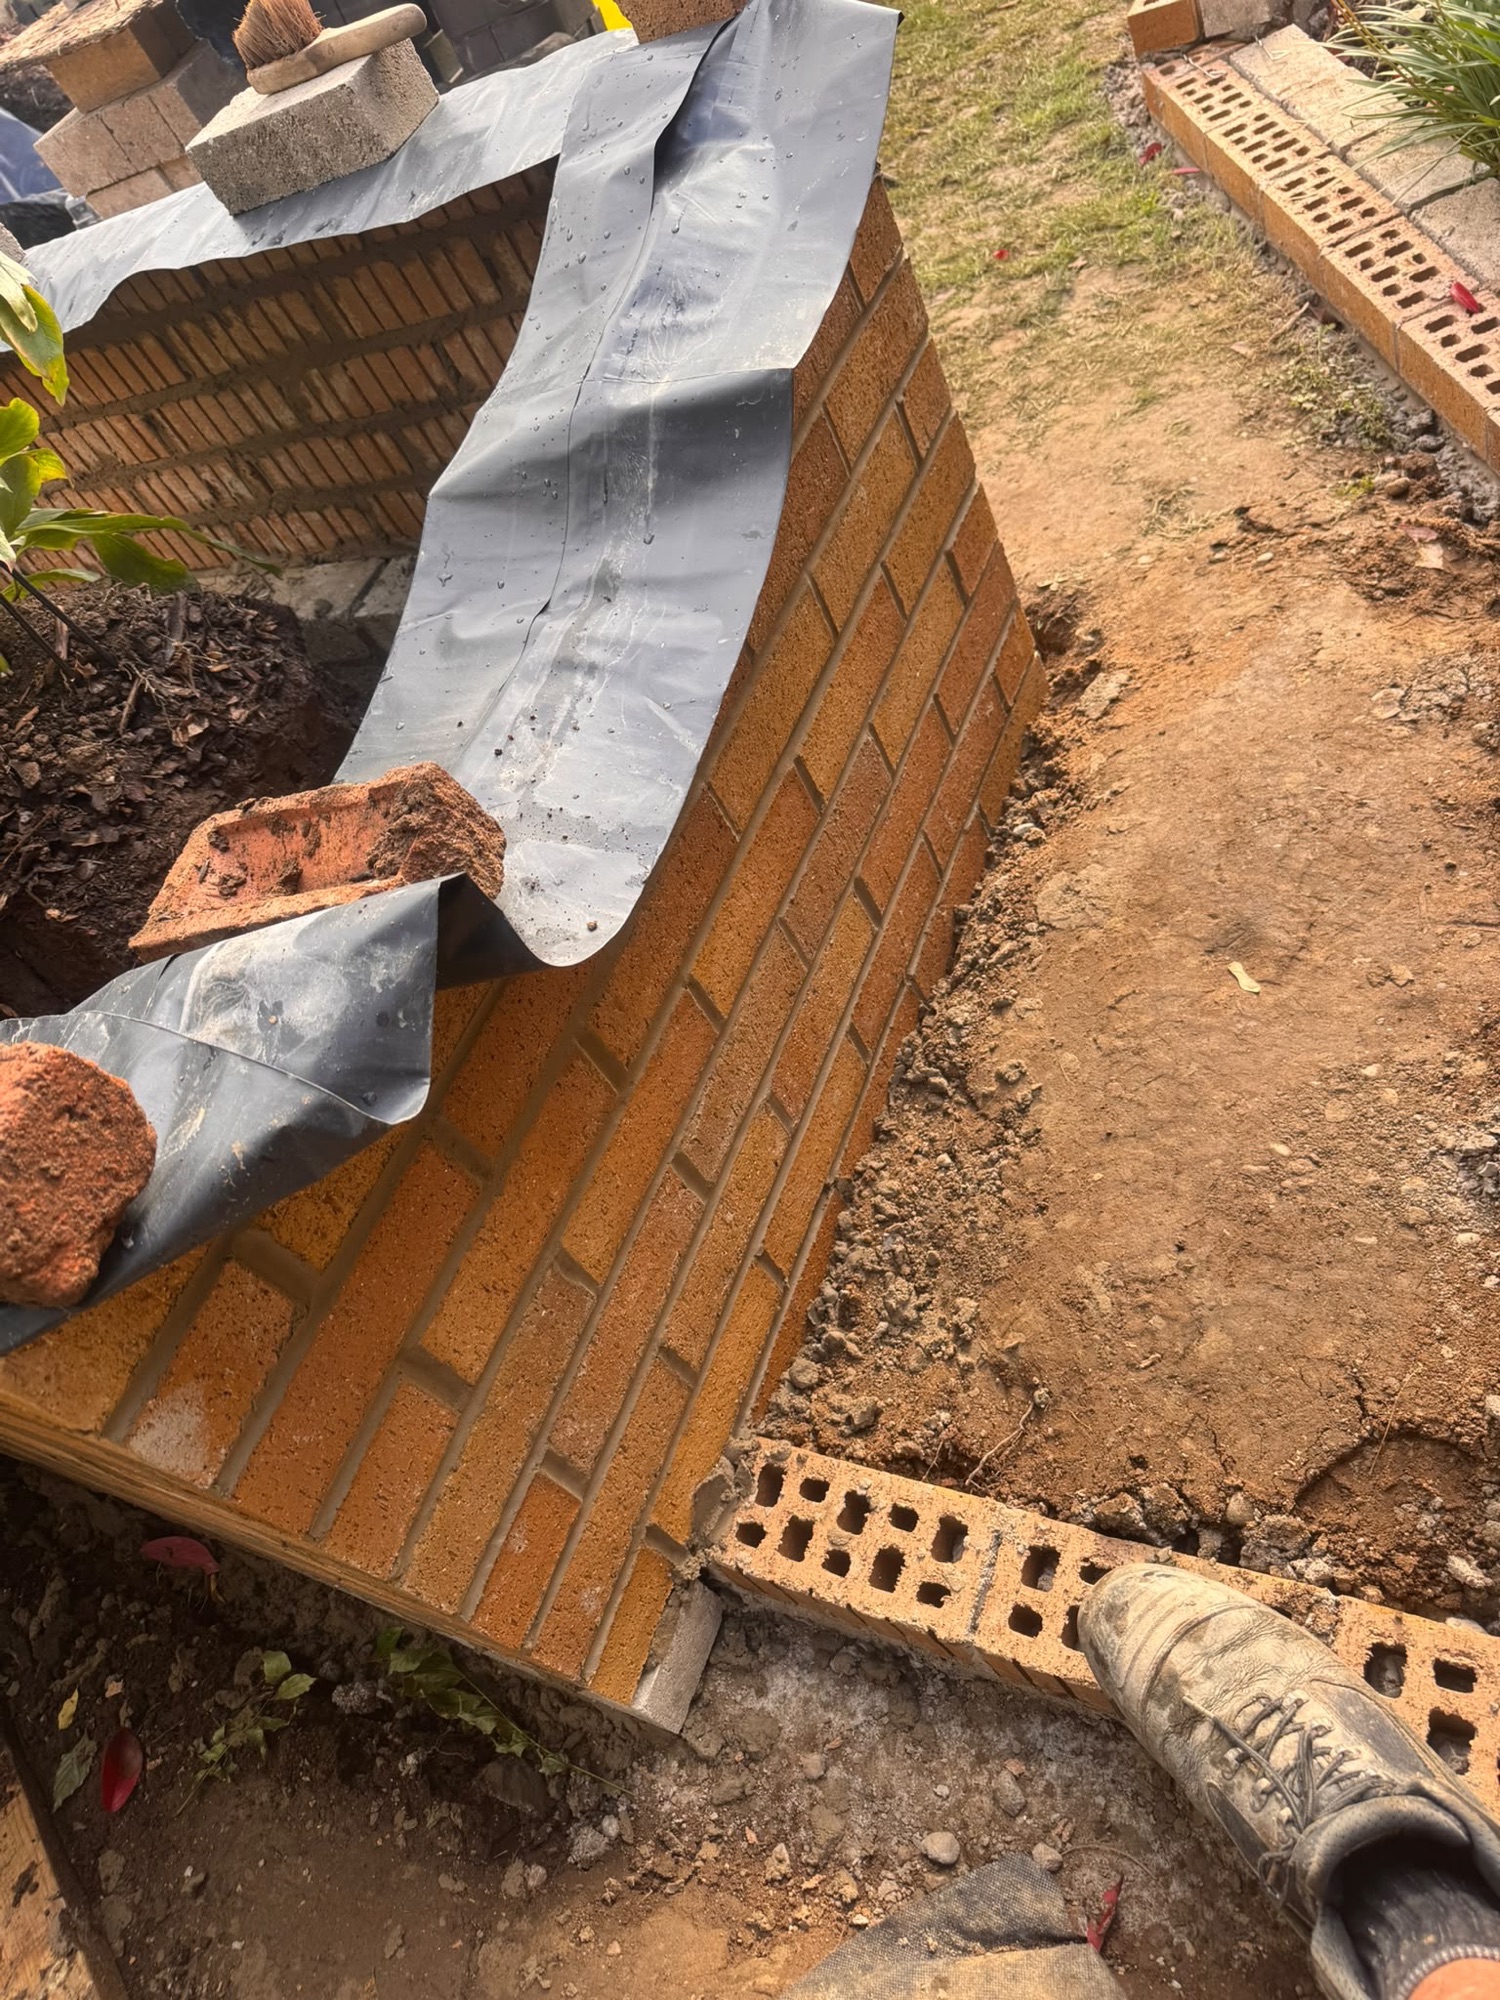
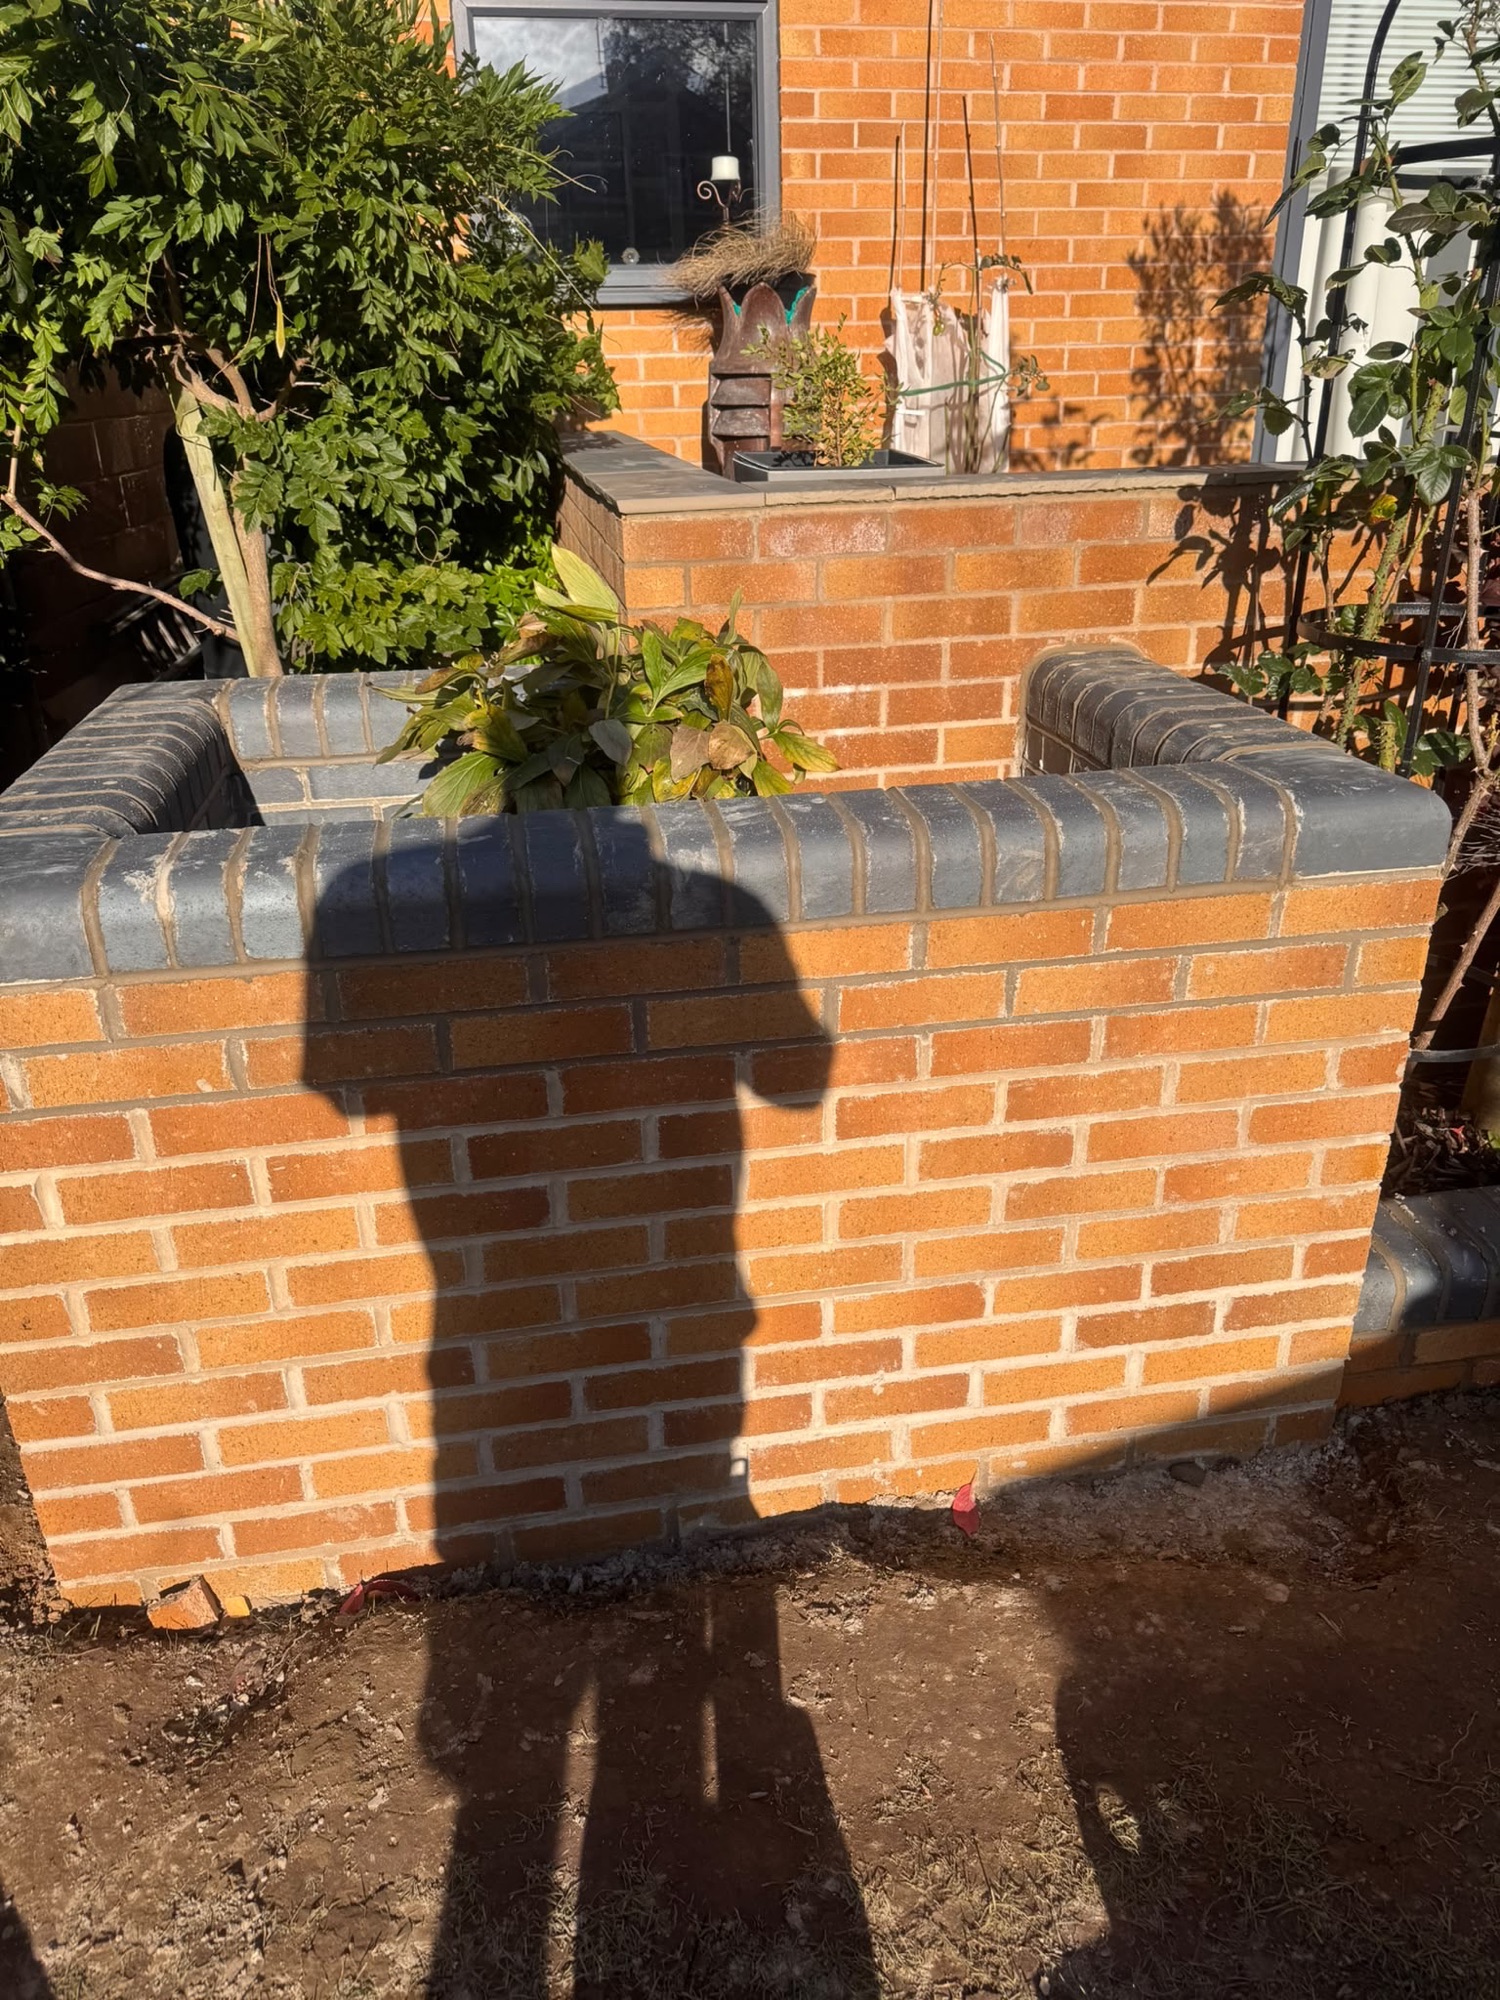
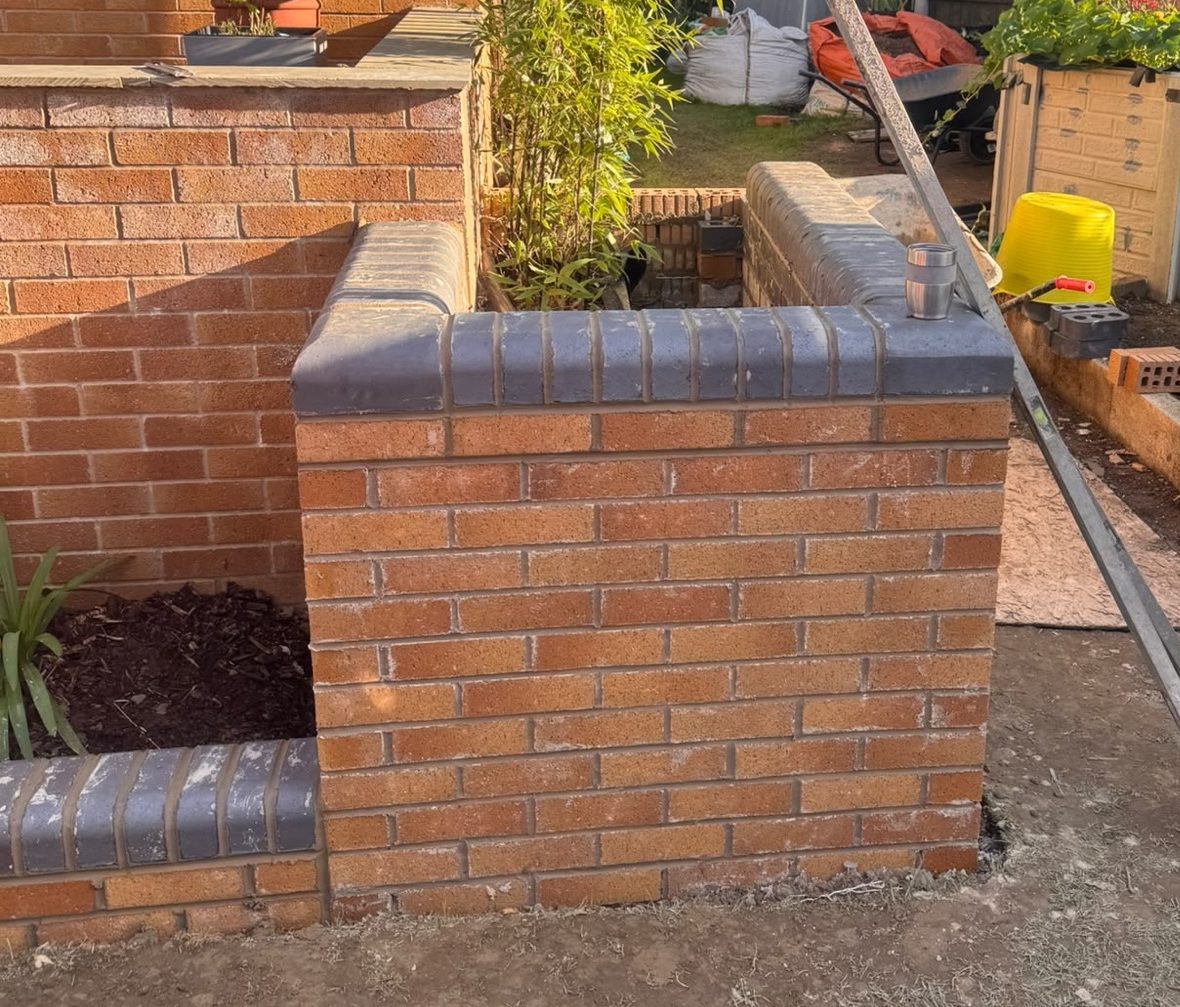
  • Structural Modification: We carefully dismantled the existing boundary wall and re-built it to accommodate a new, accessible entry point.
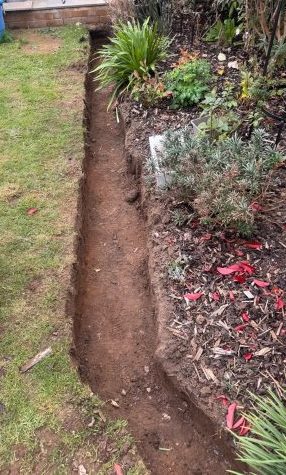
  • Groundworks: The site was leveled to ensure a comfortable, safe gradient for the scooter ramp.
  • Surfacing: We constructed the ramp using ‘Sahara Mix’ resin-bonded gravel, sourced from The Resin Mill, providing a durable, slip-resistant, and level surface. They have a really good visualiser tool for seeing what it will look like.

Design & Decision Making

Rather than adhering to a rigid, pre-set design that might not work on the ground, we collaborated closely with the client throughout the process. We waited until the wall was dismantled before finalising the handrail positioning. This allowed us to assess the site in real-time, resulting in a short handrail on either side that perfectly balanced accessibility with space for the client to manoeuvre bins.

Handrail Material Selection

We sourced materials through FH Brundle in Ilkeston. Our choice of 42mm galvanized tubing for the handrails was driven by a ‘function-first’ philosophy:

  • Strength & Rigidity: Ensuring maximum safety for the client.
  • Longevity: Selected for its weather resistance and durability.
  • Appearance: A clean, professional aesthetic that complements the property.

    After

Drainage

We chose resin-bonded gravel partly for its permeable qualities. Unlike solid concrete or tarmac, this surface allows rainwater to soak naturally into the ground rather than pooling on the ramp or running off into the street. We add a layer of pea gravel underneath and added a drainage channel in front of the front door making it a more sustainable and low-maintenance choice for the long term.

Added Value

As part of our commitment to maintaining a tidy site and supporting the resident, we cleared the front garden of all waste and disposed of it in our skip in the yard, ensuring the client was left with a clean, functional environment. We often don’t generate enough waste on a small job to warrant getting a skip so we put it in our van and bring it back to base.


If you need our help message us on 07737 988 243 or email quote@swallowhillhomes.com


#SwallowHillHomes #BuildingBetter #AccessibleHome #HomeAdaptations #MobilitySolutions #ResidentialRefurbishment #BuilderLife

#AccessibleRamp #Groundworks #Masonry #ResinBondedGravel #ProjectHandover #DisabledAccess

#LangleyMill #Ilkeston #DerbyshireConstruction #LocalTrades #DerbyshireBuilder

Categories
Groundwork

Repairing a leaking fish pond in Chilwell, Nottingham

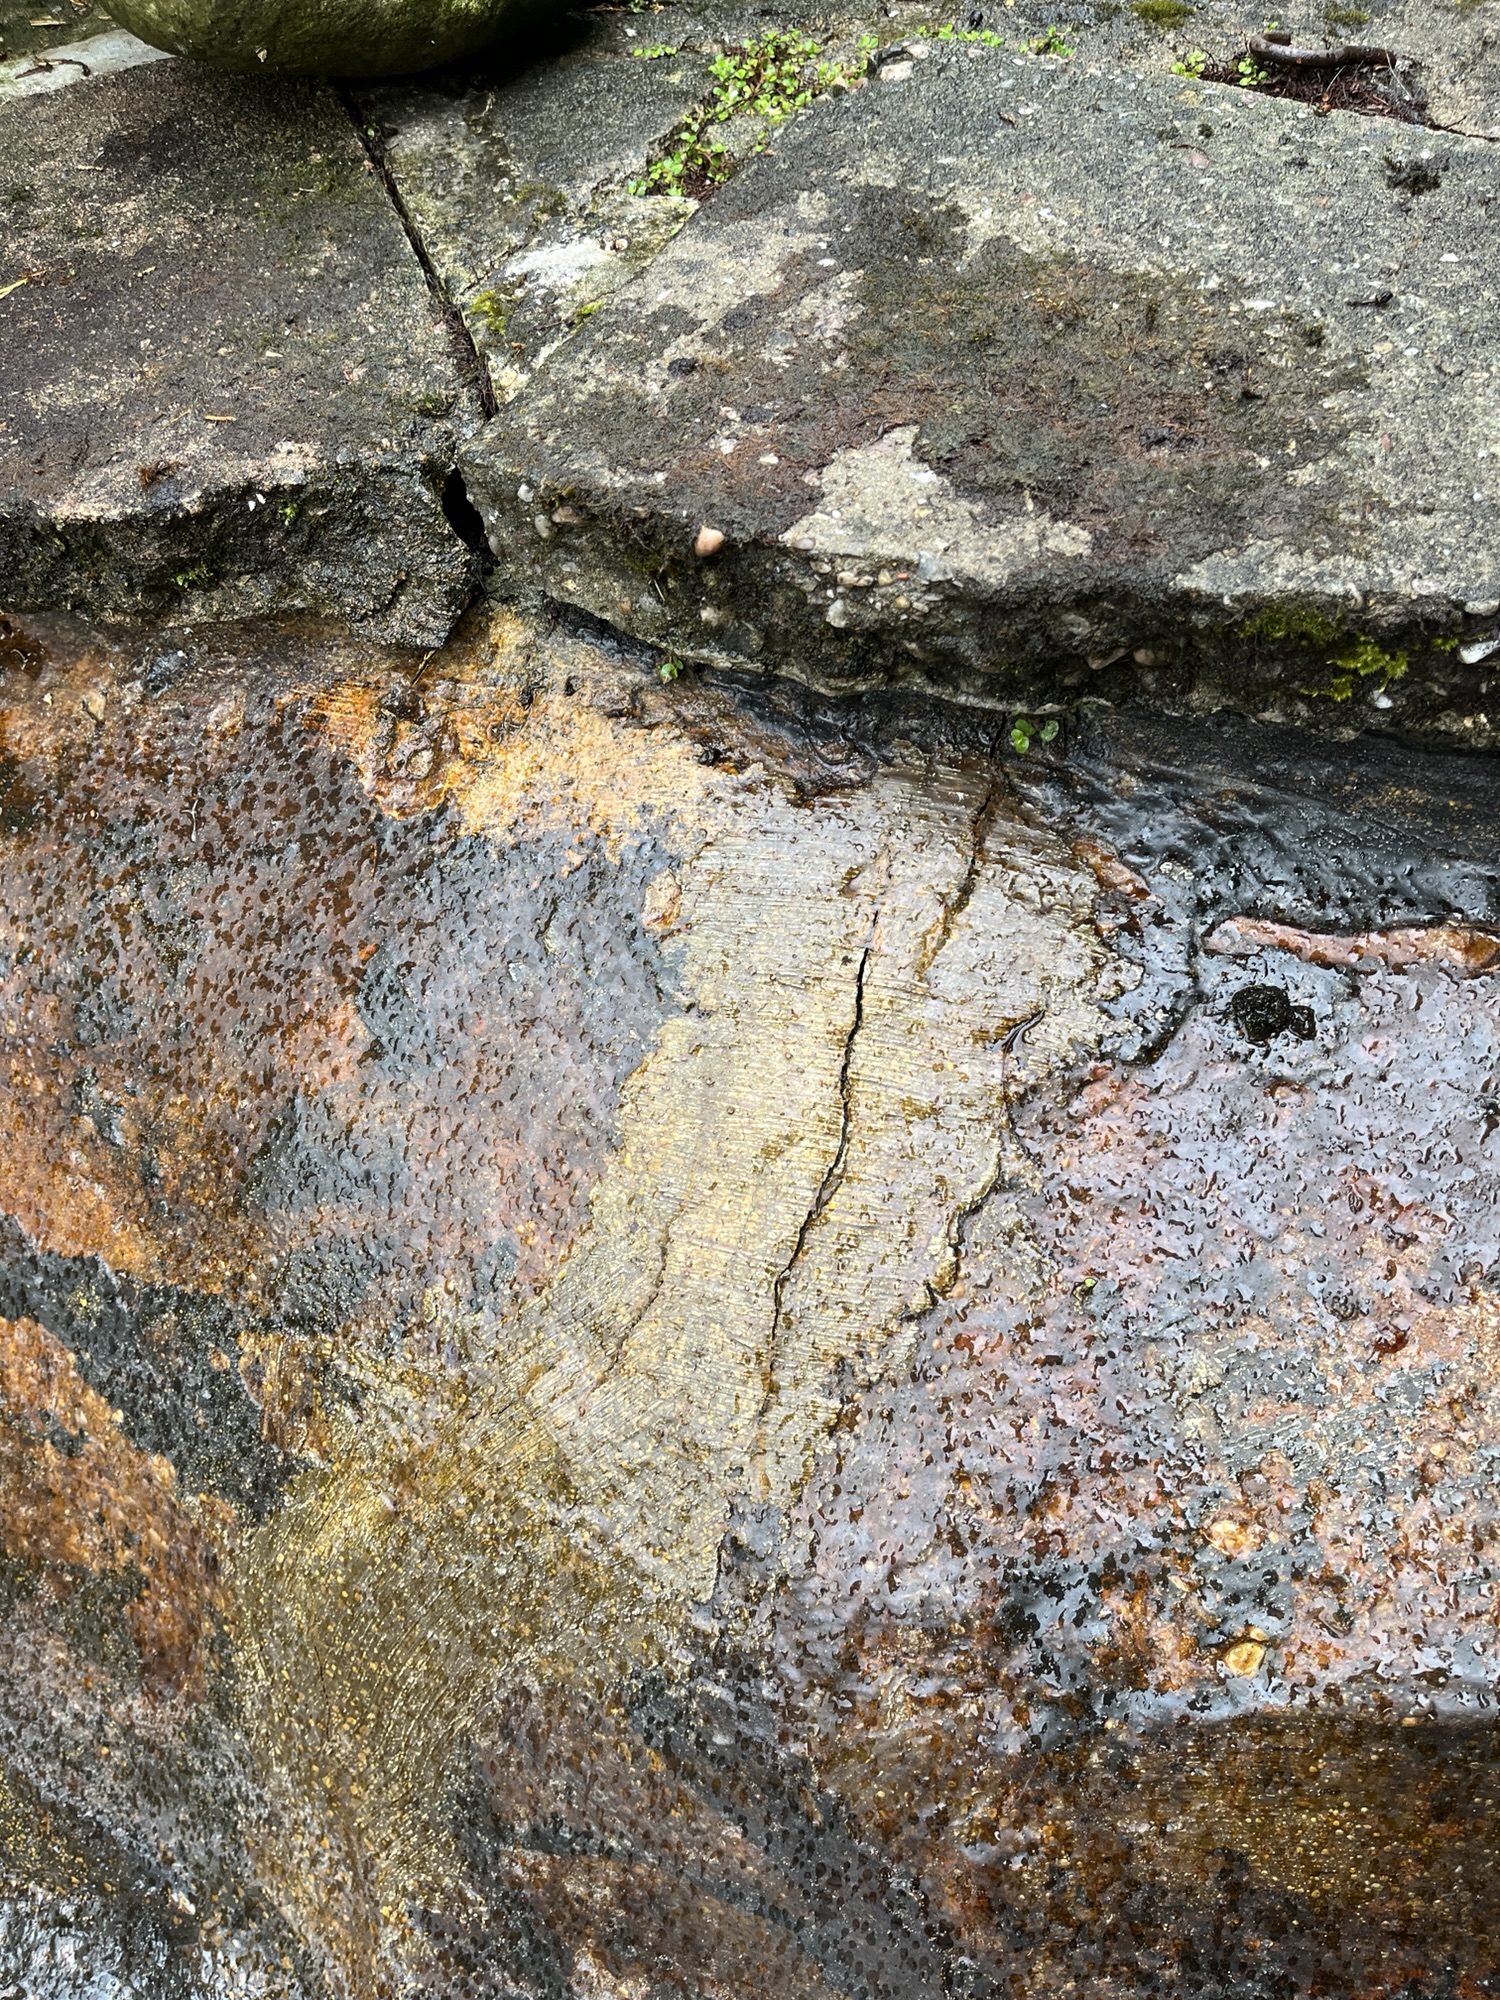
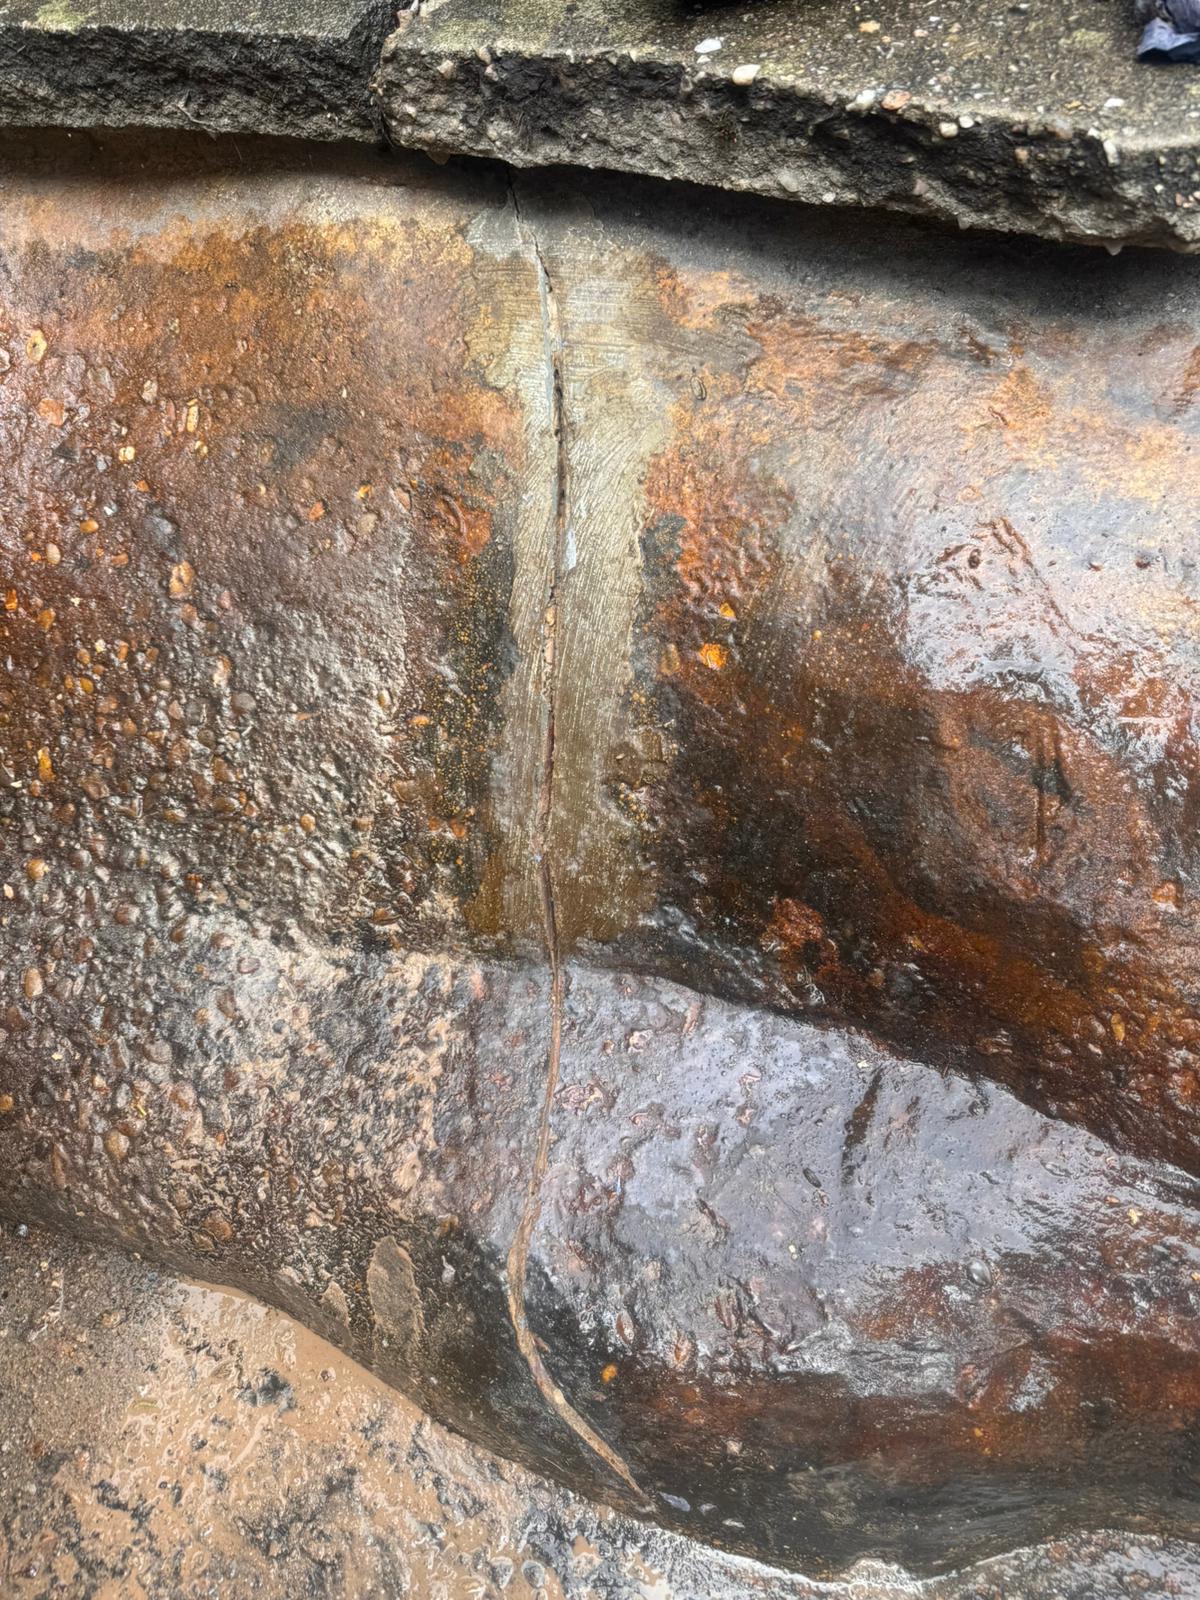
Our customer messaged us to say there pond was leaking and could we help.

img_6610
previous arrow
next arrow

Expert Guide: How to Properly Repair a Leaking Fish Pond

A leaking pond can be a major headache, but you don’t always need a full overhaul to get it back in shape. Whether you are dealing with a crack in a concrete base or a tear in a liner, the key to a lasting repair is in the preparation and the quality of your materials.

1. First, Confirm It’s a Leak

Before you start the heavy lifting, make sure the water loss isn’t just natural evaporation. In this case the cracks we’re visible.

  • The Pump Test: Turn off your pump. If the water level stops dropping, the issue is likely in your plumbing or waterfall, not the pond structure itself.
  • The Perimeter Check: If the water level keeps falling with the pump off, you have a structural leak. Check the perimeter for boggy ground or unusually lush plant growth—this is often where water is escaping the basin.

2. Professional Preparation is Key

As we’ve found in our recent repairs, the “seal” is only as good as the surface it’s applied to.

  • The “Grind Out”: For cracks in concrete or solid structures, don’t just smear sealant over the top. Use a grinder to widen the crack slightly. This creates a clean “key” or groove, giving your sealant a much better surface to adhere to.
  • Deep Cleaning: Once ground out, clear all debris, algae, and loose concrete from the crack. The surface must be clean and bone-dry before you apply any product.

3. Choosing the Right Material

Avoid generic household silicone. For pond repairs, we recommend a high-quality marine-grade product, such as the MS300 Marine Sealant.

  • Why it works: Look for a sealant that remains slightly flexible after curing. Ponds can shift slightly with temperature changes and ground settlement; a flexible sealant will move with the structure, preventing the crack from reopening immediately.
  • Application: Apply the sealant firmly into the groove, ensuring it fills the entire void. Use a smoothing tool for a clean, watertight finish that won’t collect debris.

4. Maintenance and Prevention

Once the repair is cured, regular maintenance will keep your pond healthy and leak-free:

  • Routine Inspection: Every month, check the basin and pipes for signs of stress.
  • Vegetation Control: Prune back nearby trees and shrubs. Aggressive root growth is a common culprit for structural cracks and liner punctures.
  • Debris Removal: Keep the pond clear of heavy litter and dead plant matter, which can block pipes and contribute to water stagnation.

Cost

  • Materials £15-£30
  • Labour up to £200 depending on location.

Need our help, call us on 07737 988 243

Categories
External Fencing Groundwork

Hedge removal and new fence installation.

We removed a conifer hedge back in February for the customer before the start of the bird nesting season. Pruning trees or bushes after the 1st of April without appropriate ecological supervision could get a builder like ourselves into trouble.

The customer chose composite fence panels from Charles and Ivy.

We installed these into concrete posts and gravel boards for longevity.

The last eight weeks have been very dry. It is is very important to water newly laid turf regularly if it is not raining frequently. Here is a guide to looking after your new turf.

The first few weeks after laying new turf are crucial for root establishment. Here is detailed advice for caring for your new lawn, focusing on watering, traffic, and mowing:1. Watering (The Most Critical Step)The first few weeks after laying new turf are crucial for root establishment. Here is detailed advice for caring for your new lawn, focusing on watering, traffic, and mowing:
 
1. Watering (The Most Critical Step)
  • Initial Watering (First 1-3 Weeks): New turf is a living plant that needs consistent moisture to root deeply.
    • Frequency: Water the entire lawn evenly and thoroughly every day, especially during hot or dry weather. Some advice suggests watering at least twice a day for the first seven days.
    • Technique: Use a sprinkler to ensure even coverage. The water must soak down through the turf to moisten the soil below.
    • Timing: Water early in the morning or early evening to allow the water to reach the roots before the sun causes it to evaporate.
    • Watch for Edges: Concrete edging, posts, and paving slabs absorb water quickly, so be sure to water areas near them more often.
  • Avoid Overwatering: While the turf needs water, ensure the ground is moist but not waterlogged or soggy, as this can starve the roots of oxygen and make the grass turn yellow or die.
  • Reducing Frequency: As the turf starts to knit together (around 3 to 4 weeks), reduce watering frequency. It is better to water thoroughly every two to three days than to water a little bit every day.
2. Traffic and Compaction
  • Keep Off: Avoid walking on the new turf as much as possible for the first few weeks, ideally three to four weeks. Walking on it can cause soil compaction, create dents and divots, and disrupt root formation.
  • Necessary Access: If you must cross the lawn (e.g., for watering), place wooden planks or boards down to use as a walkway to distribute your weight.
  • Pets and Play: Keep pets and children’s play equipment off the lawn until it is fully established and settled.
  • Frost: Avoid walking on the lawn during frosty weather as this can damage the grass blades.
3. Mowing
  • When to Start: Do not mow until the turf has rooted well and the blades of grass are at least 25mm high. This is typically around three weeks after laying.
  • Check Rooting: To check if it’s ready, gently tug on a few blades of grass. If the turf lifts, wait a few more days. If the turf feels stuck, the roots have started to take and it is ready for its first cut.
  • First Cut: Use the highest setting on your lawnmower and ensure the blades are sharp for a clean cut. Only cut off about a quarter to no more than one-third of the grass length at one time.
  • Ongoing Mowing: When the grass is growing, cut “a little and often” rather than cutting it once a week, as frequent light trimming prevents the coarse grass from dominating the lawn.
4. Fertilising and General Care
  • Fertiliser: Your new turf is usually pre-fertilised, so it generally will not require additional fertiliser for at least three months, or a minimum of six weeks after laying. Phosphorous is considered the most crucial nutrient during this establishment phase to encourage root growth.
  • Cuttings: Collect the clippings using a grass box or rake them up and remove them to ensure sunlight reaches the turf.
  • Brown Patches: If your turf is turning yellow or brown, it is likely due to insufficient water during a dry or hot spell. Increasing your watering will usually return the lawn to a healthy state.
Categories
Groundwork Paving

Paving concrete stairs

We need to make the concrete steps more attractive so we cut and installed 20mm porcelain slabs. it is possible to use internal tiles which are much easier to cut but we as they are normally less than 10 mm and afford to get underneath with the frost they can crack.

The main challenge with 20 mil slabs is cutting them because a large bench saw with a diamond blade is needed to cut them. The stairs also have a small nosing on them to give additional traction in the wet.

We will need to add a handrail to the stairs, we are using a system from FH bundle that bolts onto the side of the concrete step underneath.

Categories
Groundwork Uncategorised

Fire hydrant commissioning and drain cover install.

We needed to expose the fire hydrant valve which had been tarmacked over, we the approximate area from the plans. Cut out a square of tarmac, exposed hydrant valve. Fitted the correct sheathing around it & lid, then backfilled with cold lay tarmac.


Whilst installing the manholes we also installed 2 new drain covers over the rainwater gulleys.

When the work was complete we added cold lay tarmac, its ideal for low traffic use area’s or temporary repairs as long as it is suitably compacted.

Categories
Bathroom Brickwork Extension Flooring Groundwork Kitchen New build Renovation Roofing Uncategorised

Nottingham Refurbishment & extension

This was a large contract which involved building onto a 1930’s house.

We built a large open plan kitchen diner downstairs with a boot room, playroom and for home working. Upstairs we created an additional en suite bedroom .