Our customer’s brief was very clear: they wanted the best bathroom in Bulwell.
While their existing bathroom had served them well for years, it was time for an upgrade. They wanted a modern wet room with step-free shower access, high-end fittings, spotlights, his-and-hers cabinets, and a vanity unit matching their existing setup.
After providing an outline quote, our customer visited our trusted local suppliers—East Midland Ceramics and Michael Pavis. Both offer the kind of traditional showroom experience and product knowledge you simply can’t get from online marketplaces. Special thanks to Luke Henson at Michael Pavis for 5-star customer service. The quotes came right in line with our expectations (£1,400 for the shower screen and door after trade discount—though you can’t beat Merlyn 8mm fittings for quality).
We started by stripping the walls, which revealed three layers of tiles. It’s safe to say we were glad we ordered a skip from Enva, making sure to put protective boards down so the block paving didn’t get marked.
Next, we removed the existing floor and laid 15mm plywood followed by tile backer boards, and fitted a Qualitex floor profile for the shower. Minimising the step between the entrance hall and bathroom was very important to the customer to remove the trip hazard.
Finally, to make sure the water pressure matched the ambition of the project, we fitted a Stuart Turner Universal 2-bar pump supplied by Pavis. This didn’t just deliver for the wet room—it drastically improved the hot water pressure in the kitchen sink, too.
In total the work will take about 14 days, our bathroom installer is pulling in the weekends to get it finished for the customer. We appreciate that the work creates a lot of inconvenience to the customer.
Valley Road Extension: Wall Construction & Roof Framing Complete
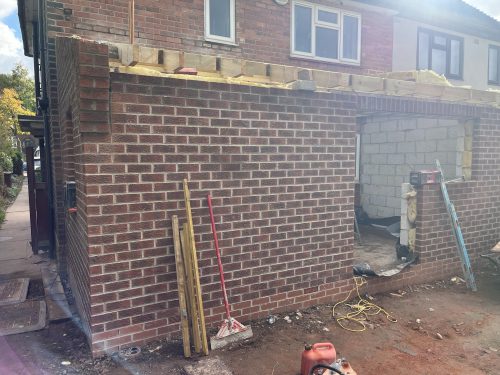
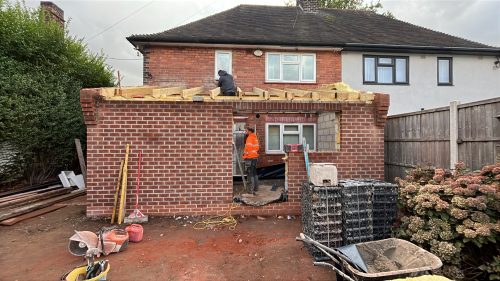
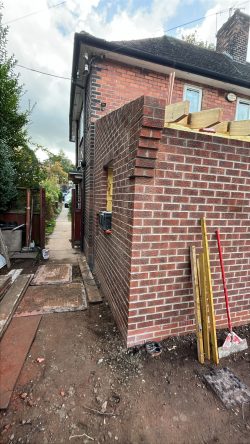
The concrete floor for our Valley Road extension project has been poured, and the brick walls are officially up!
We built the exterior walls using a 150mm full-fill cavity insulation method. We prefer this approach on our projects because it significantly reduces thermal bridging and air leakage routes, creating a warmer, more energy-efficient structure for the homeowner.
We tend to get our insulation and plasterboard from Galaxy Insulation in Long Eaton as the prices a re competitive and they always given un biased advice.
Valley Road rear elevation
Valley Road rear elevation
valley road side view
The timber roof structure is now completely framed and in place. We are currently awaiting scaffolding installation to begin the roofing works and make the entire structure fully watertight.
Stay tuned for more updates as this project progresses!
While timber sleepers are a popular choice for garden borders and raised beds, weather exposure over time inevitably takes its toll. In this recent project, the client’s existing oak sleeper planters were beginning to pull apart, decay, and lose structural integrity. They wanted a long-term, permanent solution that would hold up to the elements without sacrificing style.
The Project Overview
Out with the Old: We completely removed the shifting oak sleepers and excavated solid footings to ensure a strong base for the new masonry. We sourced a skip larger than was required so we could also remove clear the customers debris stockpile from their garden which will free up space for future projects. In total we filled an 8 yard skip for the project.
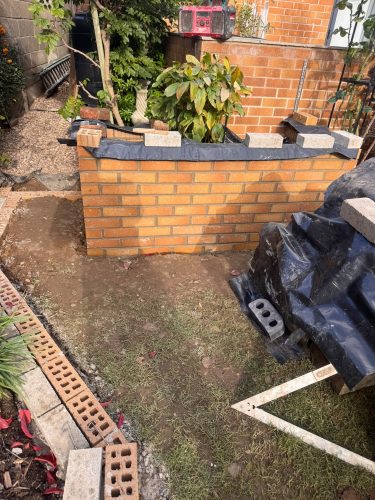
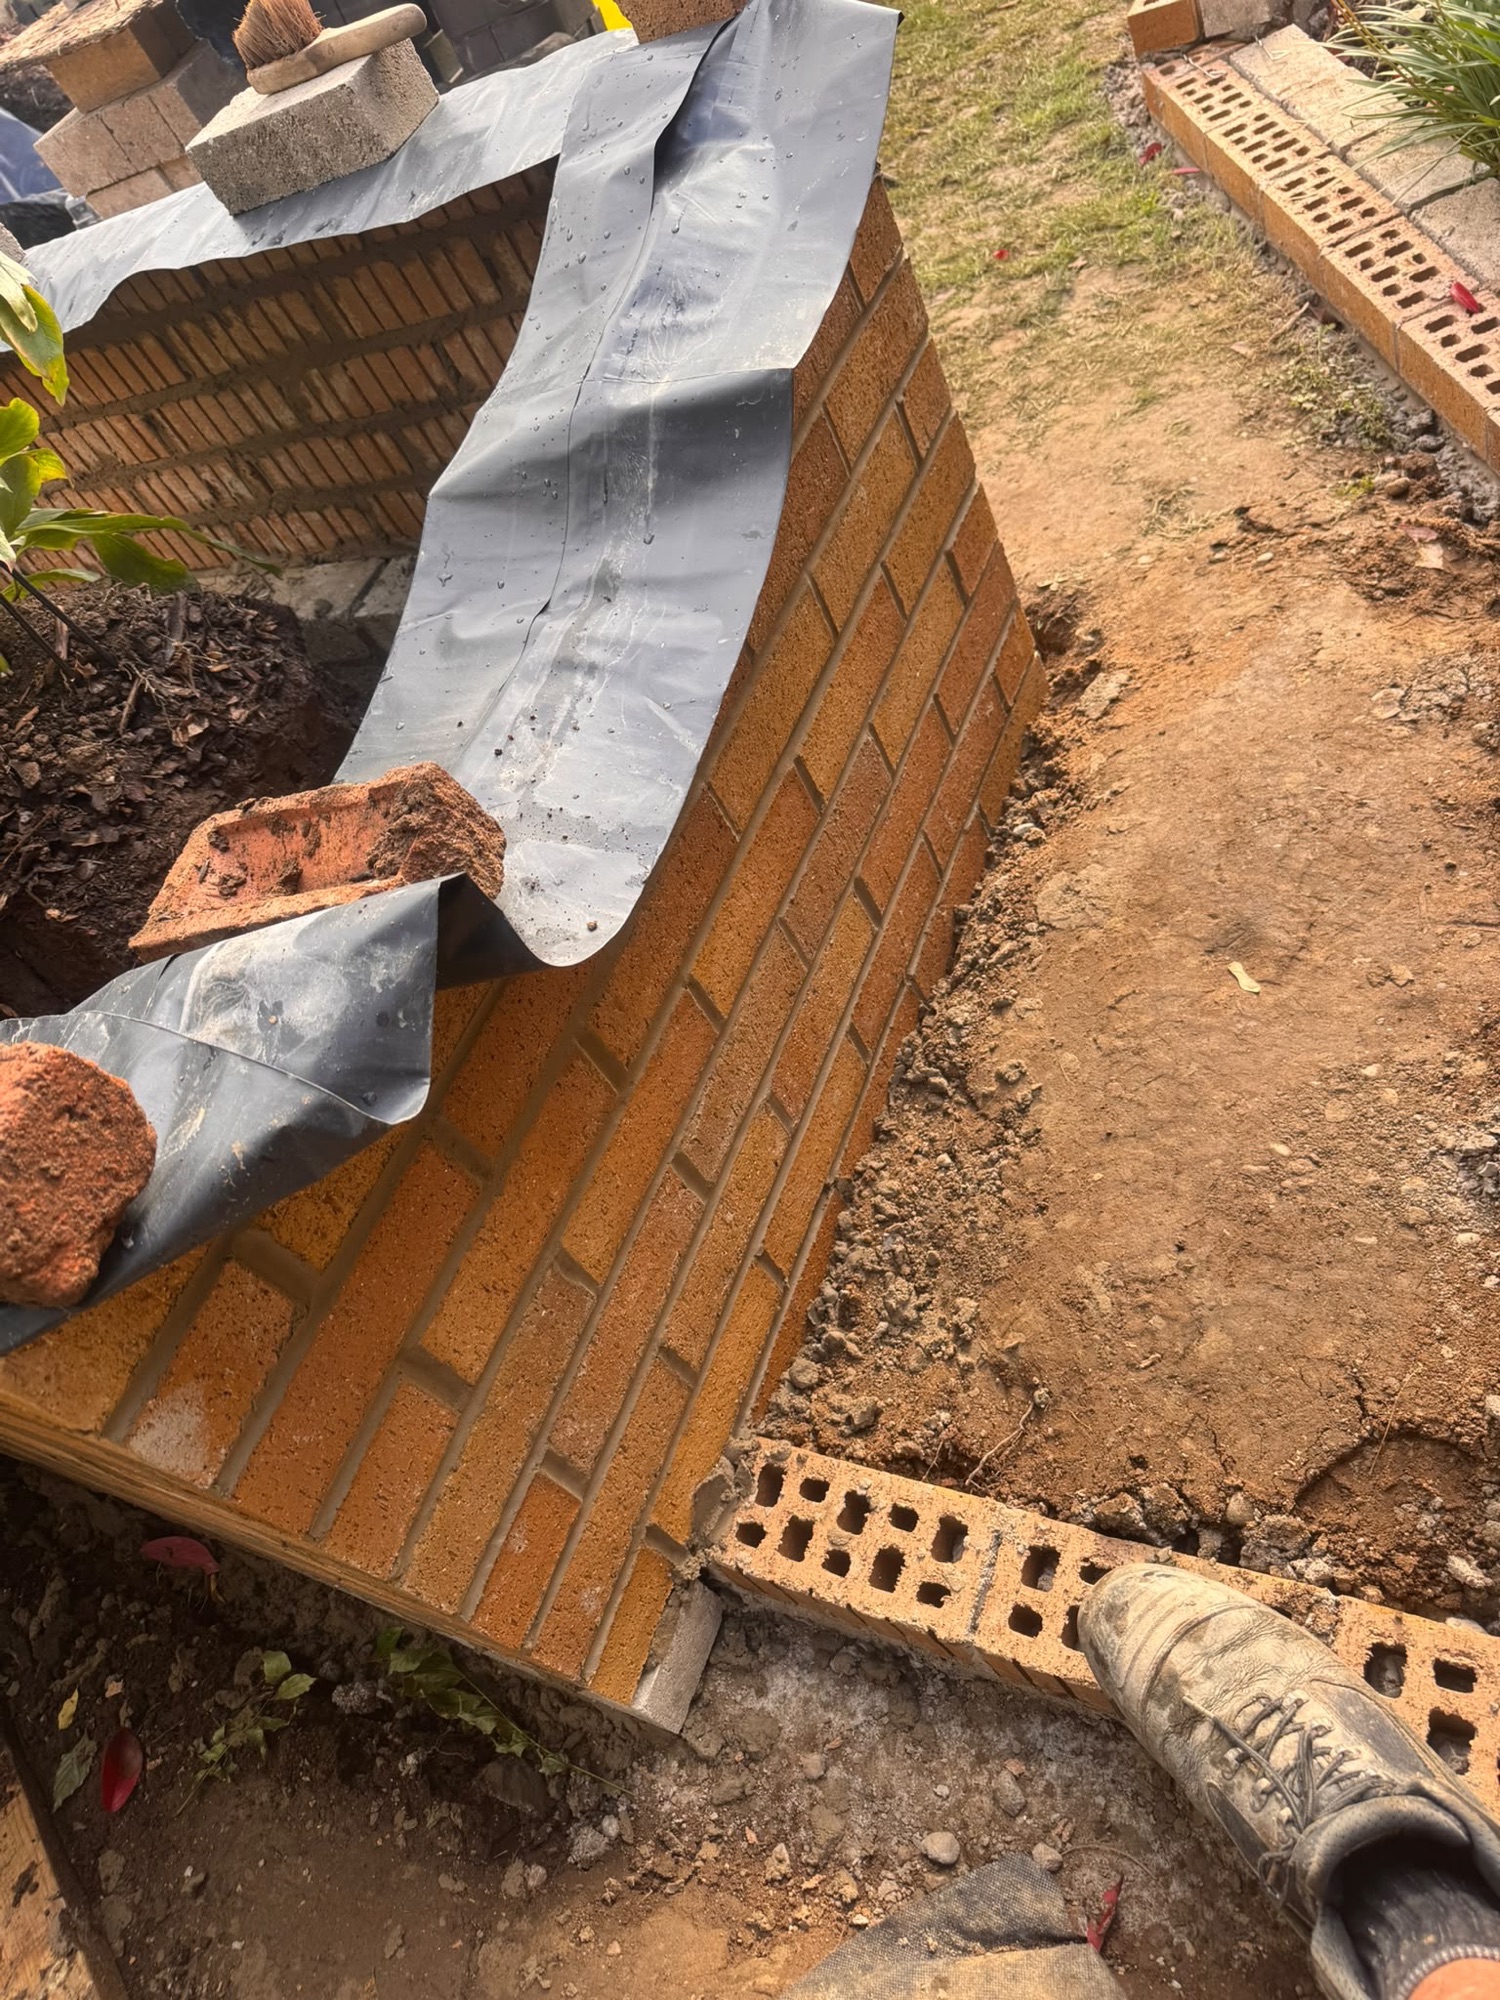
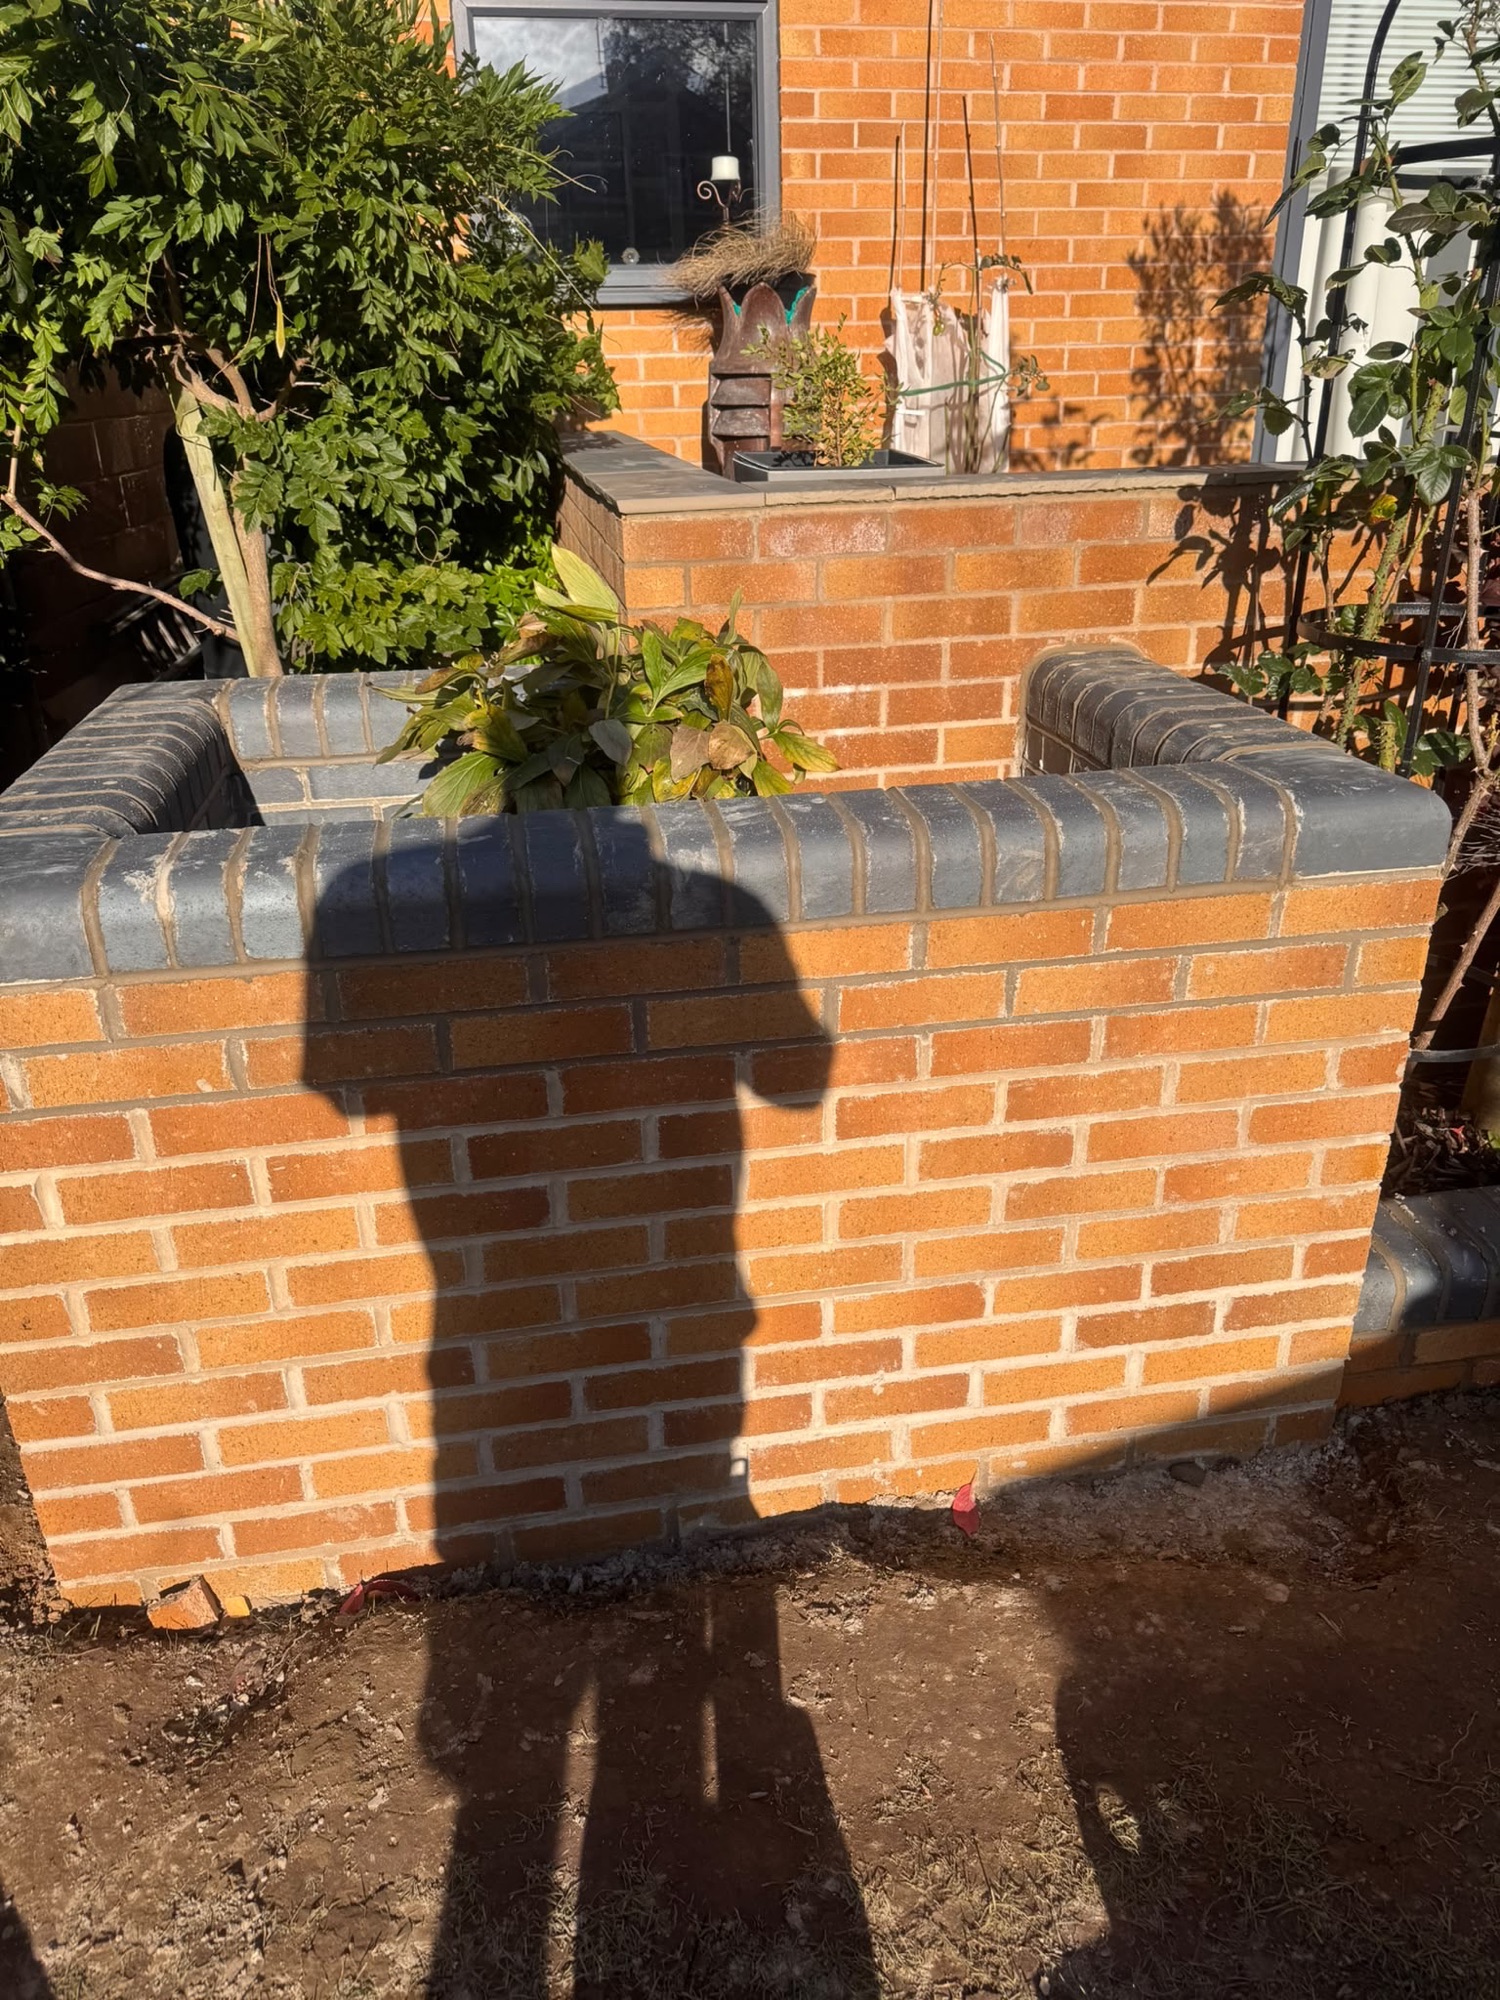
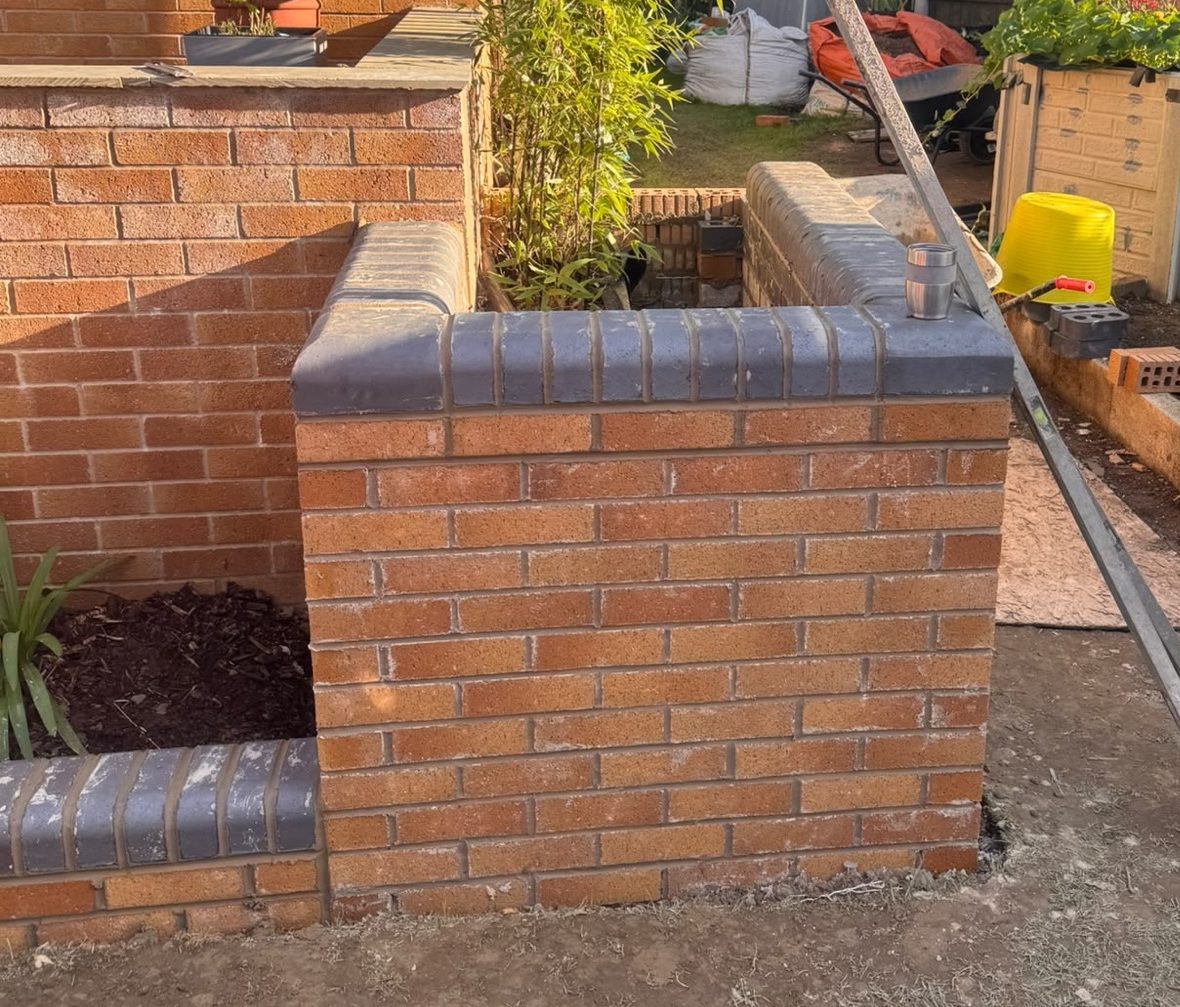
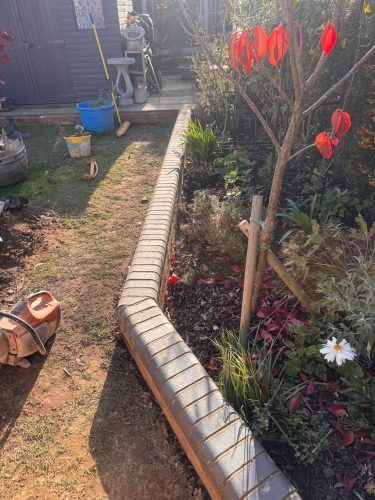
Durable Brick Construction: We used Ibstock Cattybrook Bristol Buff sourced from John A Stephens in Nottingham, they were the only local branch to hold them. We used them as they matched the house to give a smoother aesthetic, we built the retaining walls and raised planters to complement the existing home and garden layout.
Staffordshire Blue Finish: To top off the walls, we laid double bullnose Staffordshire blue bricks along the coping. The smooth, rounded edges give a clean, professional finish that doubles as comfortable garden coping.
Moisture Protection: We applied a tanking slurry to limit the moisture transferring to the bricks. We used engineering spec bricks which can be laid underground but the tanking can’t hurt and is a belt and braces approach.
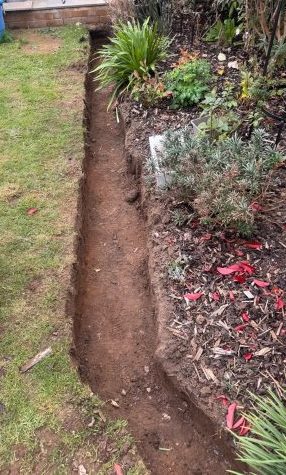
Acaster dug out
Acaster.part built wall
Aacaser part complete
Acaster finished planter2
Acaster planter
Acaster Mini Garden Wall
Why Choose Double Bullnose Staffordshire Blue’s for the soldier course?
Unmatched Durability: Staffordshire blue bricks are renowned for high strength and exceptionally low water absorption, making them ideal for ground-level garden exposure.
Safety & Comfort: The dual-rounded bullnose profile removes sharp corners—perfect for family gardens and comfortable to lean against or sit on.
Striking Contrast: The deep slate-blue tone creates a sharp, modern contrast against warm orange brickwork and green foliage.
Corner headers: We managed to source corner headers which really finish it off nicely, though they are £60 each including VAT
Looking to upgrade tired timber features in your garden to a clean, permanent brick structure? Get in touch today for a free consultation and quote! Call us on 07737 988 243
Transforming Spaces: Open-Plan Kitchen Diner Project in Woodthorpe, Nottingham
At Swallow Hill Homes, we love helping clients unlock the full potential of their properties. We are currently on-site in Woodthorpe, Nottingham, executing a structural alteration to create a open-plan kitchen and dining area.
To safely knock down the load-bearing wall separating the spaces, structural integrity is paramount. Here is a look behind the scenes at how our team is delivering this transformation:
Temporary Structural Support: Before removing any load-bearing masonry, heavy-duty adjustable steel props (Acrow props) and strongbacks were installed to fully support the floor joists and ceiling structure above.
Engineering Excellence: We installed a heavy-gauge RSJ (rolled steel joist) treated with red oxide protective coating to span the newly created opening.
Solid Load Transfer: The steel RSJ rests securely on newly constructed high-density engineering brick piers and concrete padstones, ensuring structural loads are distributed safely into the foundation.
Precision Execution: Every phase was closely monitored to ensure full compliance with building regulations, precision leveling, and absolute safety on site.
Once the remaining masonry is fully knocked through and structural load tests are complete, the temporary props will come down, leaving a spacious, light-filled layout ready for modern kitchen fitting, plastering, and finishing touches.
Looking to modernize your home or create an open-plan living space in Nottinghamshire? Contact the Swallow Hill Homes team today to discuss your project!
We were recently called out by a customer whose existing gable end pointing had begun to weather and drop out over time. While we frequently recommend and install modern dry verge systems these days for a maintenance-free finish, this customer preferred to maintain the traditional mortar look for their roofline.
The stick isn’t permanent, just to supper whilst it’s drying out.
To ensure a high-quality, long-lasting repair, we carefully raked out all the old, loose mortar to create a solid base before expertly repointing the entire gable end. (Note: If you spot a stick in the photos, don’t worry—it’s definitely not a permanent fixture! It’s simply there to provide temporary support while the fresh mortar dries and sets into place).
While we were on site, we also tackled some essential maintenance on the customer’s dwarf wall. The coping stones had become loose, so we lifted them up, cleared away the old debris, and securely relaid them. The wall is now structurally sound and looking smart once again!
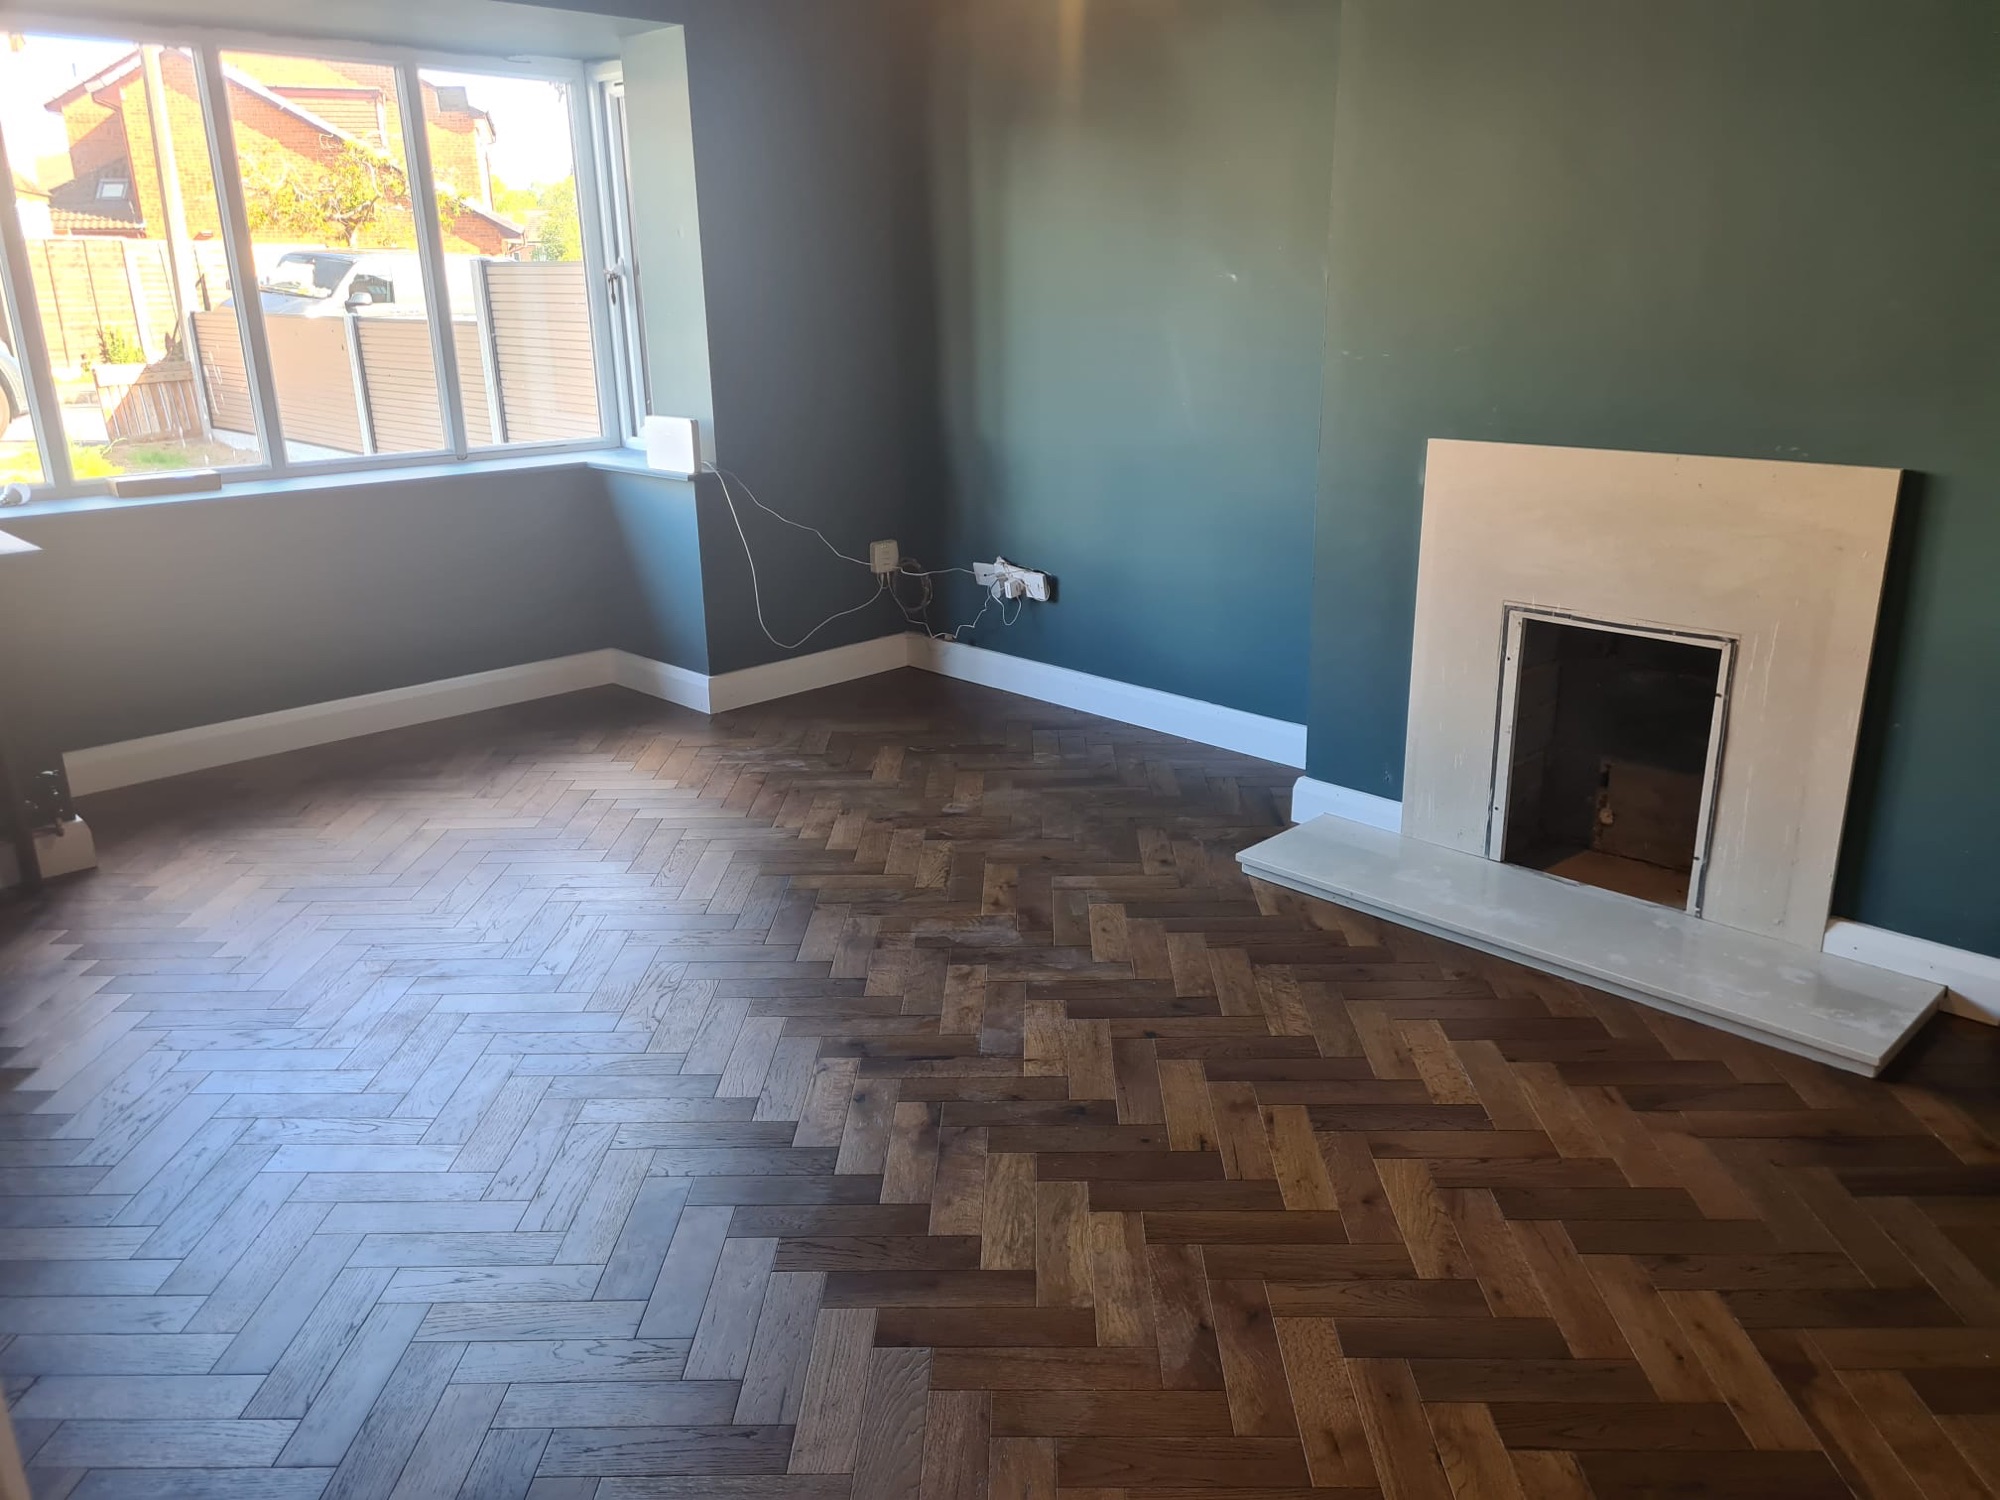
We recently completed the installation of a beautiful Herringbone Oak floor sourced from Stories Flooring. Our second from them in as many months. This project highlights our approach to subfloor preparation, a critical factor in achieving a lasting, high-quality finish.
img_6111
img_6169
img_6237
img_6236
A key consideration during preparation was the existing subfloor, which contained original tiles potentially dating from the 1980s. To ensure compliance and safety—and specifically to mitigate the risk associated with disturbing potential asbestos-containing materials (ACMs)—we opted for a non-intrusive overlay solution. This professional decision avoided complex and costly remediation.
We applied F. Ball Stopgap P131 primer and self-levelling compound. This choice allowed us to achieve a perfectly smooth and stable surface with minimal build-up, creating the ideal base for the new parquet system. Precision Installation Technique
Our method for installing this type of parquet flooring is rooted in precision and patience. The most effective technique is a staged adhesive application to manage the elasticity of the glue and ensure optimal alignment:
We initially lay and fix the central key column or the first two rows of the product.
We allow this central element time to fully cure and stabilize before proceeding with the remainder of the floor.
By allowing the adhesive to cure completely in these crucial early stages, we prevent movement and ensure the long-term integrity and alignment of the entire floor.
Cost Guide: Herringbone Parquet Flooring
For full transparency, here is a breakdown of the typical costs per square metre (m²) for a high-quality Herringbone Parquet installation:
Preparation (Self-levelling compound): £15
Flooring Material: £50
Adhesive: £10
Professional Labour: £90 – £150
These costs are excluding VAT, this job needed 15% wastage so make sure you allow for it otherwise you’ll need an emergency trip to Leeds to pick up an extra box
We frequently receive inquiries from homeowners looking to extend their existing properties. The core question is always: “How much does an extension cost?”
How much does it cost to build these days?
1. Estimated Build Costs Per Square Meter (Excluding VAT)
To help you budget, we recommend the following allowances for extensions on existing residential properties. These prices are based on the total build area (external dimensions), not the internal floor plan, as current building regulations typically require walls to be up to 35cm deep.
Lower Range: £2,000 per square meter
Specification: Very basic finish and simple design.
Mid Range: £2,500 per square meter
Specification: Includes quality features like underfloor heating and tiled floors.
Top Range: £3,000+ per square meter
Specification: For high-end designs, such as large open-plan areas, large bi-fold doors, and integrated home automation systems.
2. Essential “Soft Costs” and Regulations
Beyond the physical build, you must budget for necessary professional and regulatory fees:
Architectural Services: An architect or architectural technician is normally required for drawings and plans, costing in the region of £1,000–£2,000. A professional builder, like us, will have trusted partners we can recommend.
Building Control: Required for any structural changes or the addition of sanitary facilities (like a toilet). Building Control ensures all work complies with minimum legal standards for safety, health, and energy efficiency.1
VAT: Most established builders, including ourselves, are VAT registered and legally required to add VAT to the final price.
Planning Permission: If you are wondering if you need planning permission for an extension, the government runs a very useful section clarifying when permission is needed on the official planning portal.
3. What Factors Push the Price Up?
Certain design choices or structural requirements will inevitably increase your overall expenditure:
Large Steel Beams: These tend to require vertical steel supports to bear the load. Going above 4 meters often necessitates installing a pad stone (a large concrete base) beneath the existing property footings. Allow approximately £1,000 per meter once you exceed 4 meters.
Roof Lanterns: These are highly sought after for natural light and are not as expensive as many people think. They typically start from about £3,500 installed.
New Kitchens: A high-quality kitchen, including quartz worktops and appliances, generally starts at about £25,000.
Unexpected Work (The Contingency): When working on any existing house—especially older properties—unforeseen issues can be uncovered once demolition or excavation begins. This can strain the builder-client relationship. It is always prudent to include a 5–10% contingency fund at the start of your project to cover these necessary surprises.2
4. When to Pay the Builder
Understanding the payment structure is critical for protecting both parties:
Deposit: Most reputable builders will ask for a small deposit to secure your slot in their diary. We would caution against paying more than 10% of the project value upfront as a deposit. Paying a large amount in advance might signal that the builder is using your funds to cover other jobs.
Payment Schedule: We typically ask for weekly or monthly payments to ensure consistent financial flow. On our projects, we provide a weekly tracker so both the client and Swallow Hill Homes can see precisely what work has been authorised and completed.
Contract: A formal contract is strongly recommended for all larger projects. This clarifies payment terms and establishes a clear process should the relationship encounter difficulties.3
5. Should I Choose the Lowest Quote?
While bu
Steel RSJ’s
dgets are often tight, be cautious about accepting the lowest quote. If one quote is substantially cheaper than all others, you must ask how that contractor intends to maintain the quality you desire for your home. We are members of the Federation of Master Builders (FMB), a seal of quality.
For larger jobs, we highly advise checking customer references of previous jobs or arranging to see their completed work. Remember: if something feels too good to be true, it usually is.
6. Do I Need a Warranty?
The level of assurance depends on your trust in your chosen builder. Building Control is legally there to ensure all construction projects comply with minimum legal standards for safety and quality. They check plans and inspect key work stages (like foundations and fire safety) for compliance with Building Regulations.1
Bringing History Into the Modern Era: A Complete Victorian Terrace Renovation in Sandiacre, Nottingham
Owning a 100-year-old Victorian or Edwardian terrace house in Nottingham comes with a lot of pride. These properties are packed with character, beautiful brickwork, and historic charm. However, they also come with a unique set of challenges: drafty rooms, outdated layouts, and decades of old plaster hiding underneath layers of wallpaper.
At Swallow Hill Homes we specialize in breathing new life into these classic homes. We don’t just paper over the cracks; we strip them back to their bones and rebuild them to meet modern living standards.
Here is a sneak peek behind the scenes of our latest total refurbishment project right here in Nottingham.
IMG_6382
IMG_6379
IMG_6383
IMG_6458
Plasterboarded ceiling
ceiling xfoil
The Project: A Full-Scale Terrace Transformation
Our clients loved the location and character of this traditional terrace, but the interior needed serious intervention. To do this job right, we started with a blank canvas.
Here is exactly what we are undertaking on this comprehensive renovation:
1. Strip Back to Brick & Structural Upgrades
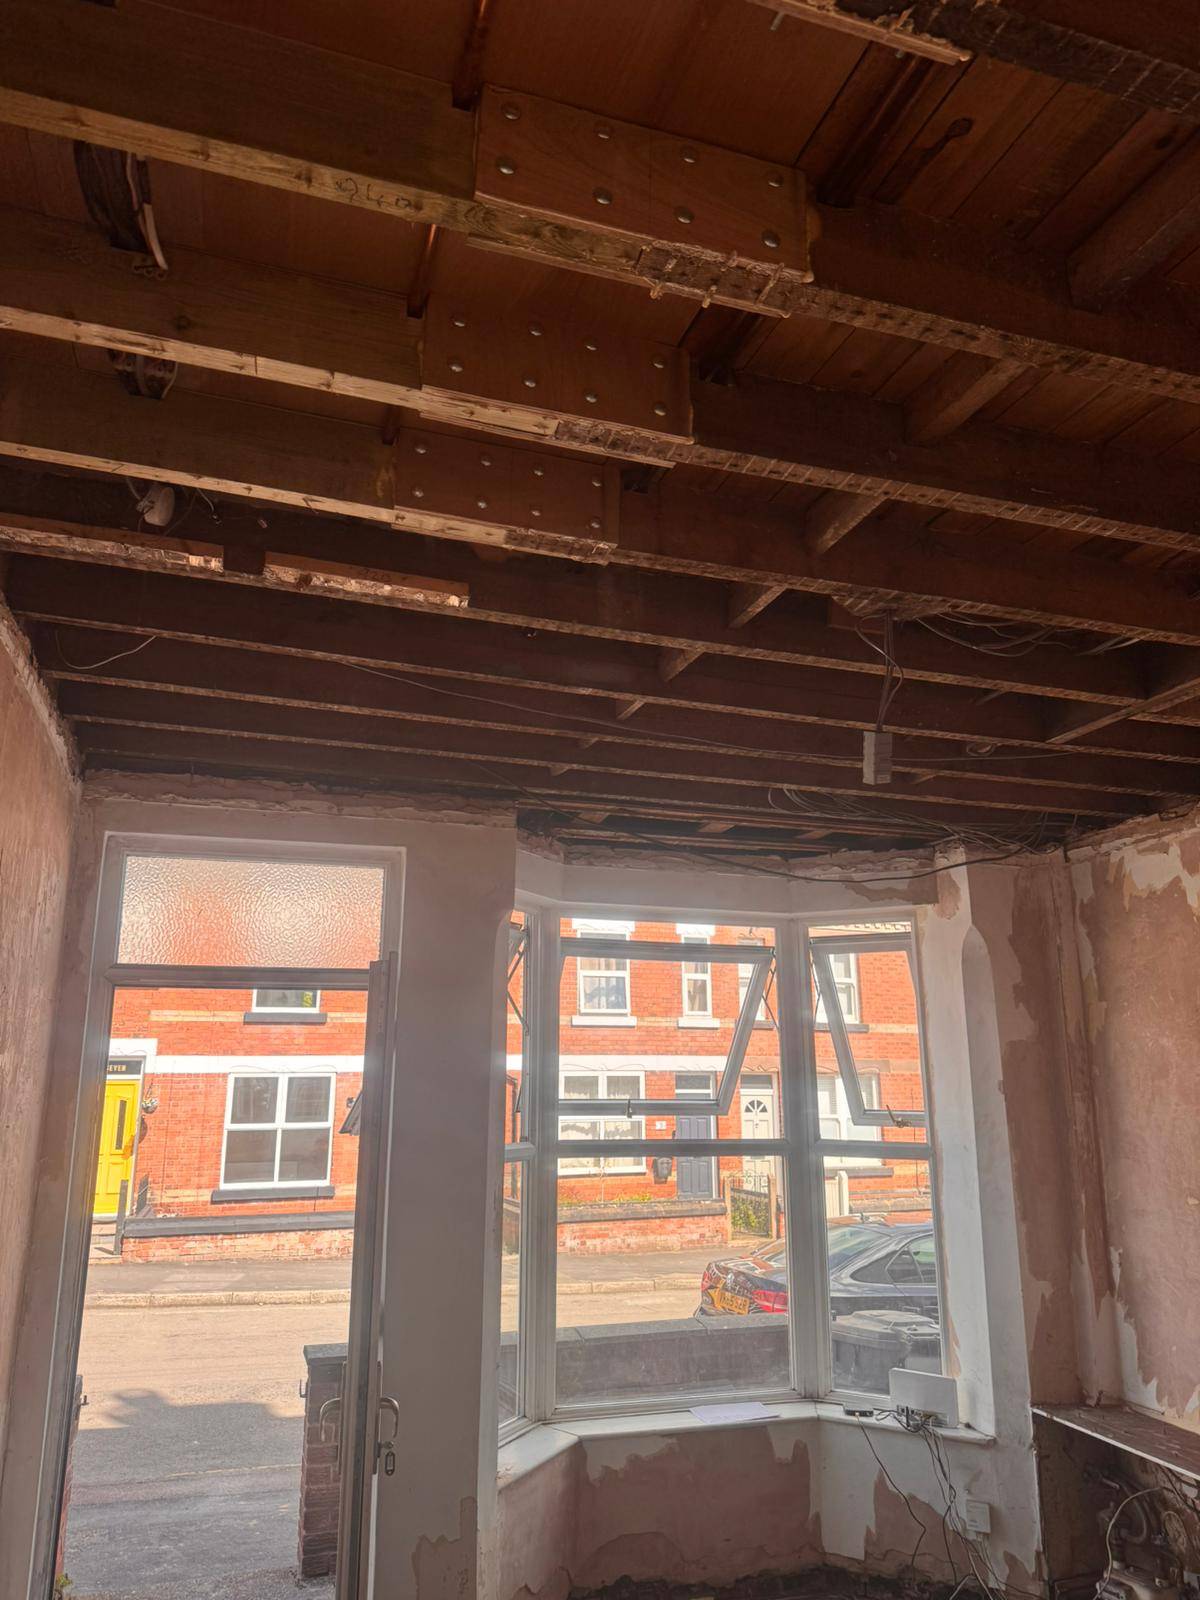
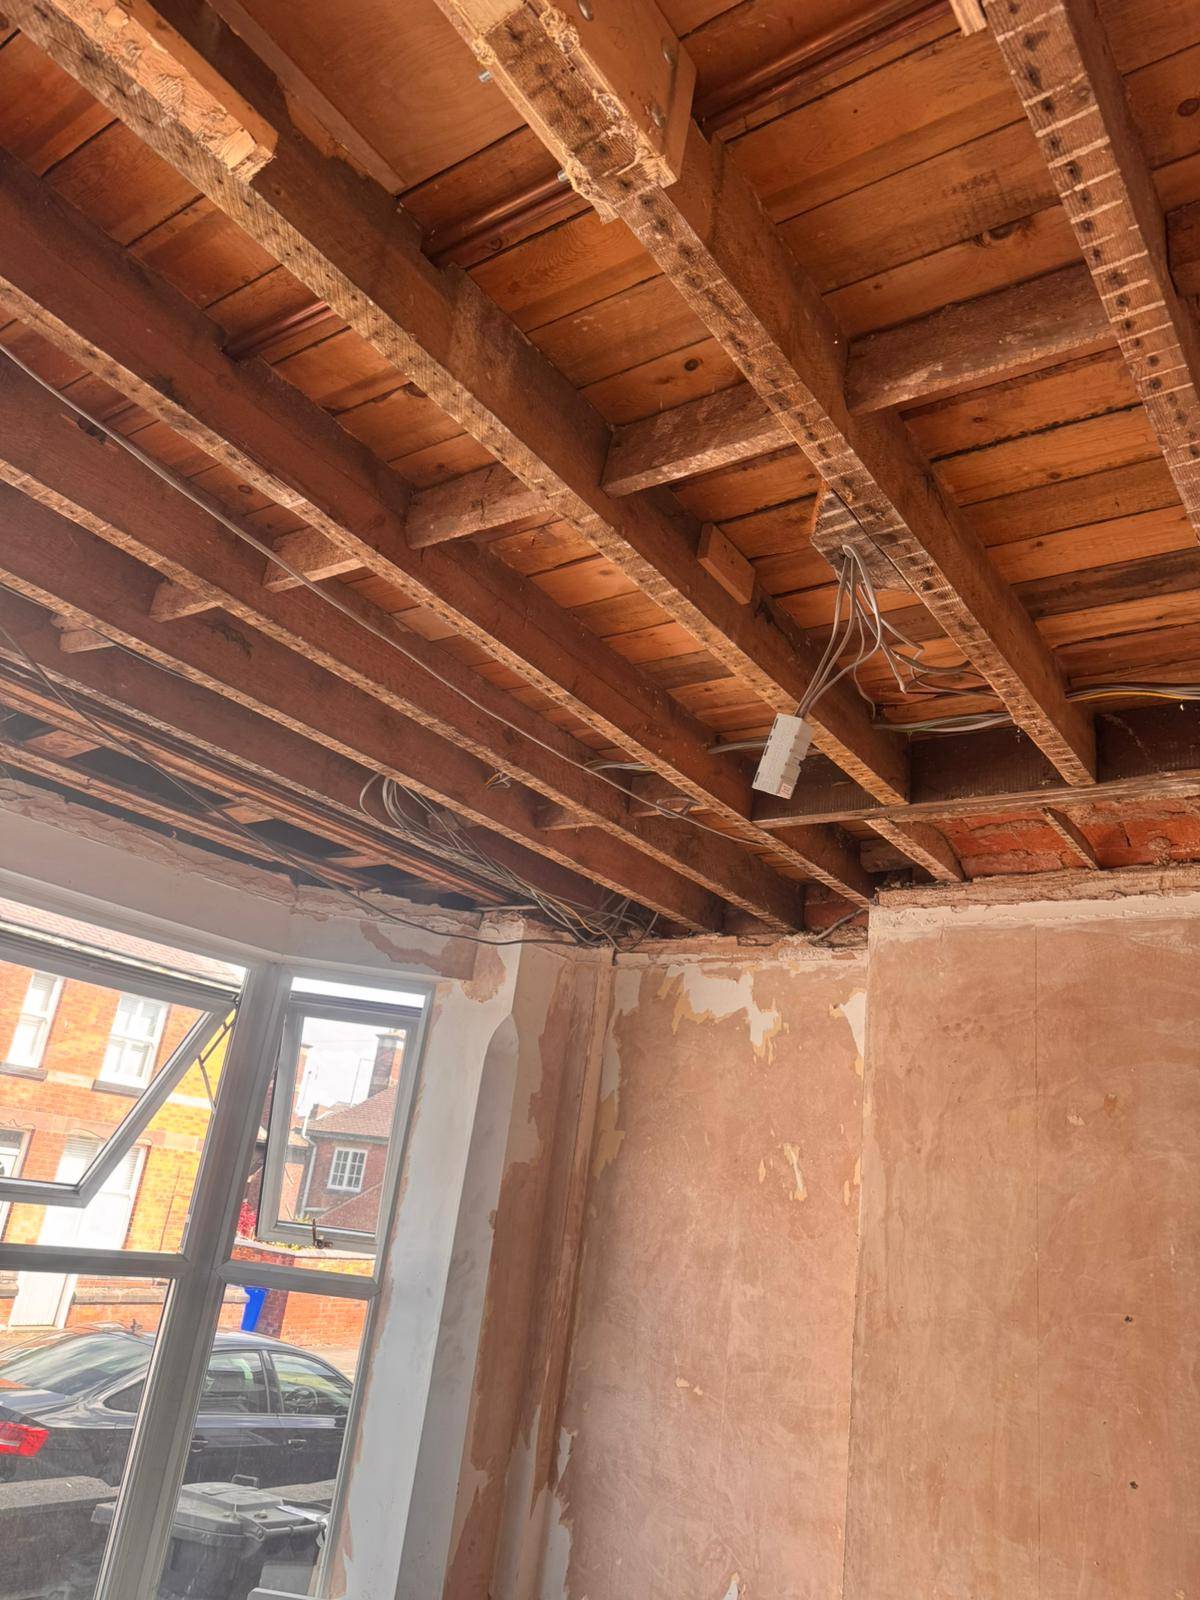
We have completely cleared out the old lath and plaster ceilings and stripped the walls back to the original brickwork. This allows us to inspect the structural integrity of the home. As you can see from our first on-site photos, we have already reinforced the ceiling joists with heavy-duty timber splicing and bolted structural plates to ensure the upper floors are level and secure for the next century.
New consumer unit to replace the existing 2
2. Comprehensive Insulation & Energy Efficiency
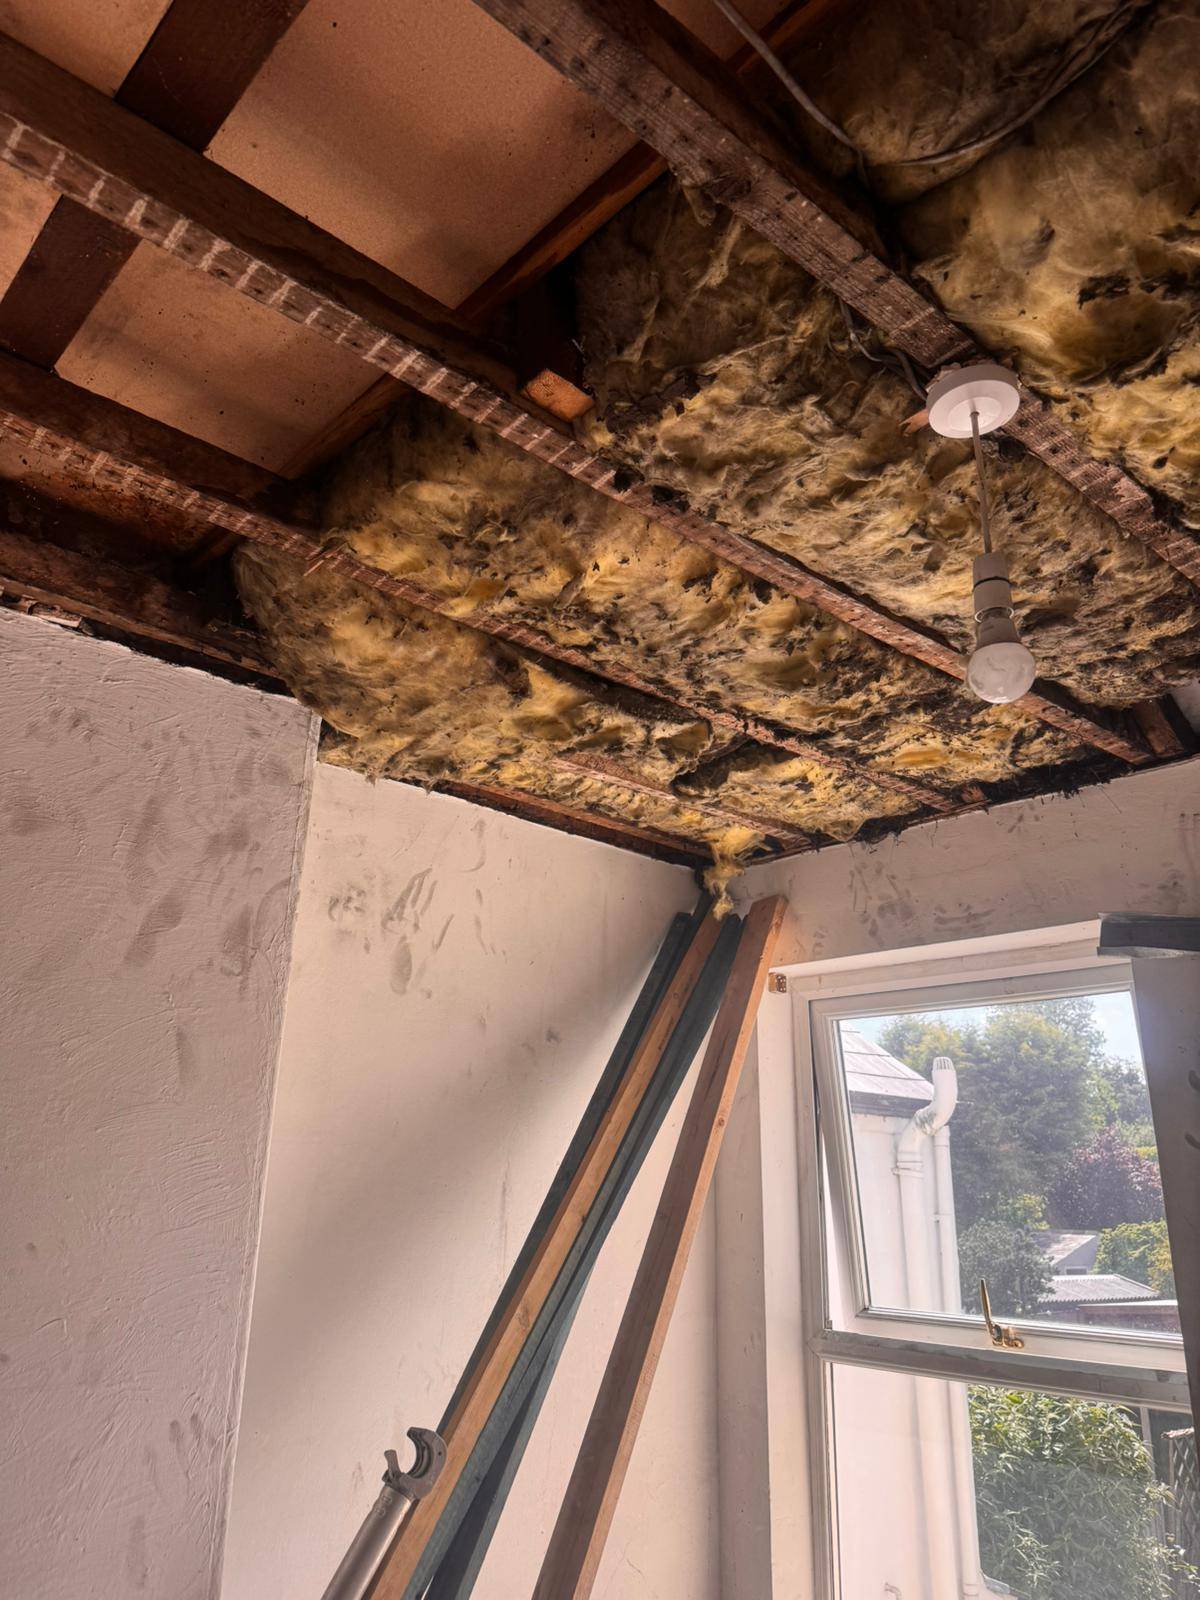
Older solid-wall terrace houses can be difficult to keep warm, leading to massive heating bills. By stripping the ceilings back int he bedroom we have fitted Super Foil SF19 X Foil which has an Roof Thermal Resistance : 2.54R (m2K/W) and is LABC approved. A standard cavity wall in the UK is between 2.3-4.5 so for a very small loss of head height 25mm your adding a huge amount of insulation.
By choosing SuperFOIL insulation you can save yourself Space, Time & Money over traditional forms of insulation. SuperFOIL is dedicated to improving Sustainbility of our products as well as our business as a whole. Our multifoil products are produced using up to 40% recycled materials. This helps save the equivalent of approx. 80 million plastic bottles from ending up in land fill every year! Because SuperFOIL consists of multiple layers of radiant barrier foil, it can protect against heat loss through radiation that non-foil insulation’s offer no protection against. Additionally, by installing as a continuous layer and sealing fully with SuperFOIL Tape, SuperFOIL insulation provides an effective air and vapour barrier. Controlling air leakage such as draughts is paramount to the achieve high levels of energy efficiency. Useful Links: SuperFOIL Brochure-2022
This simple step will make a significant difference to warmth in the bedrooms of this 1920s house into a cozy, energy-efficient home that retains heat and decreases monthly utility costs.
3. Professional Plastering
With the structural work done and insulation in place, our team is getting to work on the boarding and plastering. We use premium finishes (like the British Gypsum BoardFinish ready to go on-site) to achieve perfectly smooth, flawless walls that provide the ultimate foundation for decorating.
4. The Grand Finale: A Bespoke Media Wall
Once the room is plastered and modern flooring is laid, we will be constructing a fully custom, bespoke media wall. This will seamlessly integrate a modern widescreen TV, integrated mood lighting, hidden cabling, and a contemporary fireplace—proving that you can enjoy cutting-edge modern luxury without losing the cozy soul of a traditional terrace.
Progress Photos: Stage 1 (The Strip Out)
Take a look at the raw potential we are working with! These initial photos show the property right after the teardown phase, highlighting the exposed joists, stripped chimney breast, and the starting point of our plastering prep.
We removed a conifer hedge back in February for the customer before the start of the bird nesting season. Pruning trees or bushes after the 1st of April without appropriate ecological supervision could get a builder like ourselves into trouble.
The customer chose composite fence panels from Charles and Ivy.
We installed these into concrete posts and gravel boards for longevity.
The last eight weeks have been very dry. It is is very important to water newly laid turf regularly if it is not raining frequently. Here is a guide to looking after your new turf.
The first few weeks after laying new turf are crucial for root establishment. Here is detailed advice for caring for your new lawn, focusing on watering, traffic, and mowing:1. Watering (The Most Critical Step)The first few weeks after laying new turf are crucial for root establishment. Here is detailed advice for caring for your new lawn, focusing on watering, traffic, and mowing:
1. Watering (The Most Critical Step)
Initial Watering (First 1-3 Weeks): New turf is a living plant that needs consistent moisture to root deeply.
Frequency: Water the entire lawn evenly and thoroughly every day, especially during hot or dry weather. Some advice suggests watering at least twice a day for the first seven days.
Technique: Use a sprinkler to ensure even coverage. The water must soak down through the turf to moisten the soil below.
Timing: Water early in the morning or early evening to allow the water to reach the roots before the sun causes it to evaporate.
Watch for Edges: Concrete edging, posts, and paving slabs absorb water quickly, so be sure to water areas near them more often.
Avoid Overwatering: While the turf needs water, ensure the ground is moist but not waterlogged or soggy, as this can starve the roots of oxygen and make the grass turn yellow or die.
Reducing Frequency: As the turf starts to knit together (around 3 to 4 weeks), reduce watering frequency. It is better to water thoroughly every two to three days than to water a little bit every day.
2. Traffic and Compaction
Keep Off: Avoid walking on the new turf as much as possible for the first few weeks, ideally three to four weeks. Walking on it can cause soil compaction, create dents and divots, and disrupt root formation.
Necessary Access: If you must cross the lawn (e.g., for watering), place wooden planks or boards down to use as a walkway to distribute your weight.
Pets and Play: Keep pets and children’s play equipment off the lawn until it is fully established and settled.
Frost: Avoid walking on the lawn during frosty weather as this can damage the grass blades.
3. Mowing
When to Start: Do not mow until the turf has rooted well and the blades of grass are at least 25mm high. This is typically around three weeks after laying.
Check Rooting: To check if it’s ready, gently tug on a few blades of grass. If the turf lifts, wait a few more days. If the turf feels stuck, the roots have started to take and it is ready for its first cut.
First Cut: Use the highest setting on your lawnmower and ensure the blades are sharp for a clean cut. Only cut off about a quarter to no more than one-third of the grass length at one time.
Ongoing Mowing: When the grass is growing, cut “a little and often” rather than cutting it once a week, as frequent light trimming prevents the coarse grass from dominating the lawn.
4. Fertilising and General Care
Fertiliser: Your new turf is usually pre-fertilised, so it generally will not require additional fertiliser for at least three months, or a minimum of six weeks after laying. Phosphorous is considered the most crucial nutrient during this establishment phase to encourage root growth.
Cuttings: Collect the clippings using a grass box or rake them up and remove them to ensure sunlight reaches the turf.
Brown Patches: If your turf is turning yellow or brown, it is likely due to insufficient water during a dry or hot spell. Increasing your watering will usually return the lawn to a healthy state.
We used our regular roofing contractor to help on this job. We replaced the timber underneath with new OSB then glued a rubber membrane on top.We took out a larger section of roof that was originally intended due to the material being damp underneath