Categories
Internal fit out Kitchen

Full stave worktops in Bunny, Nottinghamshire

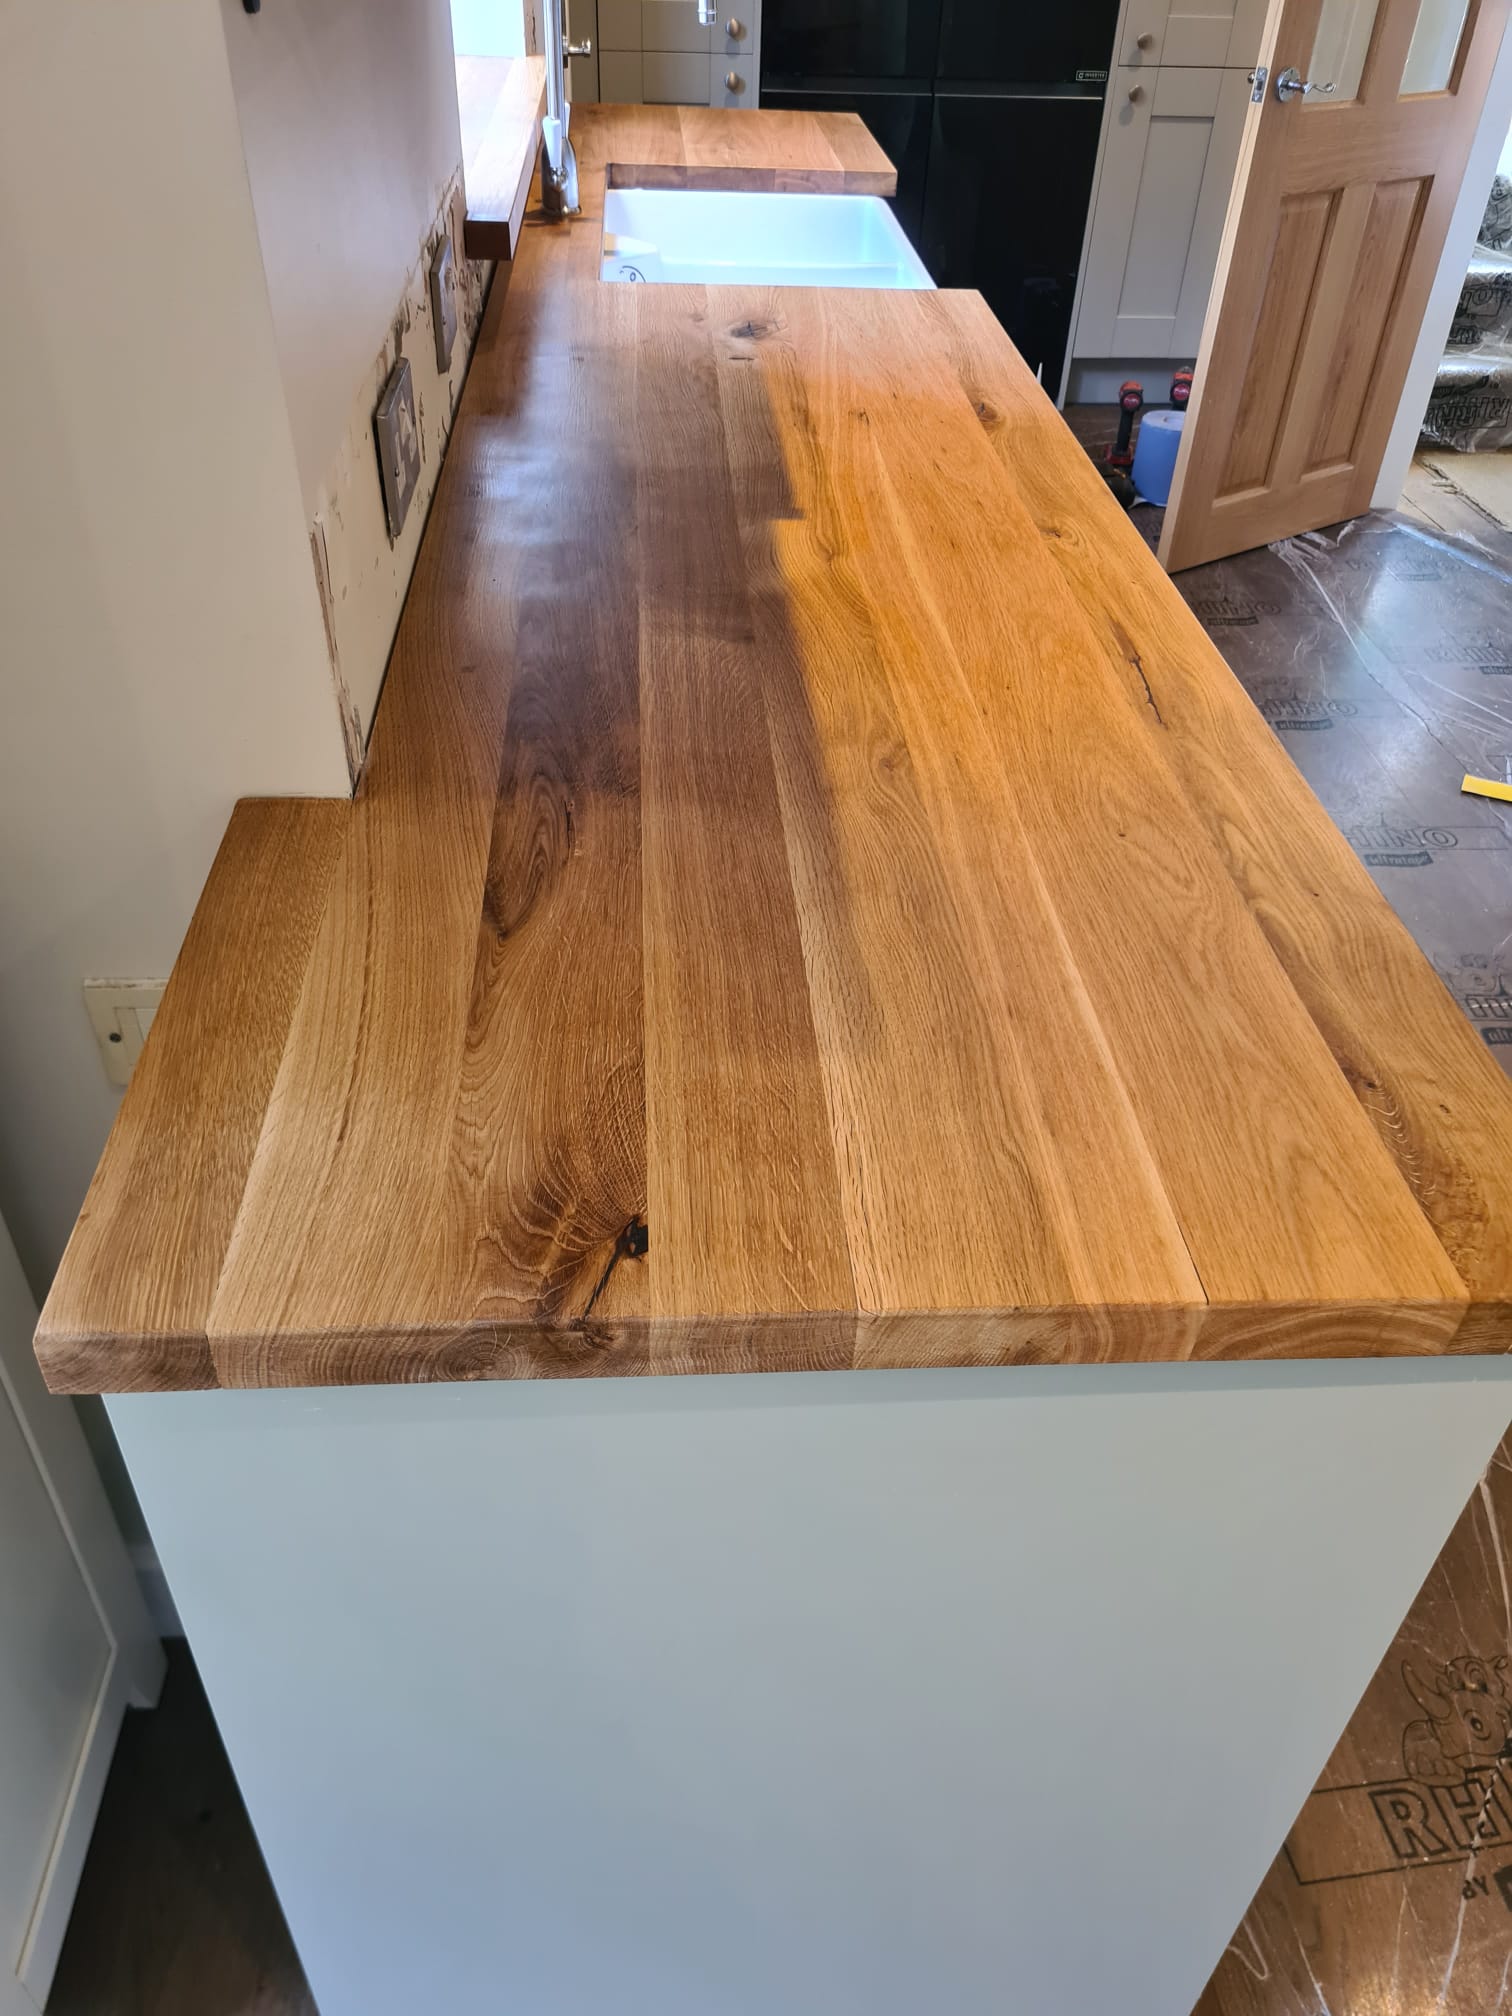
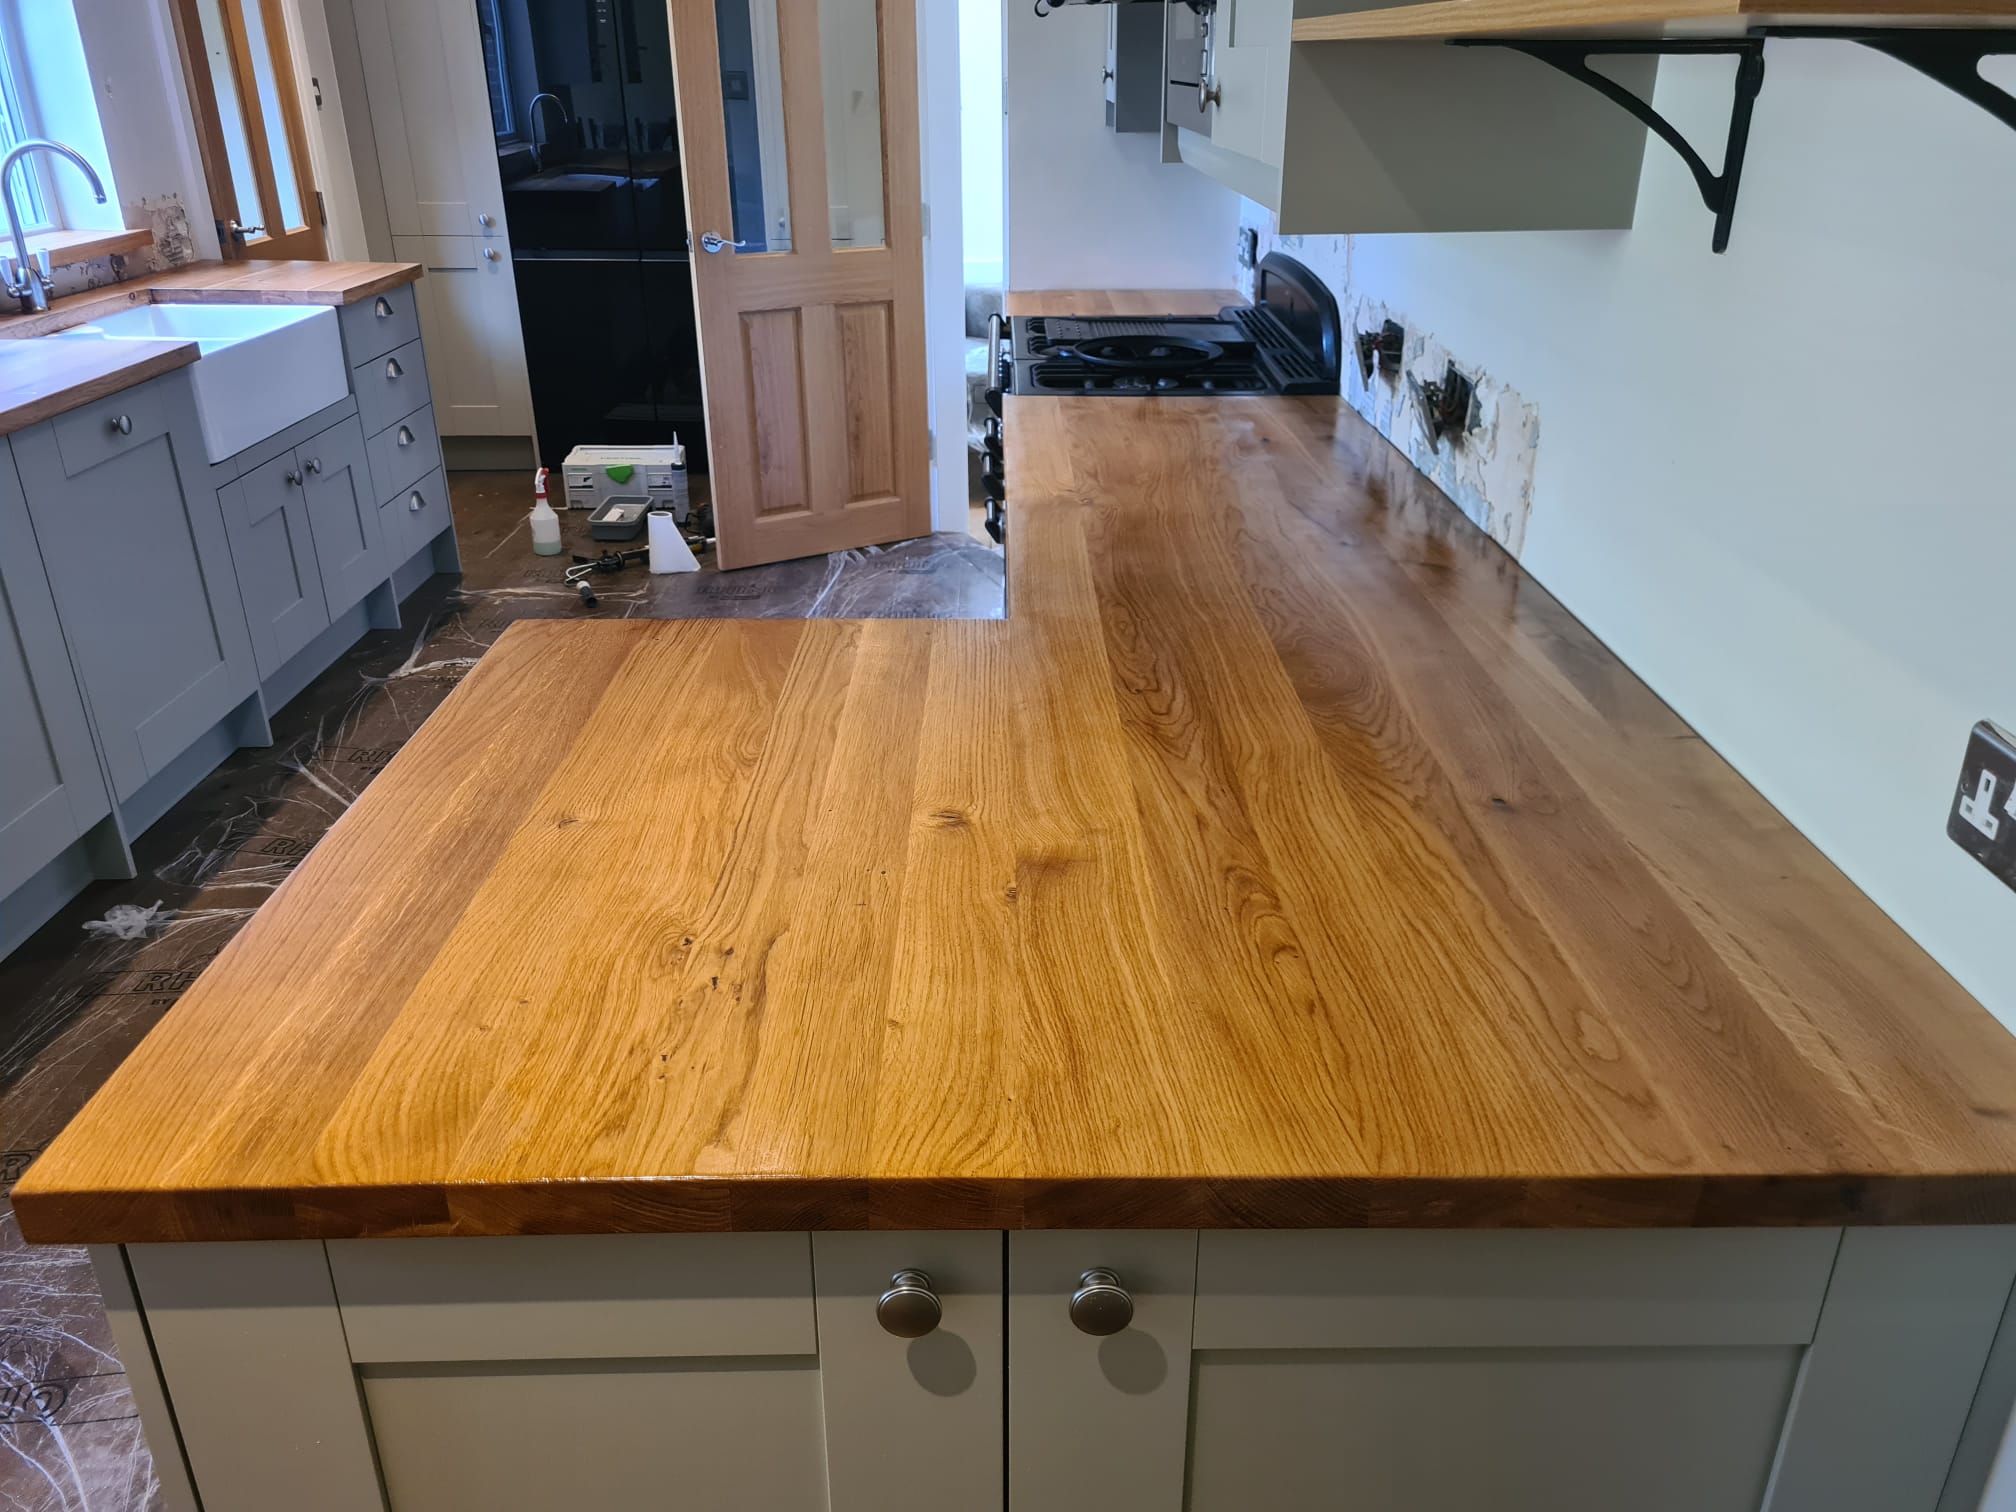
Recent Project: Stunning Solid Oak Full Stave Worktop Installation in Bunny, Nottinghamshire

There is nothing quite like the warmth and character that natural timber brings into a kitchen. We recently completed a beautiful solid oak worktop installation for a client in Bunny, Nottinghamshire, and the results speak for themselves.

For this project, we precisely cut, joined, and installed premium solid oak worktops to perfectly contour the kitchen’s layout, featuring a seamless corner joint and a classic Belfast sink cutout.What is a “Full Stave” Worktop?

WhatsApp Image 2026-07-17 at 12.24.57

What is the difference between timber worktops. Simply put, a Full Stave worktop is constructed using long, continuous planks of timber that run the entire length of the worktop without any breaks.

Full Stave vs. Finger-Jointed (Standard):

  • Full Stave: The staves run from one end to the other (typically 80mm–250mm wide). They are glued using straight-edge joins, creating a clean, flowing look.
  • Finger-Jointed: Made by joining smaller, shorter blocks together with “teeth” (finger joints) to make up the length.

Why choose Full Stave?

  • Aesthetics: You get a seamless, flowing grain pattern that showcases the timber’s natural beauty and consistent colour. It’s widely considered the high-end, premium choice.
  • Stability: Because you are using continuous, full-length timber rather than smaller glued blocks, the worktop is robust and less prone to warping over time.

Builder’s Note: Full stave worktops are heavy and rigid. They require careful handling during installation, especially when cutting for sinks or hobs, but the final finish is unmatched.

From Raw Timber to Rich Grain

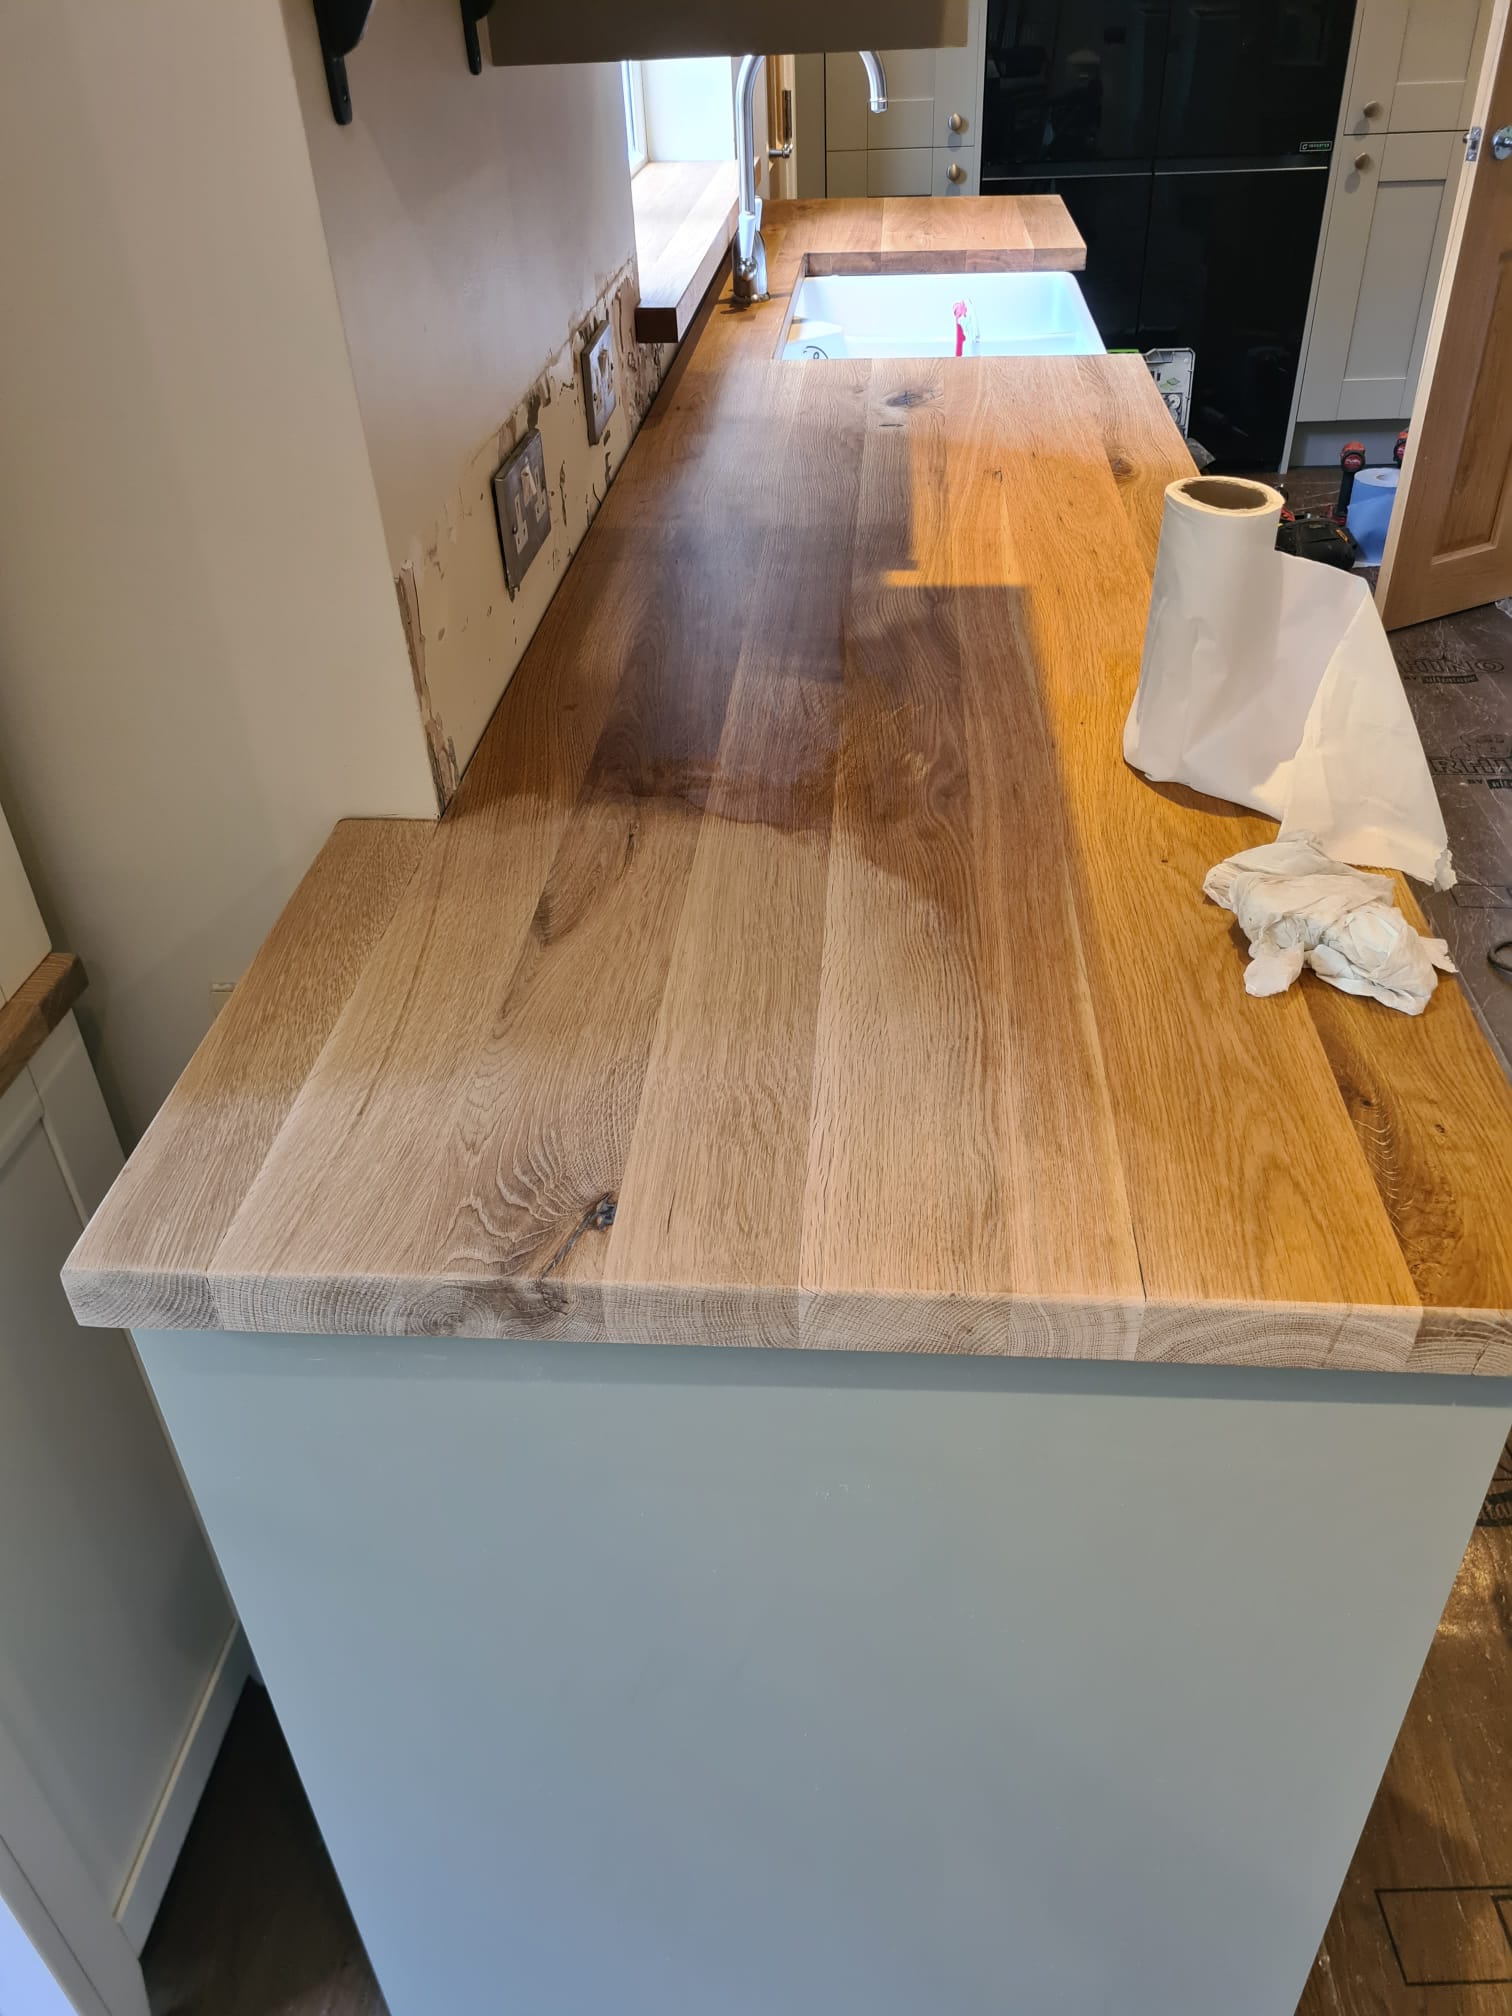
A key part of the magic with solid wood is the finishing process. As you can see from our progress shots, applying a high-quality Osmo protective oil completely transforms the wood—taking the oak from a pale, raw state to a deep, rich golden tone that highlights the natural knots and grain patterns.

Beyond the aesthetics, this oiling creates a durable, water-resistant barrier essential for busy kitchen areas around the sink and cooker.Is Solid Wood Right For You?

We always believe in being honest with our clients:

  • The Pros: If you love timber, nothing can replace that natural texture. With regular care, it is a timeless investment that lasts a lifetime.
  • The Considerations: It is an investment in both material cost and skilled labour. Because solid wood reacts to its environment, it needs to be looked after—regular oiling is a must, and standing water should be avoided. If you’re looking for a low-maintenance, “fit and forget” surface, quartz or granite might be better, but if you want that warm, natural statement piece, there is no substitute for oak.

Project Highlights

  • Location: Bunny, Nottinghamshire
  • Materials: Premium Solid Oak Worktops paired with Sage Green Shaker Cabinets
  • Features: Flawless mitre joints, custom Belfast sink integration, and bespoke window sill styling.
  • Finish: Multi-coat protective specialist wood oil for an enduring satin sheen.

Looking to Upgrade Your Kitchen in Nottinghamshire?

Whether you are based in Bunny, Ruddington, Bradmore, or across Nottingham, we specialize in precise worktop installations, custom joinery, and full kitchen transformations.

Let’s bring your dream kitchen to life.

[ 📞 Get a Free Quote Today on 07737 988243 ] or [ ✉️ Contact Us via Message quote@swallowhillhomes.com]

Categories
Plastering

Renovating History: Managing Plastering Challenges During a Heatwave

Renovating History: Managing Plastering Challenges During a Heatwave

Our current renovation project in Sandiacre, Derbyshire has been a journey. After navigating initial labour hurdles, we’re glad to say the project is back on track.

Working on a property that is over 100 years old is rarely straightforward; achieving a top-quality, modern finish on historic walls requires patience, experience, and the right hands. That is why we brought in Anthony Wood from [link removed] in Long Eaton to handle the heavy lifting.

img_6875
previous arrow
next arrow

We have a new Media Wall arriving next week, and in preparation, we made the strategic decision to fully replaster the master bedroom and the living room (excluding the areas where the media and fitted furniture will sit). While it is tempting to spend days sanding and filling, we’ve found that it is often better to take the hit and replaster the whole room to ensure a flawless, long-lasting canvas. The Heatwave Challenge

Just as we were making progress, Mother Nature threw us a curveball. We were plastering right in the middle of some of the highest temperatures ever recorded in the United Kingdom.

The heat proved to be quite a challenge. Anthony was on-site by 6 am every morning to squeeze in a few productive hours before the heat of the day truly struck, but it was still a battle against the elements. At one point, the living room ceiling had to be plastered twice because the heat was so intense that the first coat “went off” (dried) far too quickly to achieve a smooth finish.Why Heat Affects Plaster

That experience was a vivid reminder of why plastering in extreme heat is such a technical risk. When the evaporation of water exceeds the material’s hydration rate, you often encounter several structural and aesthetic defects:

  • Shrinkage Cracking: Rapid moisture loss causes the plaster to shrink before it has gained sufficient internal strength, leading to hairline cracks or “spiderweb” micro-cracking.
  • Weak Adhesion and Surface Strength: If the surface dries too quickly, the plaster won’t bond correctly to the substrate. This results in a weak, powdery, or chalky finish that makes for a poor base for decorating.
  • Reduced Working Time: High temperatures drastically shorten the window available to pump, place, and finish the material. This often forces a rushed application, which can lead to “cold joints” and difficulty achieving a consistent, smooth surface.
  • Inconsistent Coloration: Variations in drying rates—often caused by uneven exposure to direct sunlight, drafts, or hot versus shaded areas—can result in patchy or mismatched colors across the wall.
  • Excessive Suction: A hot substrate will aggressively draw moisture out of the wet plaster, causing premature drying and increased surface porosity.

Our Tips for Mitigation

If you are planning a plastering project during warmer weather, don’t let the conditions derail your finish. Here are a few ways to mitigate these issues:

  1. Work Early: Start as early as possible to finish your main work before the peak heat of the day.
  2. Dampen Substrates: Thoroughly dampen the walls before applying the plaster to help manage suction.
  3. Control Your Mix: Use cold or even iced water to mix the plaster to extend the working time.
  4. Protect the Area: Shield your workspace from direct sun and hot winds by using tarps, blinds, or shading.

Even with the challenges of a 100-year-old house and a UK heatwave, we are happy with the results. If you’re embarking on a renovation, don’t underestimate the impact of the weather—it pays to plan ahead!

Next in is the joiner to do the skirting and architrave before the plasterer comes in.

Where did we get our plaster from?

Big shout-out to the team at Galaxy insulation in Long Eaton, they are our go-to for all things insulation, dry lining, and plaster.

I’ve developed a bit of a routine of swinging by at 3:55 PM to grab our essentials for the next day—the staff are always incredibly helpful and the prices are spot on. Why the rush? Because quality matters. We never keep plaster on-site for longer than 28 days to avoid it going to waste. Fresh materials mean a better finish every time. If you’re looking for a reliable supplier, these are the folks to see!

Need a quote for some building work, call us on 07737 988 243
Categories
Brickwork Extension Internal fit out

Opening up kitchen with steel (RSJ) beams in Selston, Nottinghamshire

Open Plan Living: How We Safely Removed a Wall to Expand a Kitchen

Changing the layout of a property to create an open-plan kitchen is one of the most common requests we receive. It’s a fantastic way to transform how a home feels, but it requires careful structural planning.

img_6819
previous arrow
next arrow

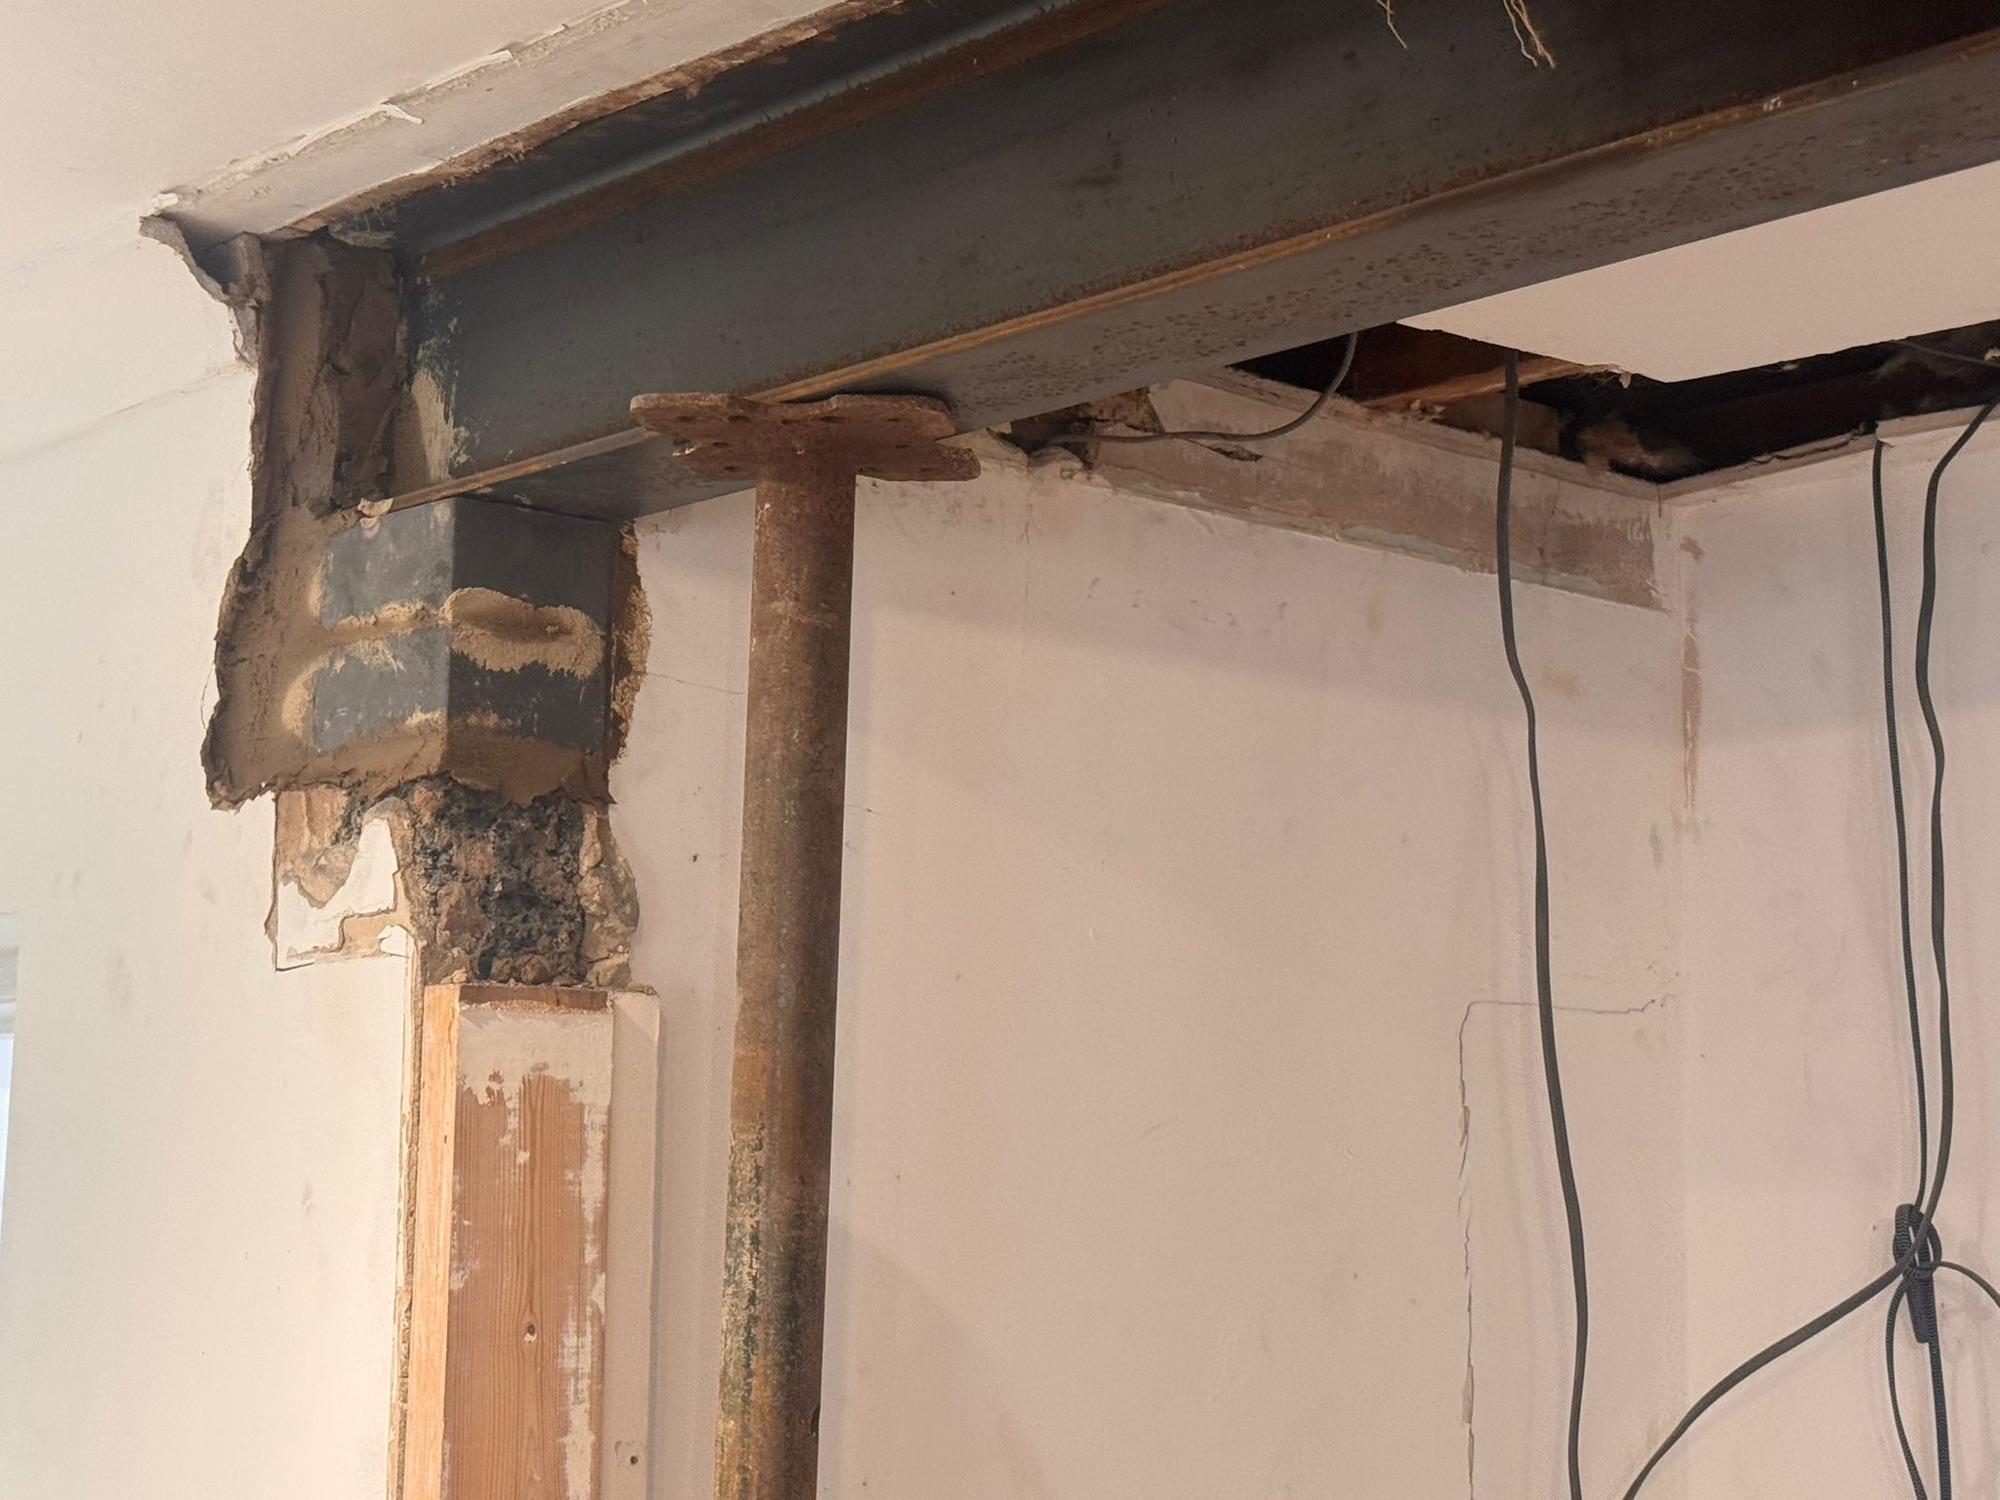
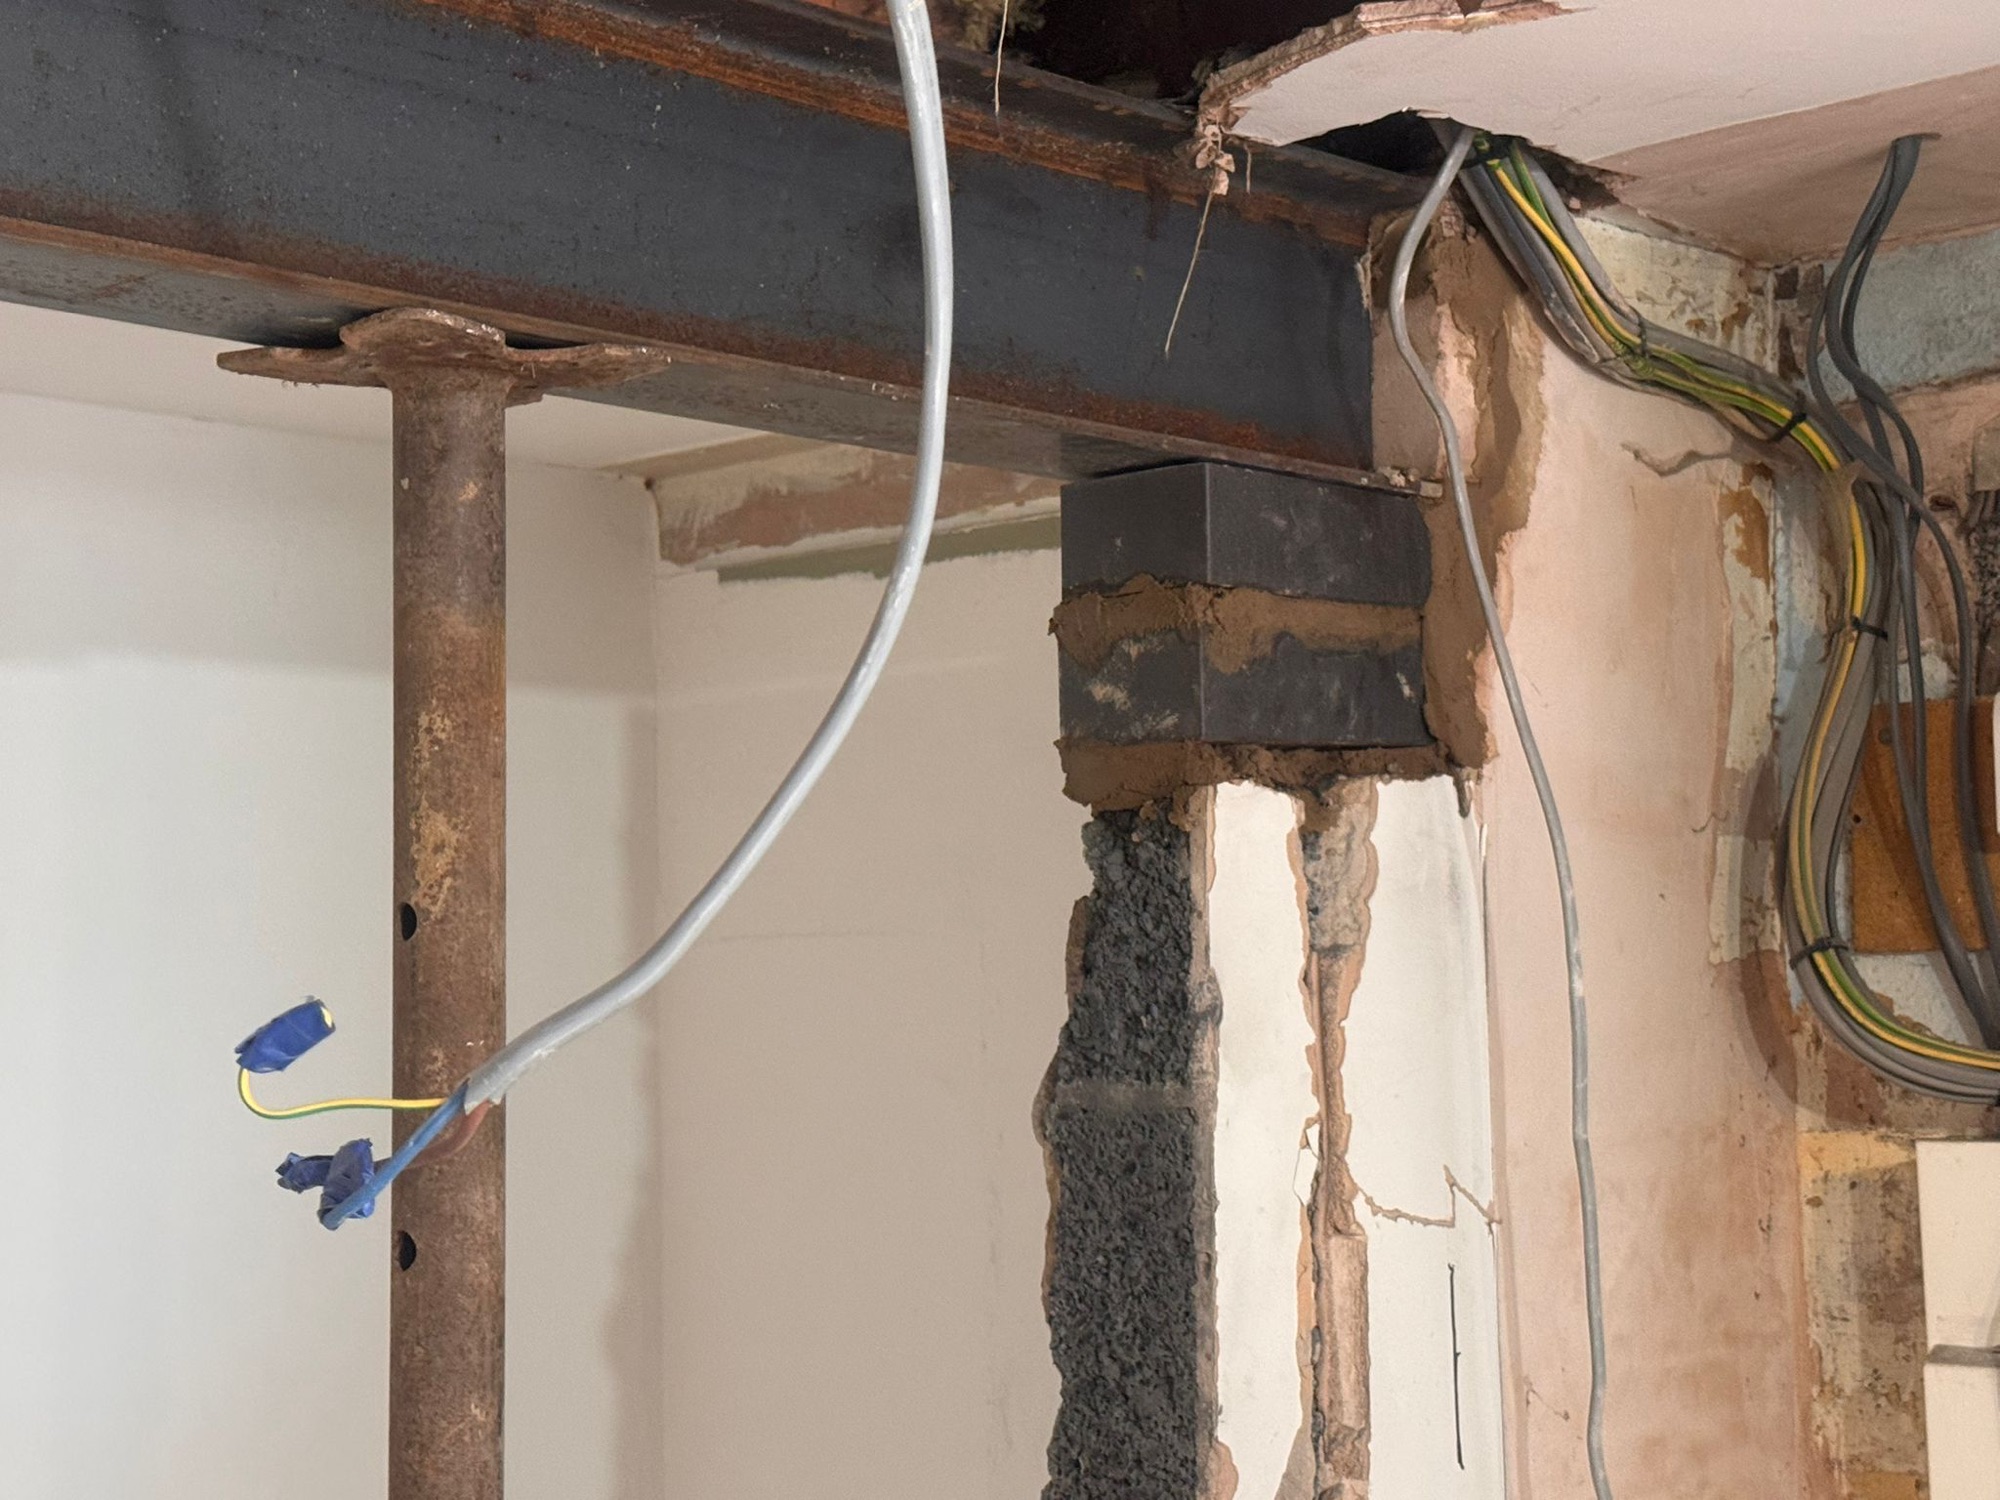
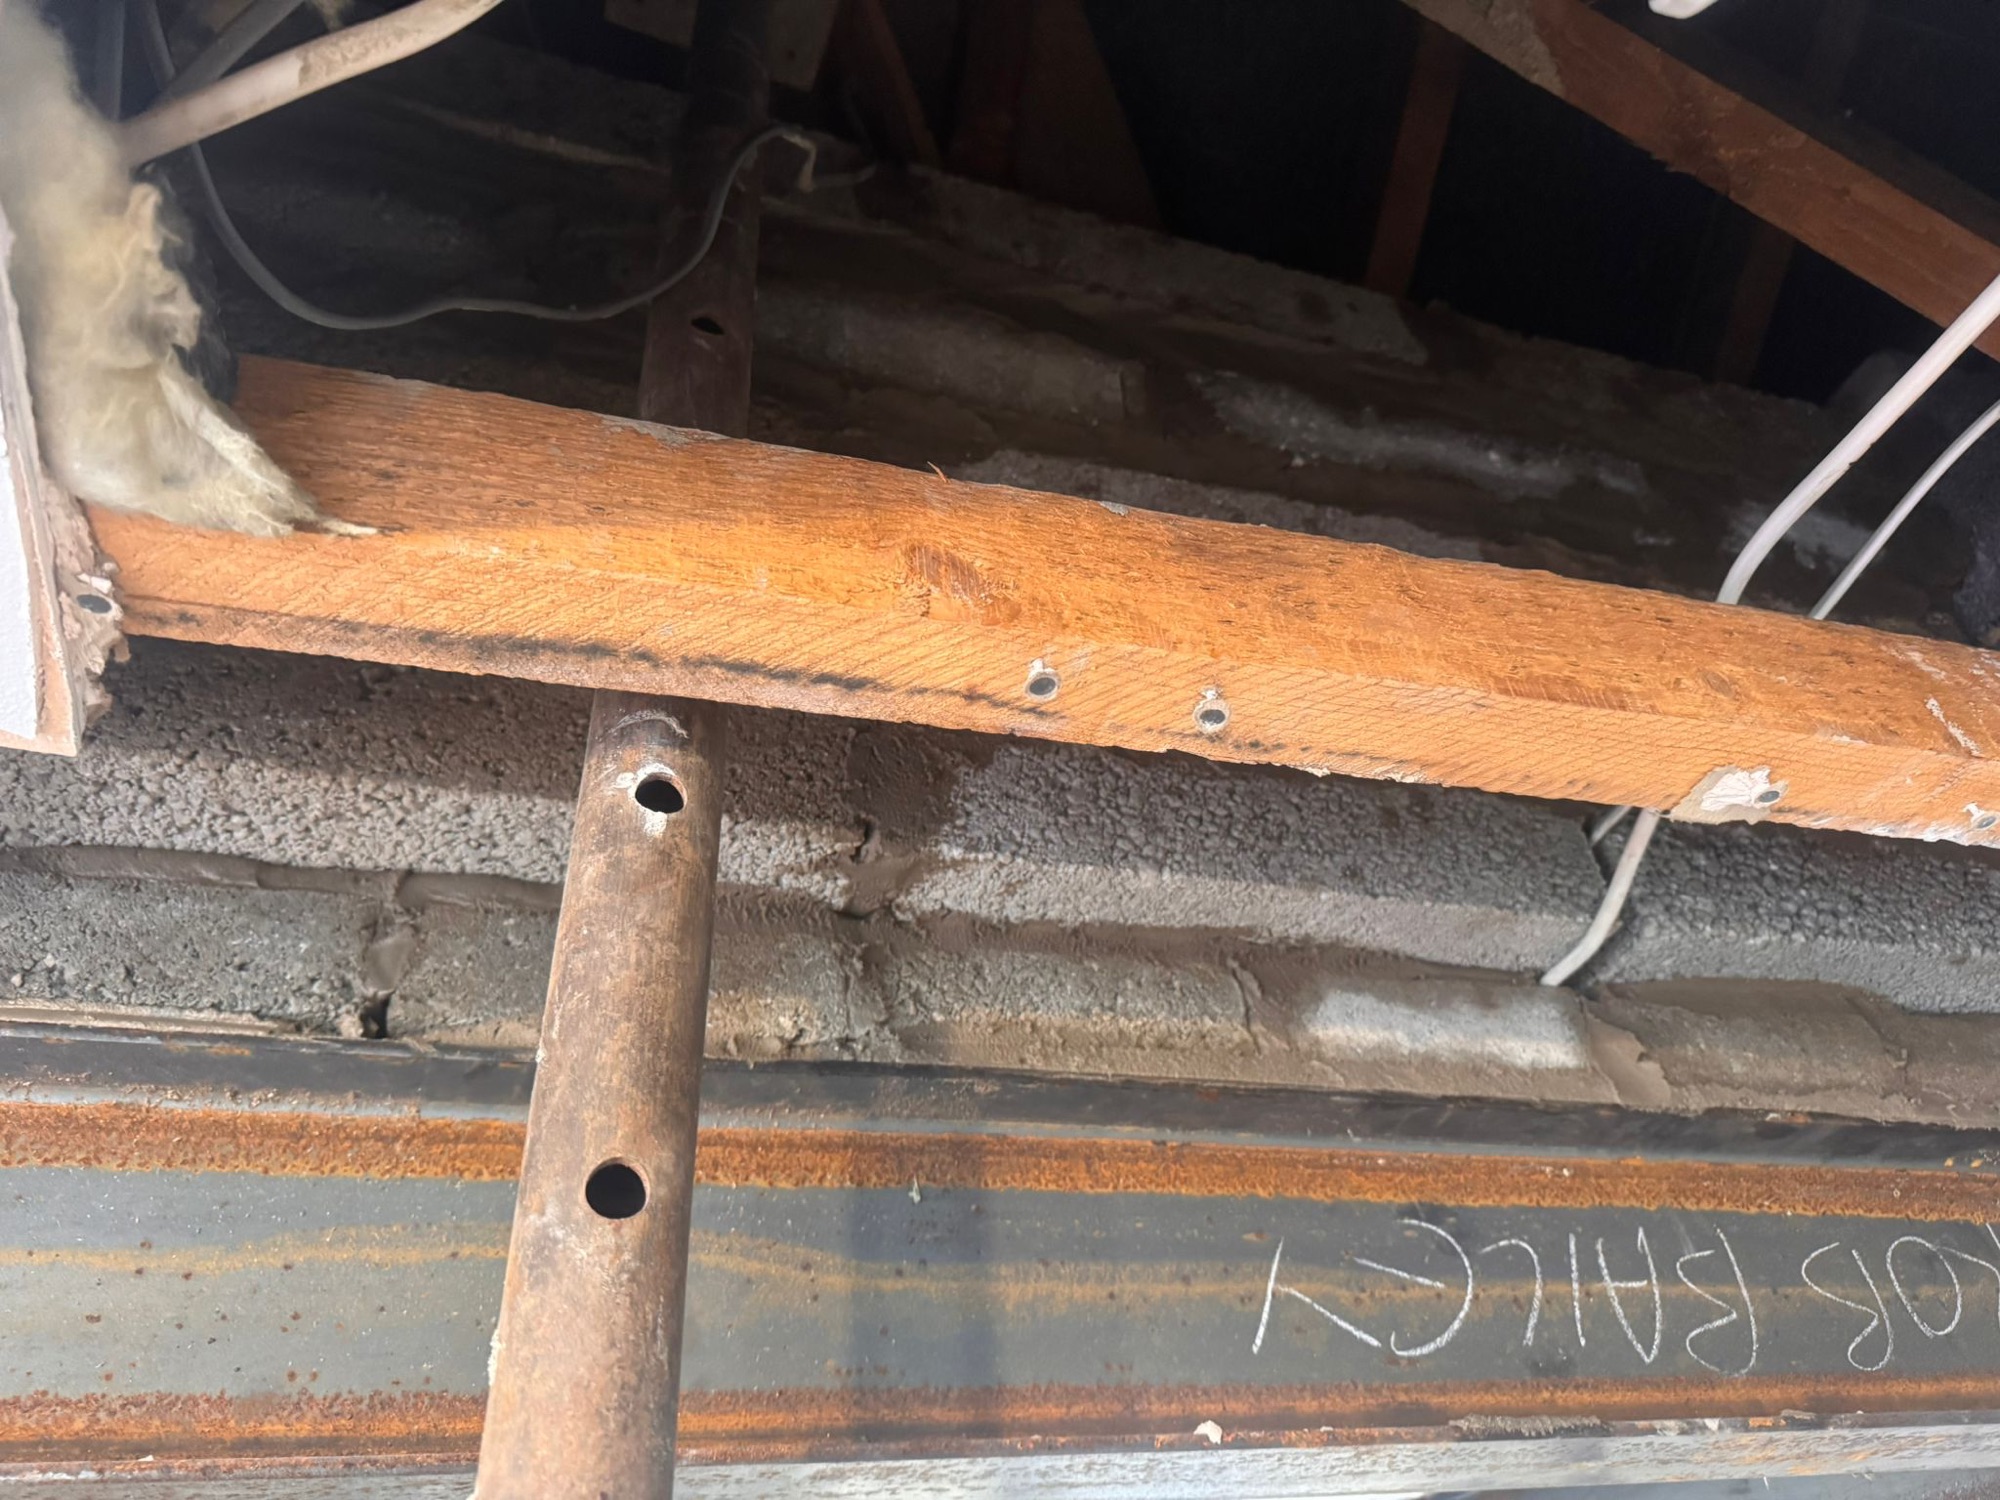
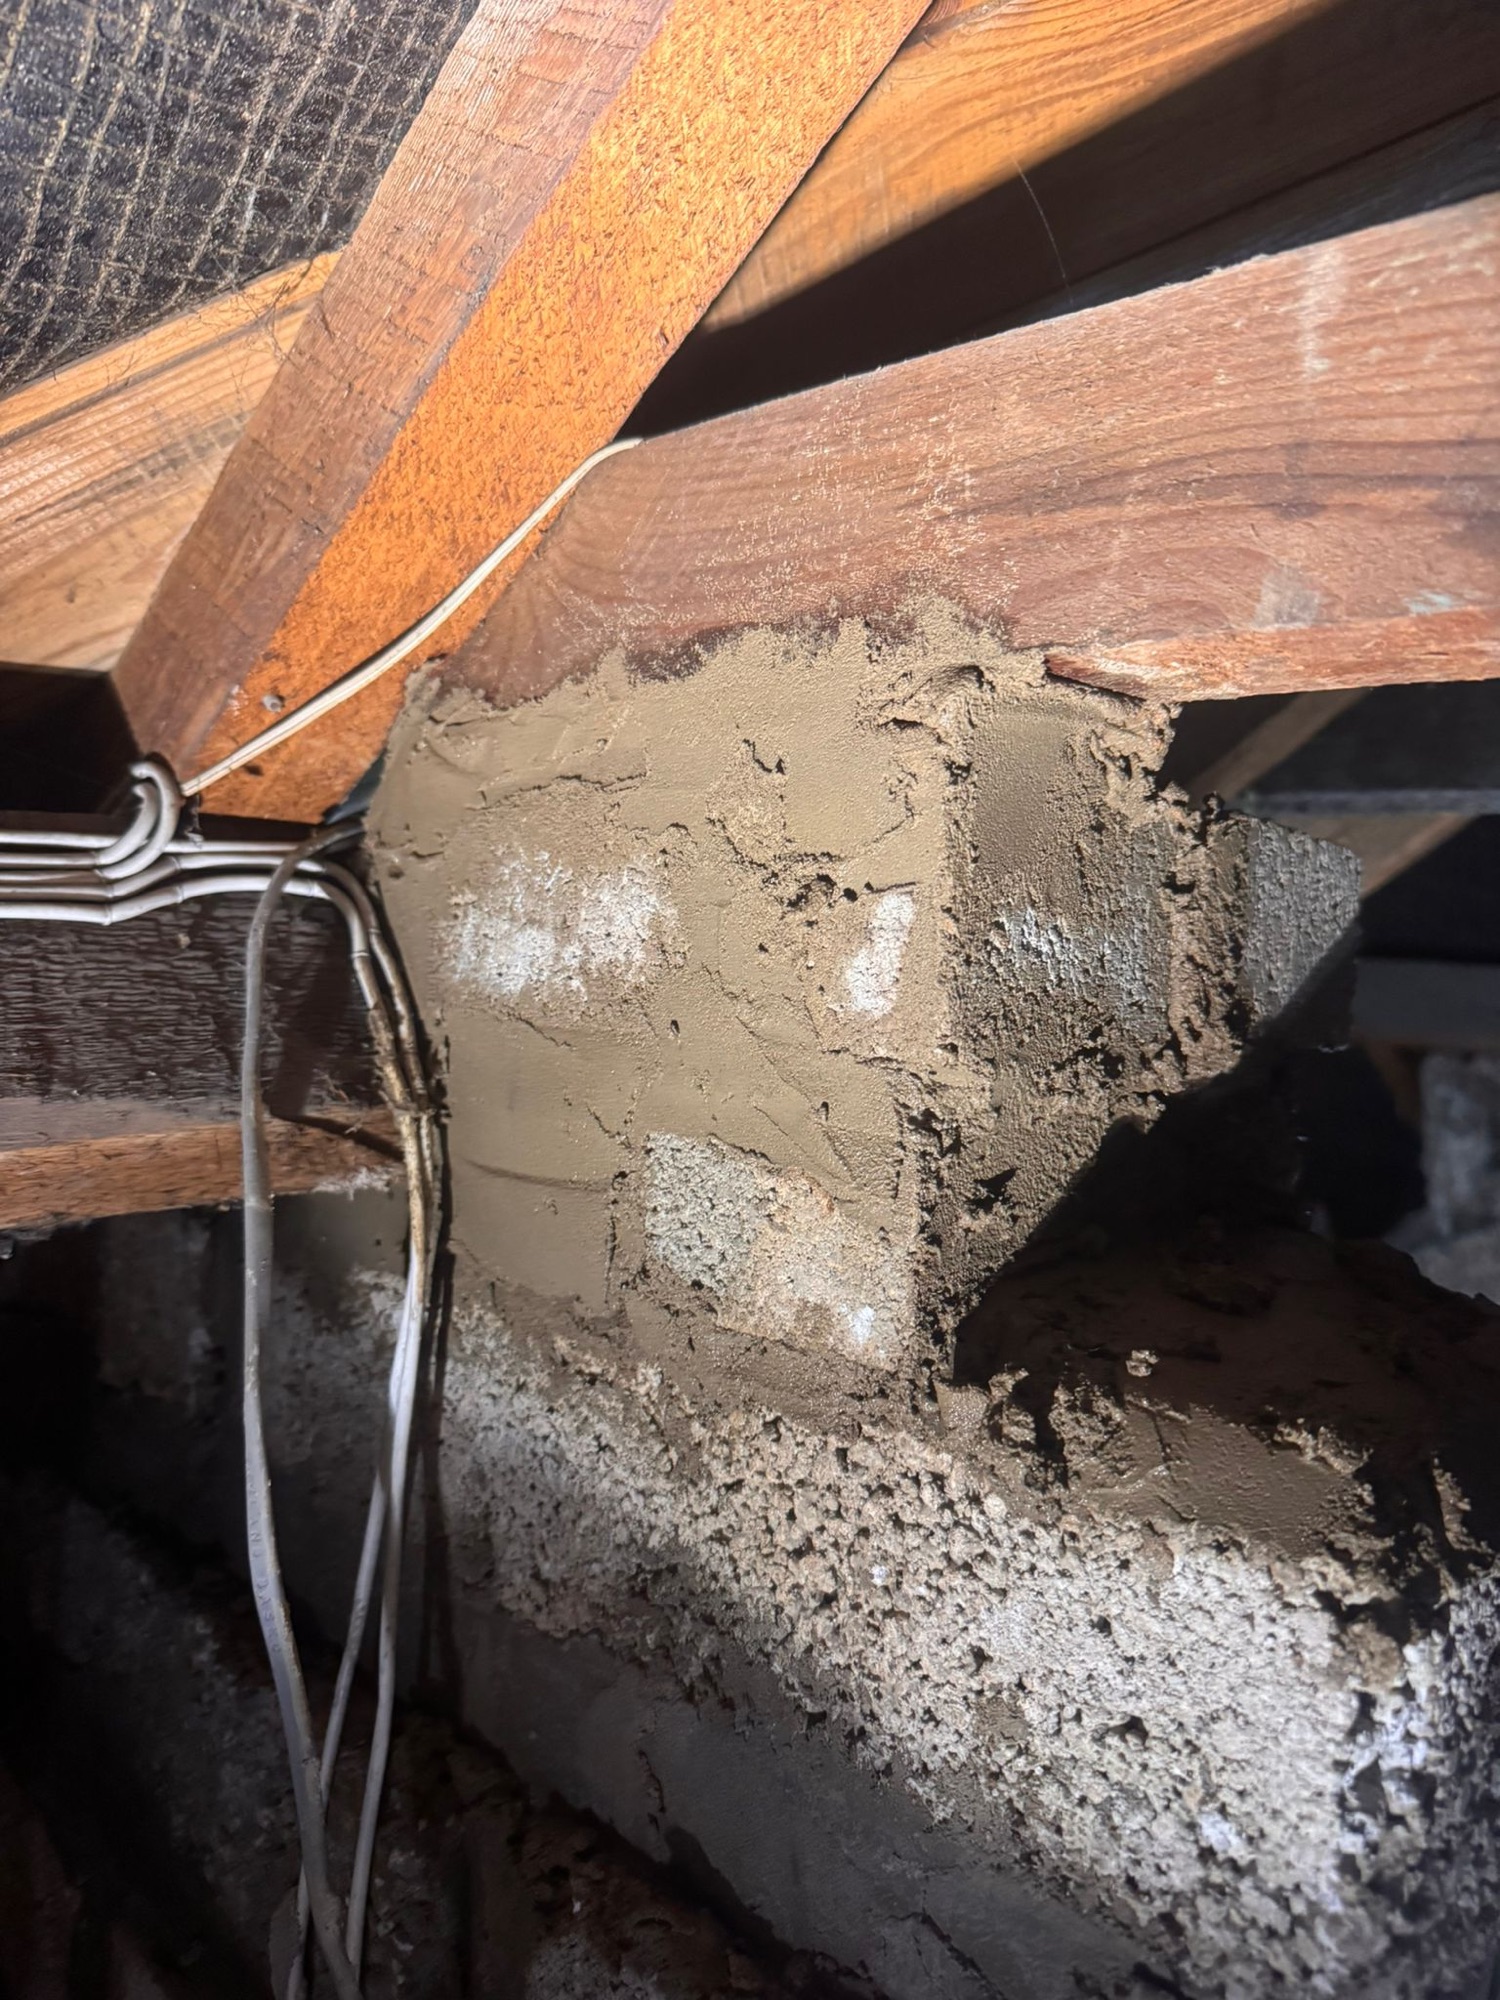
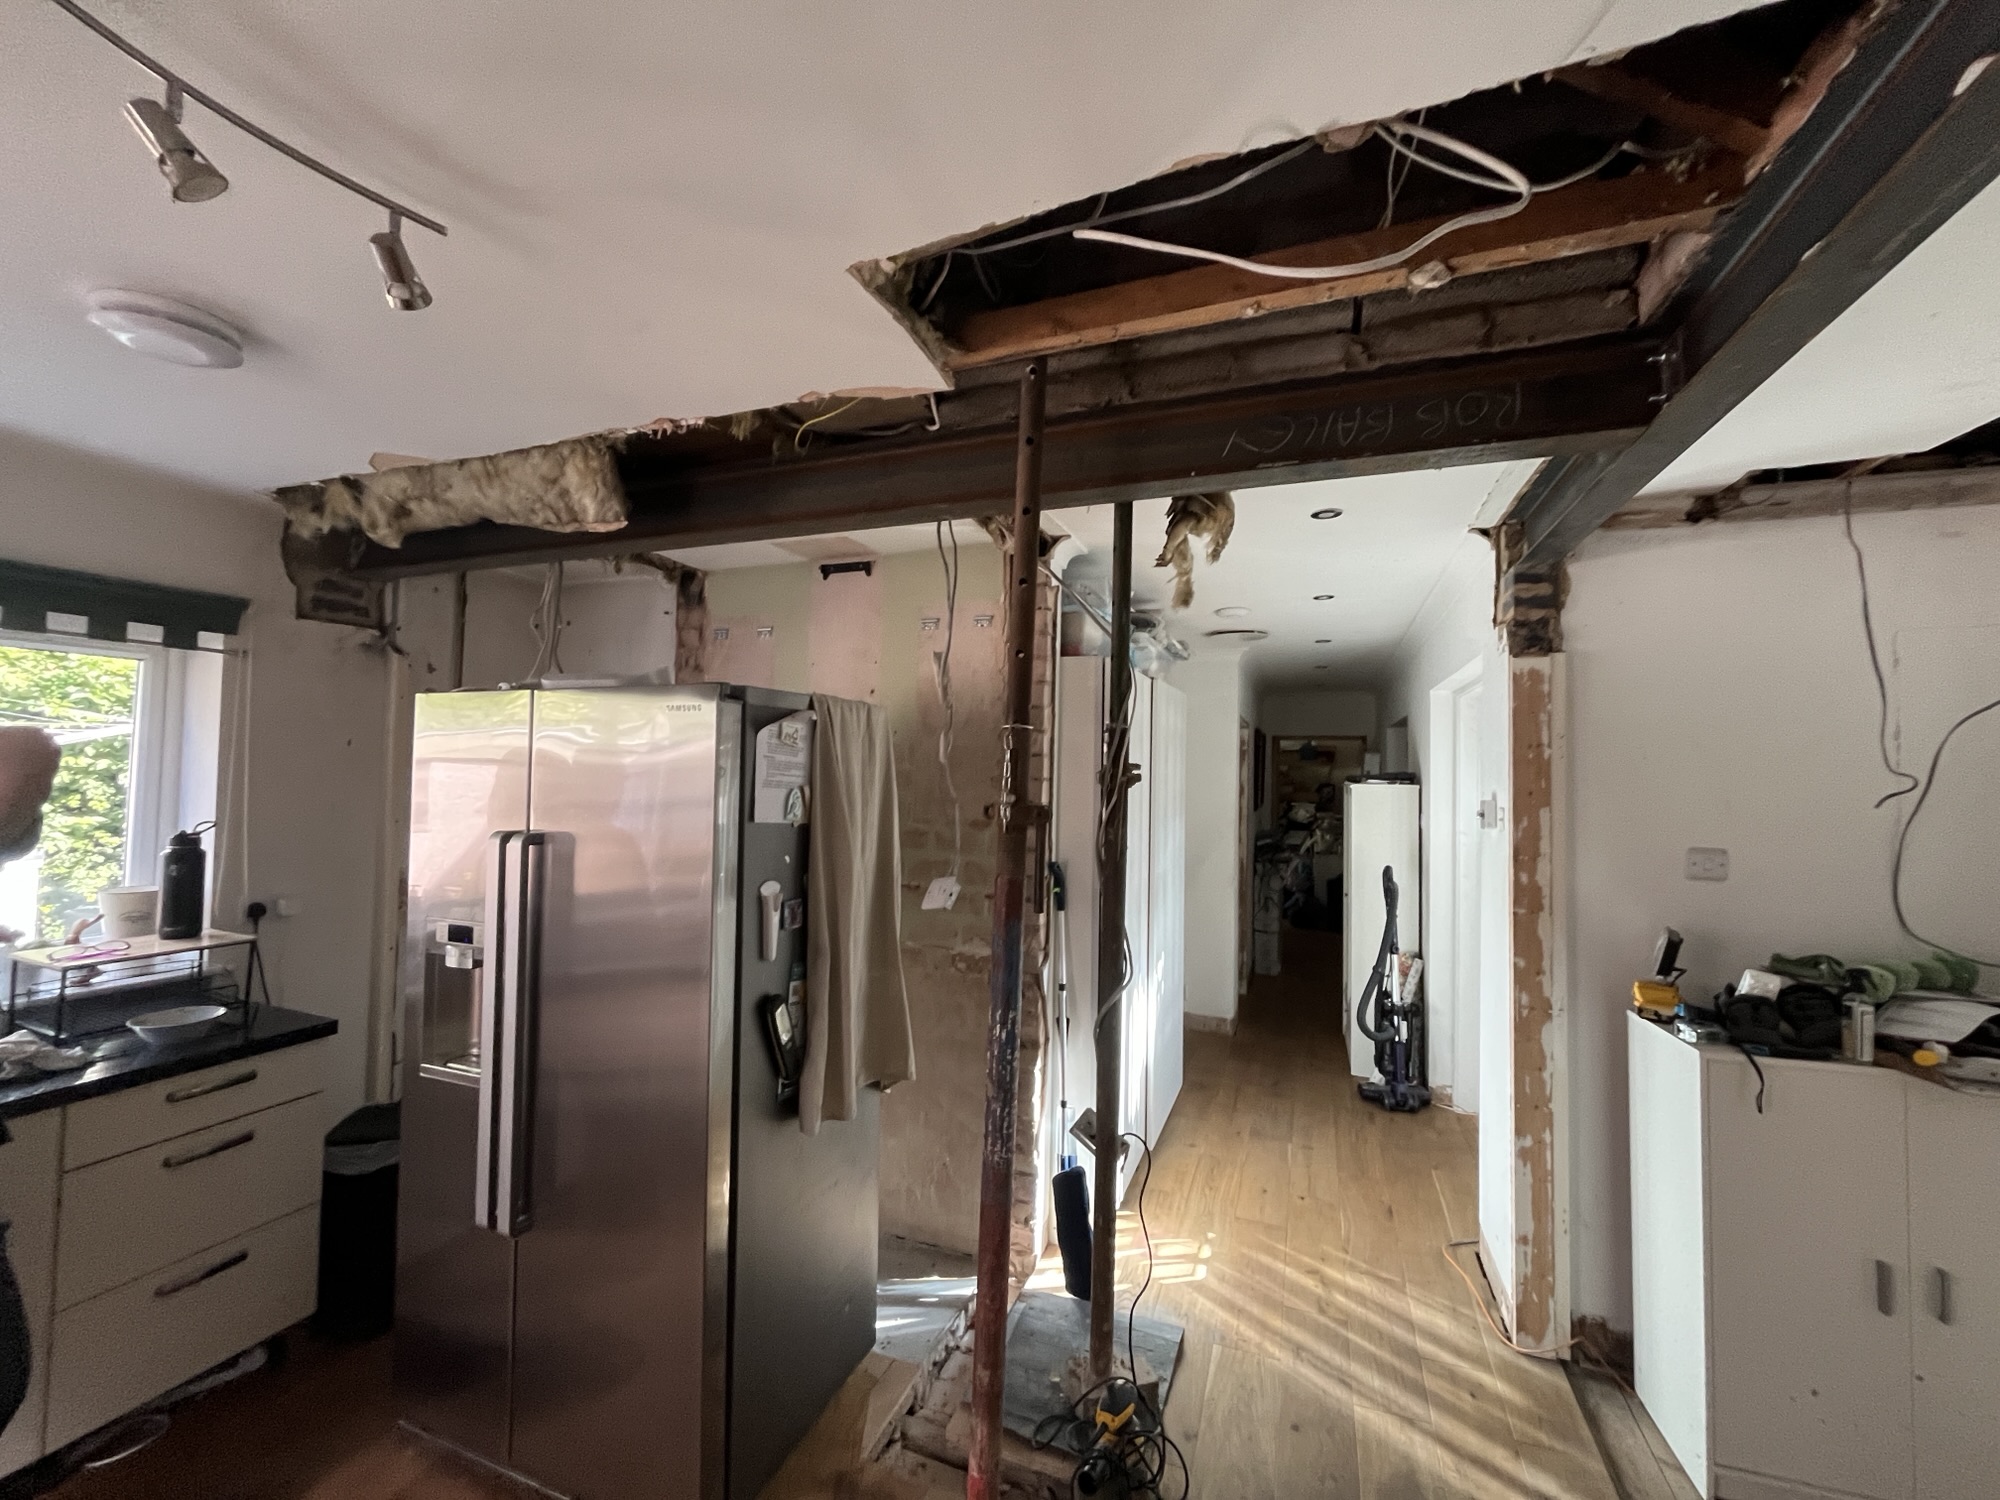
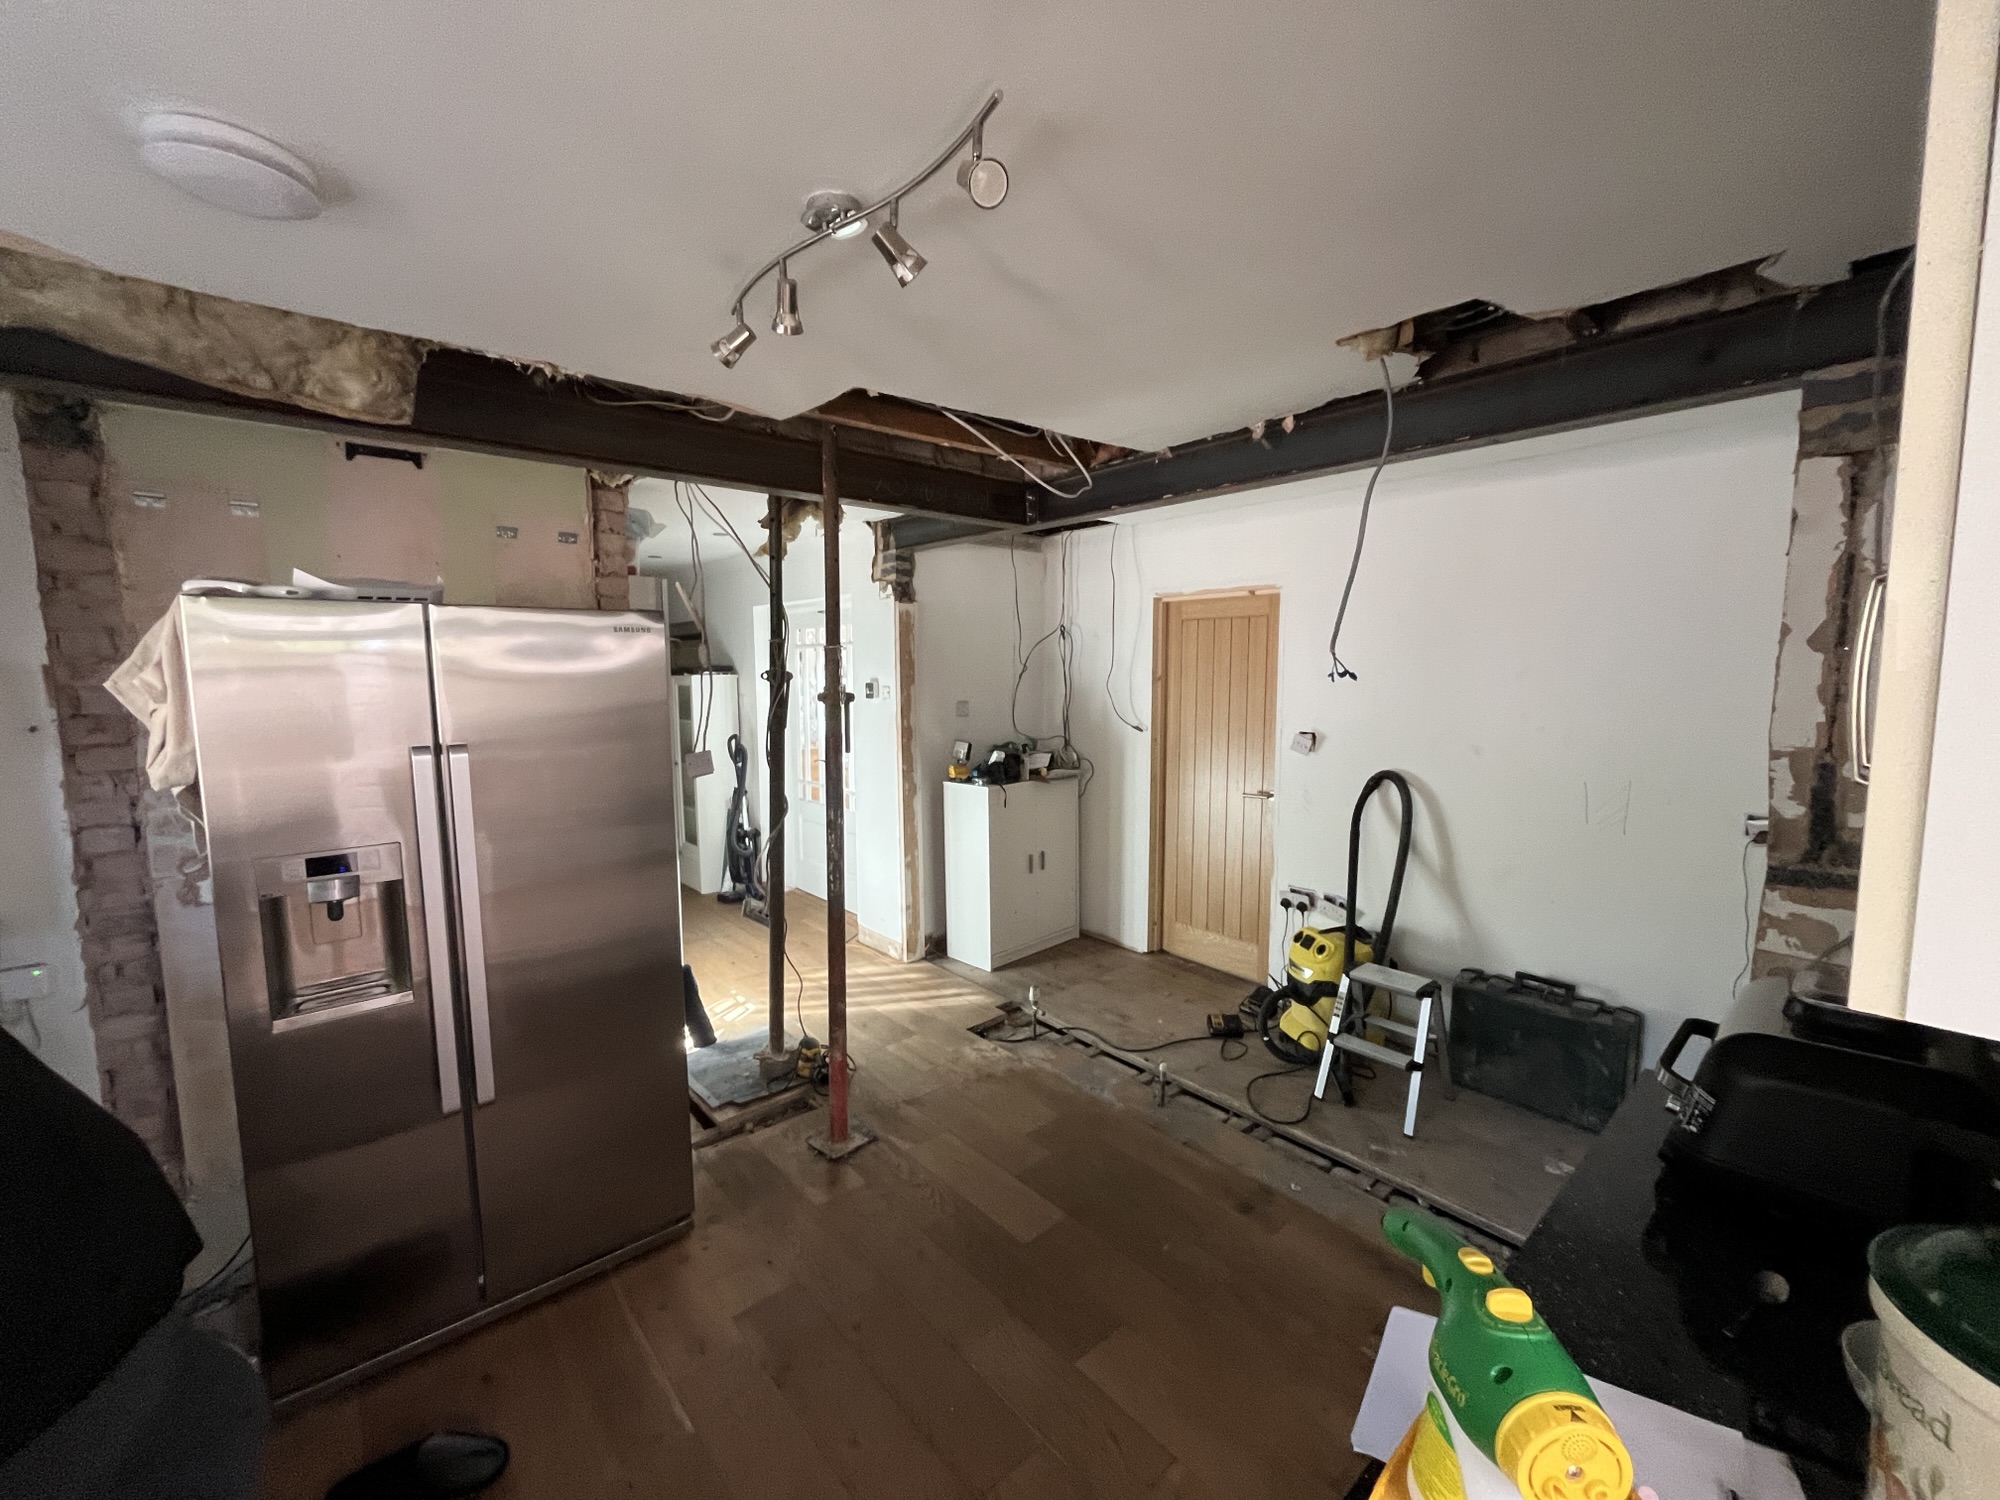
We recently worked on a bungalow where the client wanted to open up their kitchen space. This project had an extra layer of complexity: the property had been extended in the past, and the roof purlins were sitting directly on the internal walls that needed to be removed.

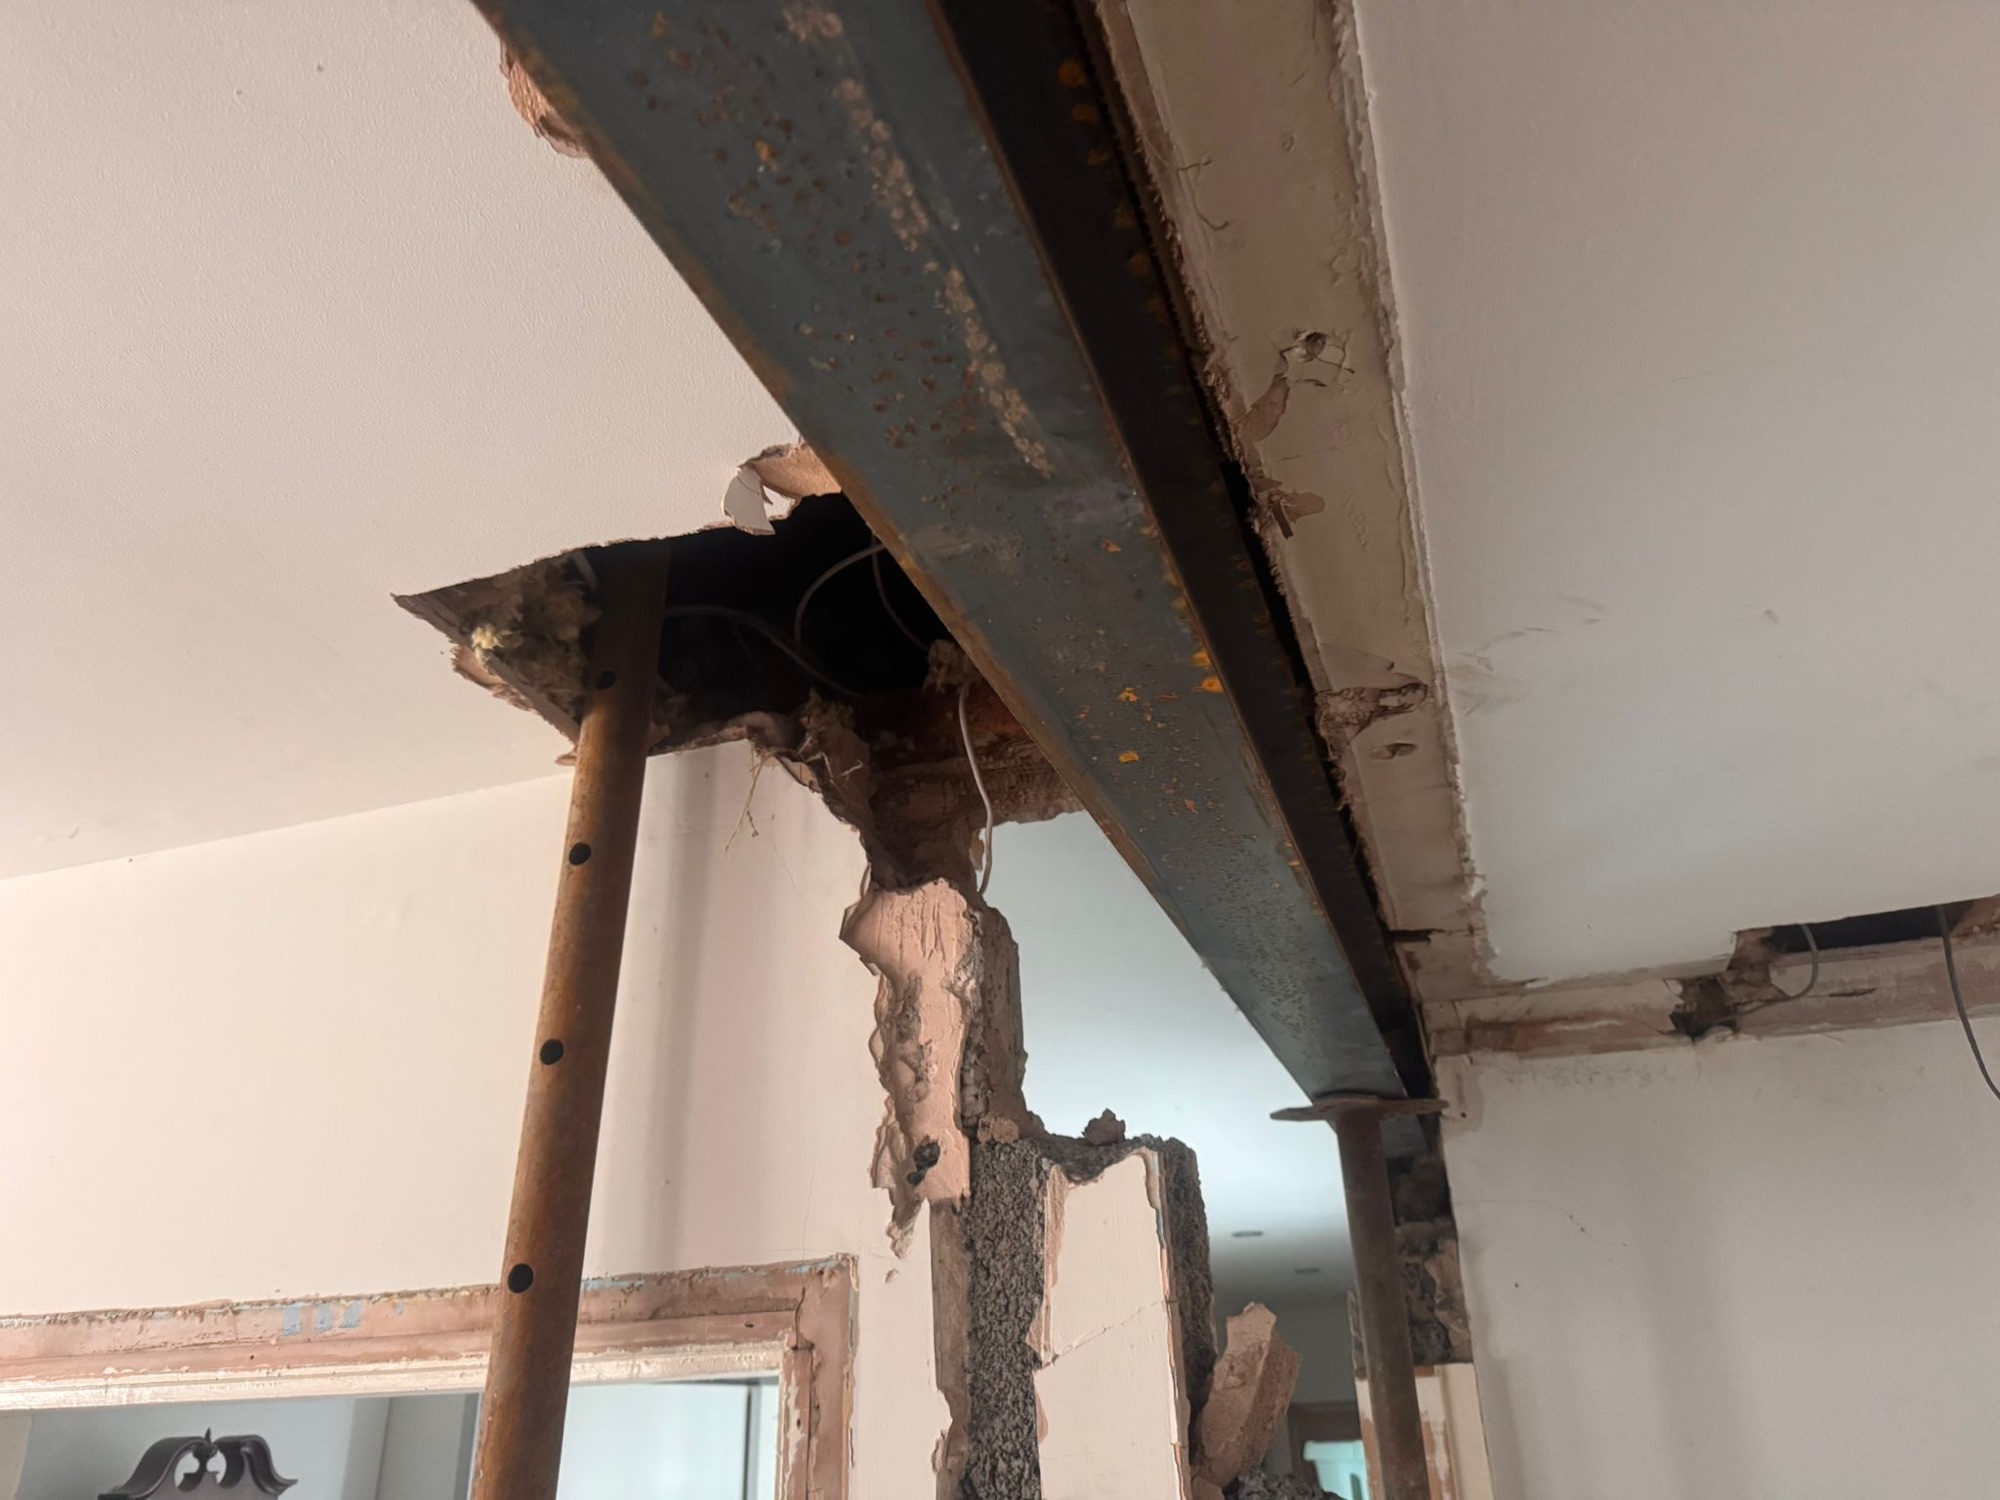
We never cut corners on safety. We started by engaging an Archetectural technician to provide cost-effective drawings, and we had a structural engineer specify two steel RSJ beams to take the load safely. 

The installation required a precise, multi-step approach:

  1. Preparation: Once the steel beams arrived, we propped up the roof using Acro props in multiple locations to ensure stability.
  2. Structural Installation: We removed the top section of brickwork and installed the two lintels (3.6m and 3.8m respectively) onto new pad stones, which spread the load evenly.
  3. Removal: Only once the structure was fully supported by the new steelwork did we remove the old block walls and clear the waste.

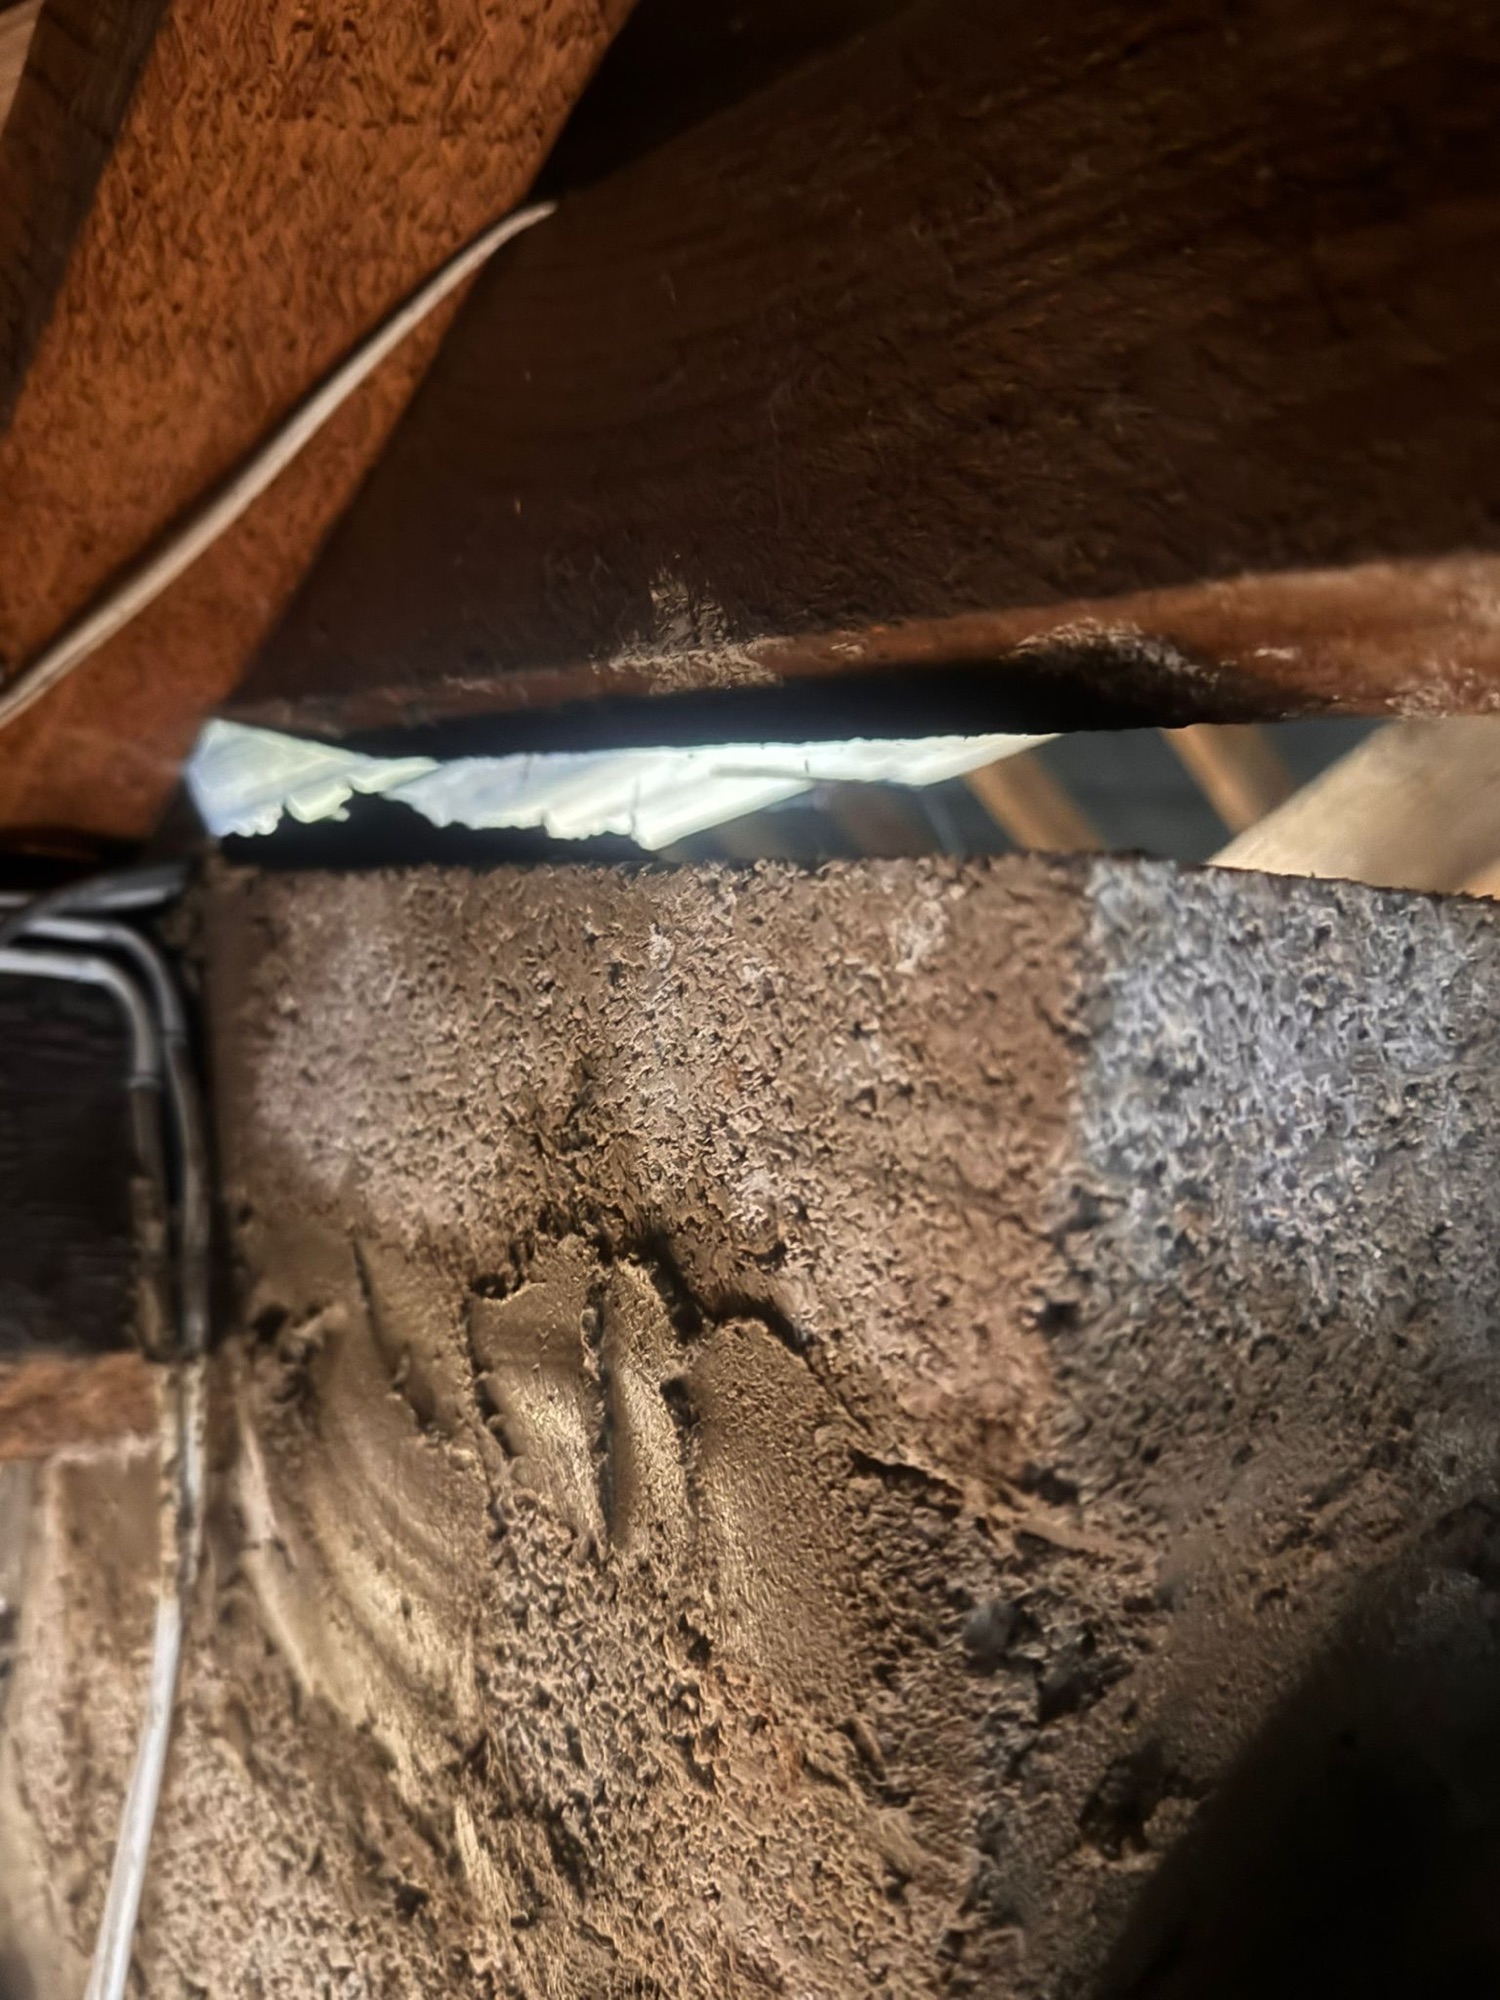
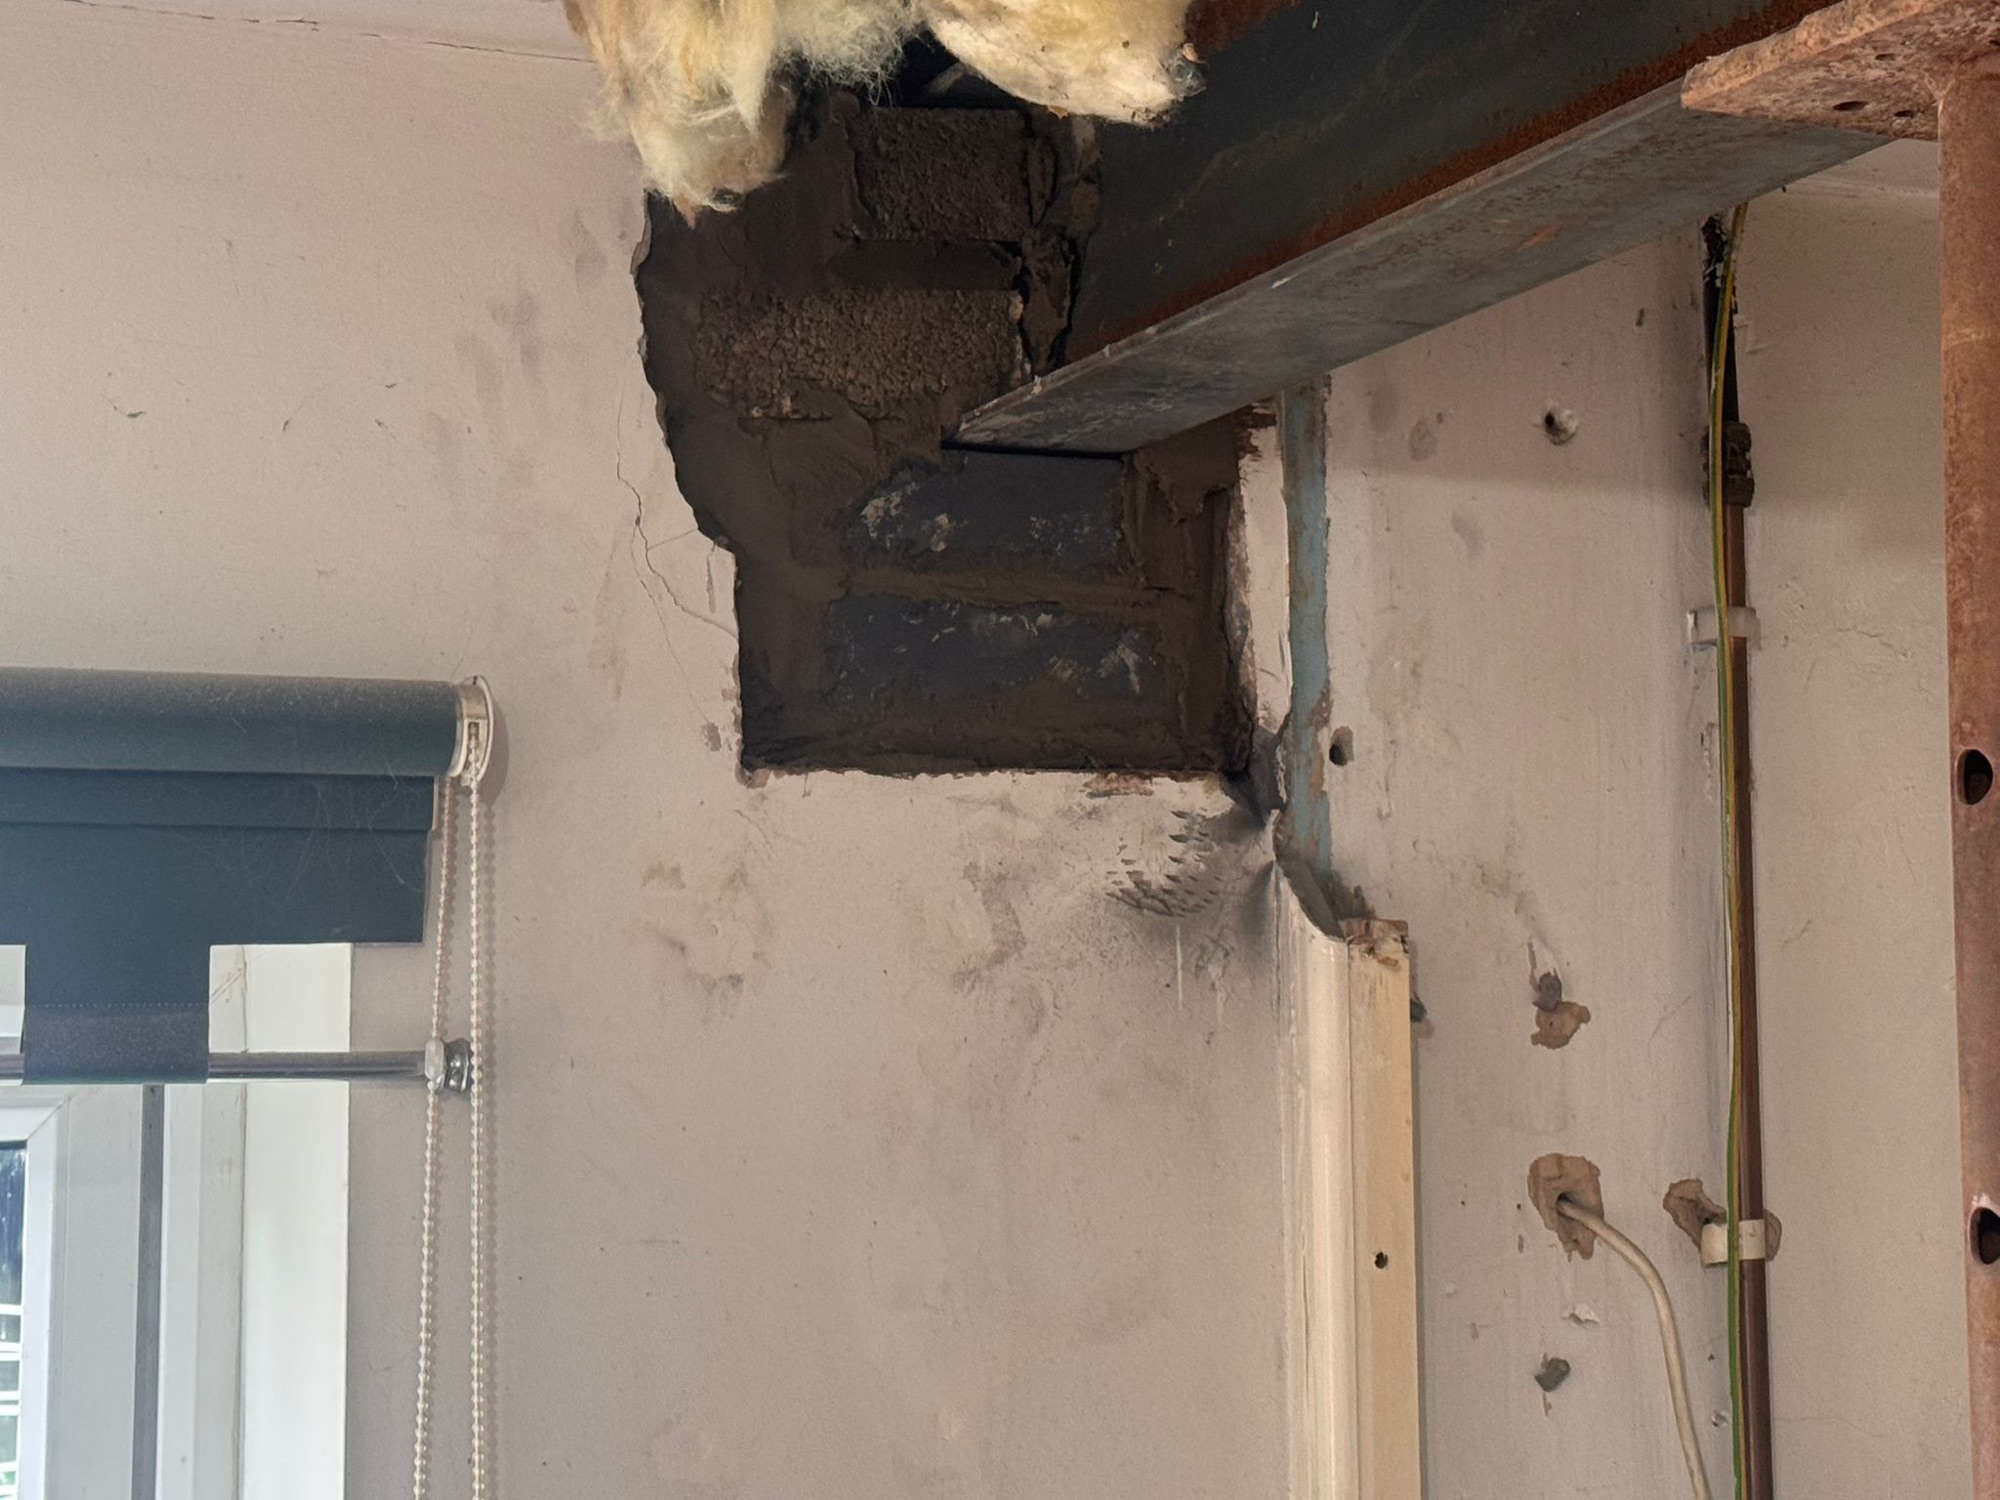
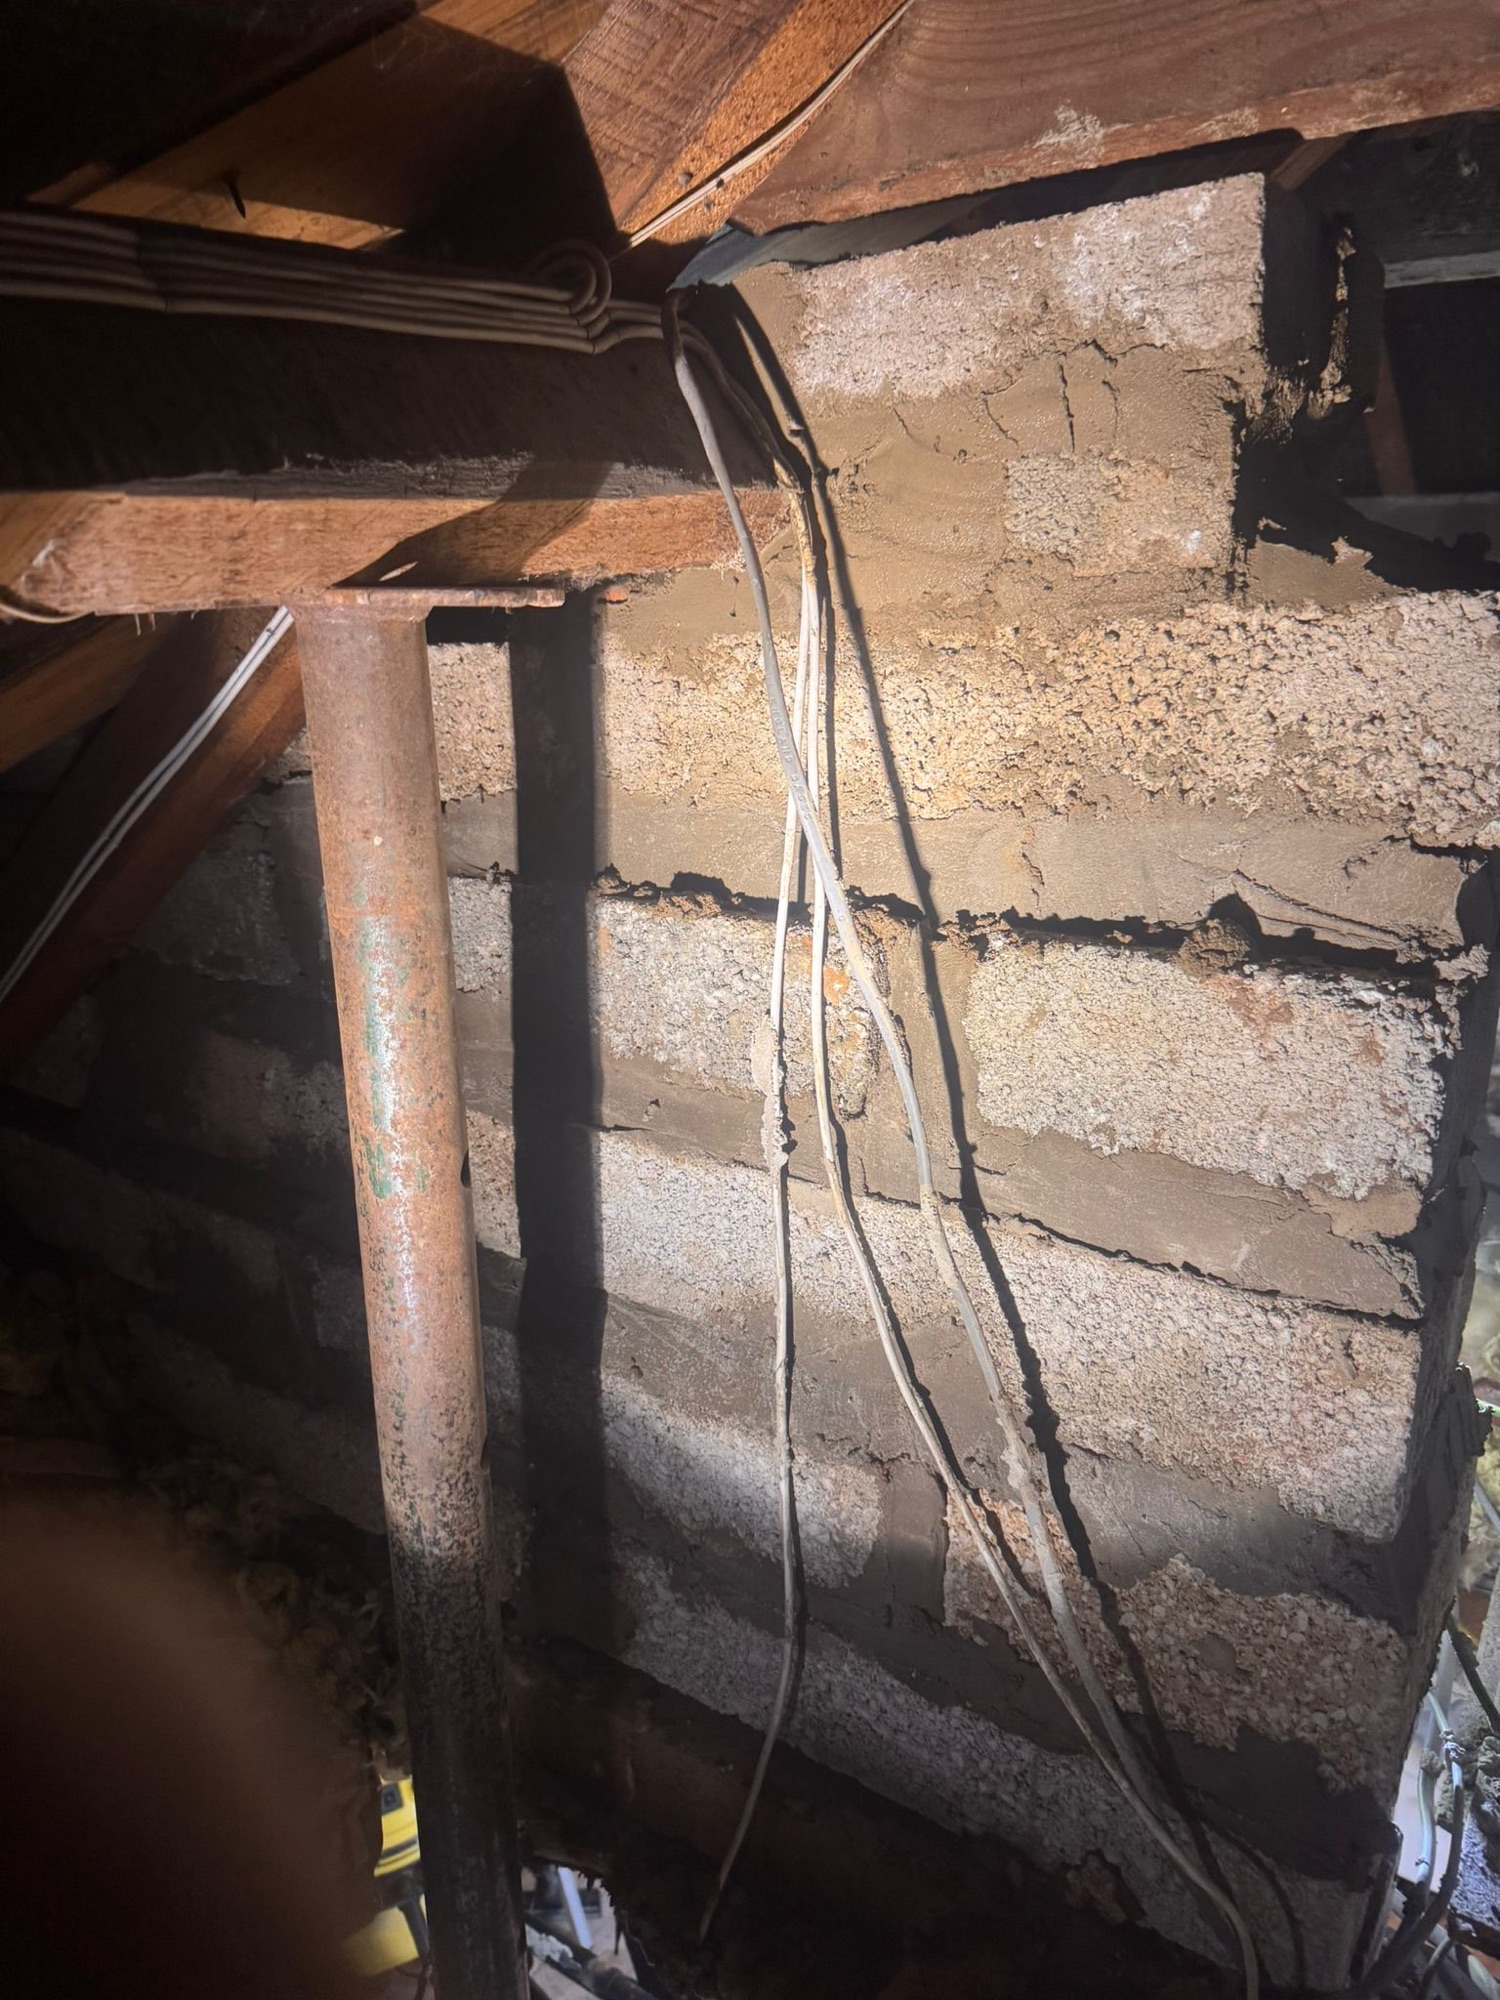
A Note on Quality: During the removal process, we discovered that the blocks supporting the existing roof purlins were already crumbling. It was a good thing we undertook this project when we did; had those supports failed, the structural consequences would have been severe. 

We always break down the costs of our jobs. This gives our clients the option to handle specific finishing tasks themselves—like “making good” the plaster and joinery—to save on their overall budget.

Estimated Costs for this Project:

  • Steel Beams: £500
  • Architectural Plans: £400
  • Structural Engineer Design: £250
  • Labour (Removal & Installation): £2,500 (approx. 4 days work requiring specialist tools/equipment)
  • Waste Disposal: £325
  • Basic Materials: £200 (Pad stones, cement, sand, bricks/blocks)

Optional:

  • “Making Good”: We didn’t perform this for this specific client, but we advise allowing £1,000 for plastering and finishing.

Other Considerations:

Always remember to check for hidden utilities. If radiators or electrical sockets are in the way, you may need specialist trades. In this case, we were able to isolate the electrical socket into the ceiling space ourselves using compliant fittings, which we did at no extra charge to the client.


Need Help with Your Structural Alterations?

Whether you’re looking to create an open-plan living space or need to remove a load-bearing wall, we are here to ensure it’s done safely and professionally.

Call us today on 07737 088243 or email quote@swallowhillhomes.com for a prompt consultation.

Categories
Flooring Renovation

Herringbone Oak parquet floor, Watnall, Nottingham

Installing Herringbone Oak Parquet Flooring

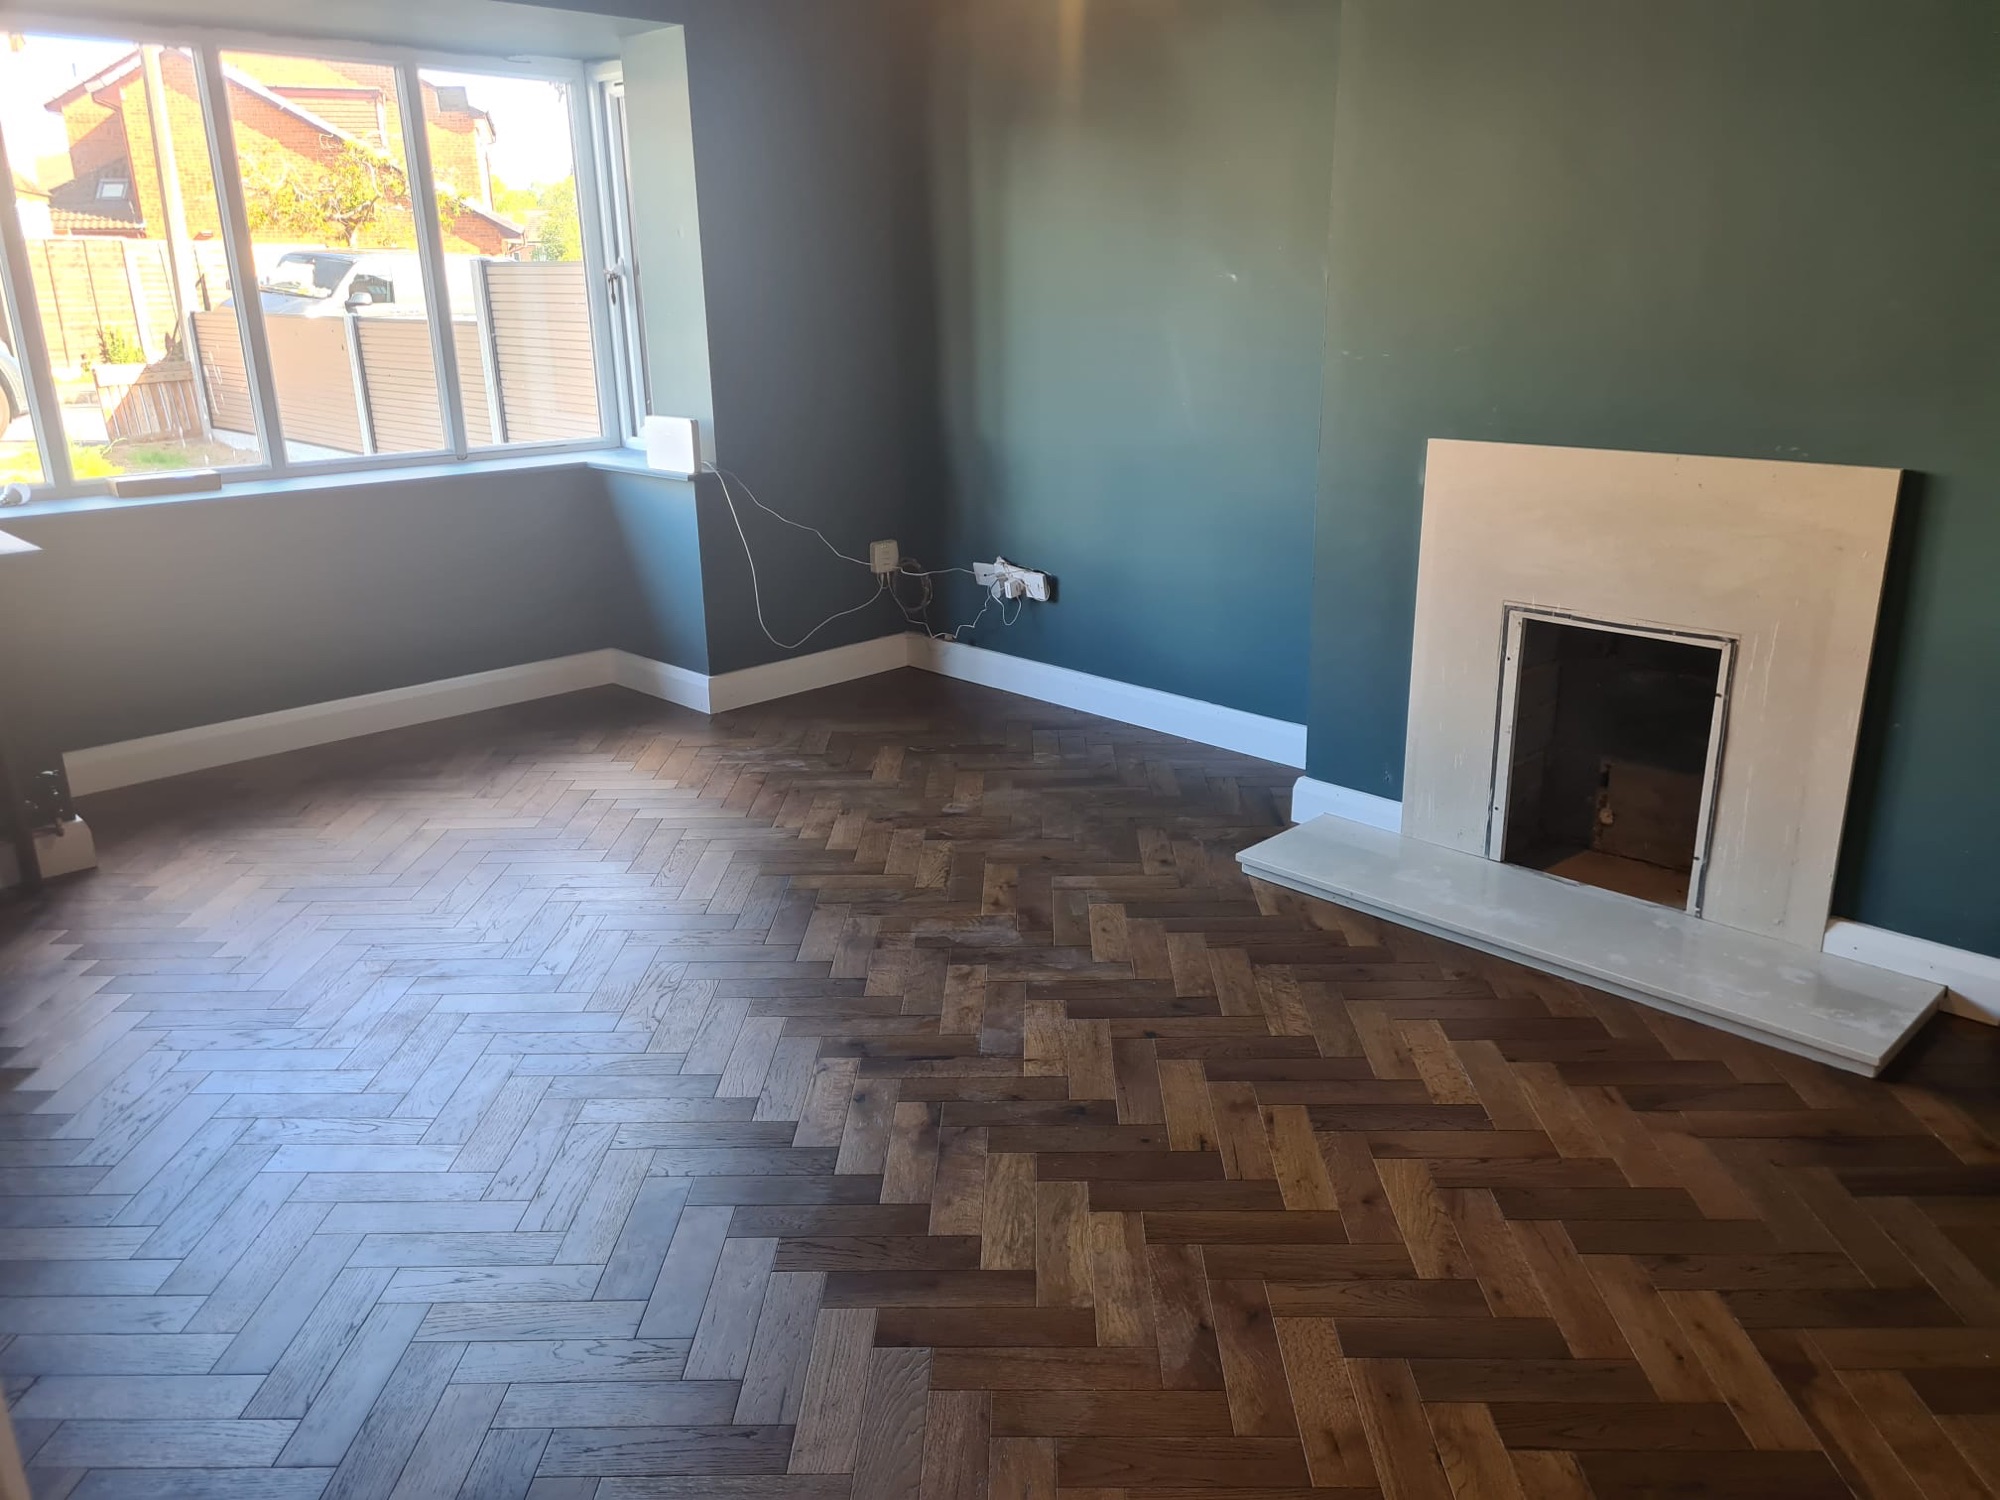
We recently completed the installation of a beautiful Herringbone Oak floor sourced from Stories Flooring. Our second from them in as many months. This project highlights our approach to subfloor preparation, a critical factor in achieving a lasting, high-quality finish.

img_6111
previous arrow
next arrow

A key consideration during preparation was the existing subfloor, which contained original tiles potentially dating from the 1980s. To ensure compliance and safety—and specifically to mitigate the risk associated with disturbing potential asbestos-containing materials (ACMs)—we opted for a non-intrusive overlay solution. This professional decision avoided complex and costly remediation.

We applied F. Ball Stopgap P131 primer and self-levelling compound. This choice allowed us to achieve a perfectly smooth and stable surface with minimal build-up, creating the ideal base for the new parquet system. Precision Installation Technique

Our method for installing this type of parquet flooring is rooted in precision and patience. The most effective technique is a staged adhesive application to manage the elasticity of the glue and ensure optimal alignment:

  1. We initially lay and fix the central key column or the first two rows of the product.
  2. We allow this central element time to fully cure and stabilize before proceeding with the remainder of the floor.

By allowing the adhesive to cure completely in these crucial early stages, we prevent movement and ensure the long-term integrity and alignment of the entire floor.


Cost Guide: Herringbone Parquet Flooring

For full transparency, here is a breakdown of the typical costs per square metre (m²) for a high-quality Herringbone Parquet installation:

  • Preparation (Self-levelling compound): £15
  • Flooring Material: £50
  • Adhesive: £10
  • Professional Labour: £90 – £150

These costs are excluding VAT, this job needed 15% wastage so make sure you allow for it otherwise you’ll need an emergency trip to Leeds to pick up an extra box

Categories
Bathroom

Bathroom remodel

Case Study: Bathroom Reconfiguration and Specialist Upgrades

This project focused on a comprehensive bathroom refurbishment, involving plumbing & electrical modifications to resolve functional issues and enhance the client’s living space. Providing a private bathroom for a family member and a separate space to store shoes that cog up the hallway.

Project Scope and Functional Redesign

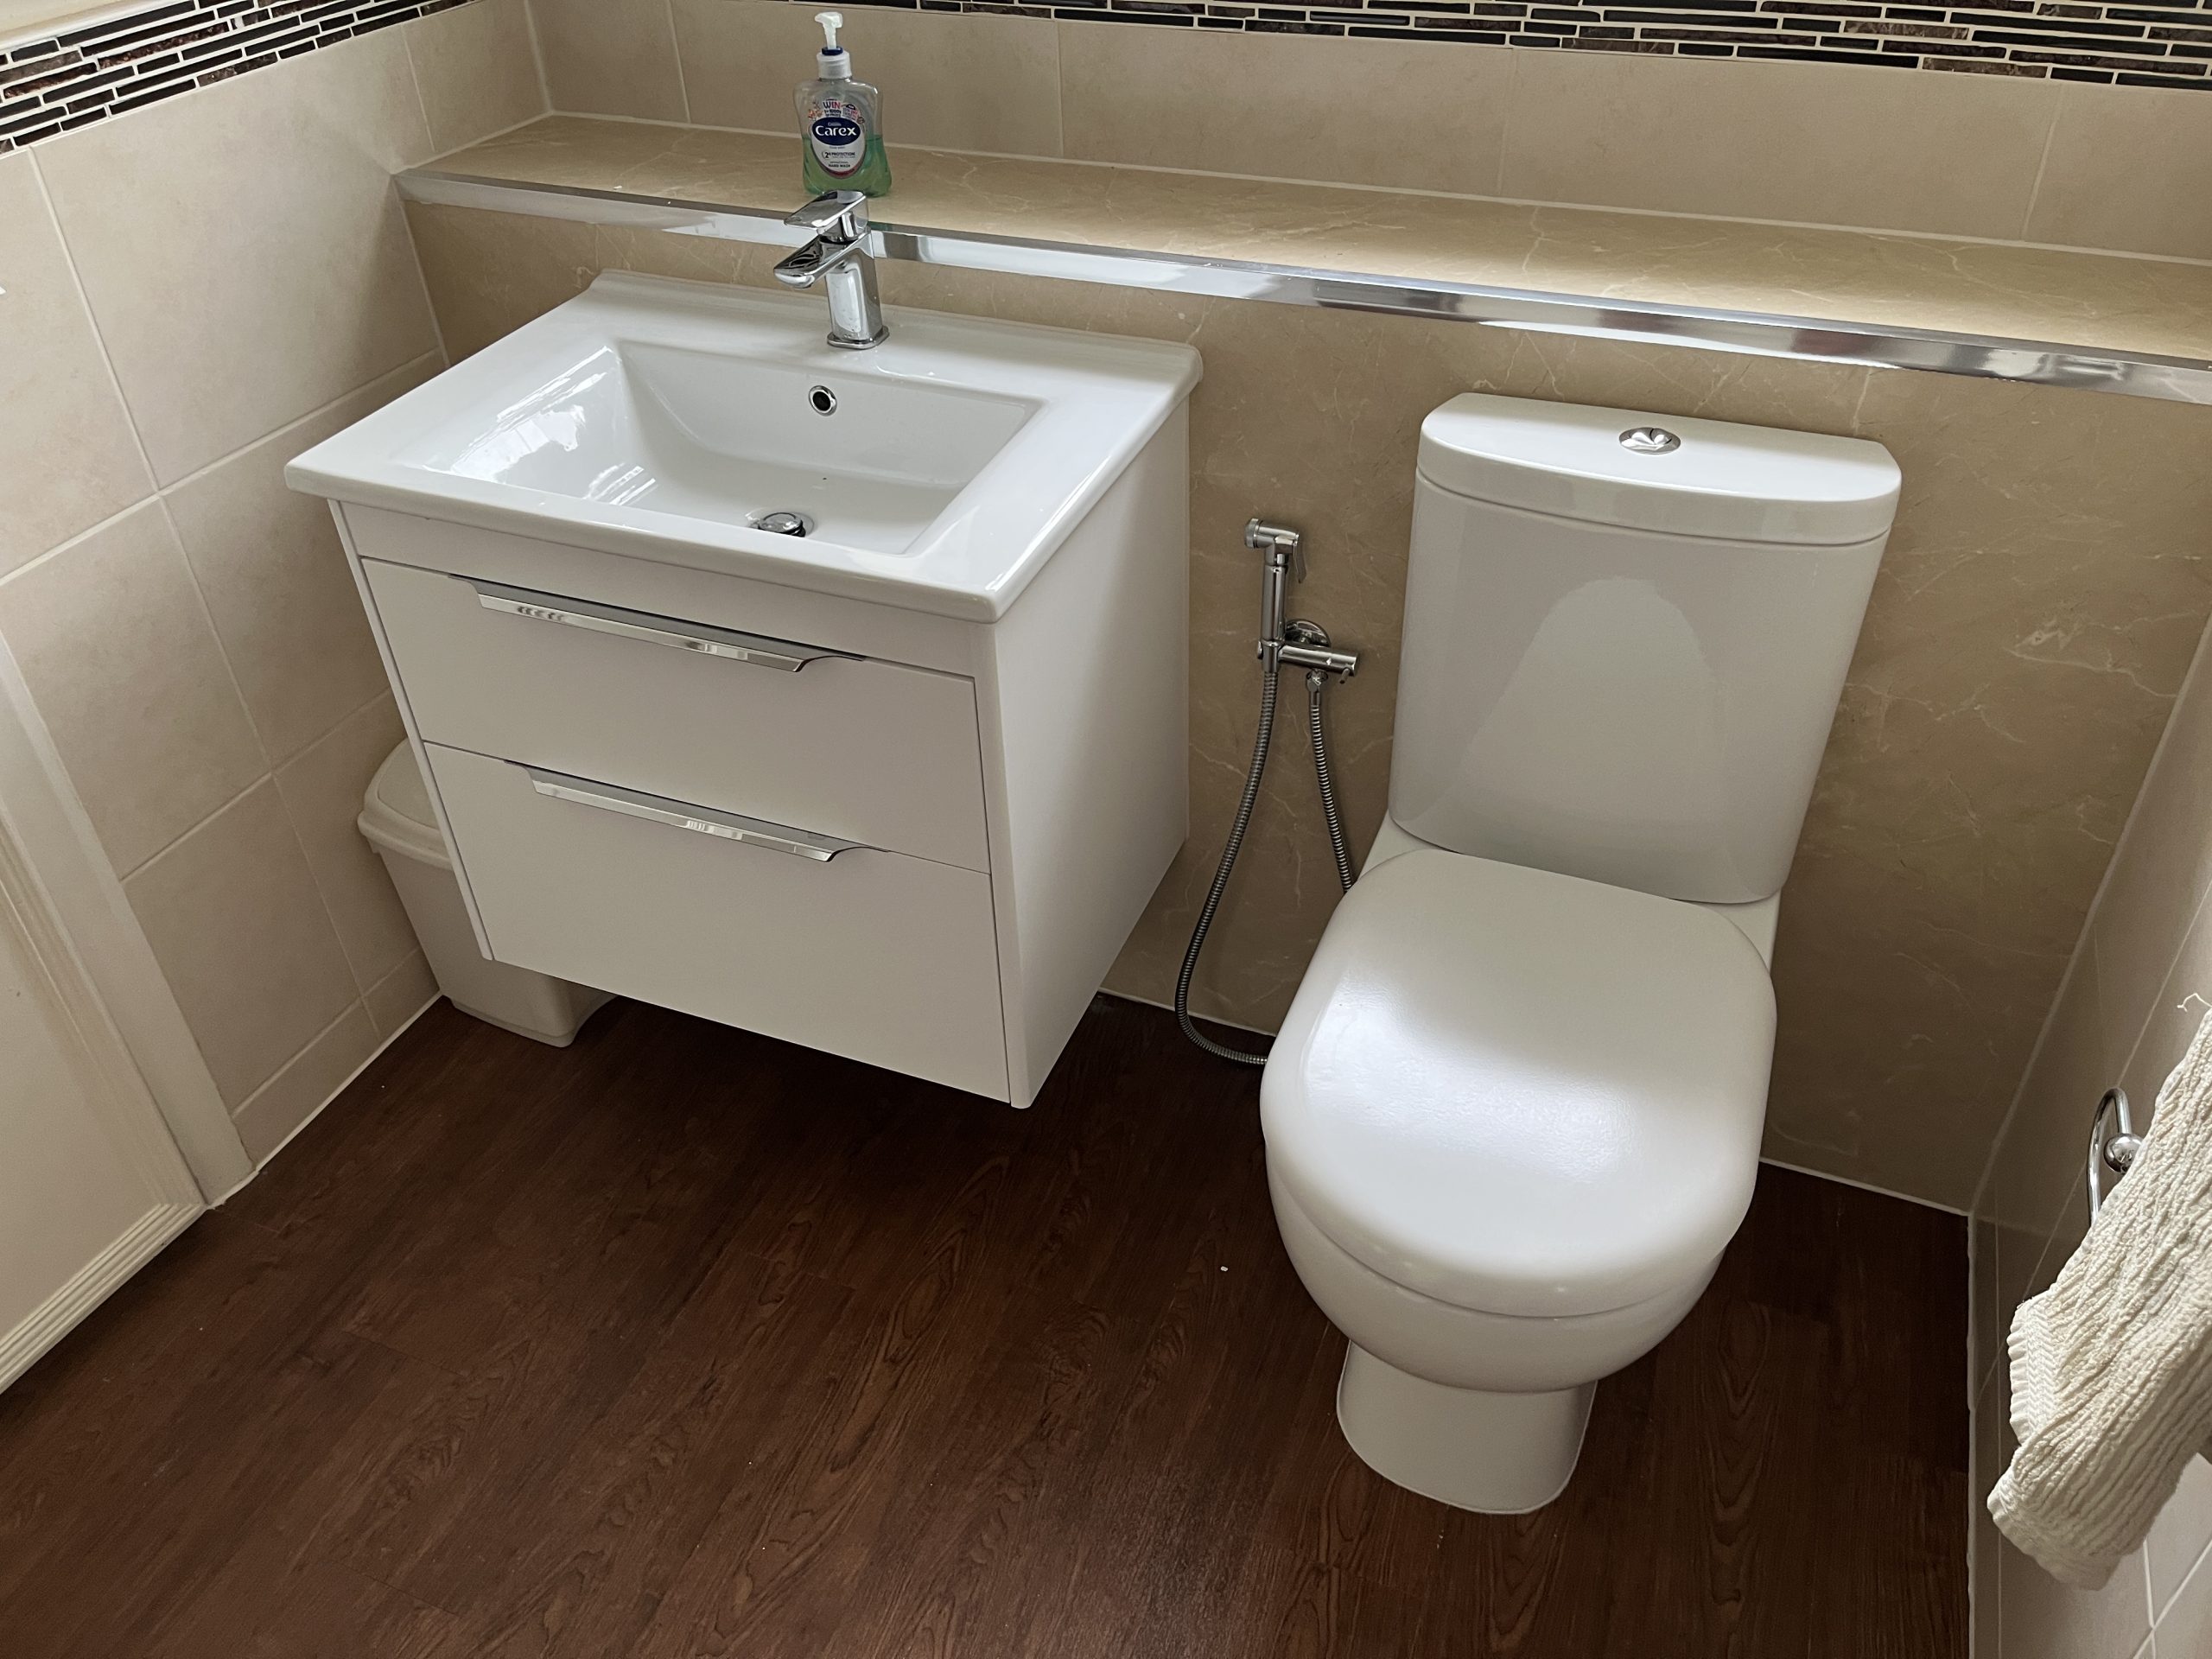
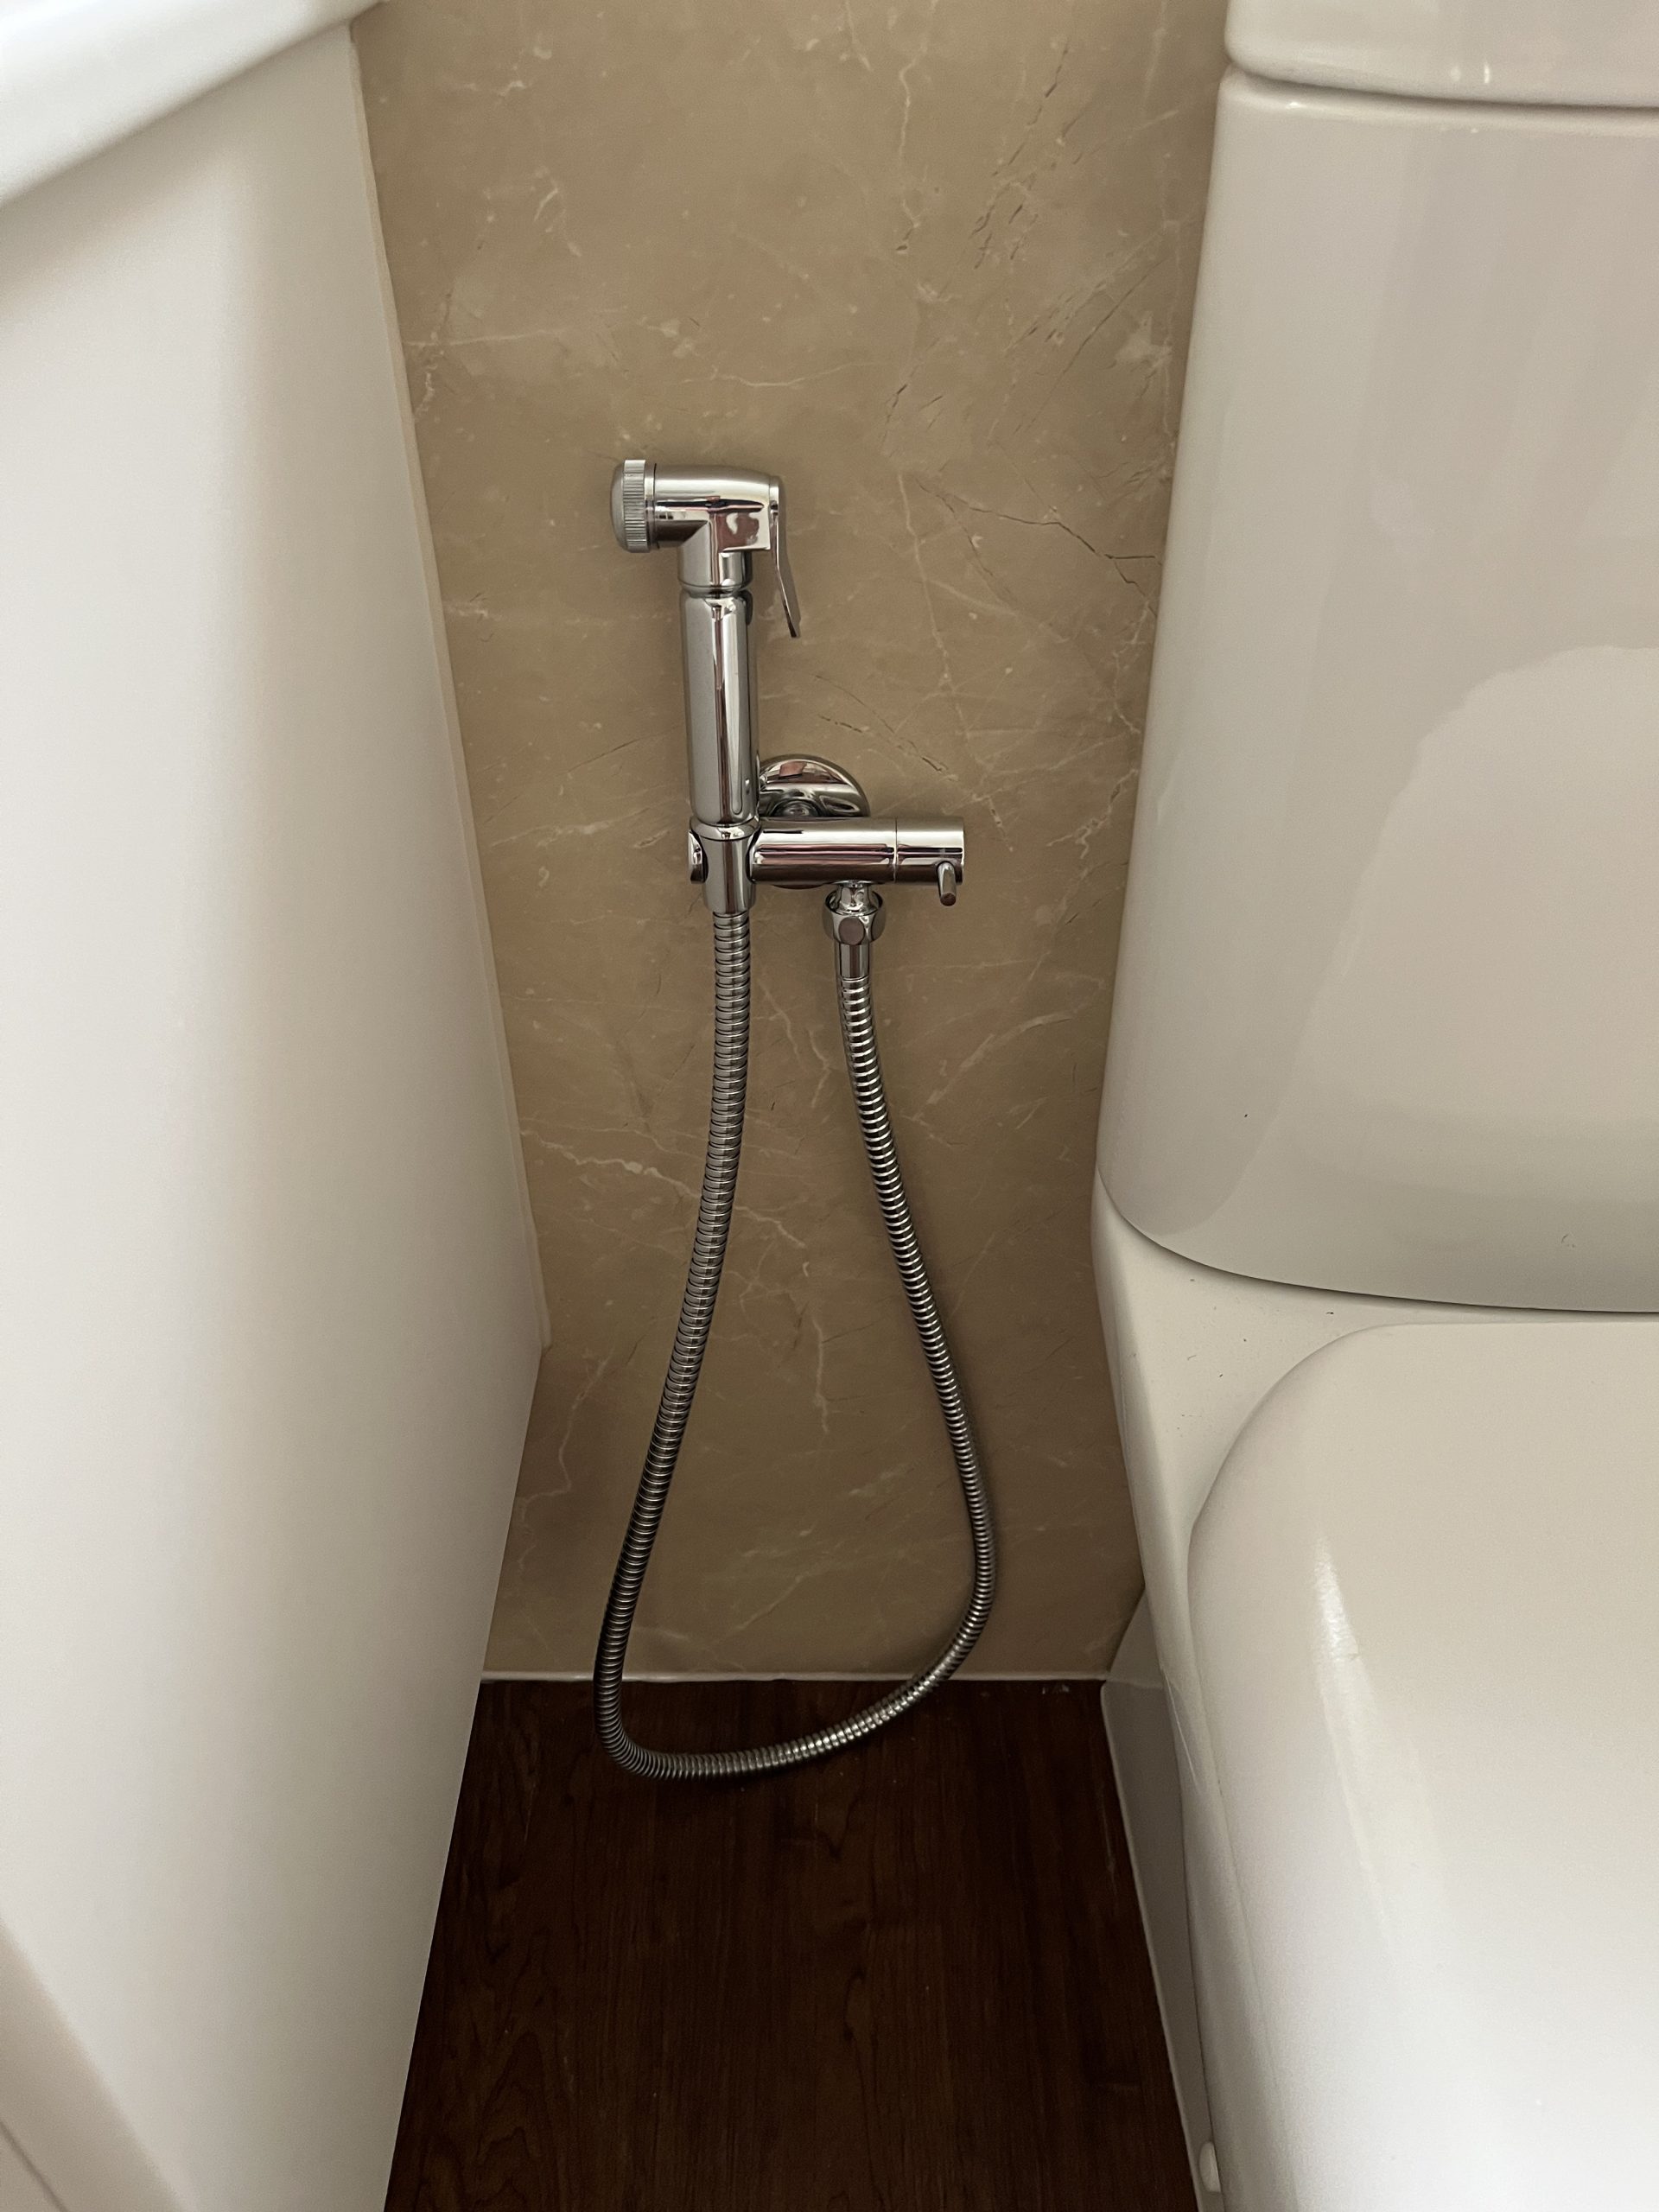
The primary drivers for this renovation were to remedy a leak in the shattaf/shower douche unit and to improve the home’s utility by removing the ‘Jack and Jill’ dual-access feature. By eliminating the second doorway, we successfully partitioned the space to create a dedicated cloakroom/shoe cupboard and a more private, functional single bathroom. This reconfiguration maximized the available floorplan to deliver a new, tailored storage solution.

IMG_6102
previous arrow
next arrow

Electrical and Plumbing Upgrades

The renovation included complex electrical work to ensure safety and regulatory compliance. The existing lighting system was consolidated into a single circuit controlled by dual switches. Our team expertly isolated and divided this legacy system to establish two individual, independent lighting circuits—one for the main bathroom and a separate circuit for the new cloakroom. This precise re-wiring ensures full compliance with modern electrical standards and provides independent control for the segregated areas.

In the plumbing specification, client safety and ease-of-use were paramount. The isolation valve on the shattaf unit was required to be highly accessible and simple to operate. We rejected the original unit and procured a replacement featuring a superior, ergonomic handle. The new isolation valve was installed in line with industry best practice for functionality, correctly positioned on the right-hand side of the toilet.

Finishing Solutions: Efficiency and Aesthetic Integration

To meet the client’s preference for minimal disruption and to avoid the cost and time associated with full re-tiling, we deployed high-quality shower panels. This method provided a seamless, waterproof finish that was selected to harmoniously integrate with the existing tiling, delivering a premium look with enhanced project efficiency.

Project Metrics: Delivery and Investment

This comprehensive refurbishment was executed with controlled precision, demonstrating our ability to deliver complex projects efficiently:

  • Timeline: The project was completed in approximately one week from start to finish.
  • Cost Breakdown (Excluding VAT):
    • Materials: £1,200
    • Labour: £2,800
    • Electrics (including lights and extractor fan): £400
    • Plastering: £300
    • Joinery: £300
    • Total Project Investment (Excluding VAT): £5,000
Categories
Internal fit out Windows

Window hinge replacement

This customer got in contact through the Bark app. We use it if we have surplus labour availability and for small jobs which keep the bank account ticking over.
The 8 year old hinge had broken. The fix was 10 inch replacement from eBay for £9.20 for a pair. The total bill was under £100 including labour and Vat
 
The new hinge is installed in just 10 minutes.
Categories
Bathroom

Bathroom refurbishment

Refurbishment of a bathroom for one of our existing clients on a tight budget.

Our customer asked us to get involved because they wanted a second opinion on the plumber who claimed moisture was just getting in behind the back of the tiles. On closer inspection the Bath Plumbing supply and basin waste had both been leaking for years Meaning the entire floor needed to be replaced. We completed the work for the customer in 3 1/2 days fitting in around the time when their tenants were on holiday and the property vacant.

We could’ve purchased a cheap bathroom Selco, but we got a decent quality item from Michael Pavis at a reasonable price which included an anti slip floor.

We fitted a hansgrohe bath/shower mixer tap so it would keep the pipes exposed and provide a robust solution given the quality of the product products that hansgrohe produces

We used a an aqua panel so there was less maintenance required in the future and no grout to clean between tenancies.

Able to keep the toilet as it has been replaced by Plumber in the last 12 months.

We still have the boxing to do on this photo

Joiner installed the Bath and used CLS timber to make larger feet areas to spread the load from the bath. The bath also included 6 feet rather than the normal five.

The leak had been so bad the insulation in the wall was absolutely sodden wet, acting like a sponge.

If the customer had listened to the Plumber, they would have wasted £250 regrouting the tiles. All the while their property would have been damaged further, luckily it wasn’t so bad that we had to replace the joists. We did however have to replace the floor with an 18 mm moisture resistant chipboard.

Categories
Extension Flooring Kitchen

Media Wall & parquet floor

Bramcote – Media Wall & parquet floor – February 2026

Project Spotlight: Modern Slat Wall & Custom Media Console in Bramcote

When it comes to elevating a living space, nothing combines warmth, texture, and functionality quite like custom woodwork. We recently completed this stunning living room transformation, turning a plain wall into a striking, architectural focal point.

If you are looking for inspiration to upgrade your home entertainment setup, here is a breakdown of how we brought this sleek, modern design to life.

The Design Details

Our client wanted a sophisticated media center that felt integrated into the room rather than just a collection of standalone furniture. We achieved this by focusing on clean lines, rich textures, and hidden functionality.

The Slat Wall Feature: We installed a floor-to-ceiling vertical wood slat accent wall. The deep oak tones contrasted against the dark backing add incredible visual depth, while the vertical lines create the illusion of higher ceilings.

Custom Floating Media Console: Built to span the width of the wall, using cabinets from Ween in the same range as the kitchen cabinets which helped tie the room together, this low-profile console features a seamless black countertop that perfectly anchors the large-screen TV.

Smart Storage Solutions: The console features balance and symmetry, with spacious, push-to-open drawers on either side to tuck away clutter, and a central open shelving unit to house media devices and showcase personal decor.

Flawless Wire Management: No messy cords here! All cables, power strips, and router boxes are neatly routed behind the slat wall and inside the console for a completely flush, wire-free look. We did need to loop an rj45 cable between the top and bottom of the unit to future proof the work for alternative set ups.

The Engineered Oak flooring was supplied by Stories flooring again and laid in a Herringbone layout. It is very time consuming so not cheap to lay but we thing the result is worthwhile.

If you would like us to create something similar in your home please let me know.

Categories
New build Wardrobes

Fitted wardrobes

Categories
Bathroom Brickwork Extension Flooring Groundwork Kitchen New build Renovation Roofing Uncategorised

Nottingham Refurbishment & extension

This was a large contract which involved building onto a 1930’s house.

We built a large open plan kitchen diner downstairs with a boot room, playroom and for home working. Upstairs we created an additional en suite bedroom .

Categories
Brickwork Flooring Renovation

Brickwork & ceiling repair. Room renovation