Categories
External Resin bound gravel

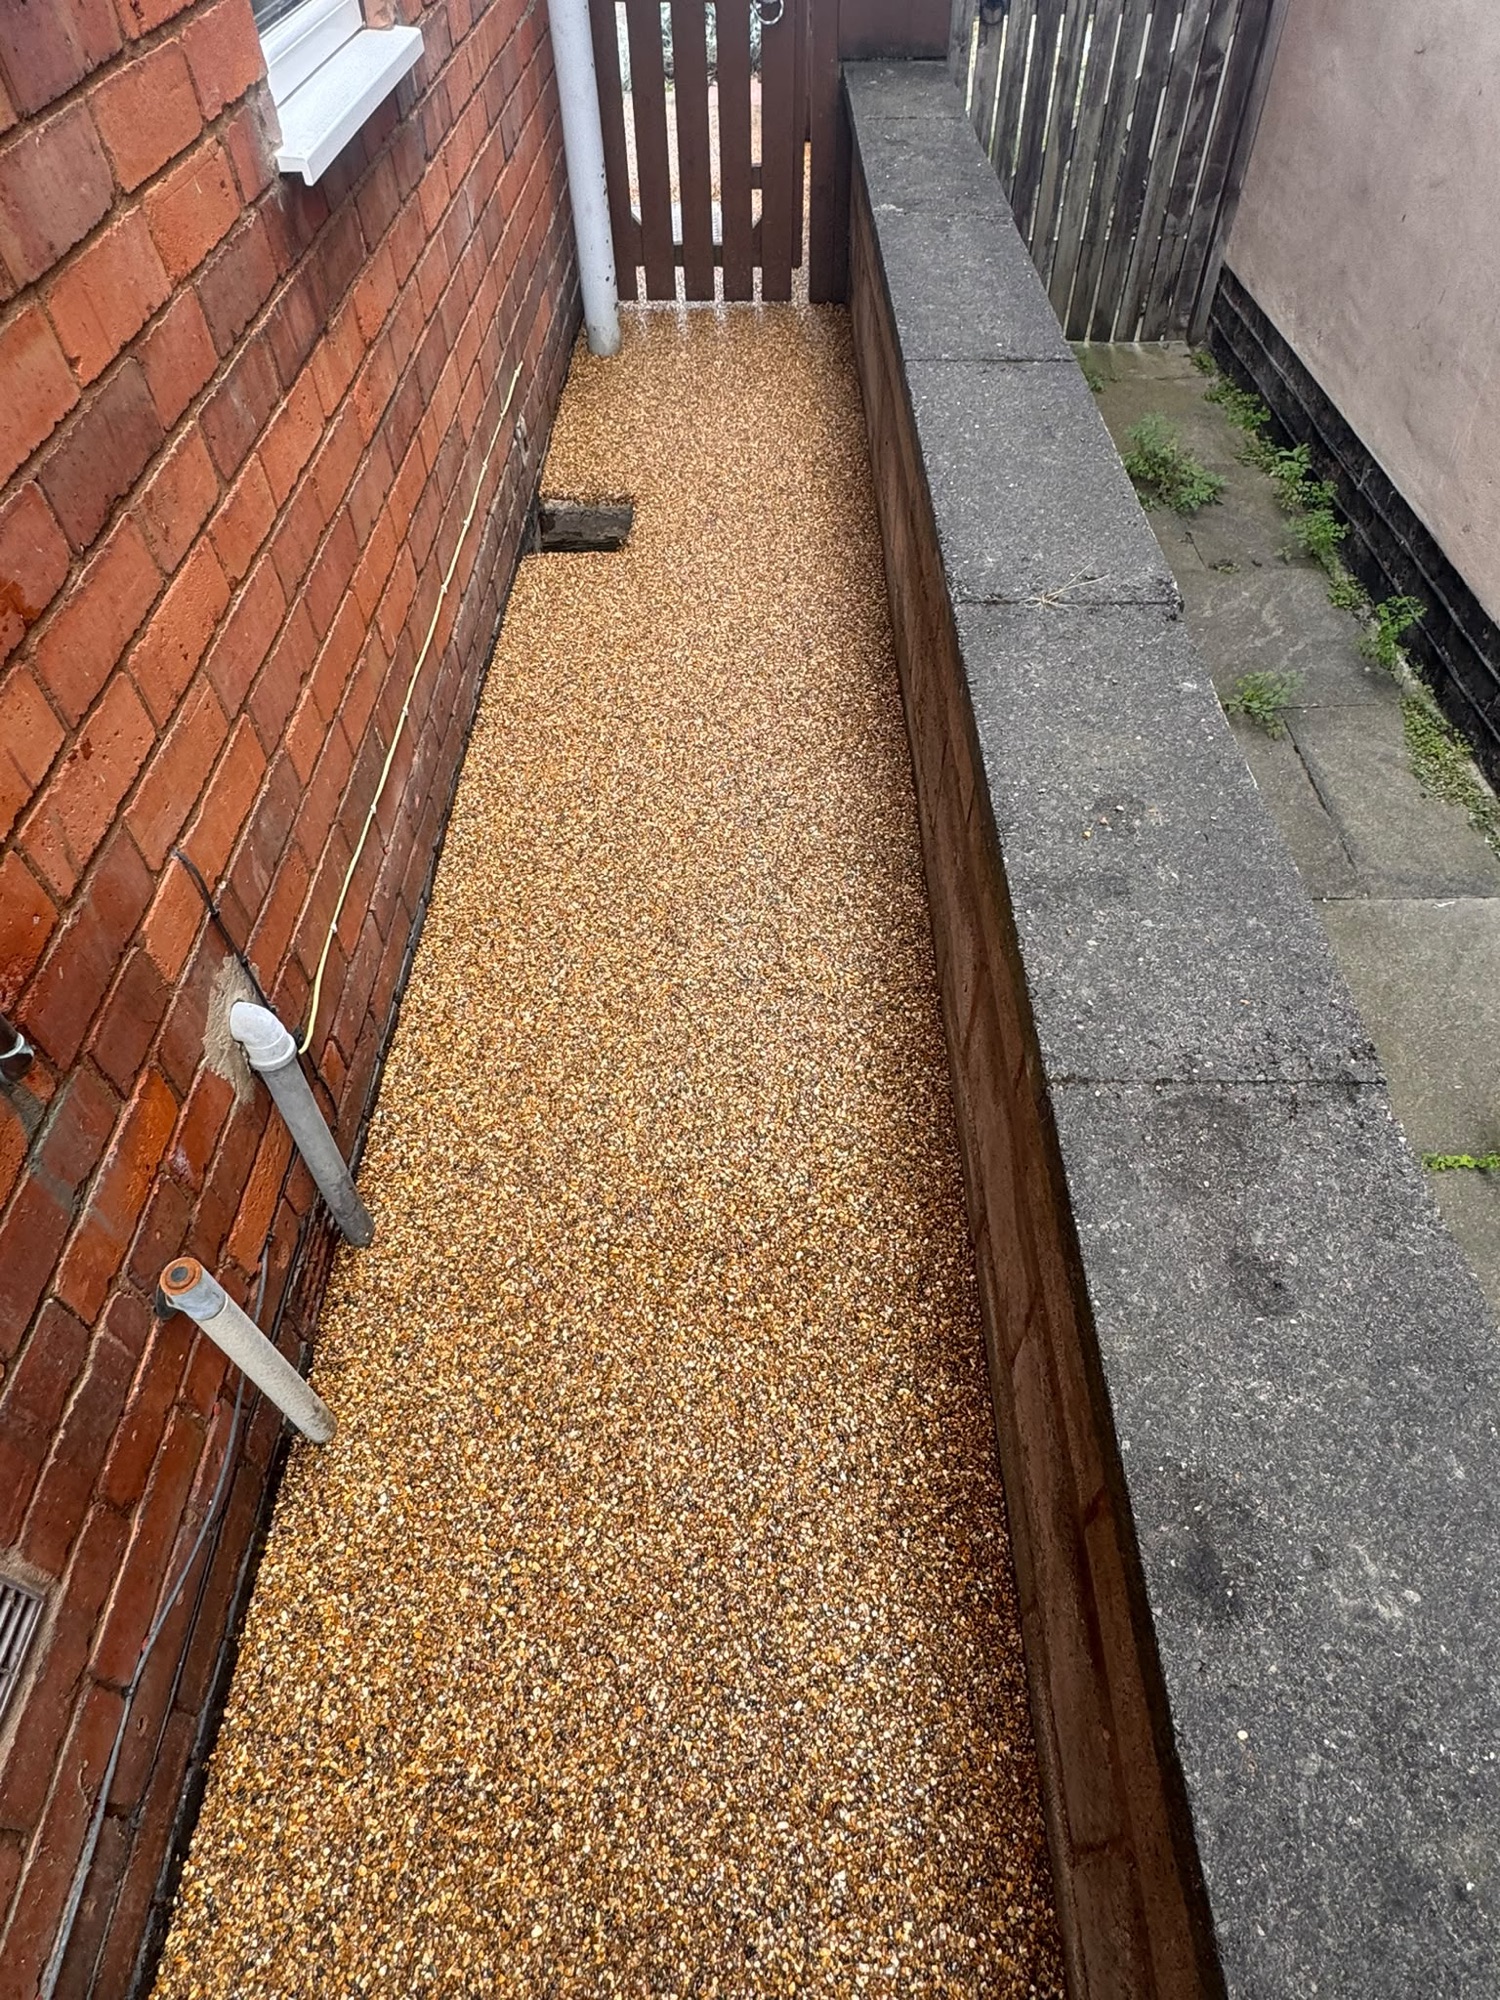
Long Eaton, Derbyshire Resin Bonded Gravel over concrete path

Recent Project: Durable Resin Bonded Gravel Driveway, Long Eaton

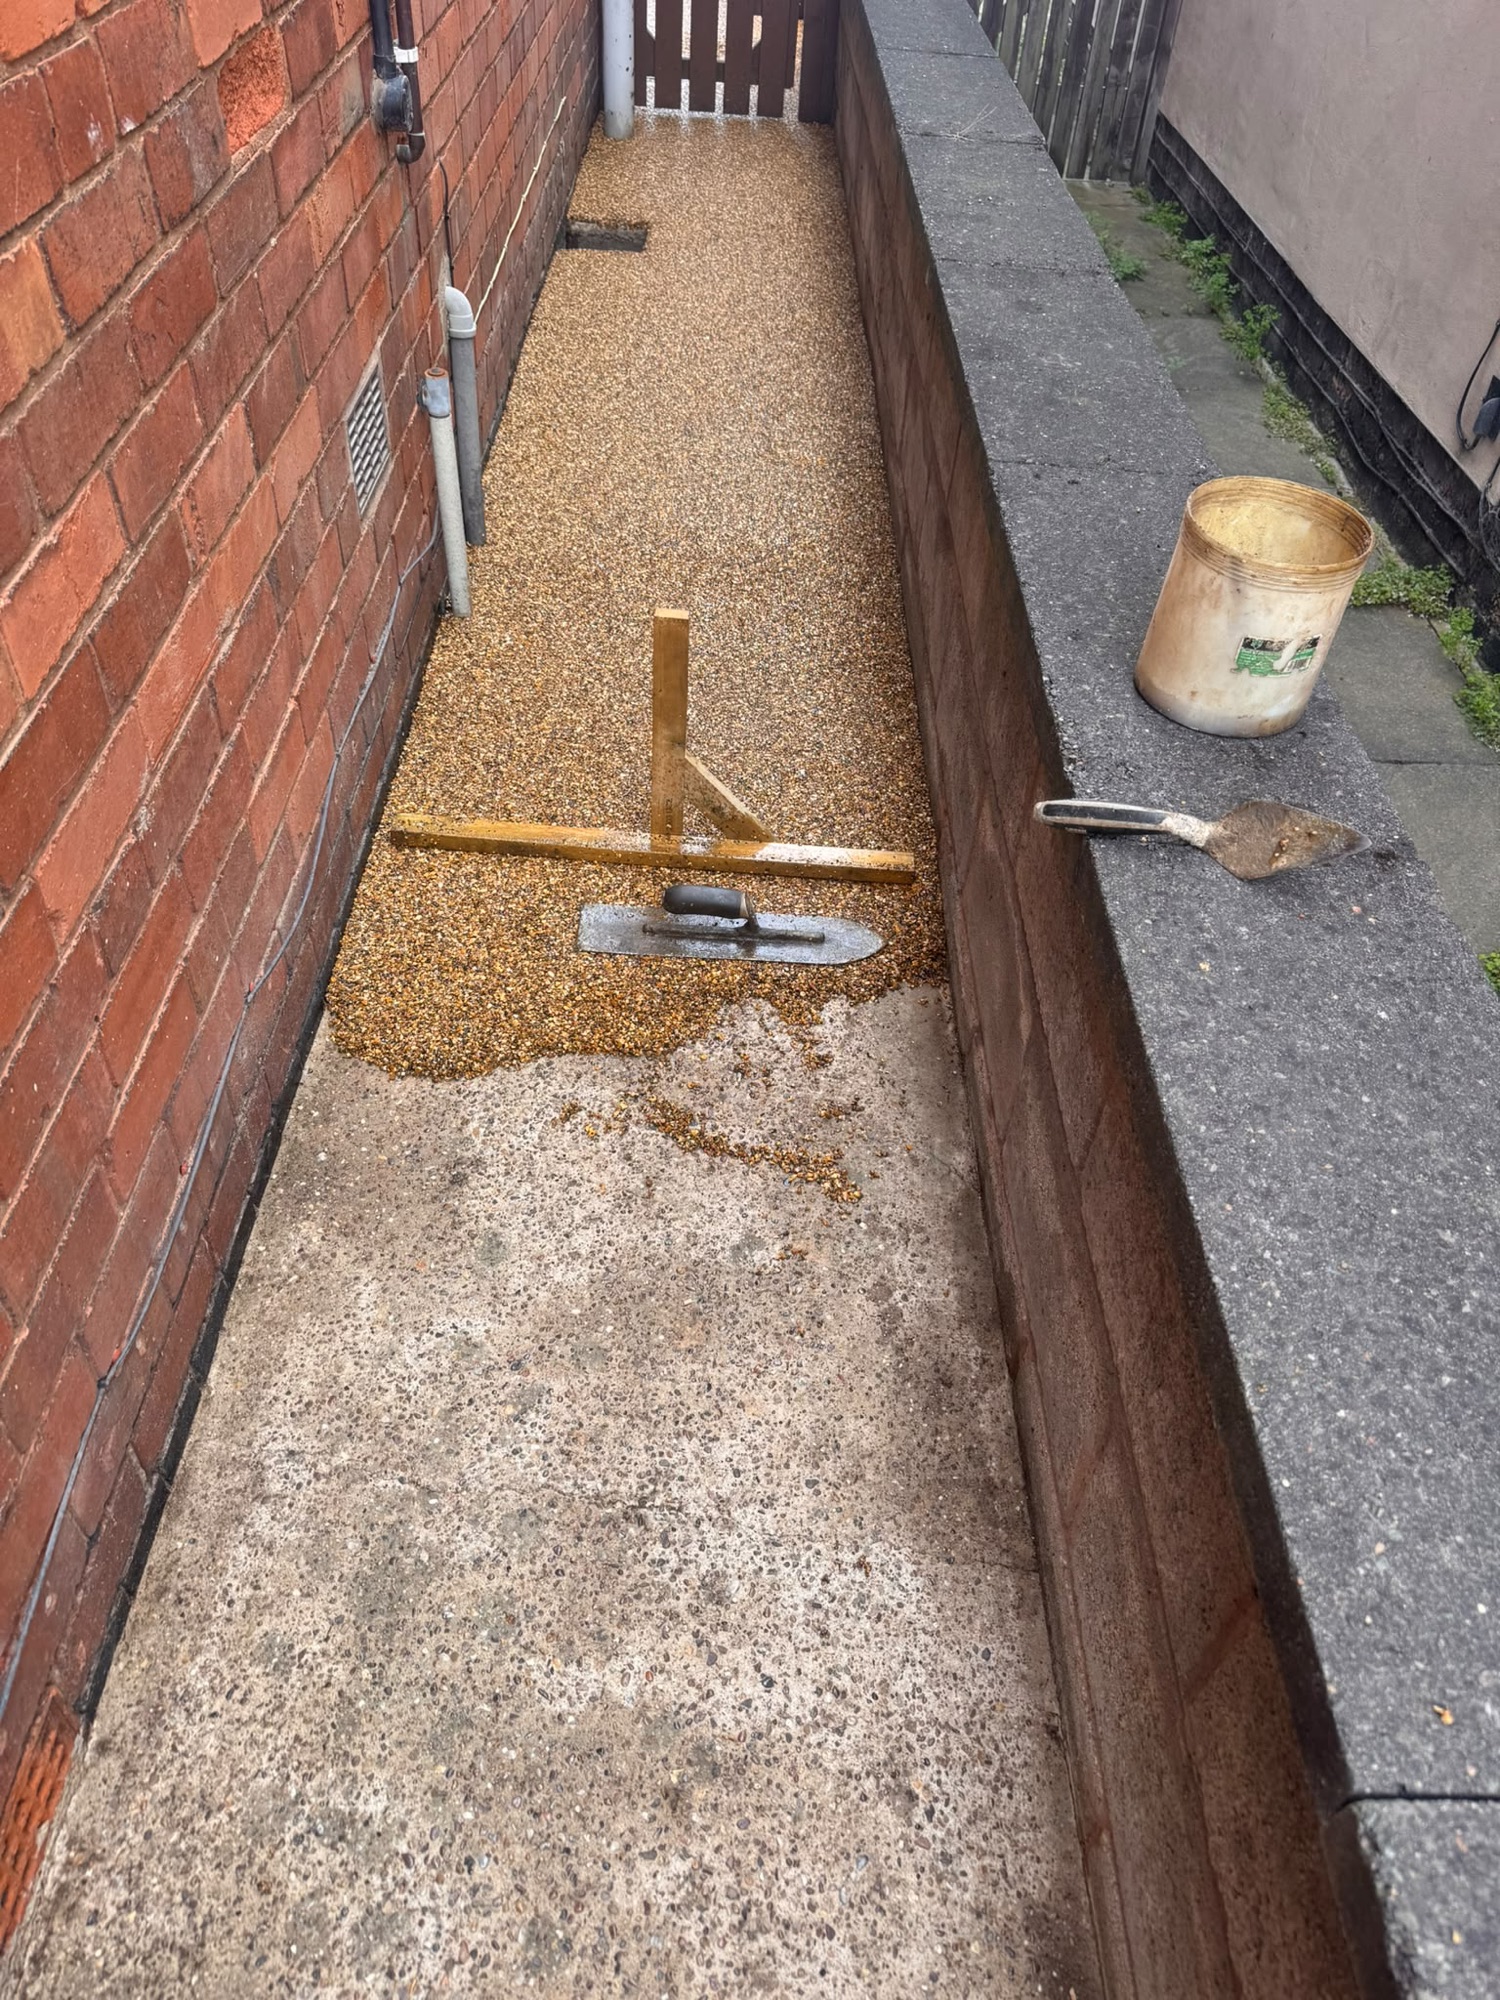
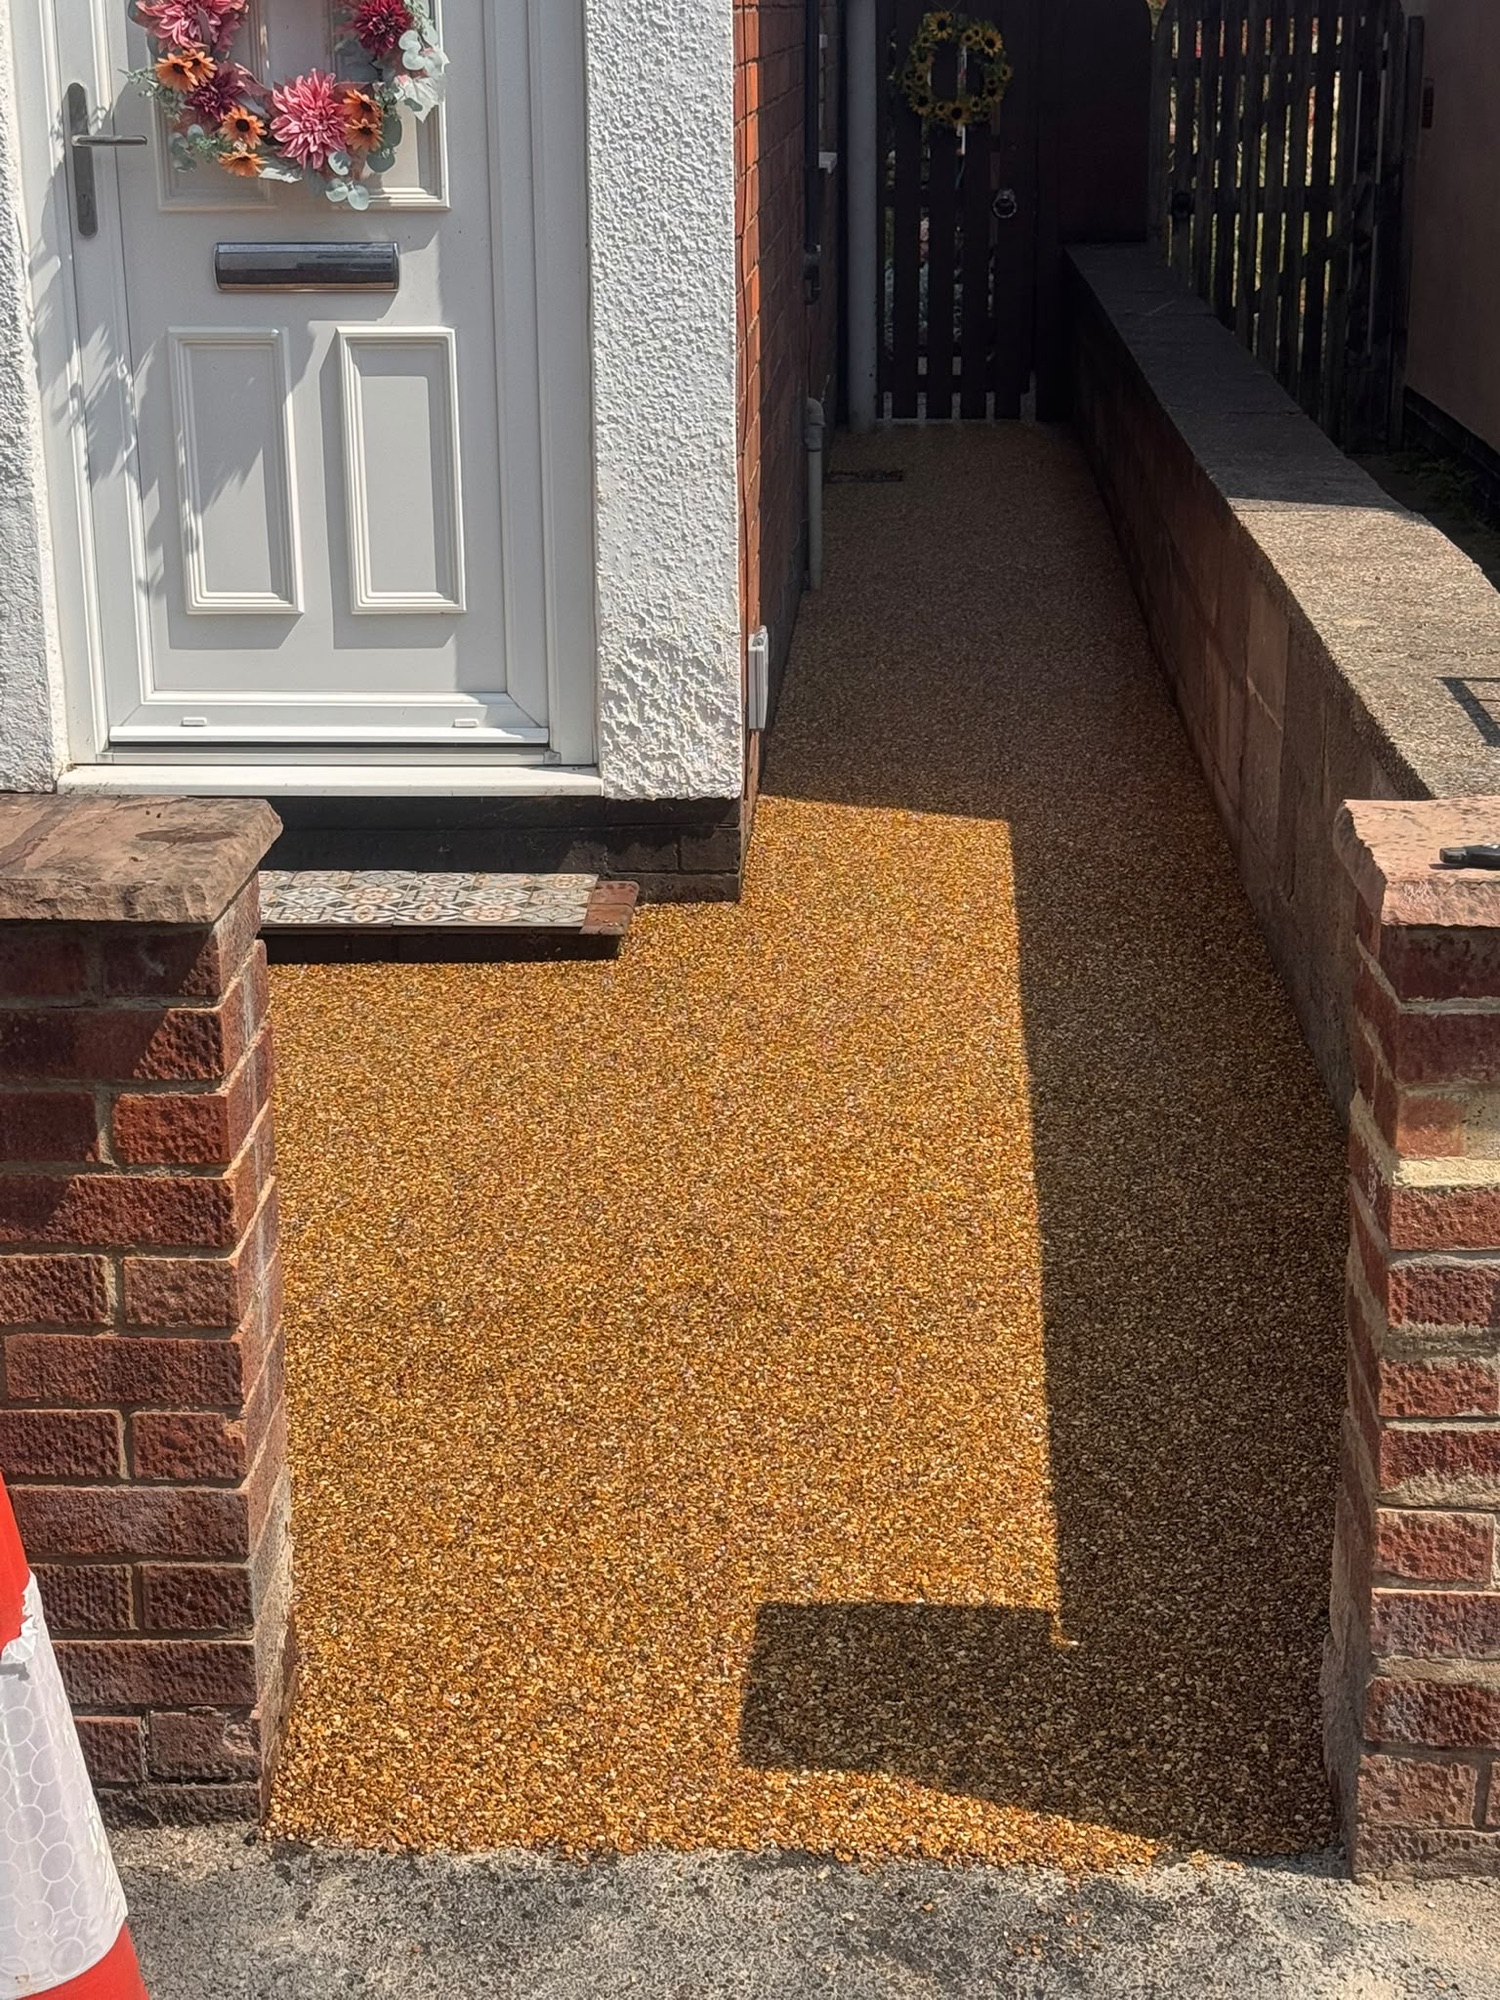
Our customer had had a fall from the slightly uneven surface of an old concrete path, she initially contacted us to renew it but we suggested adding resin bonded gravel on top would be a cheaper option and achieve the same effect. First impressions matter. We recently completed a driveway transformation for a client in Long Eaton, Derbyshire, and the choice of surfacing has completely changed the look and functionality of the property frontage.

For this project, we installed Honeycomb-coloured resin-bonded gravel, sourced from the specialists at The Resin Mill. Their website has a really good AI powered visualiser for showing a “before” and “after”

img_7135

Why Resin-Bonded Gravel?

We chose this system for three key reasons:

  • Aesthetics: The charcoal finish provides a crisp, modern contrast that really elevates the home’s exterior. It looks clean, sophisticated, and stays looking that way for a long time.
  • Permeability: Like our previous ramp projects, drainage is key. Resin-bonded systems allow water to permeate the surface naturally, which reduces pooling and takes the pressure off local drainage systems—a huge benefit for any driveway or pathway.
  • Durability: It creates a hard-wearing, slip-resistant finish that stands up well to daily vehicle use and the typical British weather.

Our Installation Process:

  • Preparation: We pressure washed the concrete surface using our high powered pressure washer, and let it dry. We applied a primer to get suitable bonding for the RBG.
  • Precision Application: The resin-bonded gravel was applied to a consistent depth, ensuring a smooth, uniform texture across the entire driveway.
  • Finishing: We ensured all edges were crisp and clearly defined against the existing boundary walls and lawns, providing that “perfect finish” look.

Problems we had along the way

  • We had originally planned to raise the drain cover to the rear of the property but the edge was concreted into the building, we therefore took out the mortar around the edge and flaunched the RBG in so there was no trip hazard.

Project Highlights:

  • Location: Long Eaton, Derbyshire
  • Materials: Charcoal Resin-Bonded Gravel (The Resin Mill)
  • Key Benefits: Excellent drainage, modern aesthetic, slip-resistant, and low-maintenance.

Looking to Upgrade Your Driveway or Pathway?

Whether you’re looking for a low-maintenance driveway or a durable, accessible pathway for your home, we focus on high-quality materials and precise installation.

Let’s get your project off the ground. Contact us on 07737 988 243

Categories
Internal fit out Kitchen

Full stave worktops in Bunny, Nottinghamshire

Recent Project: Stunning Solid Oak Full Stave Worktop Installation in Bunny, Nottinghamshire

There is nothing quite like the warmth and character that natural timber brings into a kitchen. We recently completed a beautiful solid oak worktop installation for a client in Bunny, Nottinghamshire, and the results speak for themselves.

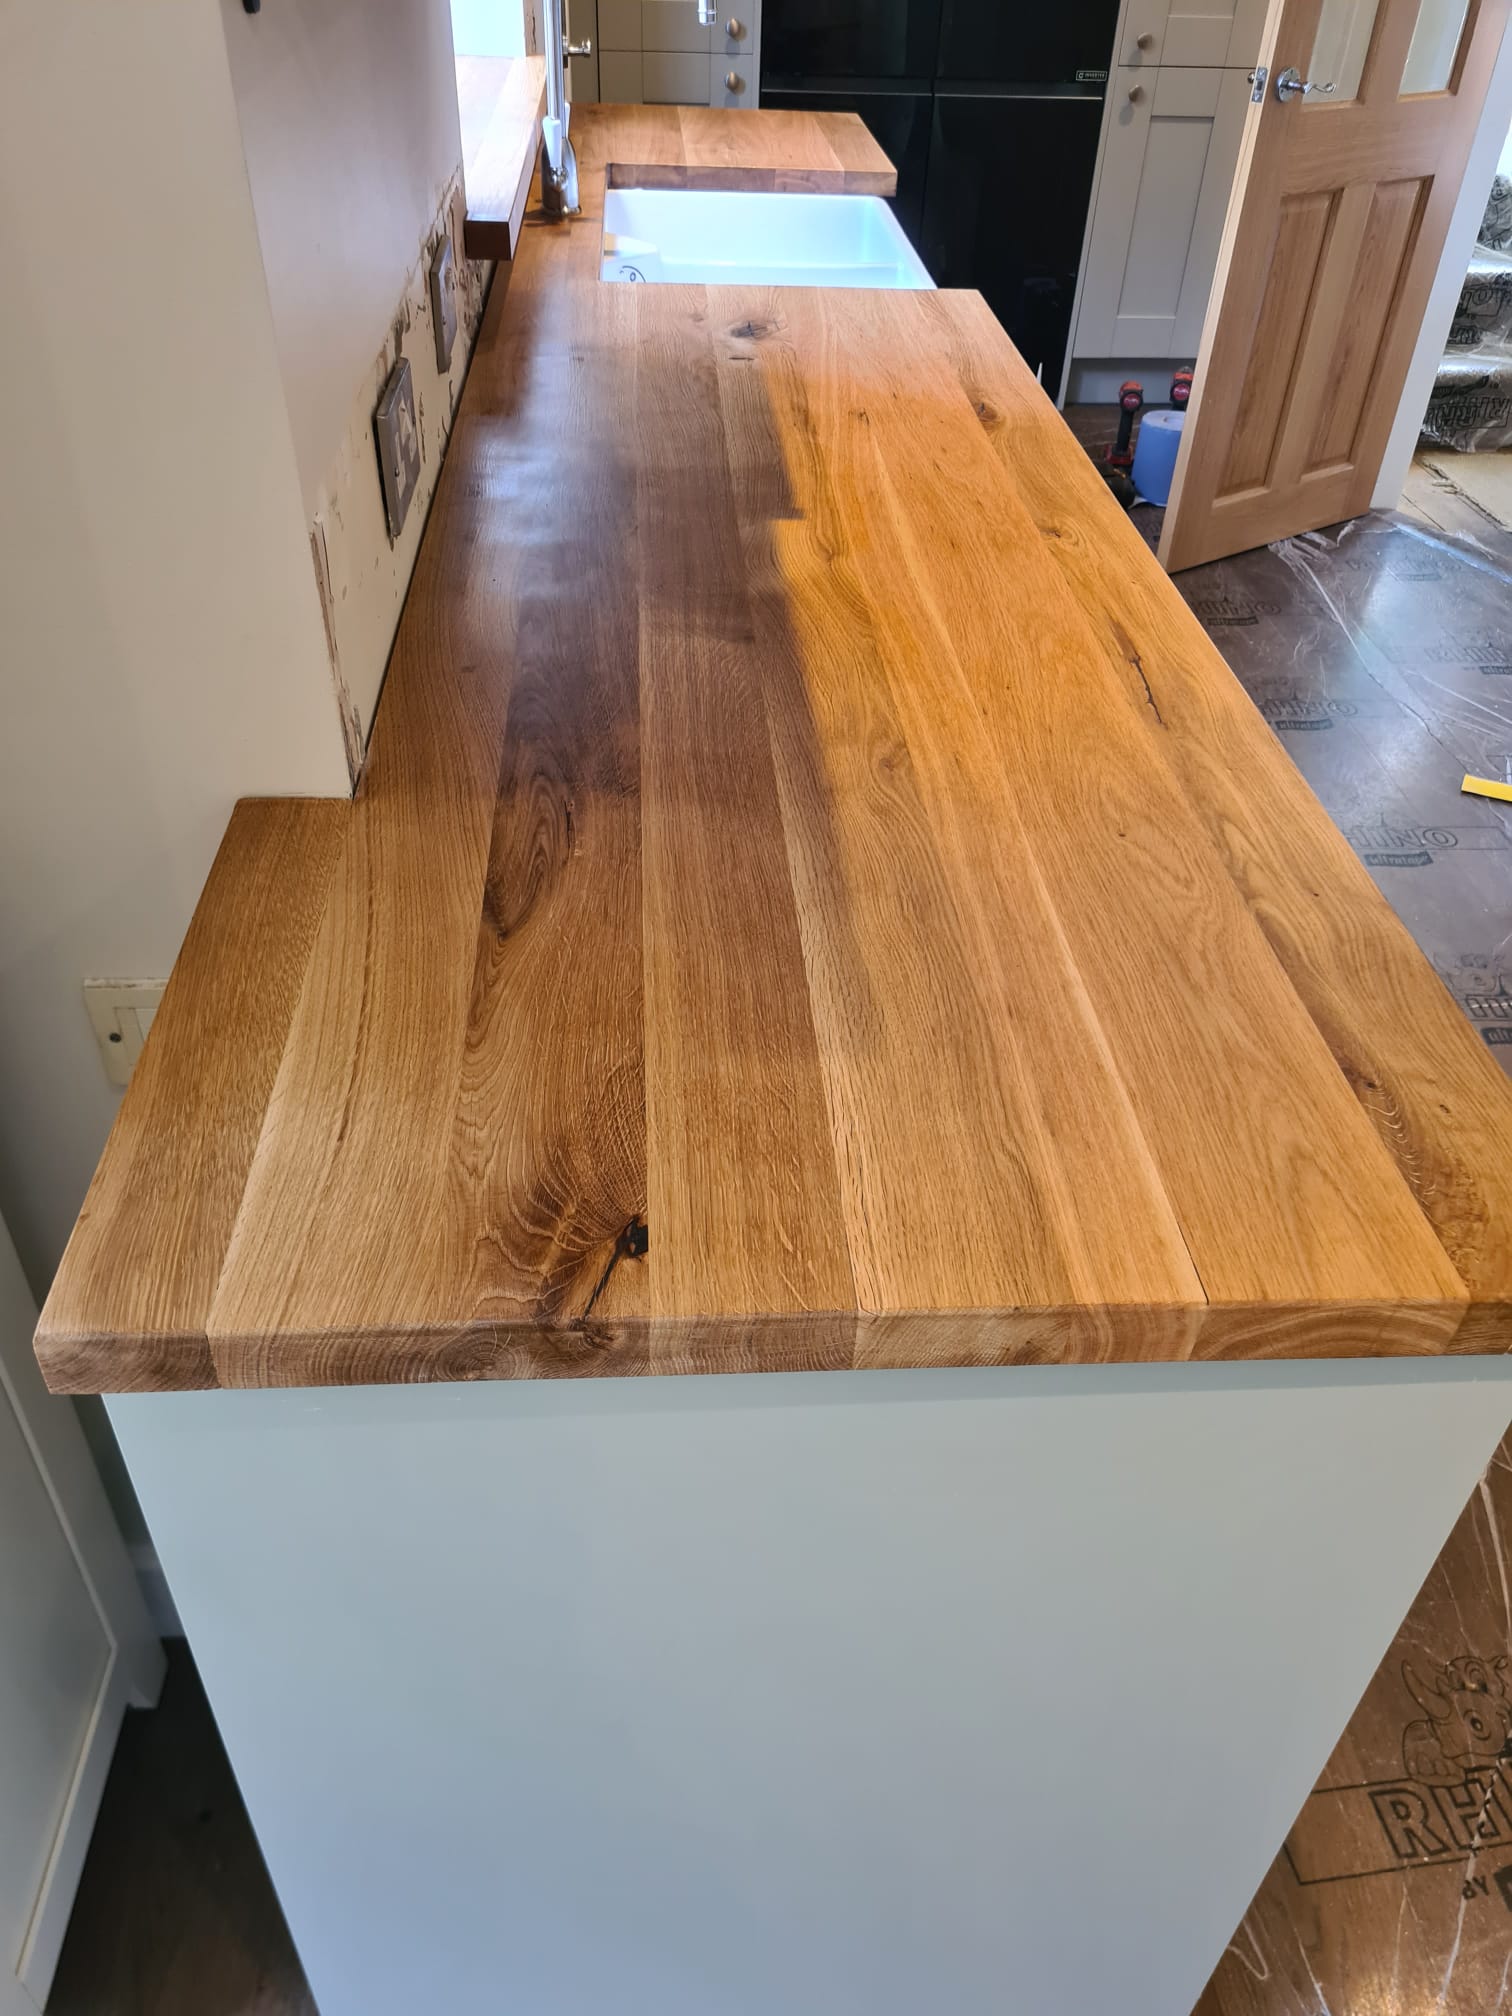
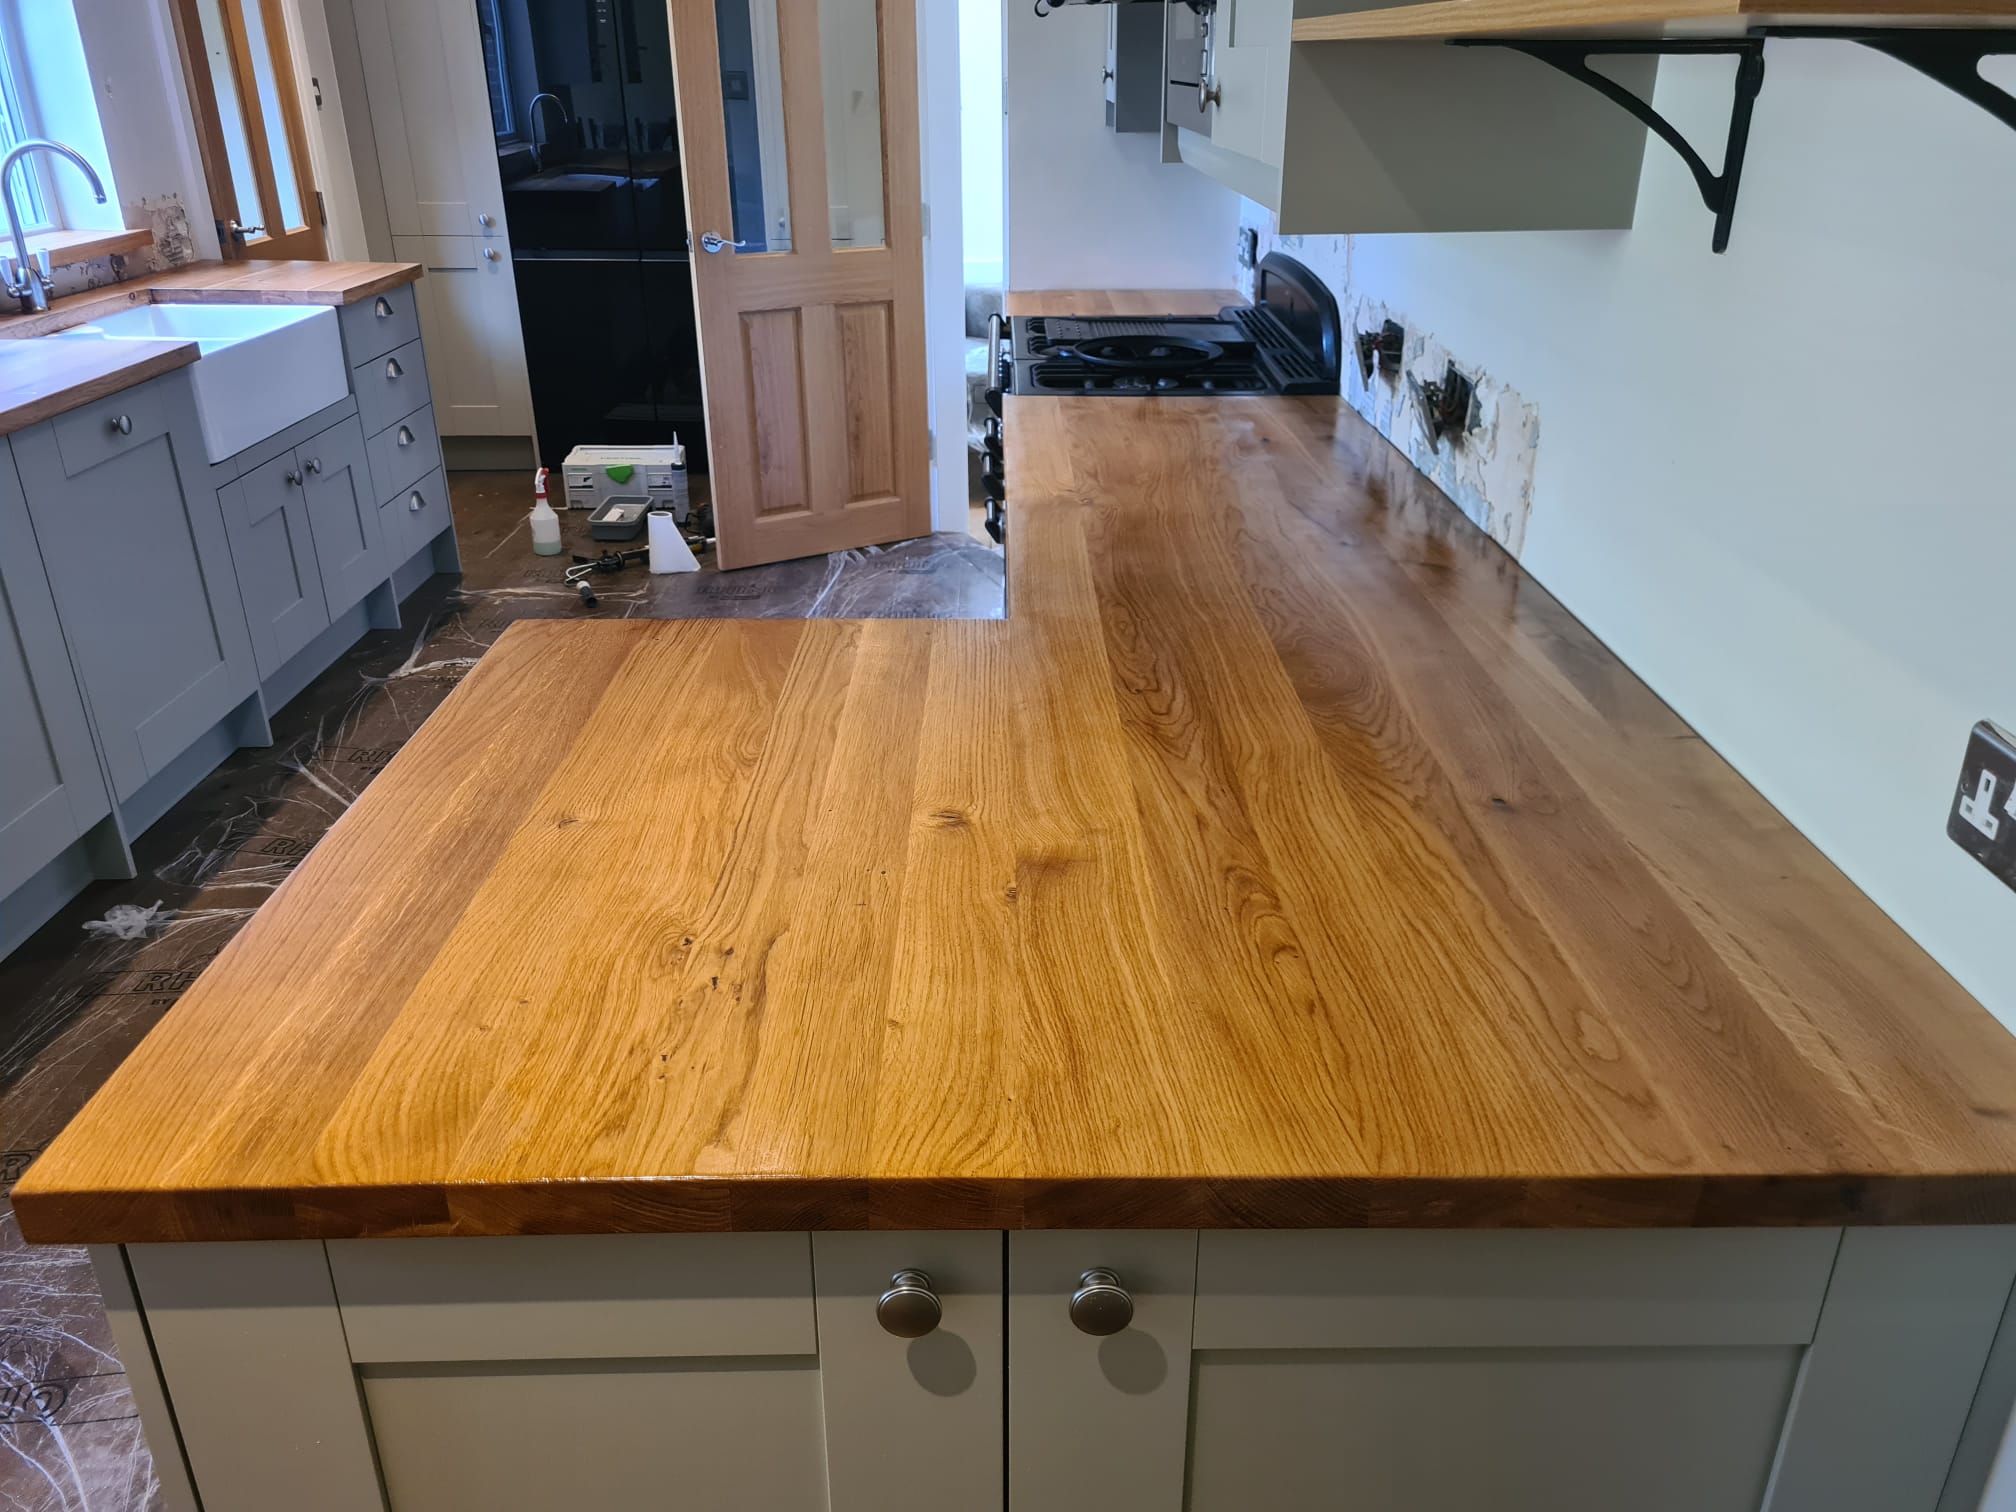
For this project, we precisely cut, joined, and installed premium solid oak worktops to perfectly contour the kitchen’s layout, featuring a seamless corner joint and a classic Belfast sink cutout.What is a “Full Stave” Worktop?

WhatsApp Image 2026-07-17 at 12.24.57

What is the difference between timber worktops. Simply put, a Full Stave worktop is constructed using long, continuous planks of timber that run the entire length of the worktop without any breaks.

Full Stave vs. Finger-Jointed (Standard):

  • Full Stave: The staves run from one end to the other (typically 80mm–250mm wide). They are glued using straight-edge joins, creating a clean, flowing look.
  • Finger-Jointed: Made by joining smaller, shorter blocks together with “teeth” (finger joints) to make up the length.

Why choose Full Stave?

  • Aesthetics: You get a seamless, flowing grain pattern that showcases the timber’s natural beauty and consistent colour. It’s widely considered the high-end, premium choice.
  • Stability: Because you are using continuous, full-length timber rather than smaller glued blocks, the worktop is robust and less prone to warping over time.

Builder’s Note: Full stave worktops are heavy and rigid. They require careful handling during installation, especially when cutting for sinks or hobs, but the final finish is unmatched.

From Raw Timber to Rich Grain

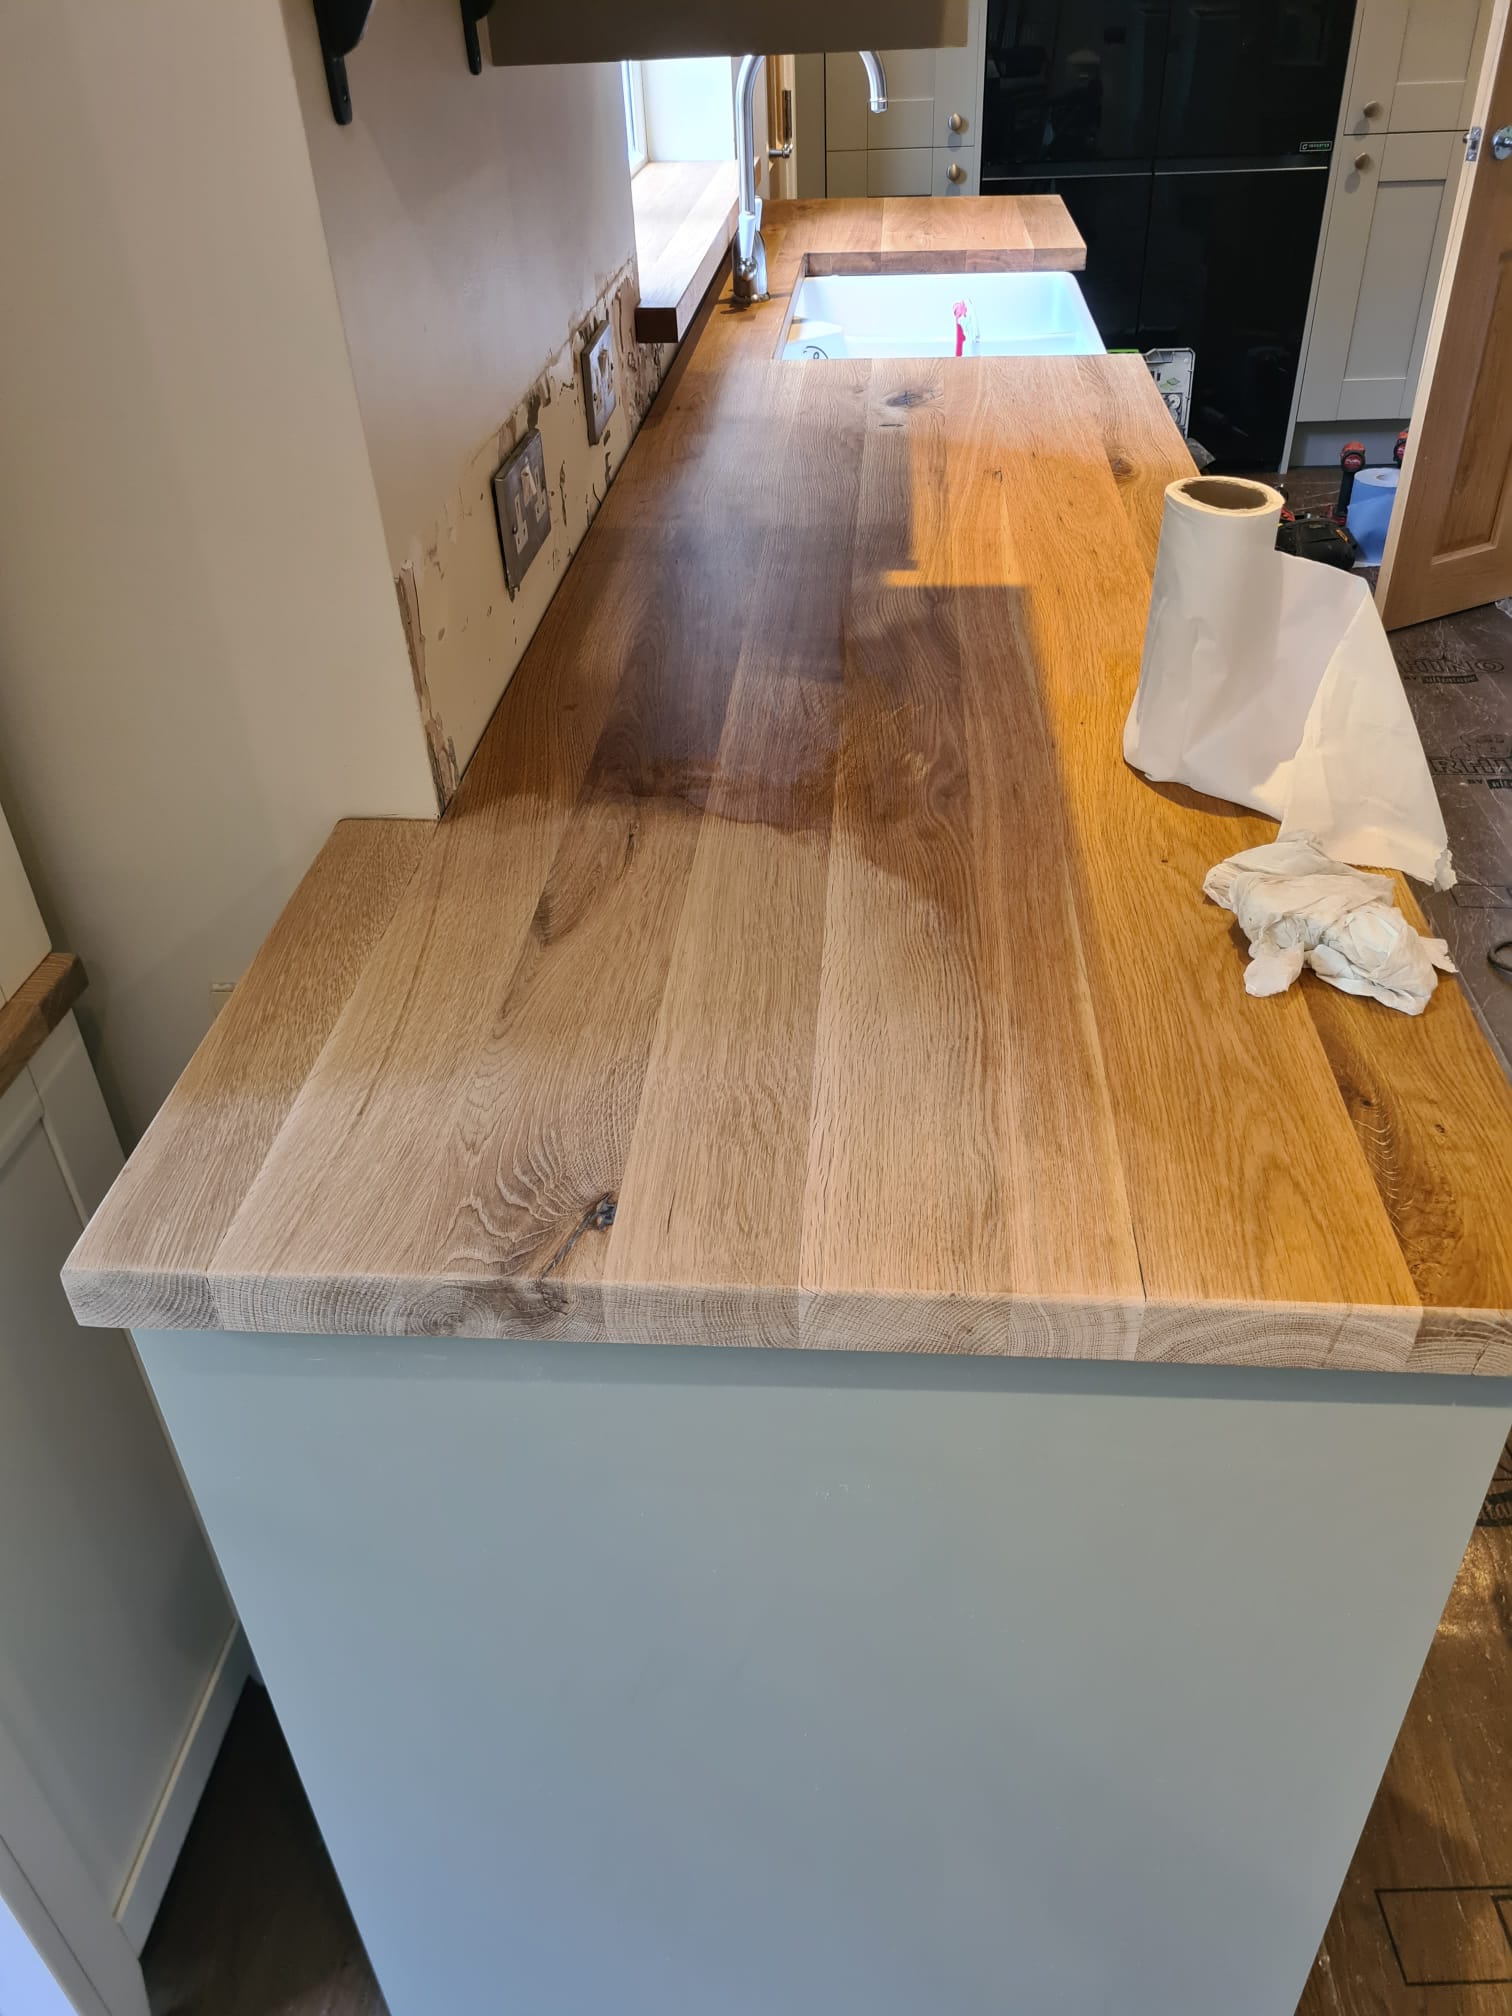
A key part of the magic with solid wood is the finishing process. As you can see from our progress shots, applying a high-quality Osmo protective oil completely transforms the wood—taking the oak from a pale, raw state to a deep, rich golden tone that highlights the natural knots and grain patterns.

Beyond the aesthetics, this oiling creates a durable, water-resistant barrier essential for busy kitchen areas around the sink and cooker.Is Solid Wood Right For You?

We always believe in being honest with our clients:

  • The Pros: If you love timber, nothing can replace that natural texture. With regular care, it is a timeless investment that lasts a lifetime.
  • The Considerations: It is an investment in both material cost and skilled labour. Because solid wood reacts to its environment, it needs to be looked after—regular oiling is a must, and standing water should be avoided. If you’re looking for a low-maintenance, “fit and forget” surface, quartz or granite might be better, but if you want that warm, natural statement piece, there is no substitute for oak.

Project Highlights

  • Location: Bunny, Nottinghamshire
  • Materials: Premium Solid Oak Worktops paired with Sage Green Shaker Cabinets
  • Features: Flawless mitre joints, custom Belfast sink integration, and bespoke window sill styling.
  • Finish: Multi-coat protective specialist wood oil for an enduring satin sheen.

Looking to Upgrade Your Kitchen in Nottinghamshire?

Whether you are based in Bunny, Ruddington, Bradmore, or across Nottingham, we specialize in precise worktop installations, custom joinery, and full kitchen transformations.

Let’s bring your dream kitchen to life.

[ 📞 Get a Free Quote Today on 07737 988243 ] or [ ✉️ Contact Us via Message quote@swallowhillhomes.com]

Categories
Brickwork Groundwork Resin bound gravel

Accessible Resin bonded ramp in Langley Mill, Derbyshire

The Challenge

Our client, who has limited mobility, required a solution to gain independent access to their property with a mobility scooter. The existing front wall of the property created a significant physical barrier, preventing this access with the limited turning circle.

img_6974
previous arrow
next arrow

Our Approach

We prioritised a practical, site-led approach to find the best solution:

  • Structural Modification: We carefully dismantled the existing boundary wall and re-built it to accommodate a new, accessible entry point.
  • Groundworks: The site was leveled to ensure a comfortable, safe gradient for the scooter ramp.
  • Surfacing: We constructed the ramp using ‘Sahara Mix’ resin-bonded gravel, sourced from The Resin Mill, providing a durable, slip-resistant, and level surface. They have a really good visualiser tool for seeing what it will look like.

Design & Decision Making

Rather than adhering to a rigid, pre-set design that might not work on the ground, we collaborated closely with the client throughout the process. We waited until the wall was dismantled before finalising the handrail positioning. This allowed us to assess the site in real-time, resulting in a short handrail on either side that perfectly balanced accessibility with space for the client to manoeuvre bins.

Handrail Material Selection

We sourced materials through FH Brundle in Ilkeston. Our choice of 42mm galvanized tubing for the handrails was driven by a ‘function-first’ philosophy:

  • Strength & Rigidity: Ensuring maximum safety for the client.
  • Longevity: Selected for its weather resistance and durability.
  • Appearance: A clean, professional aesthetic that complements the property.

    After

Drainage

We chose resin-bonded gravel partly for its permeable qualities. Unlike solid concrete or tarmac, this surface allows rainwater to soak naturally into the ground rather than pooling on the ramp or running off into the street. We add a layer of pea gravel underneath and added a drainage channel in front of the front door making it a more sustainable and low-maintenance choice for the long term.

Added Value

As part of our commitment to maintaining a tidy site and supporting the resident, we cleared the front garden of all waste and disposed of it in our skip in the yard, ensuring the client was left with a clean, functional environment. We often don’t generate enough waste on a small job to warrant getting a skip so we put it in our van and bring it back to base.


If you need our help message us on 07737 988 243 or email quote@swallowhillhomes.com


#SwallowHillHomes #BuildingBetter #AccessibleHome #HomeAdaptations #MobilitySolutions #ResidentialRefurbishment #BuilderLife

#AccessibleRamp #Groundworks #Masonry #ResinBondedGravel #ProjectHandover #DisabledAccess

#LangleyMill #Ilkeston #DerbyshireConstruction #LocalTrades #DerbyshireBuilder

Categories
Commercial

Replacing 15 glass windows in Nottinghams Park Estate

Commercial Project Spotlight: Window Replacement at Nottingham Squash Club

img_6788
previous arrow
next arrow

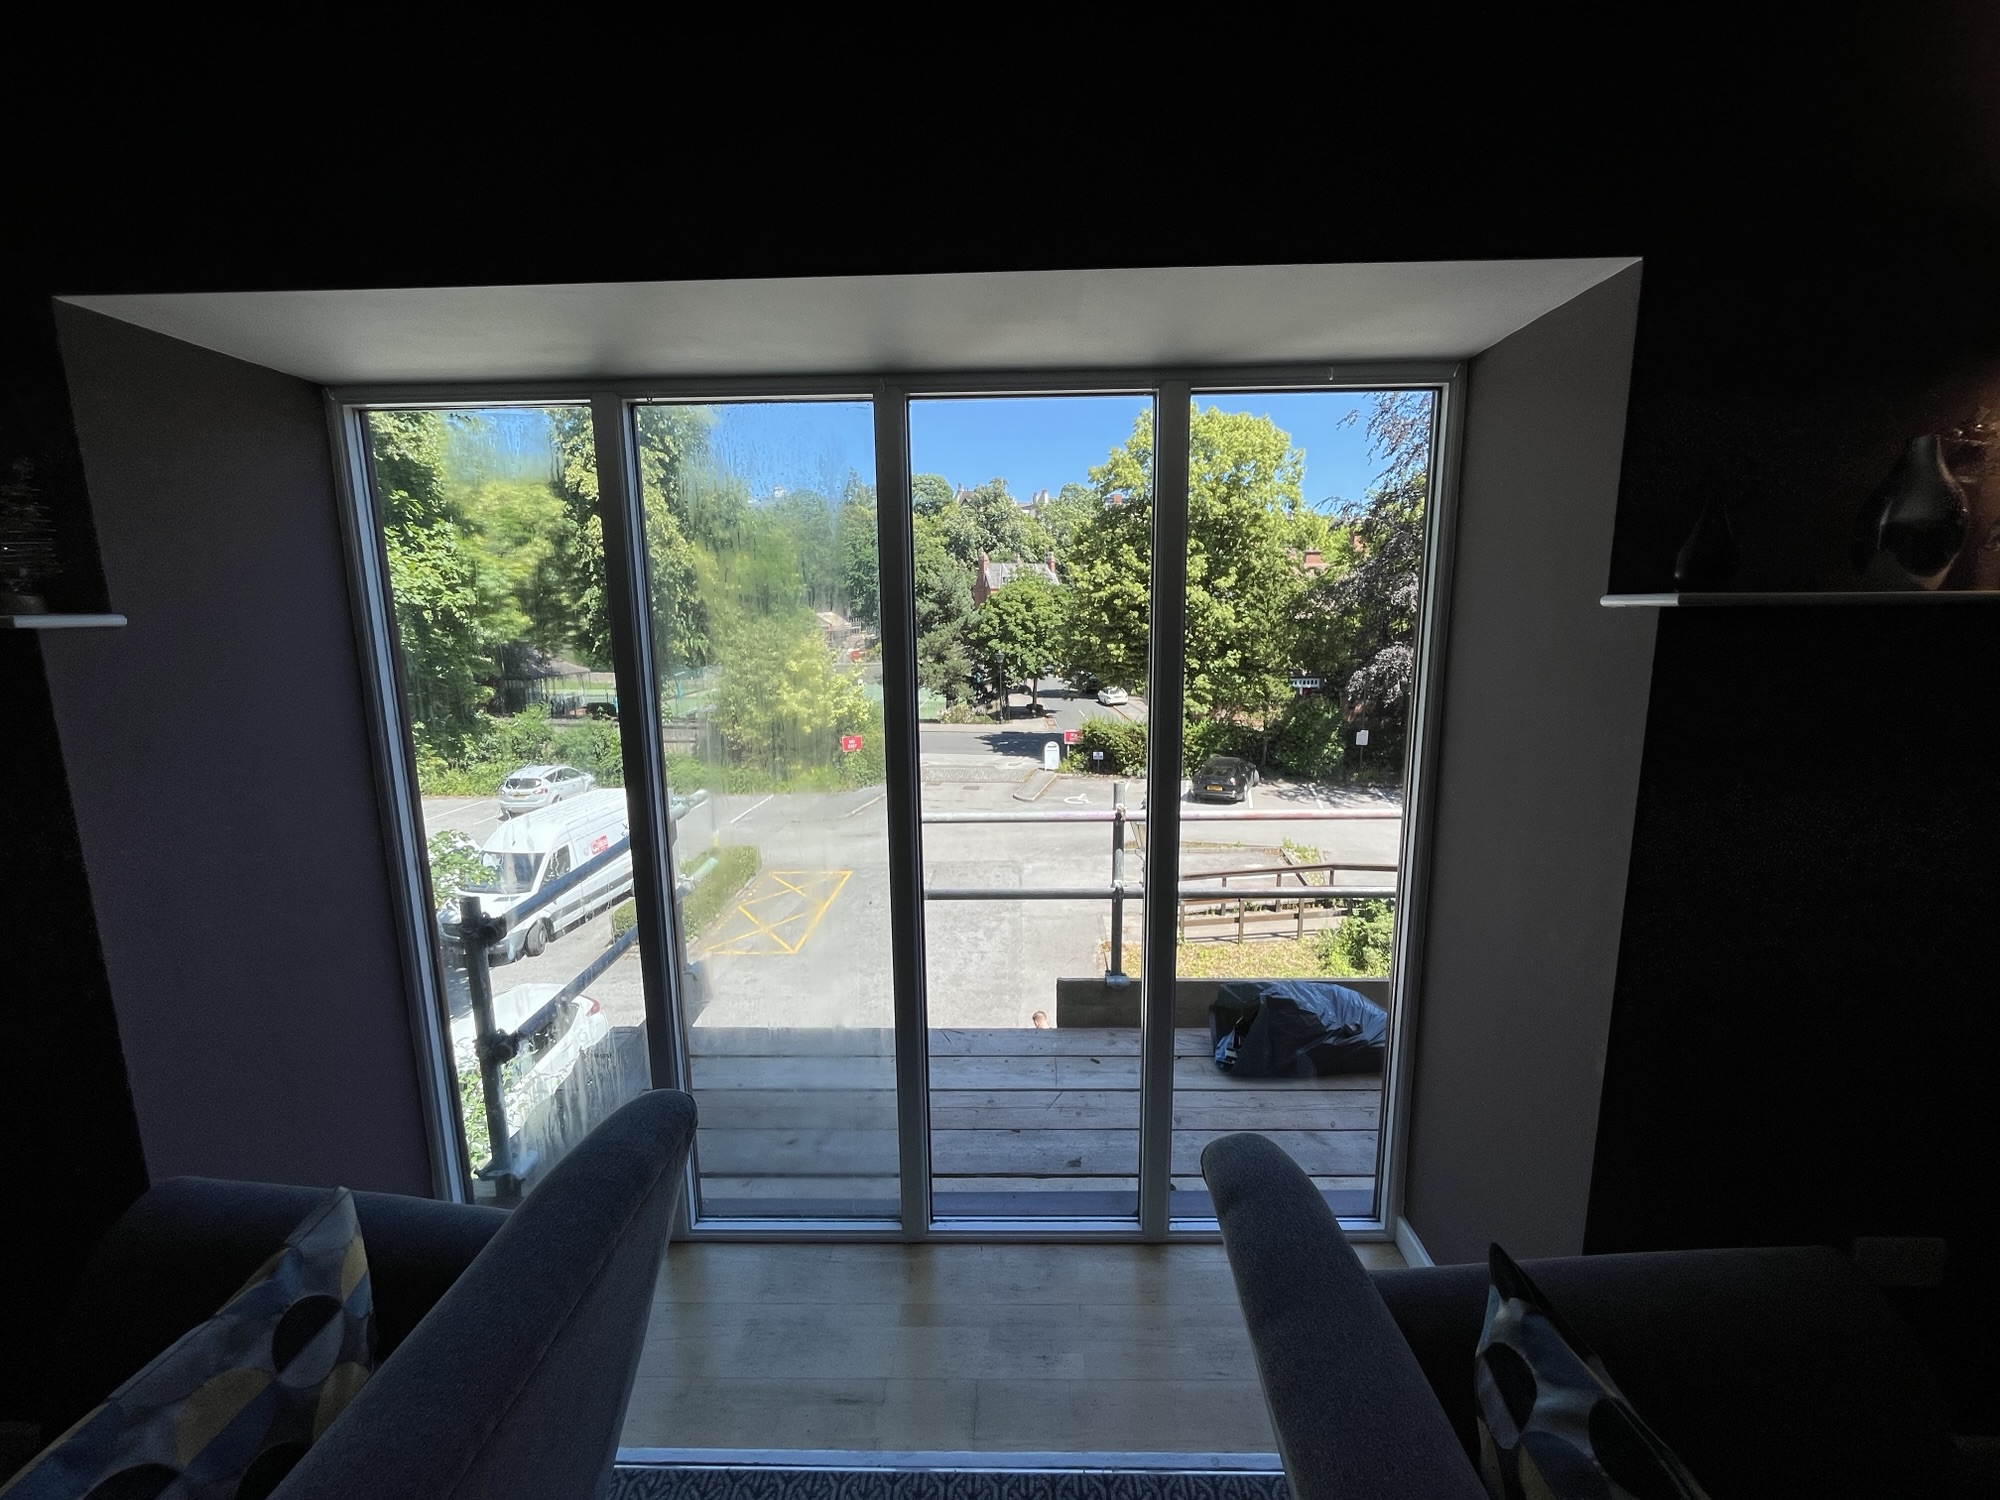
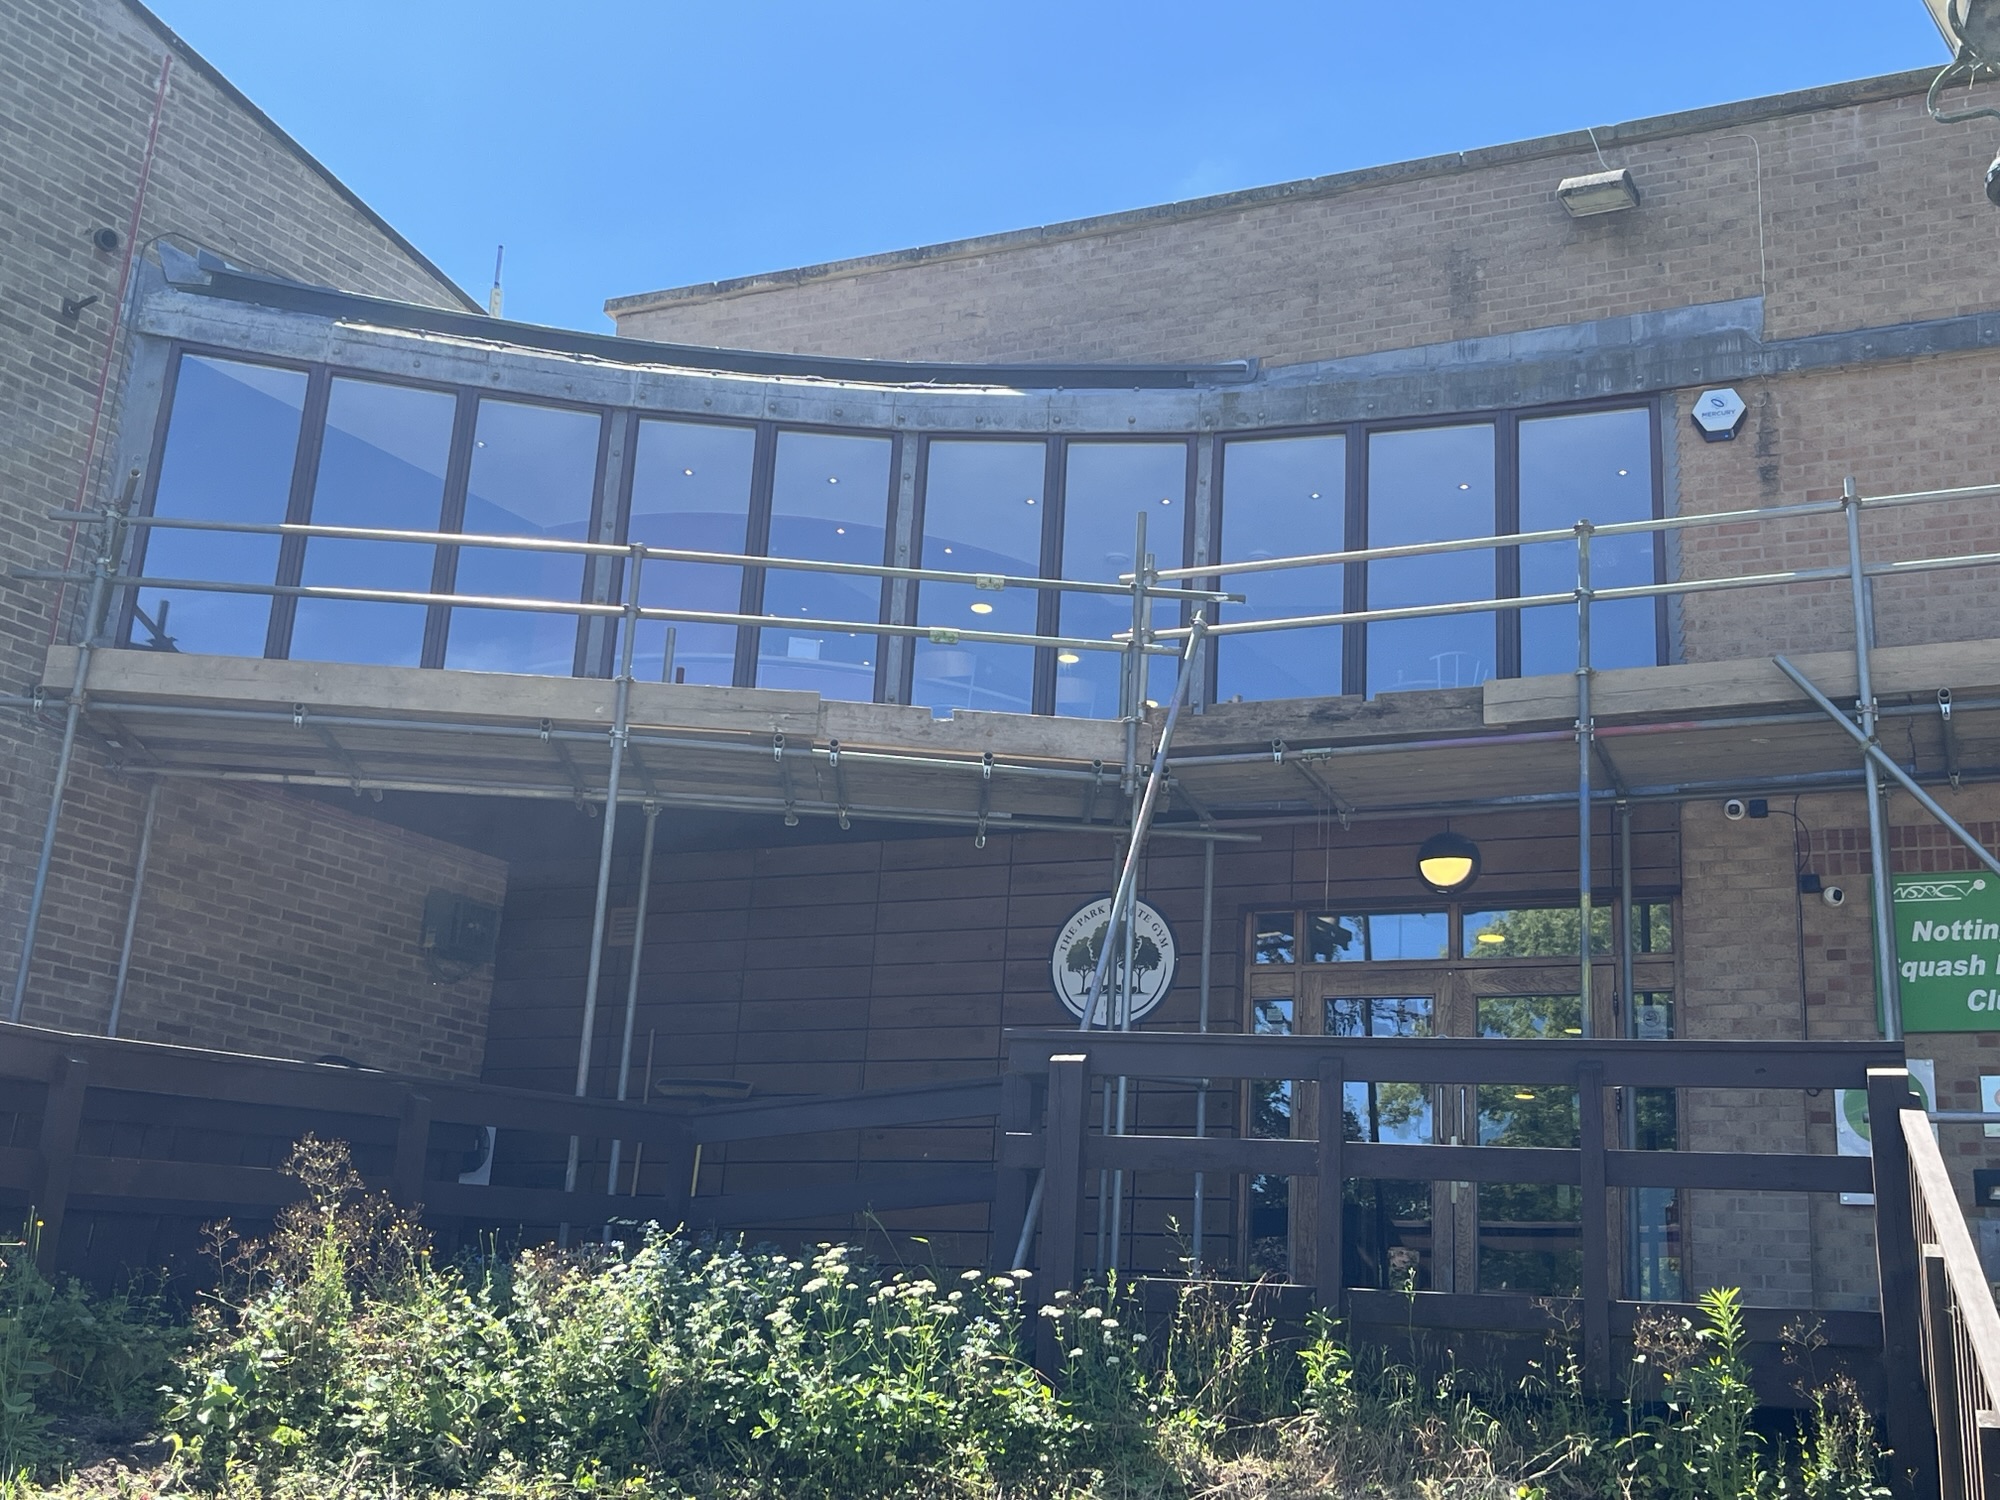
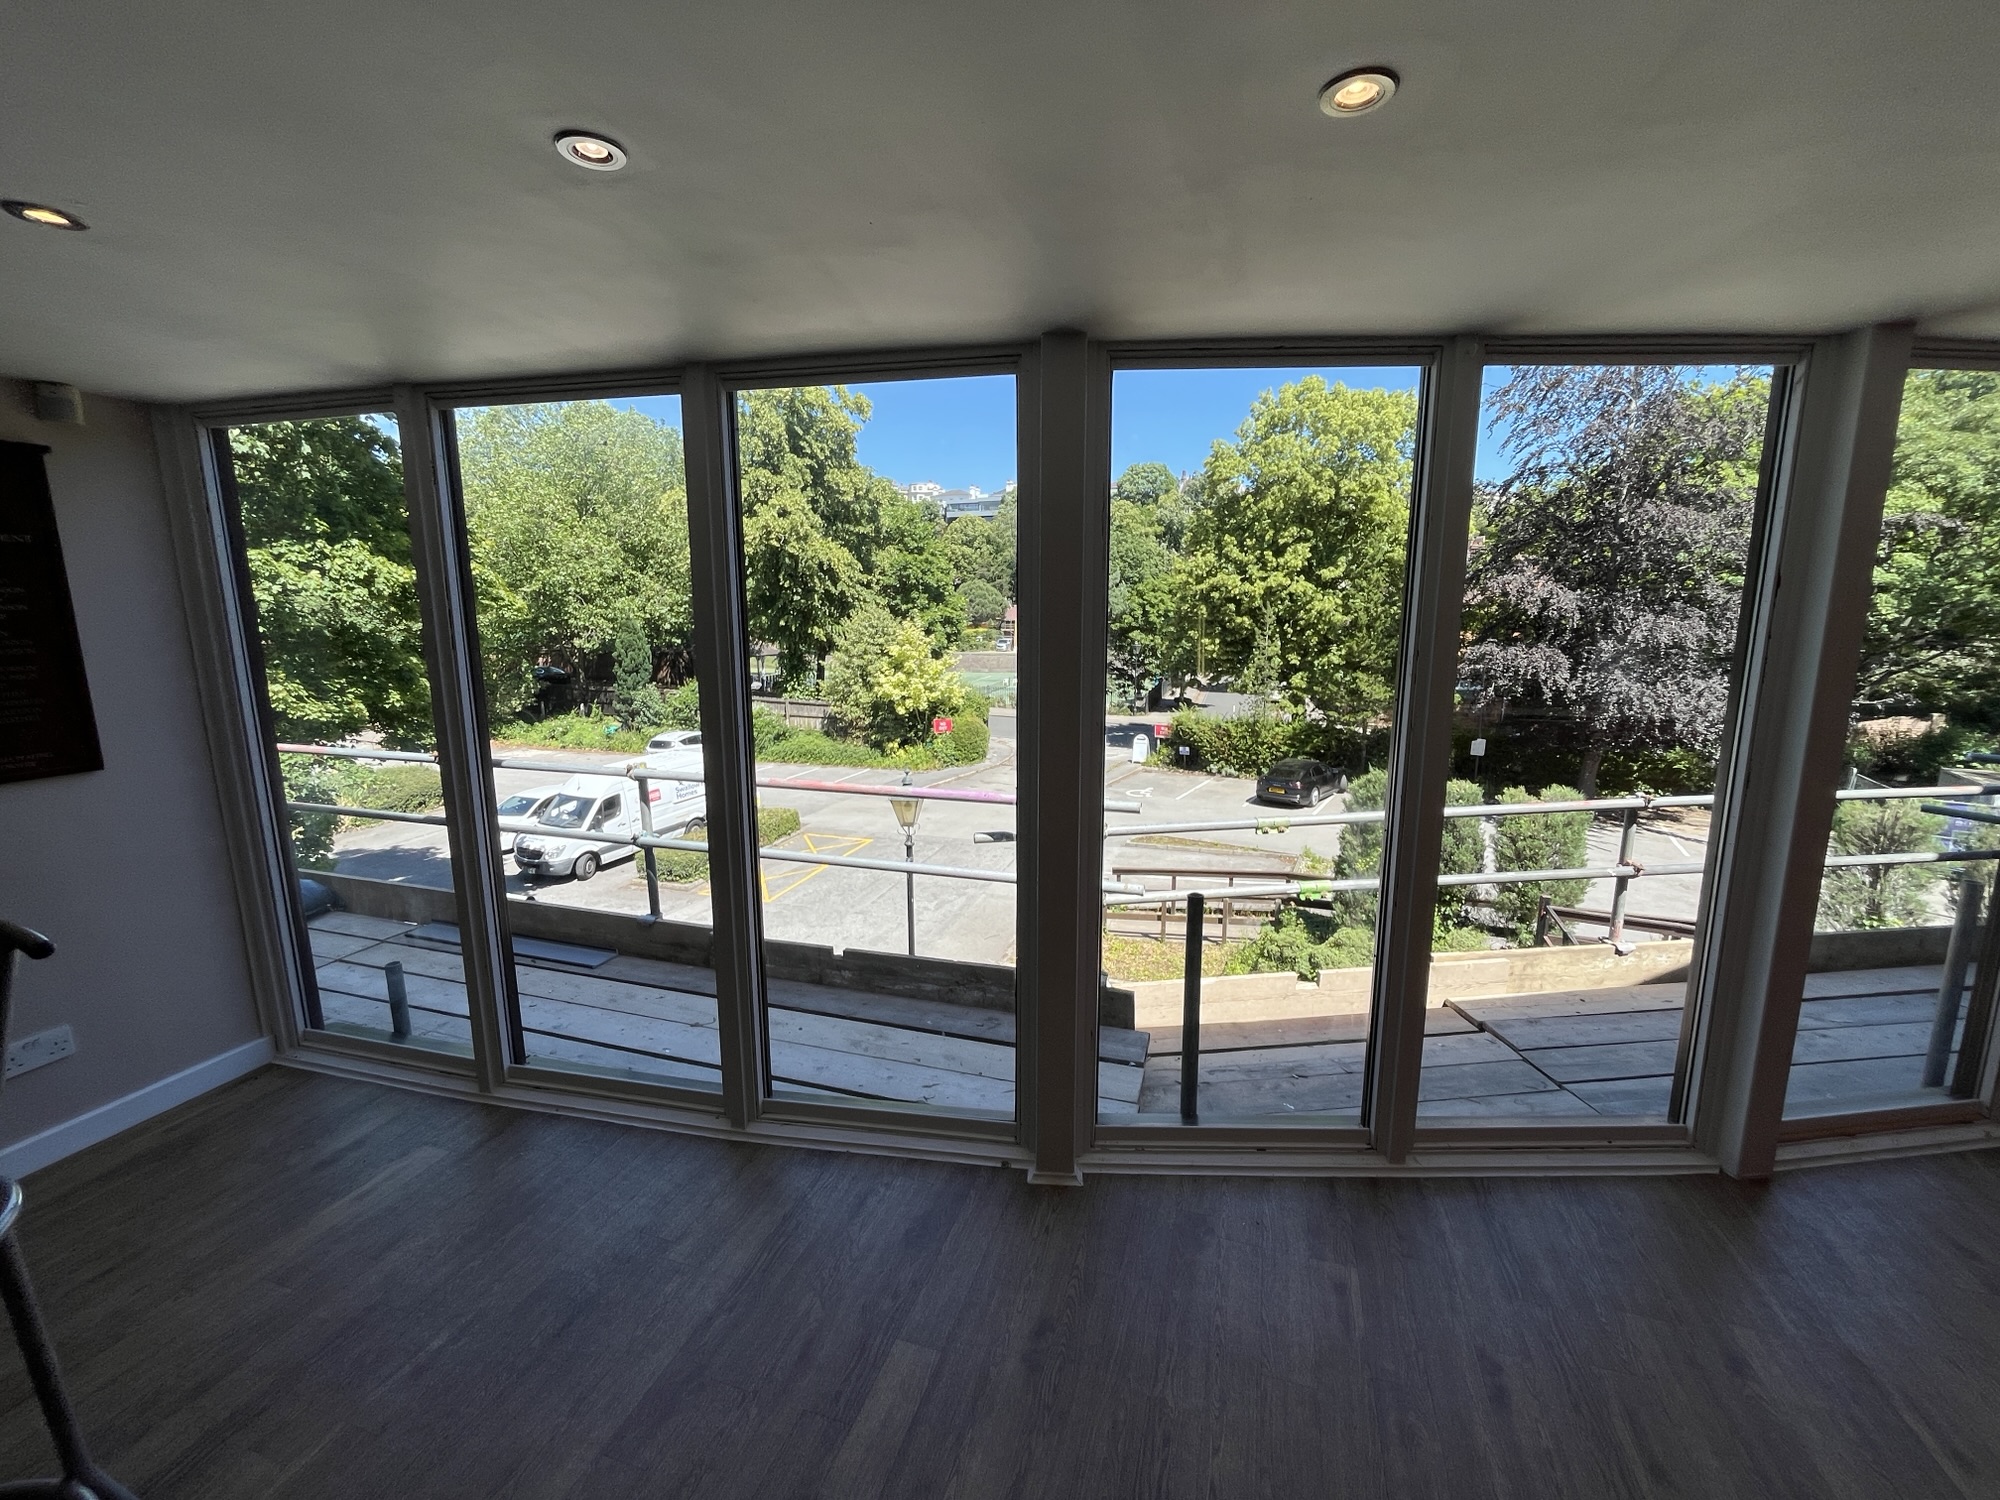
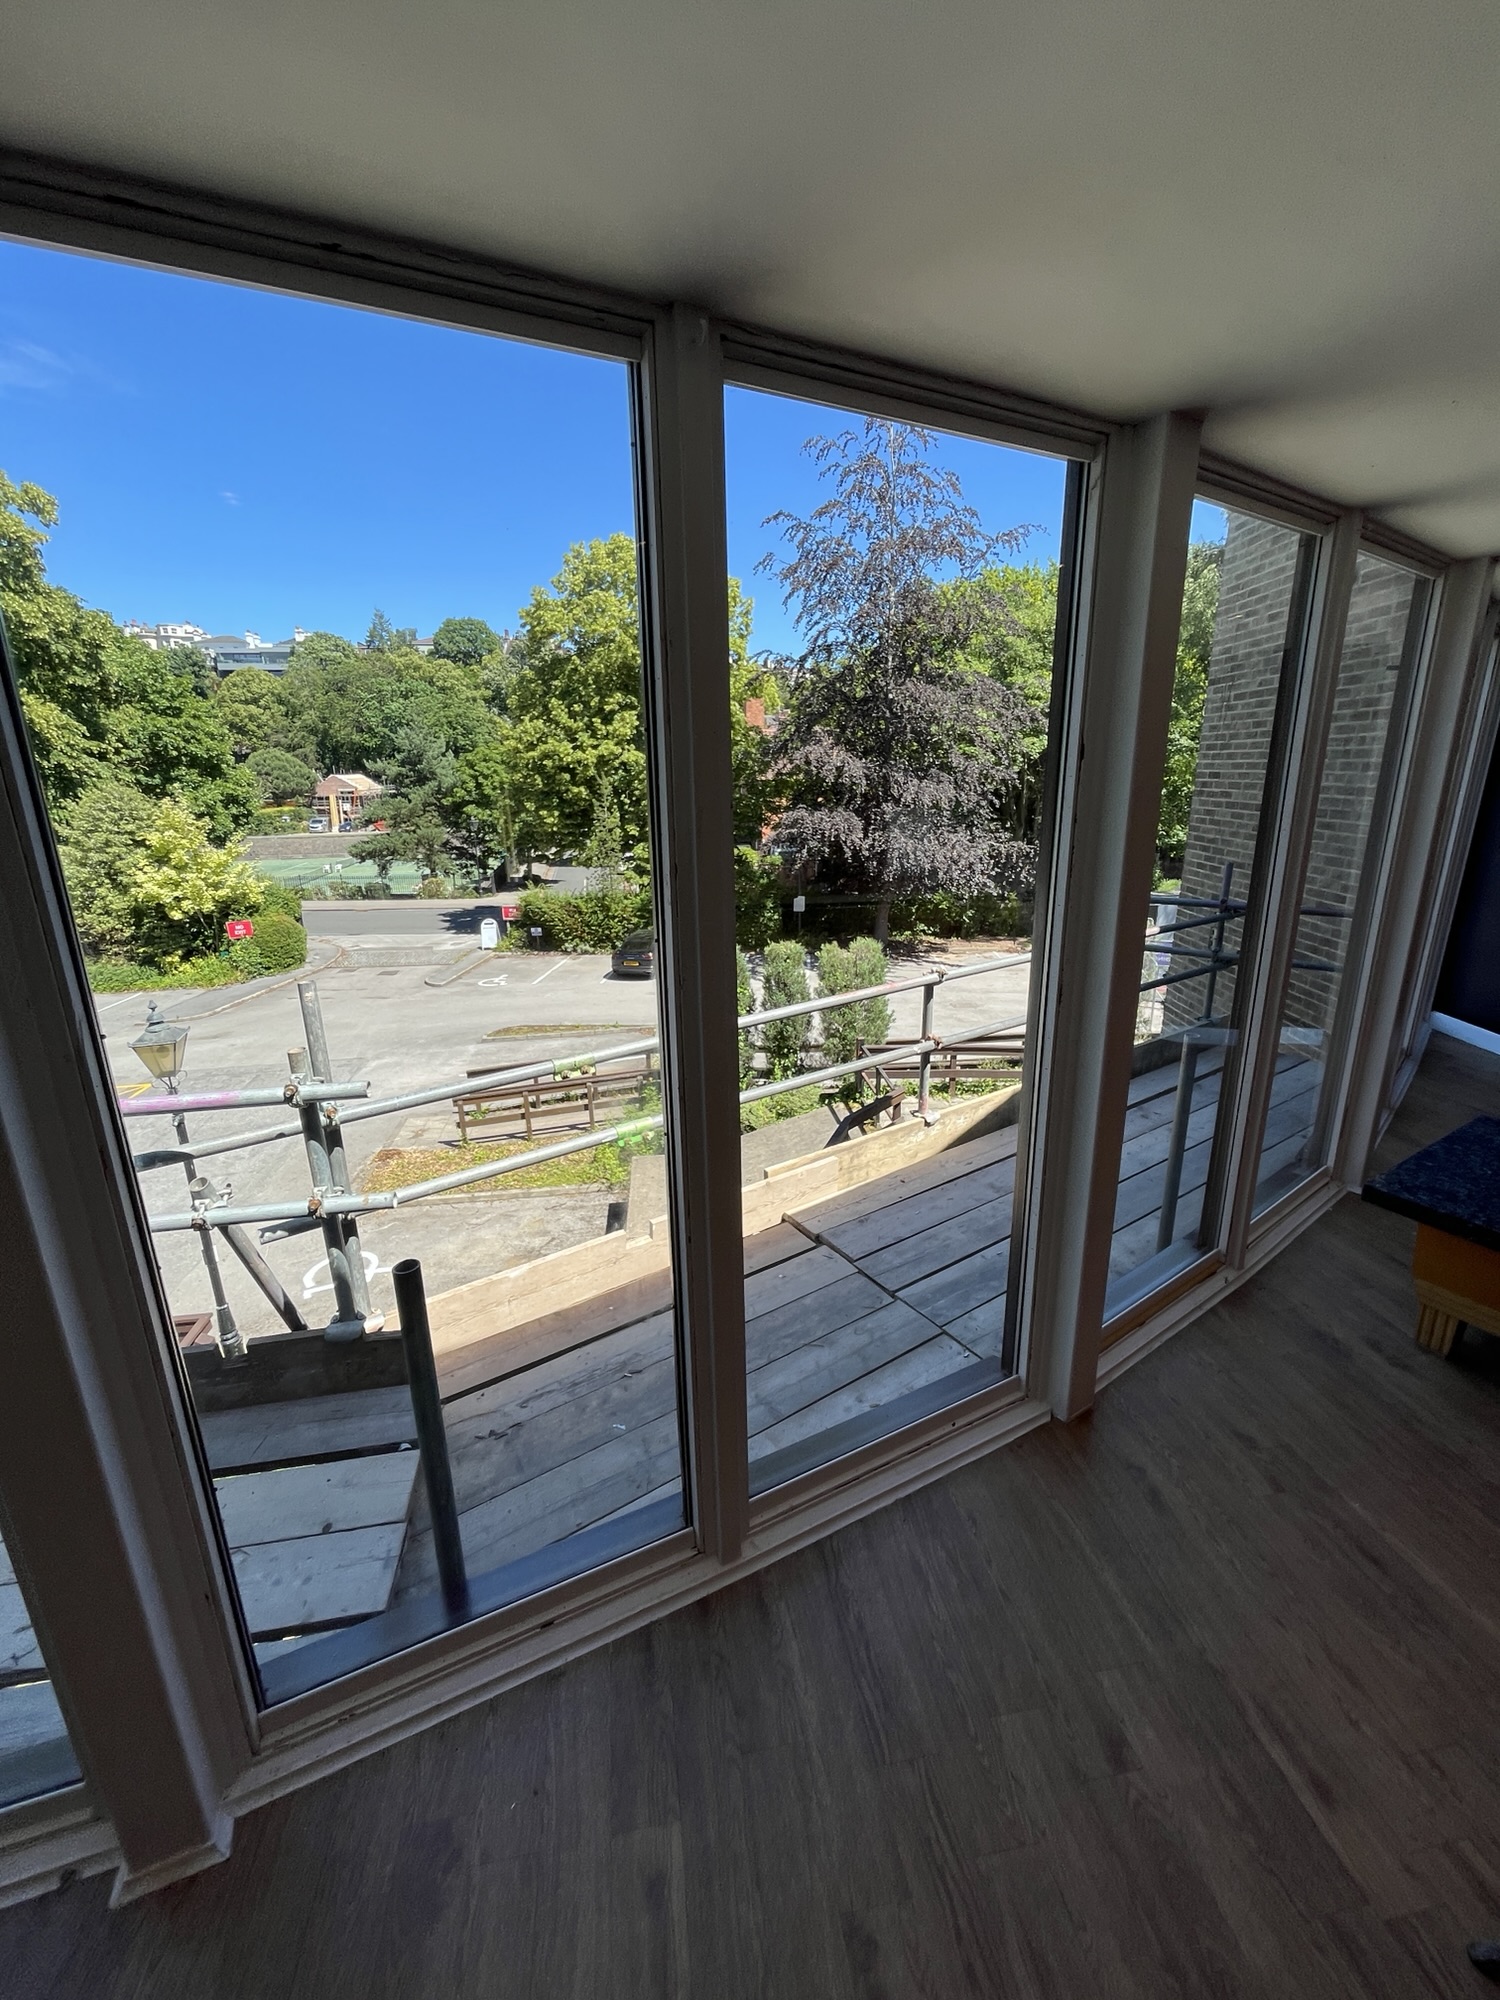
We were recently commissioned for a major commercial maintenance project: replacing 15 large, aging windows at the Nottingham Squash Club. Having been in place for over 25 years, the original units were well past their prime. Most of the windows had “popped,” creating condensation and significantly impacting the building’s aesthetic and thermal efficiency.

Why Windows “Pop”

Double-glazed windows rely on an airtight seal and a desiccant (a drying agent) to keep the cavity between the glass panes bone-dry. Over time, constant exposure to the elements and natural building movement cause these seals to deteriorate. Once the seal is broken, humid air leaks in, causing persistent condensation and cloudiness inside the unit.

The Installation Challenge

This wasn’t a standard window swap. Because the windows were internally beaded and located on the first floor with no existing fall protection, we had to be incredibly precise with our safety measures. We erected a full scaffold to allow us to remove the windows safely by pushing them inwards from the exterior.

Safety was our top priority throughout. We installed high-specification 6-10-6 toughened laminated glass, which ensures durability and safety for a busy public venue. With each panel weighing 50kg, this was a heavy-duty installation that required careful handling.

Going Above and Beyond

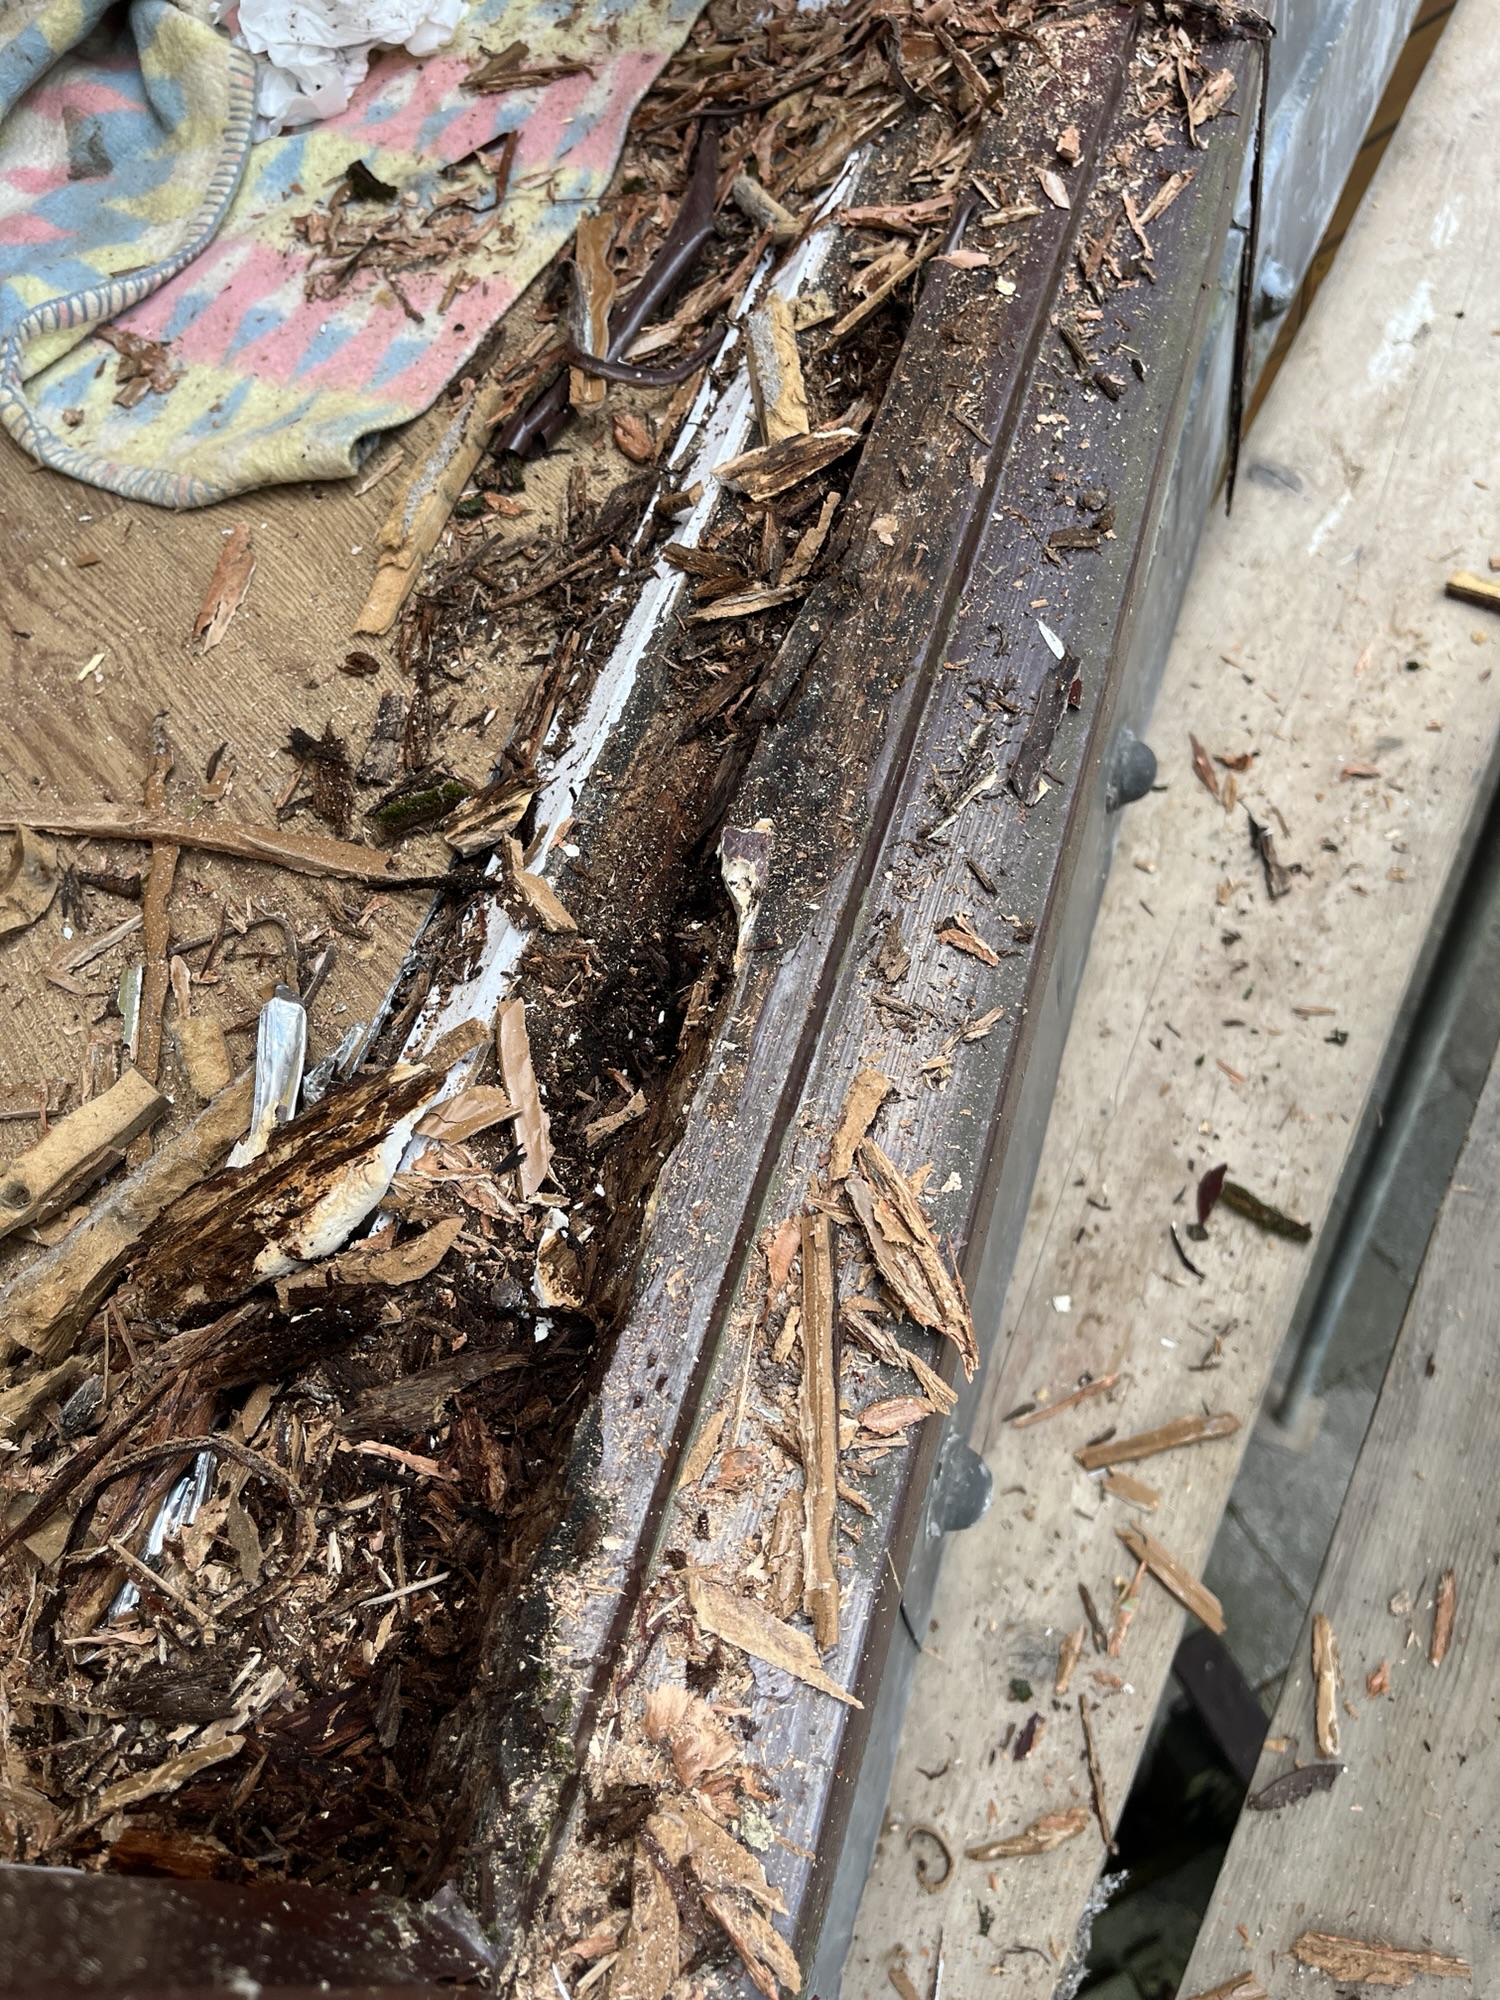
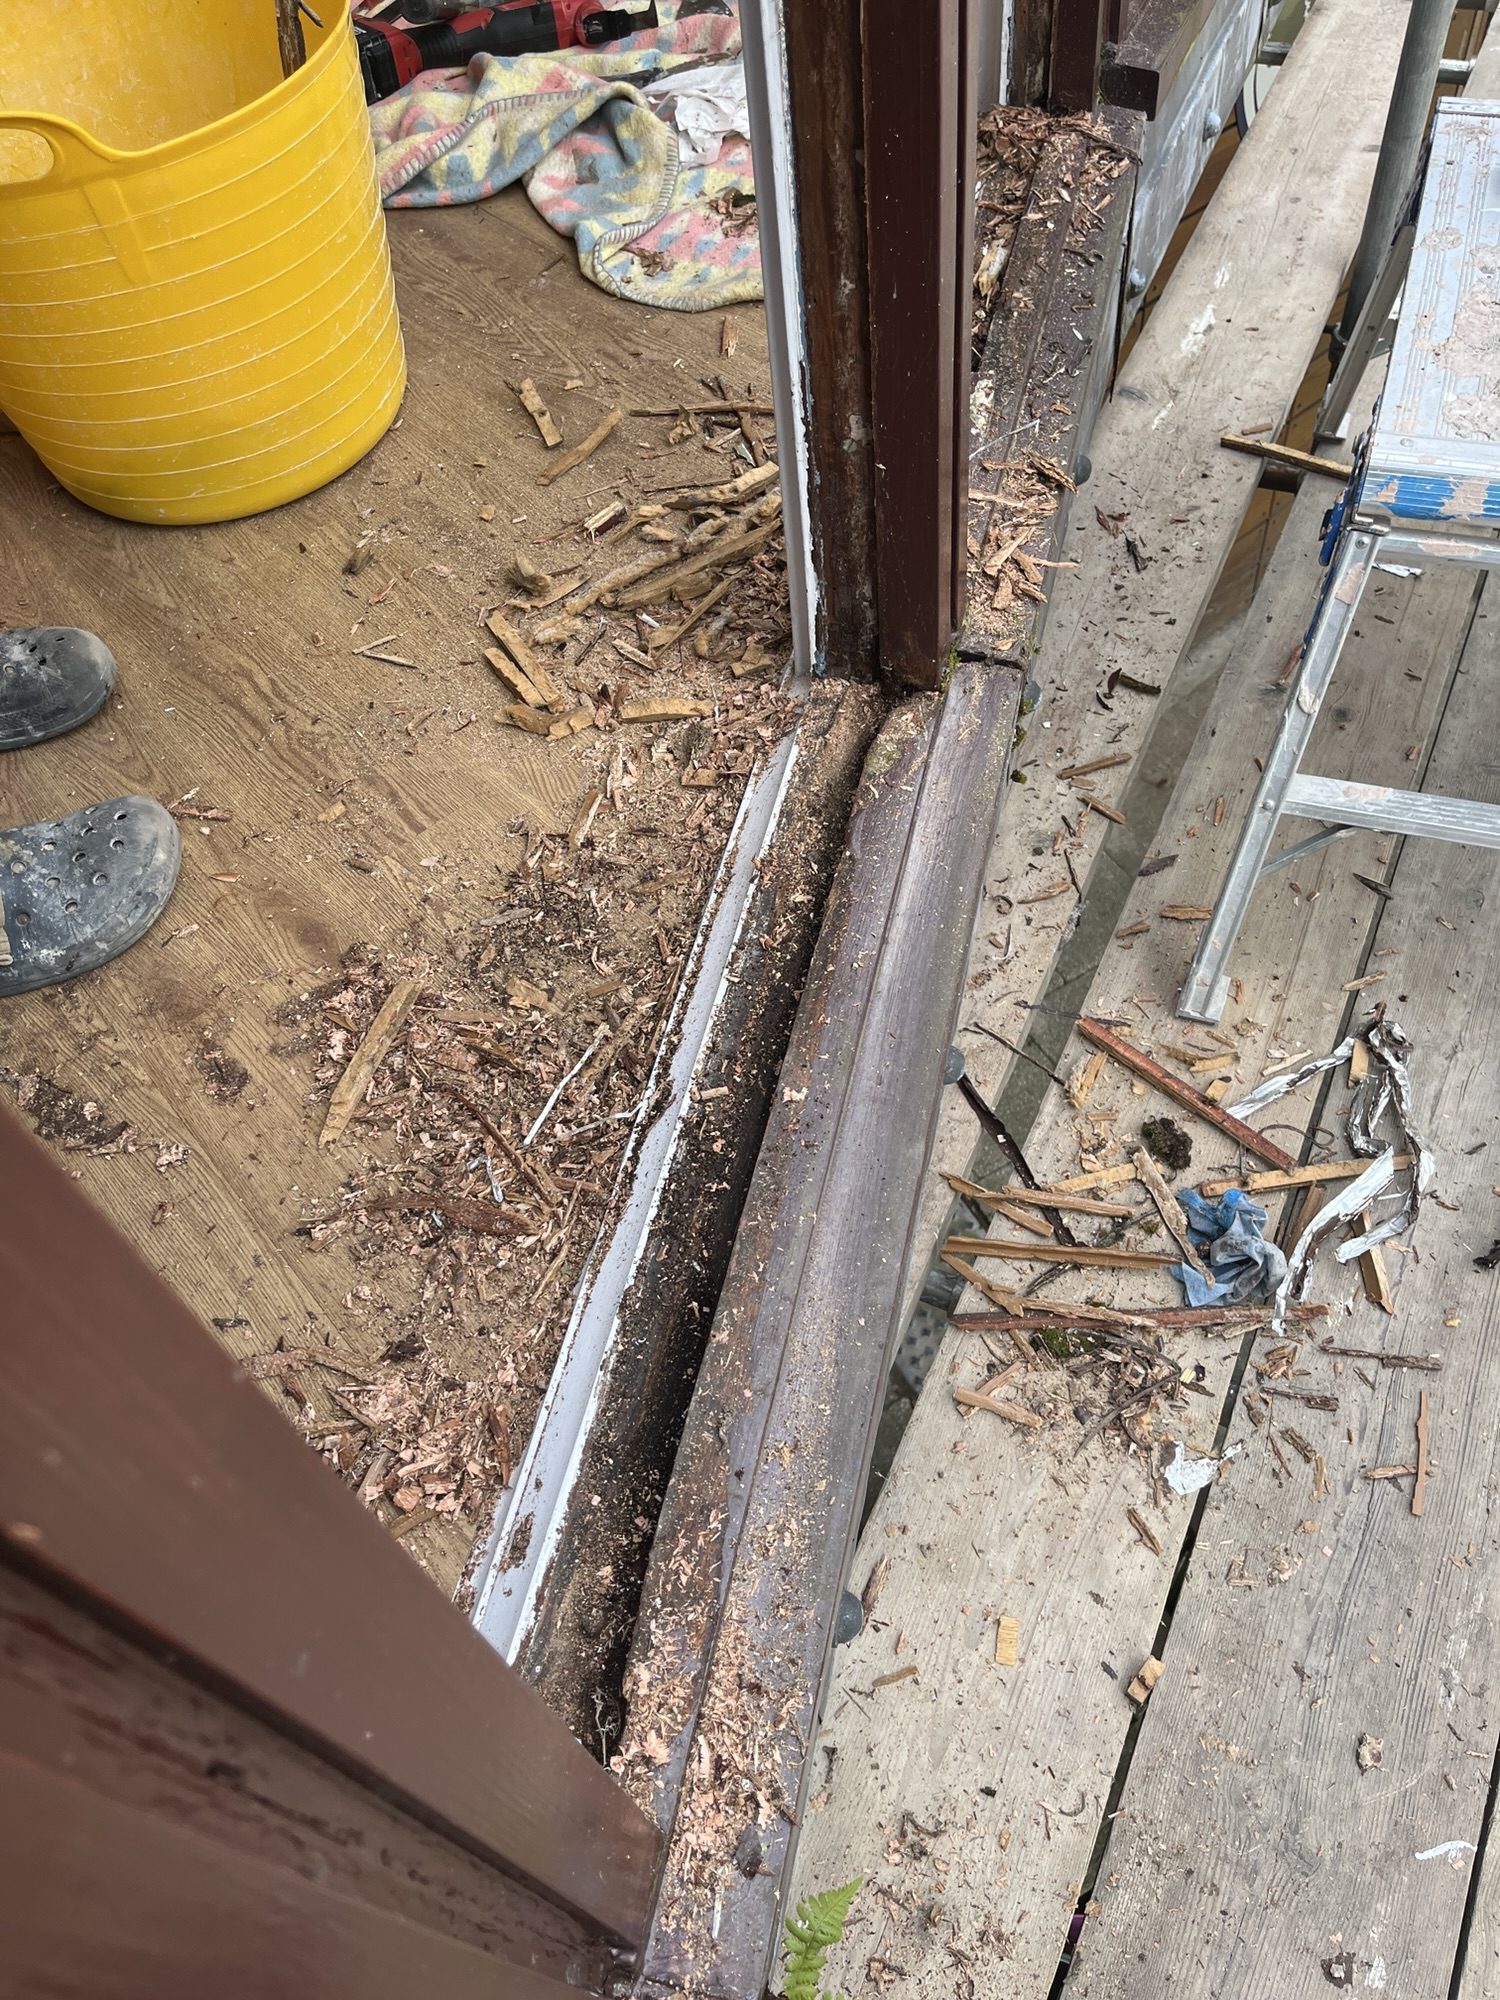
During the removal process, we identified that the window cills were badly rotted. Rather than simply installing new units onto compromised wood, we cleaned out the rot and applied a durable plastic capping. This proactive step will extend the life of the new windows by at least another decade.

Managing the Unexpected

As with many construction projects, we faced a small hiccup: our supplier, Byron Glass short-delivered two units, which we didn’t discover until partway through the job. However, as builders, part of the job is managing the unexpected. Byron Glass turned the new units round within 48 hours including the toughening and laminating process. We adjusted our schedule to keep the project moving and will complete the replacement to our usual high standards.

Project Breakdown

  • Duration: 4 days (from start to finish).
  • Scaffold Costs: £500
  • Glass Costs: £200 per pane
Categories
Brickwork Extension Internal fit out

Opening up kitchen with steel (RSJ) beams in Selston, Nottinghamshire

Open Plan Living: How We Safely Removed a Wall to Expand a Kitchen

Changing the layout of a property to create an open-plan kitchen is one of the most common requests we receive. It’s a fantastic way to transform how a home feels, but it requires careful structural planning.

img_6819
previous arrow
next arrow

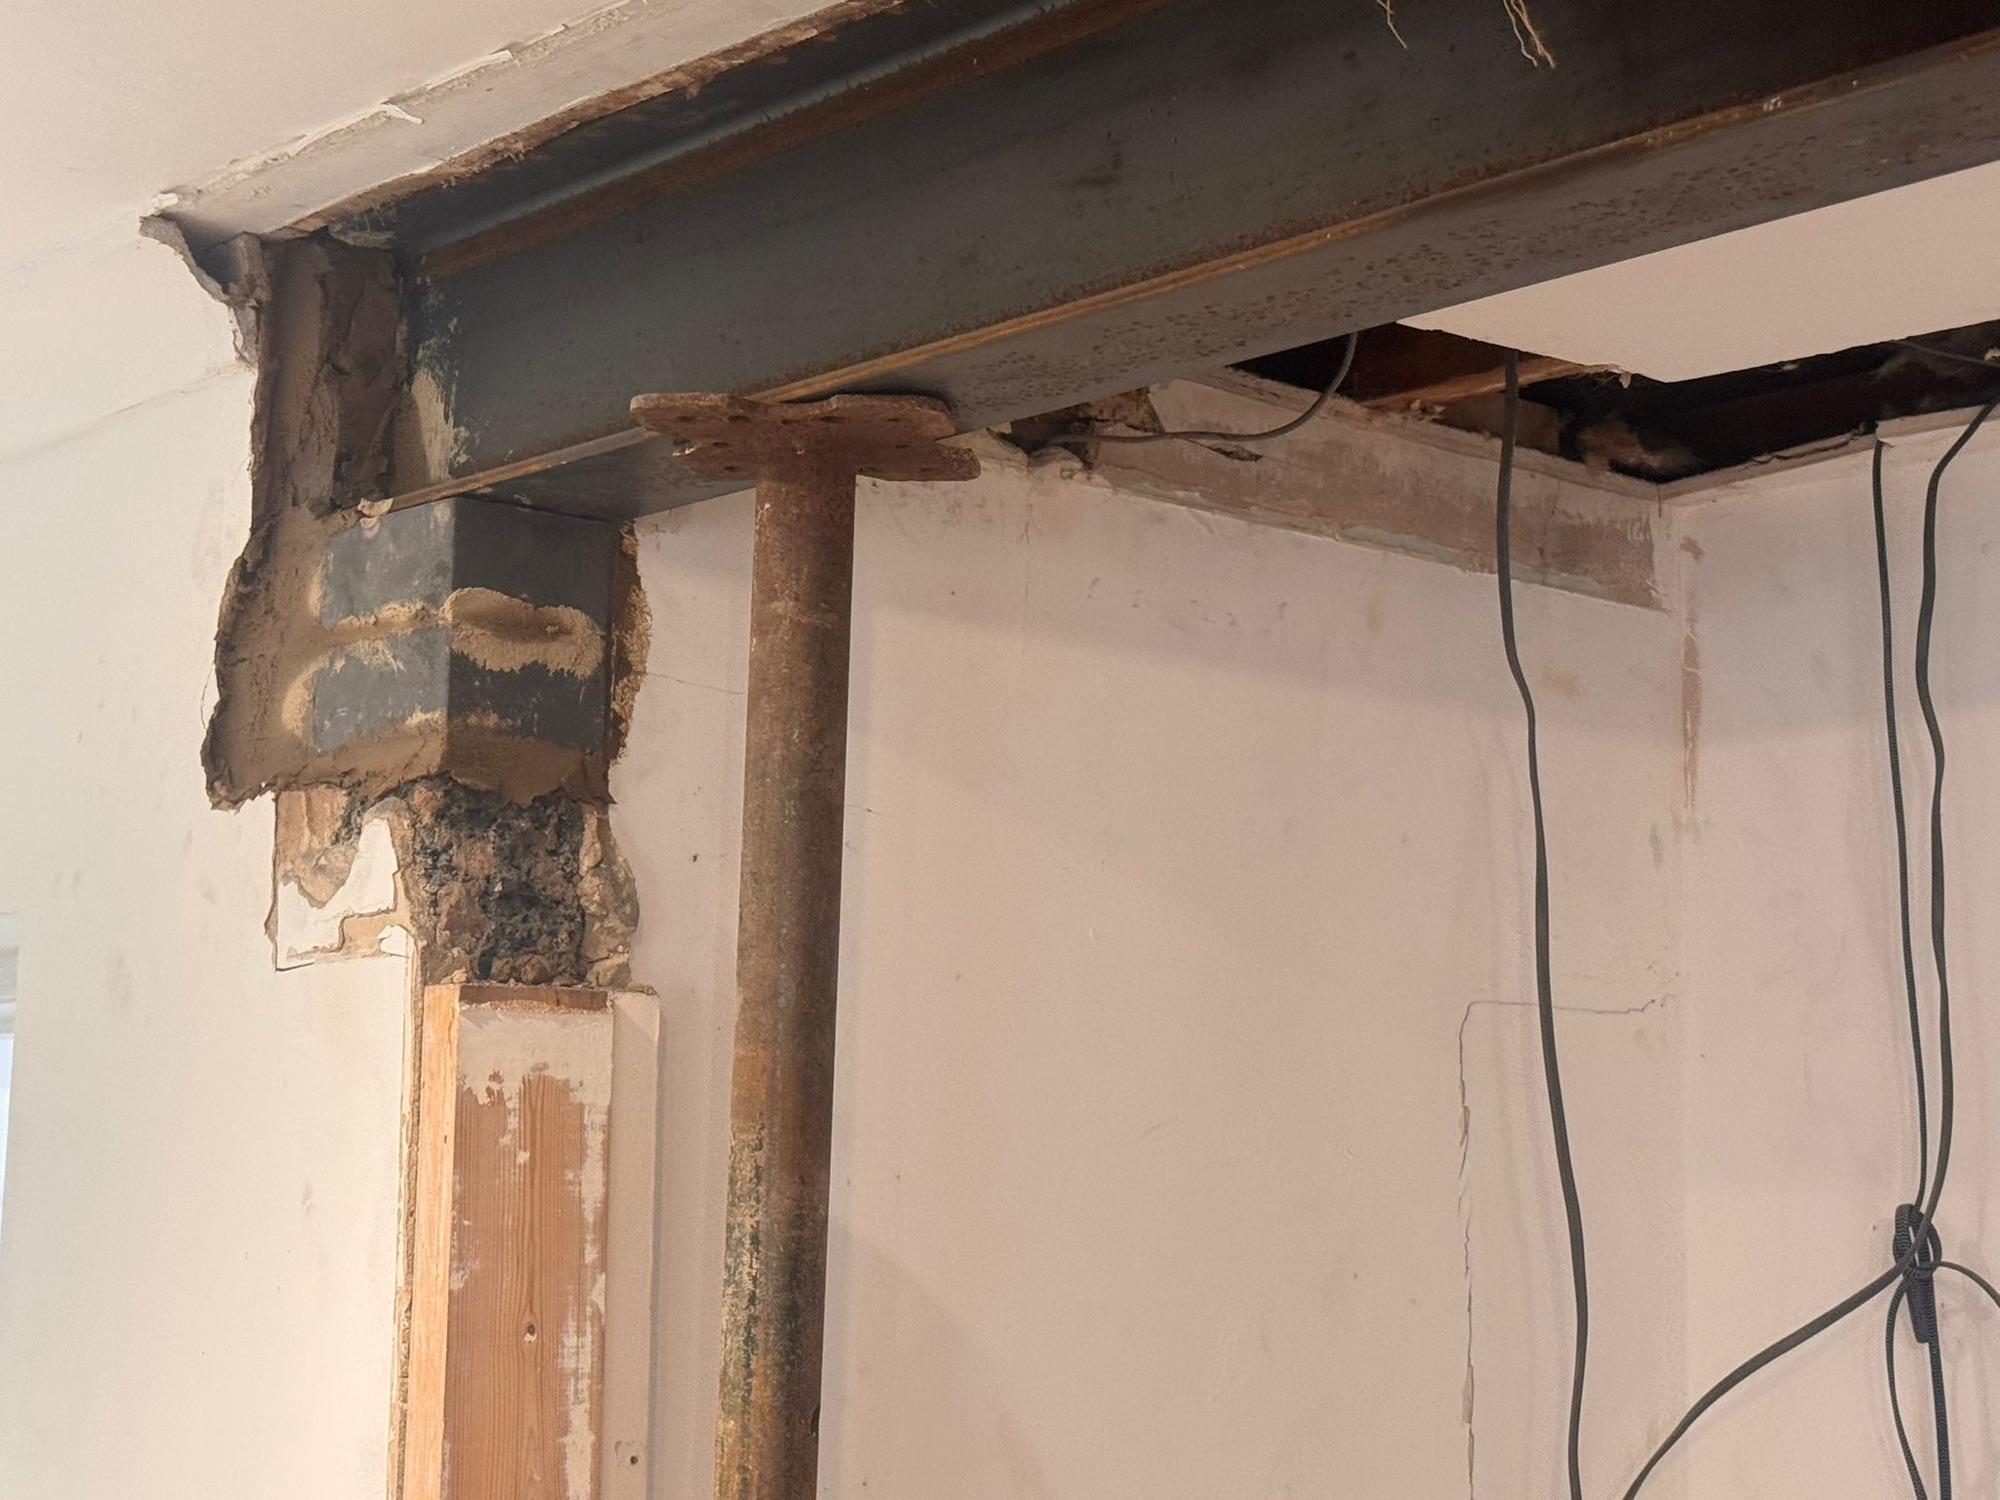
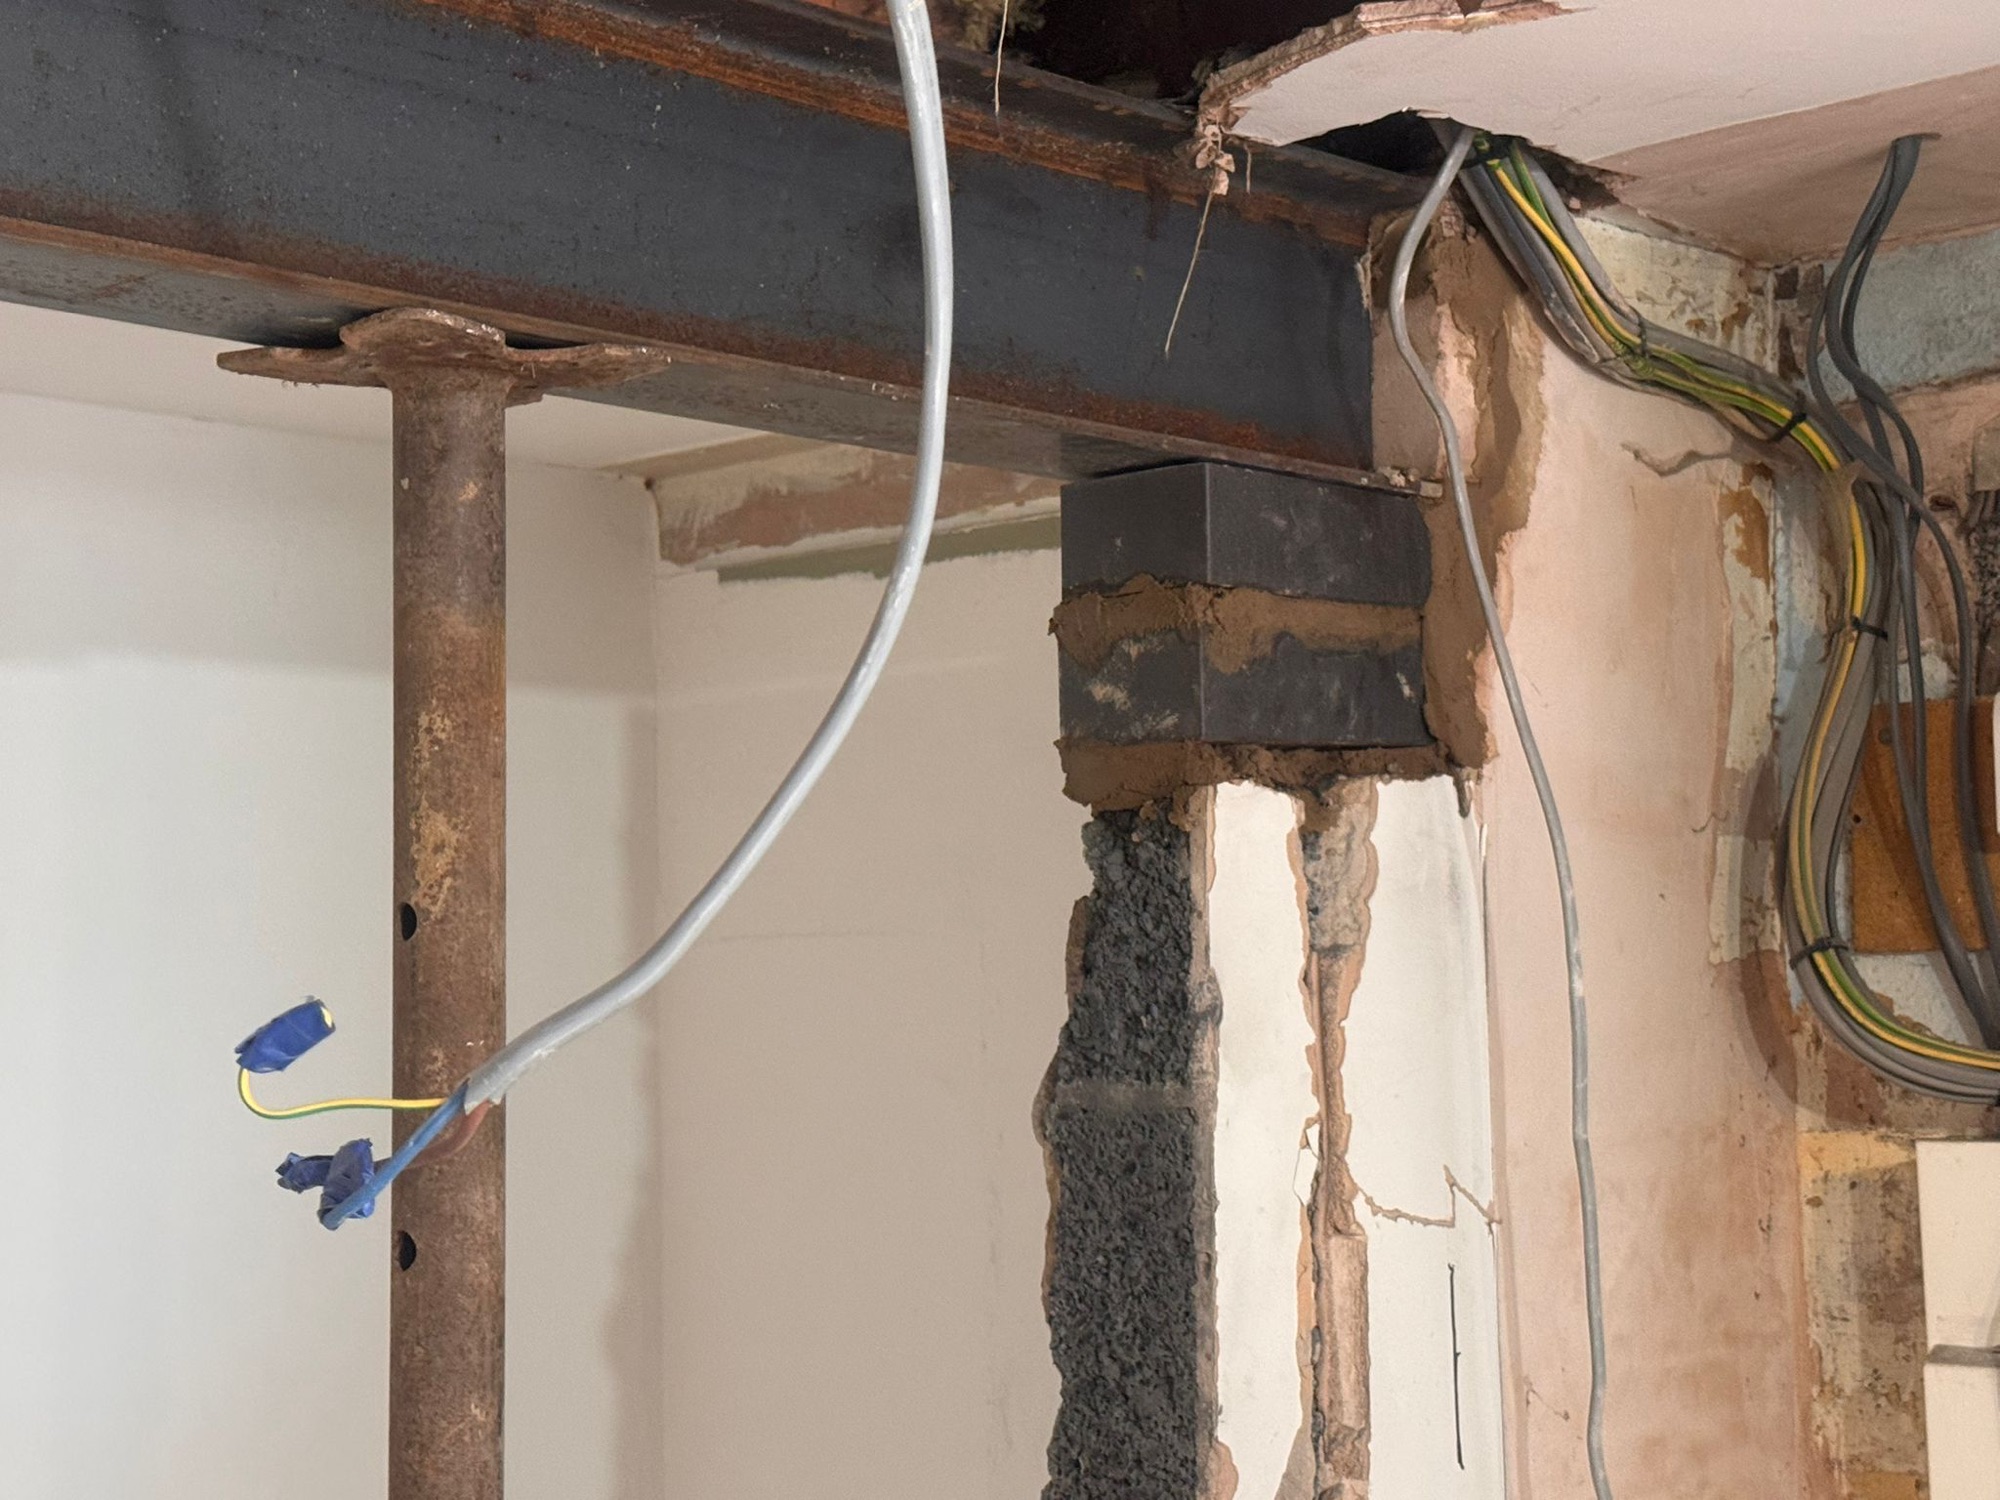
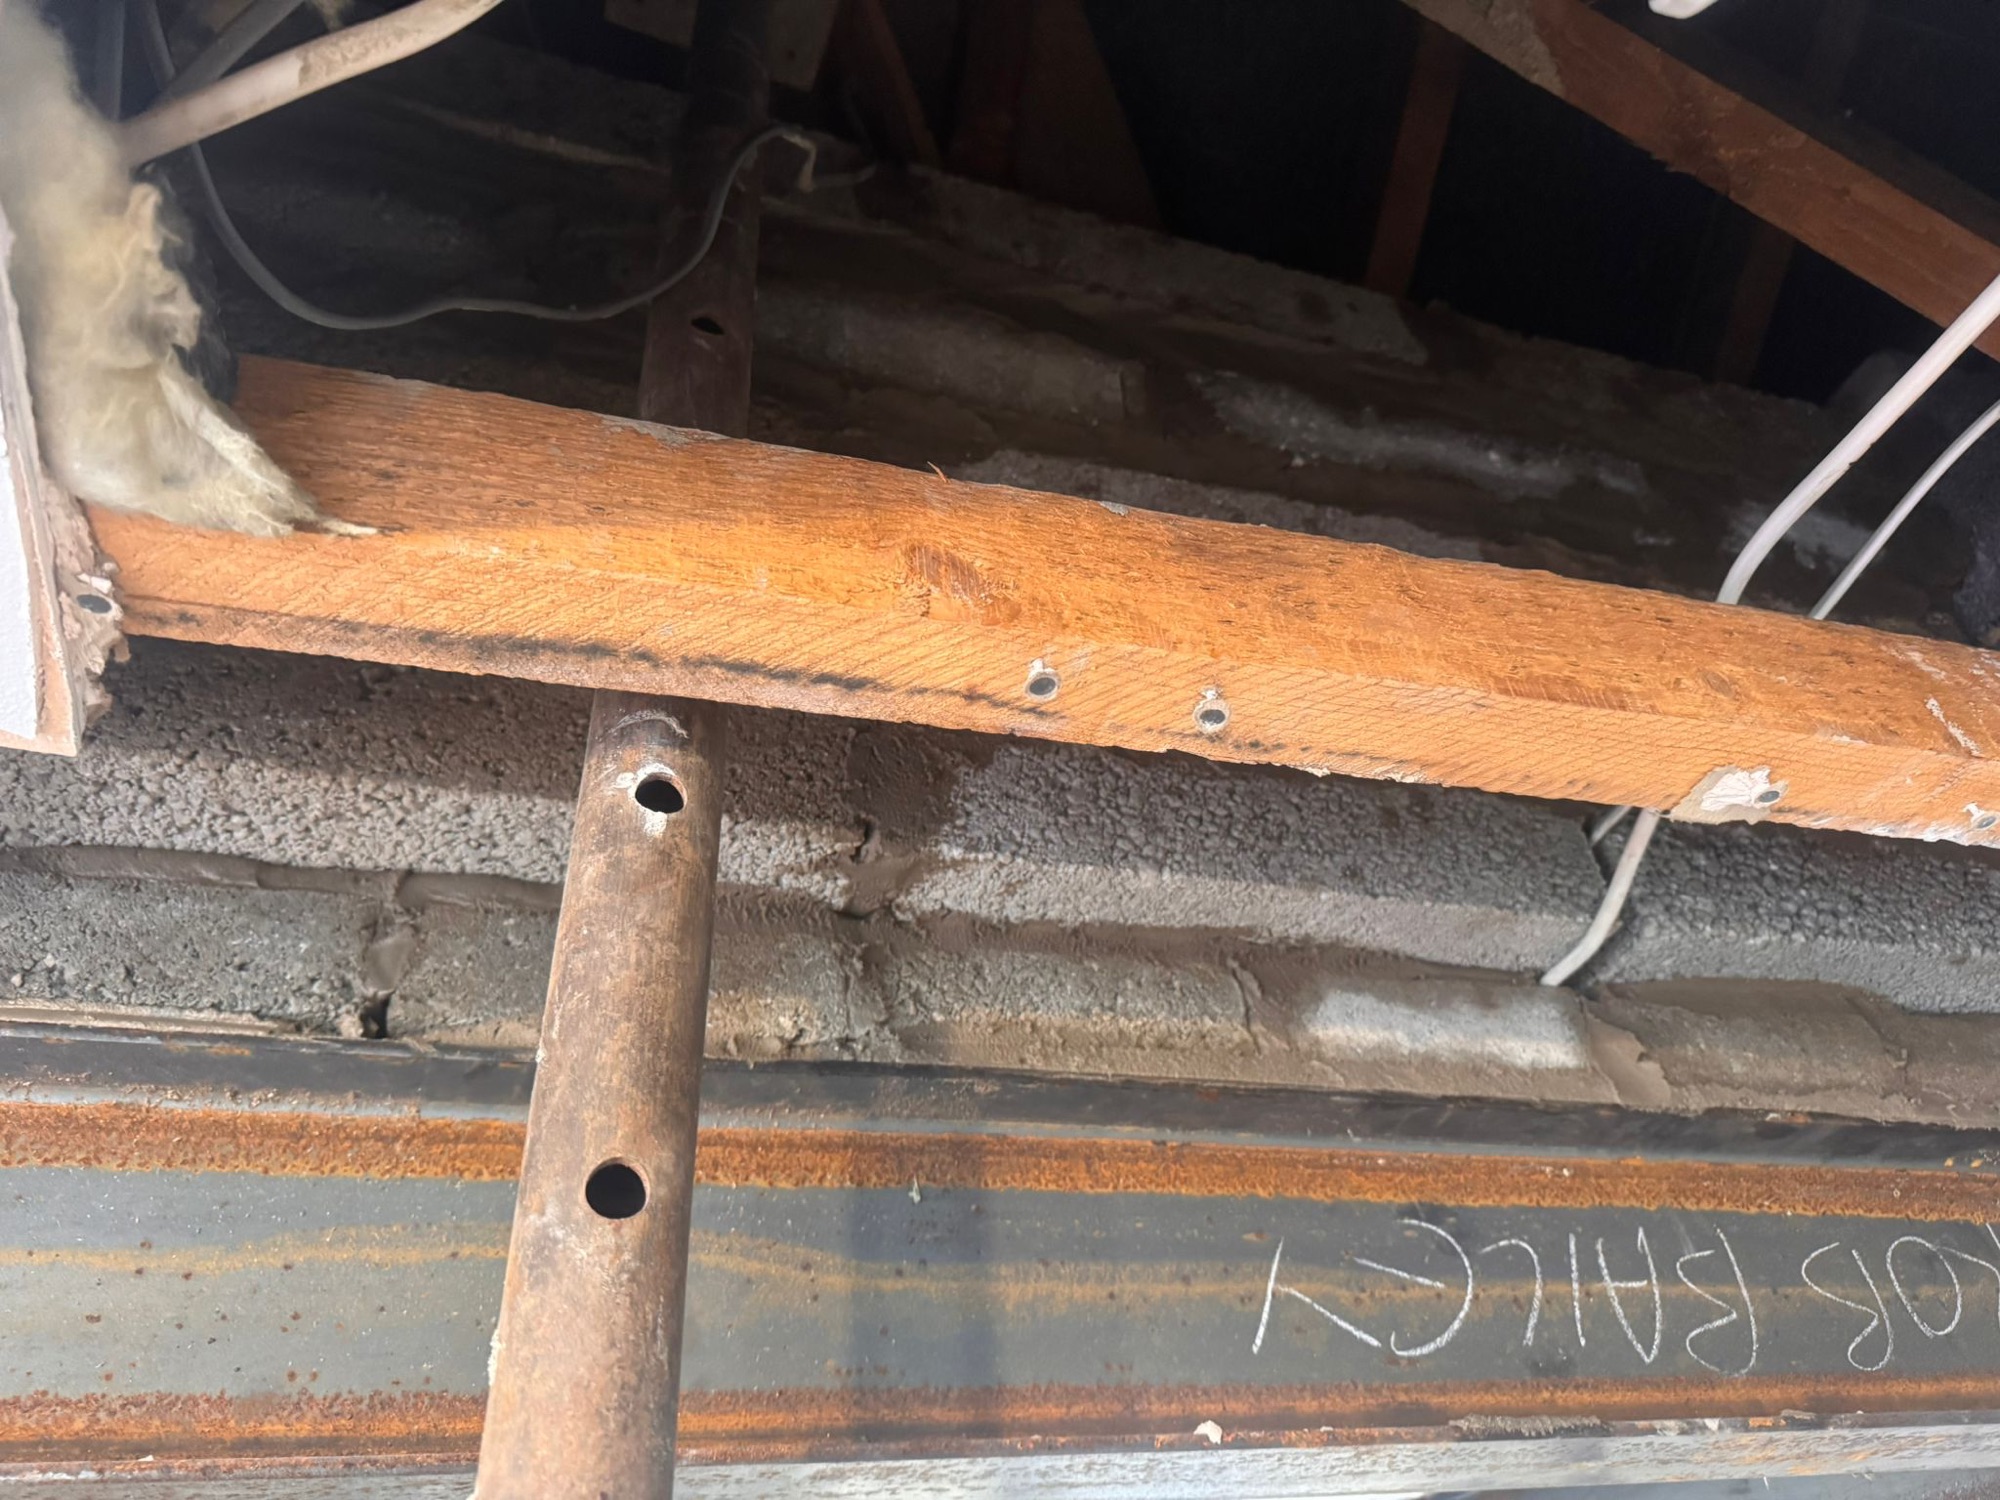
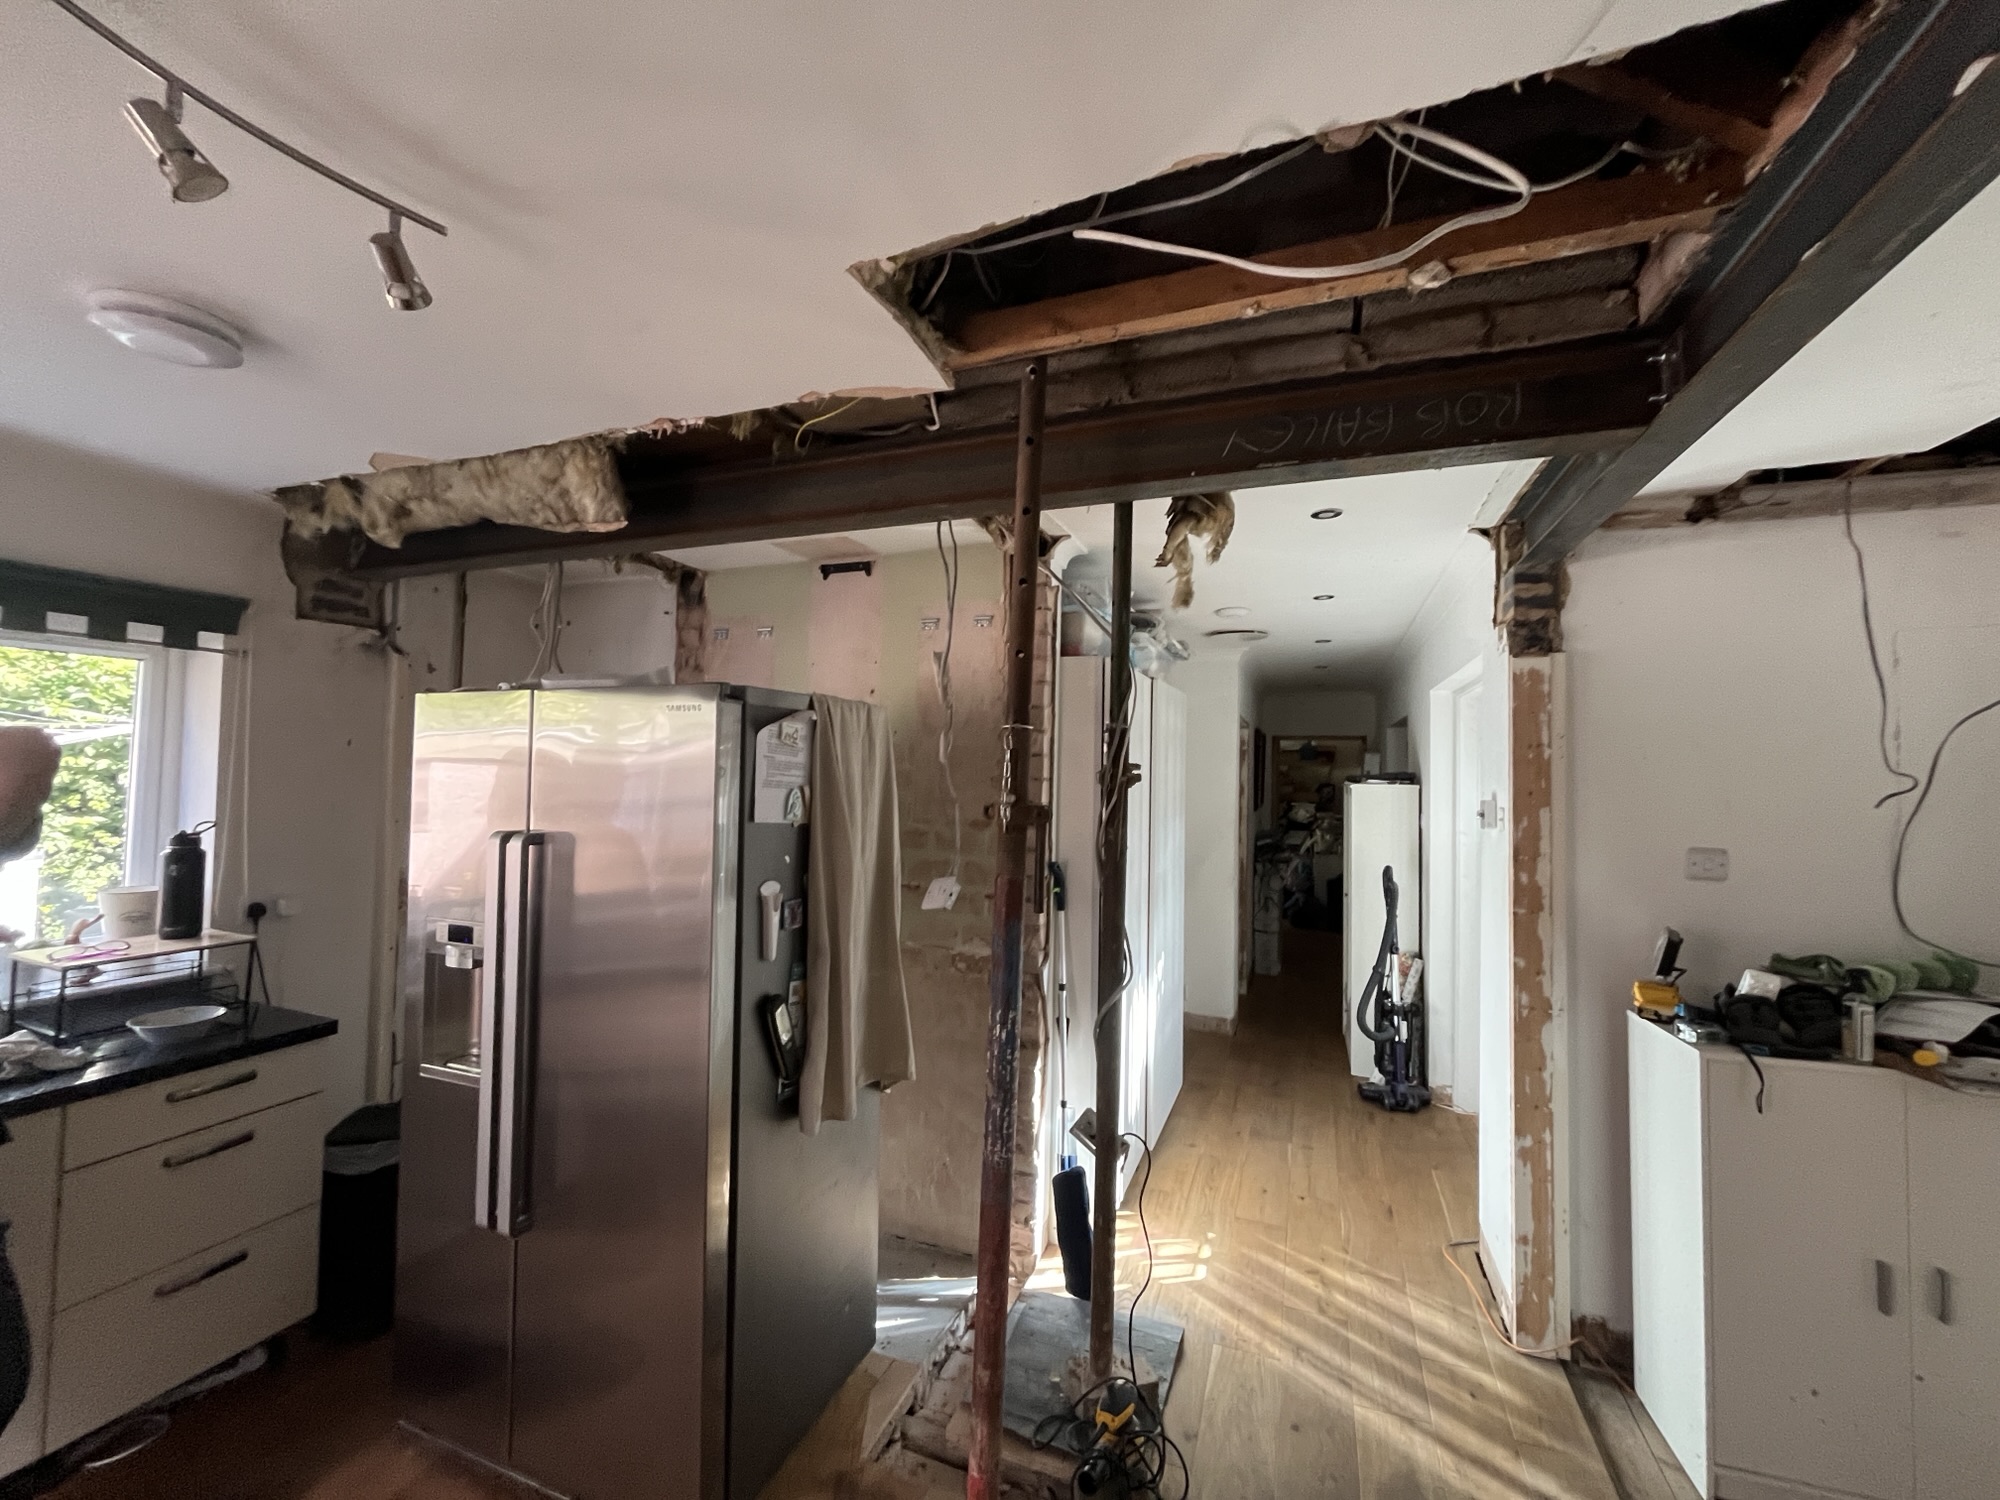
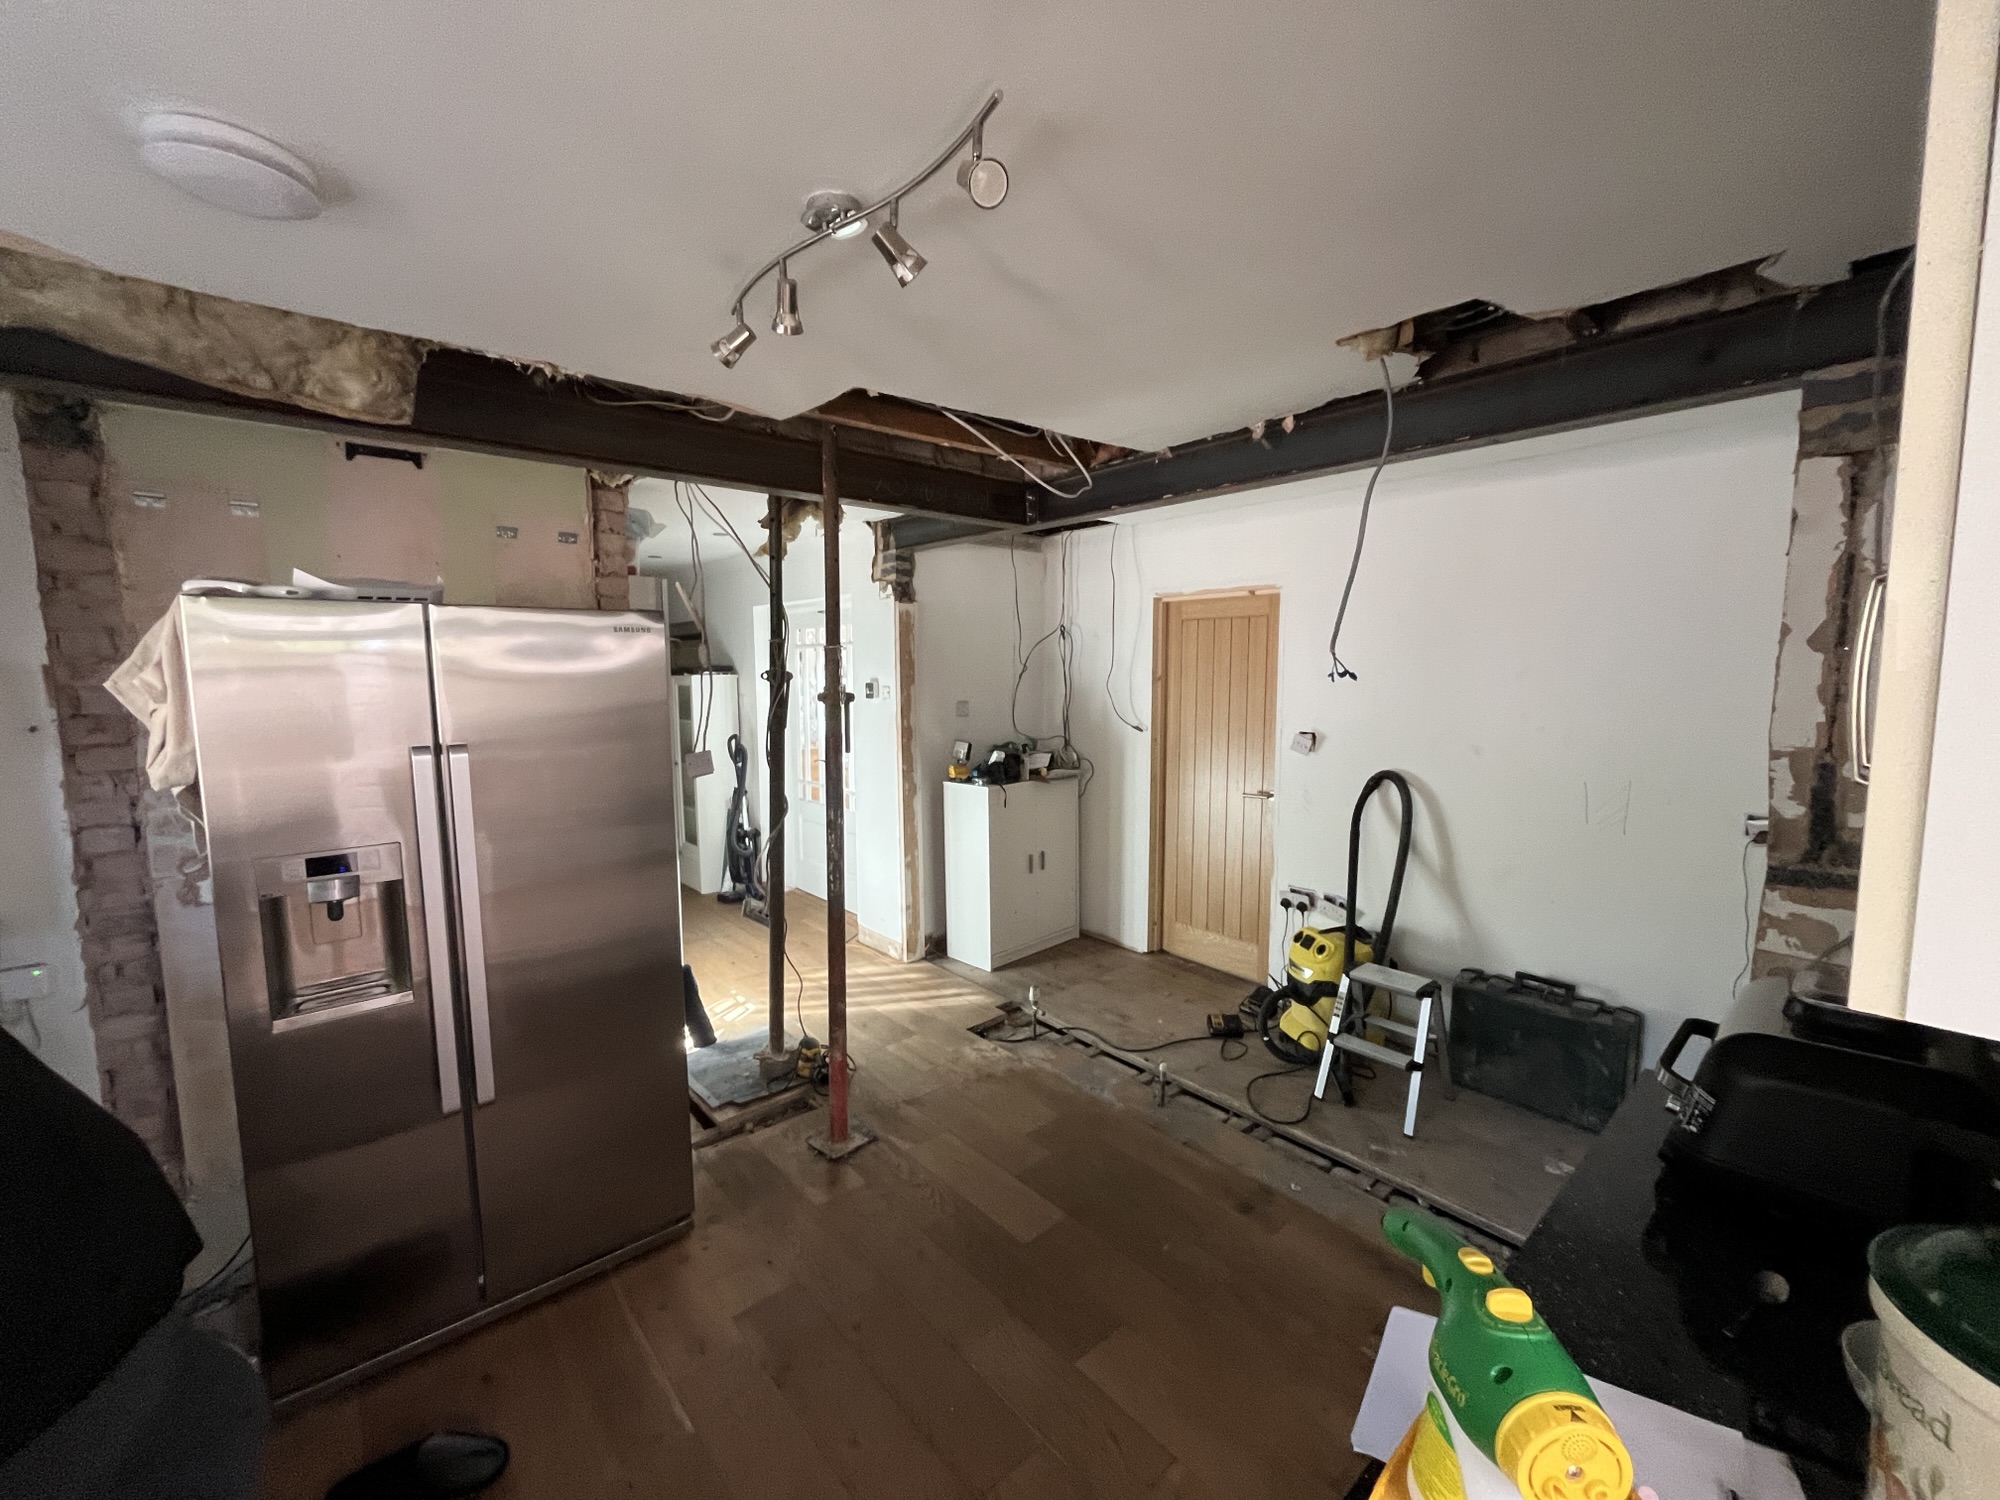
We recently worked on a bungalow where the client wanted to open up their kitchen space. This project had an extra layer of complexity: the property had been extended in the past, and the roof purlins were sitting directly on the internal walls that needed to be removed.

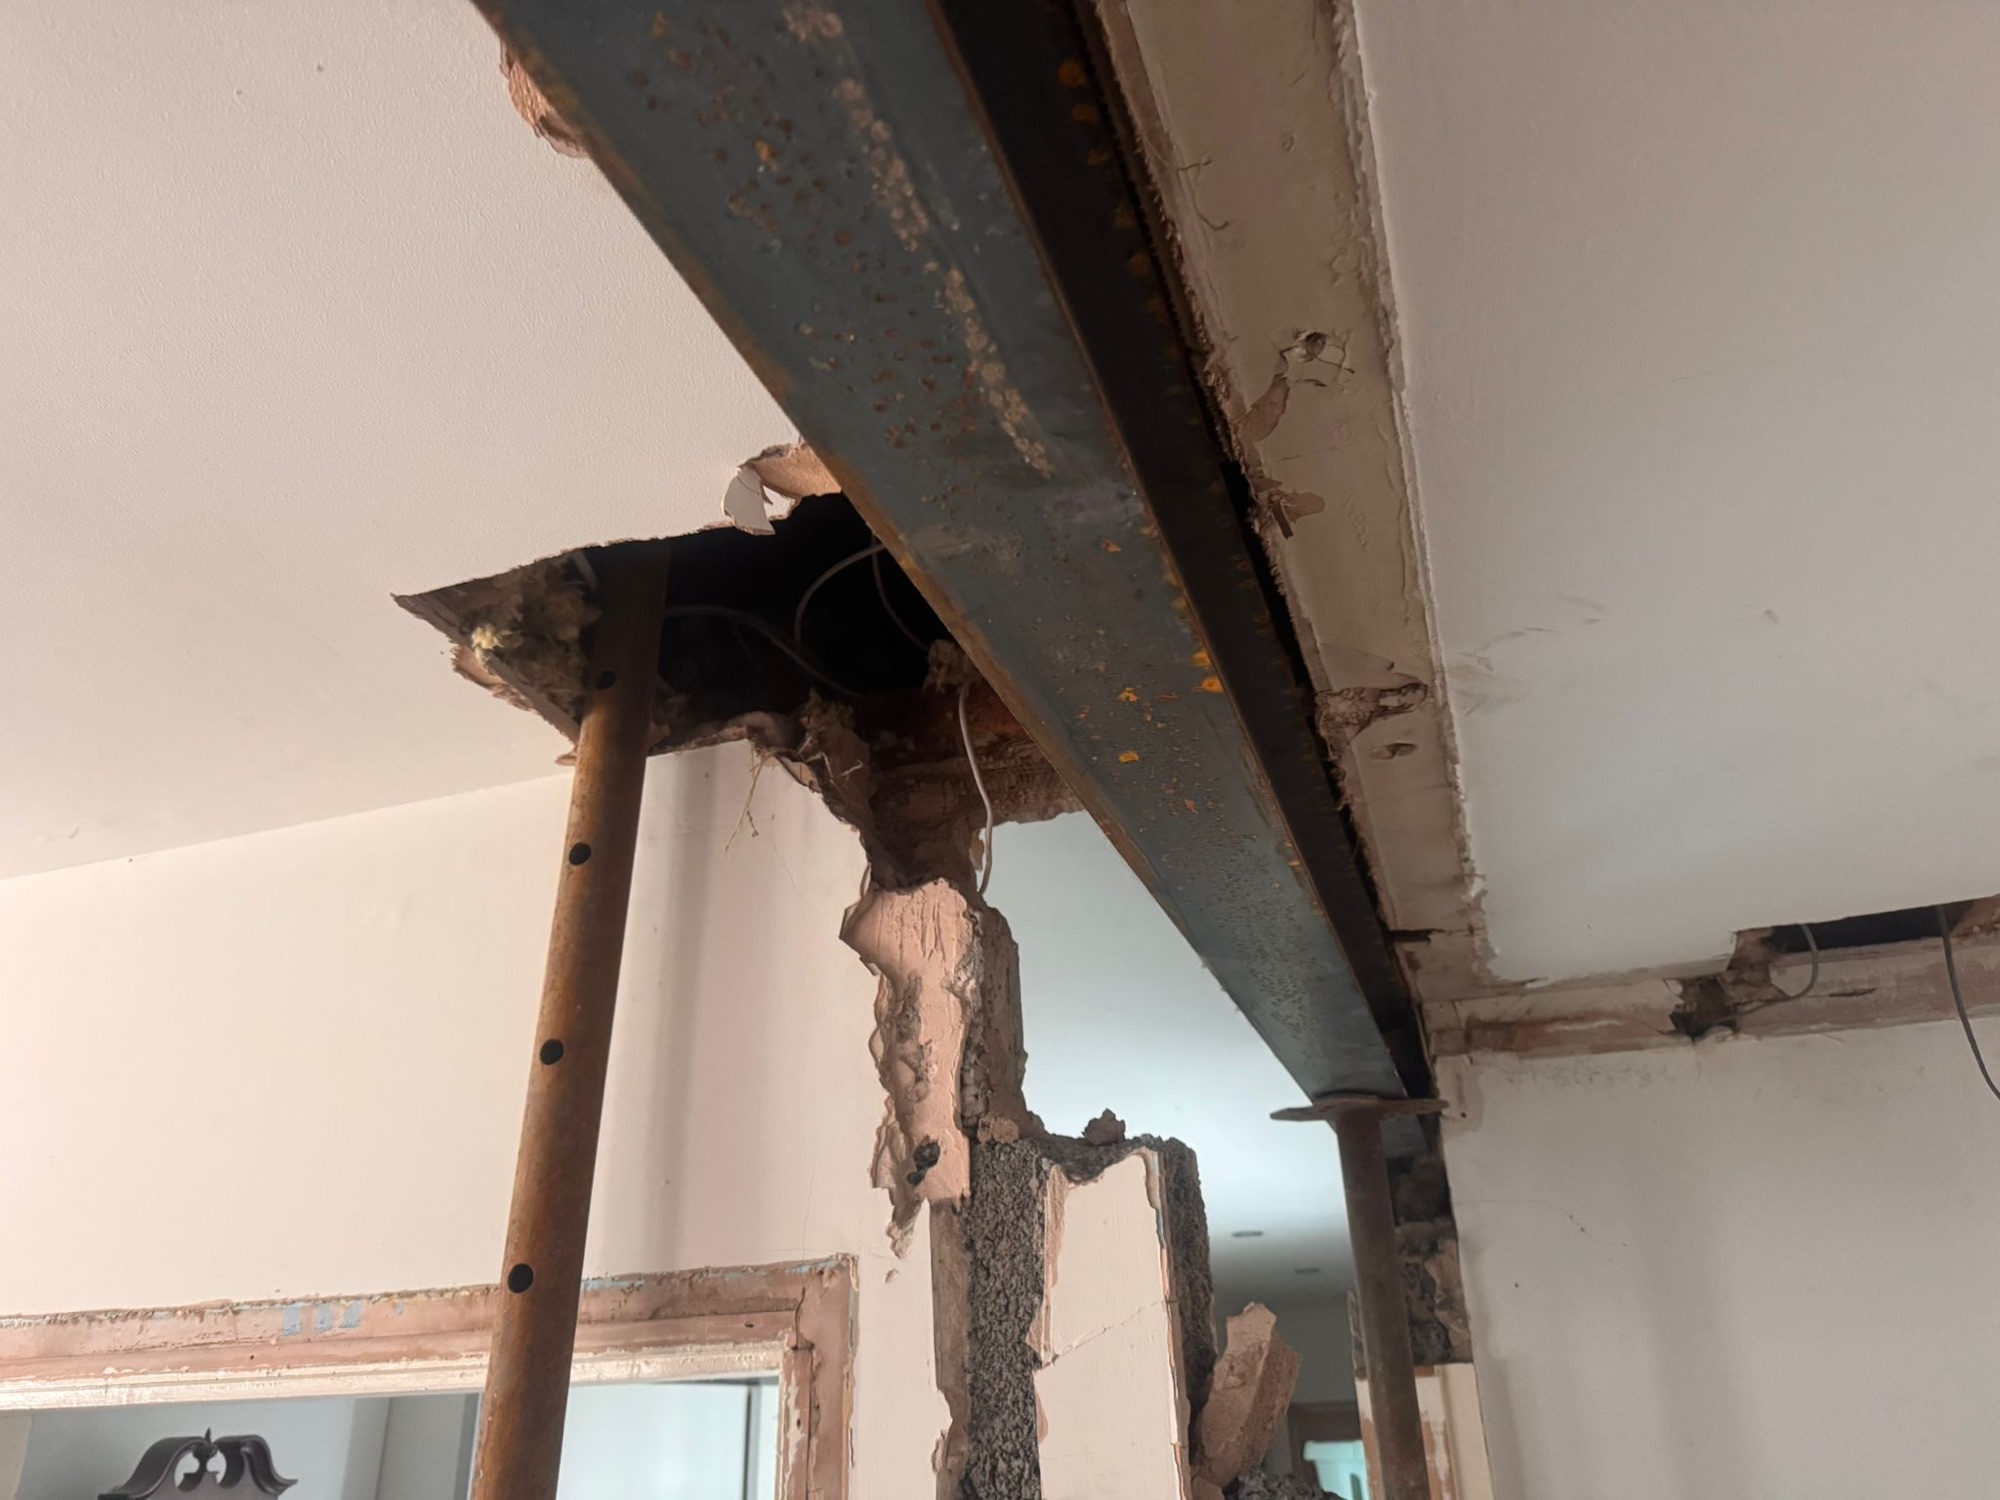
We never cut corners on safety. We started by engaging an Archetectural technician to provide cost-effective drawings, and we had a structural engineer specify two steel RSJ beams to take the load safely. 

The installation required a precise, multi-step approach:

  1. Preparation: Once the steel beams arrived, we propped up the roof using Acro props in multiple locations to ensure stability.
  2. Structural Installation: We removed the top section of brickwork and installed the two lintels (3.6m and 3.8m respectively) onto new pad stones, which spread the load evenly.
  3. Removal: Only once the structure was fully supported by the new steelwork did we remove the old block walls and clear the waste.

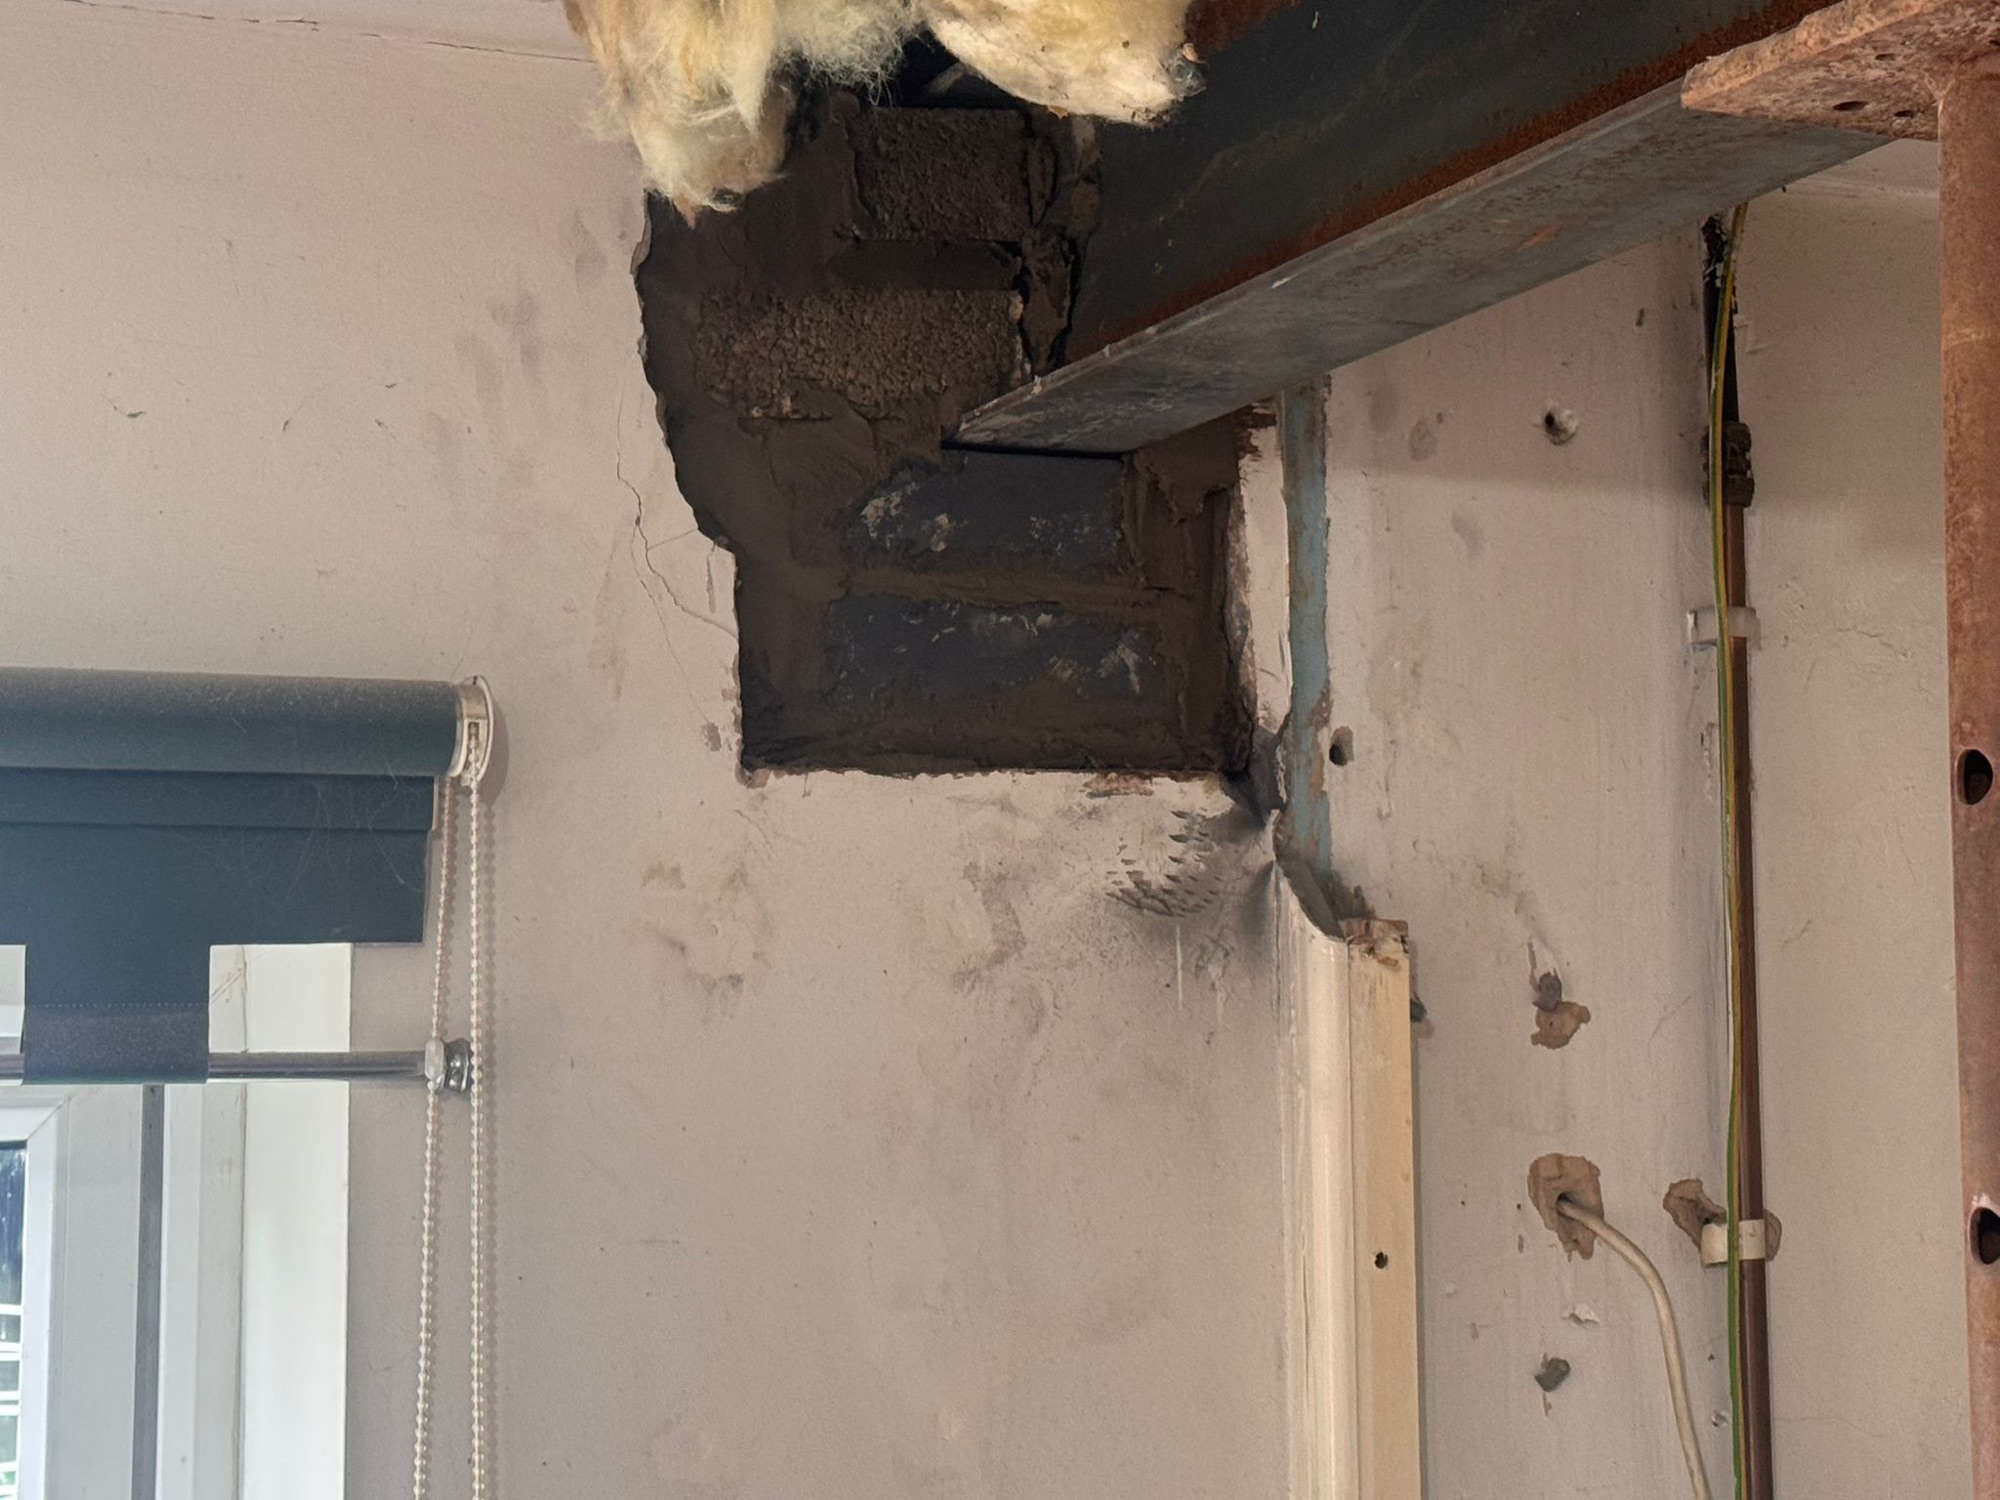
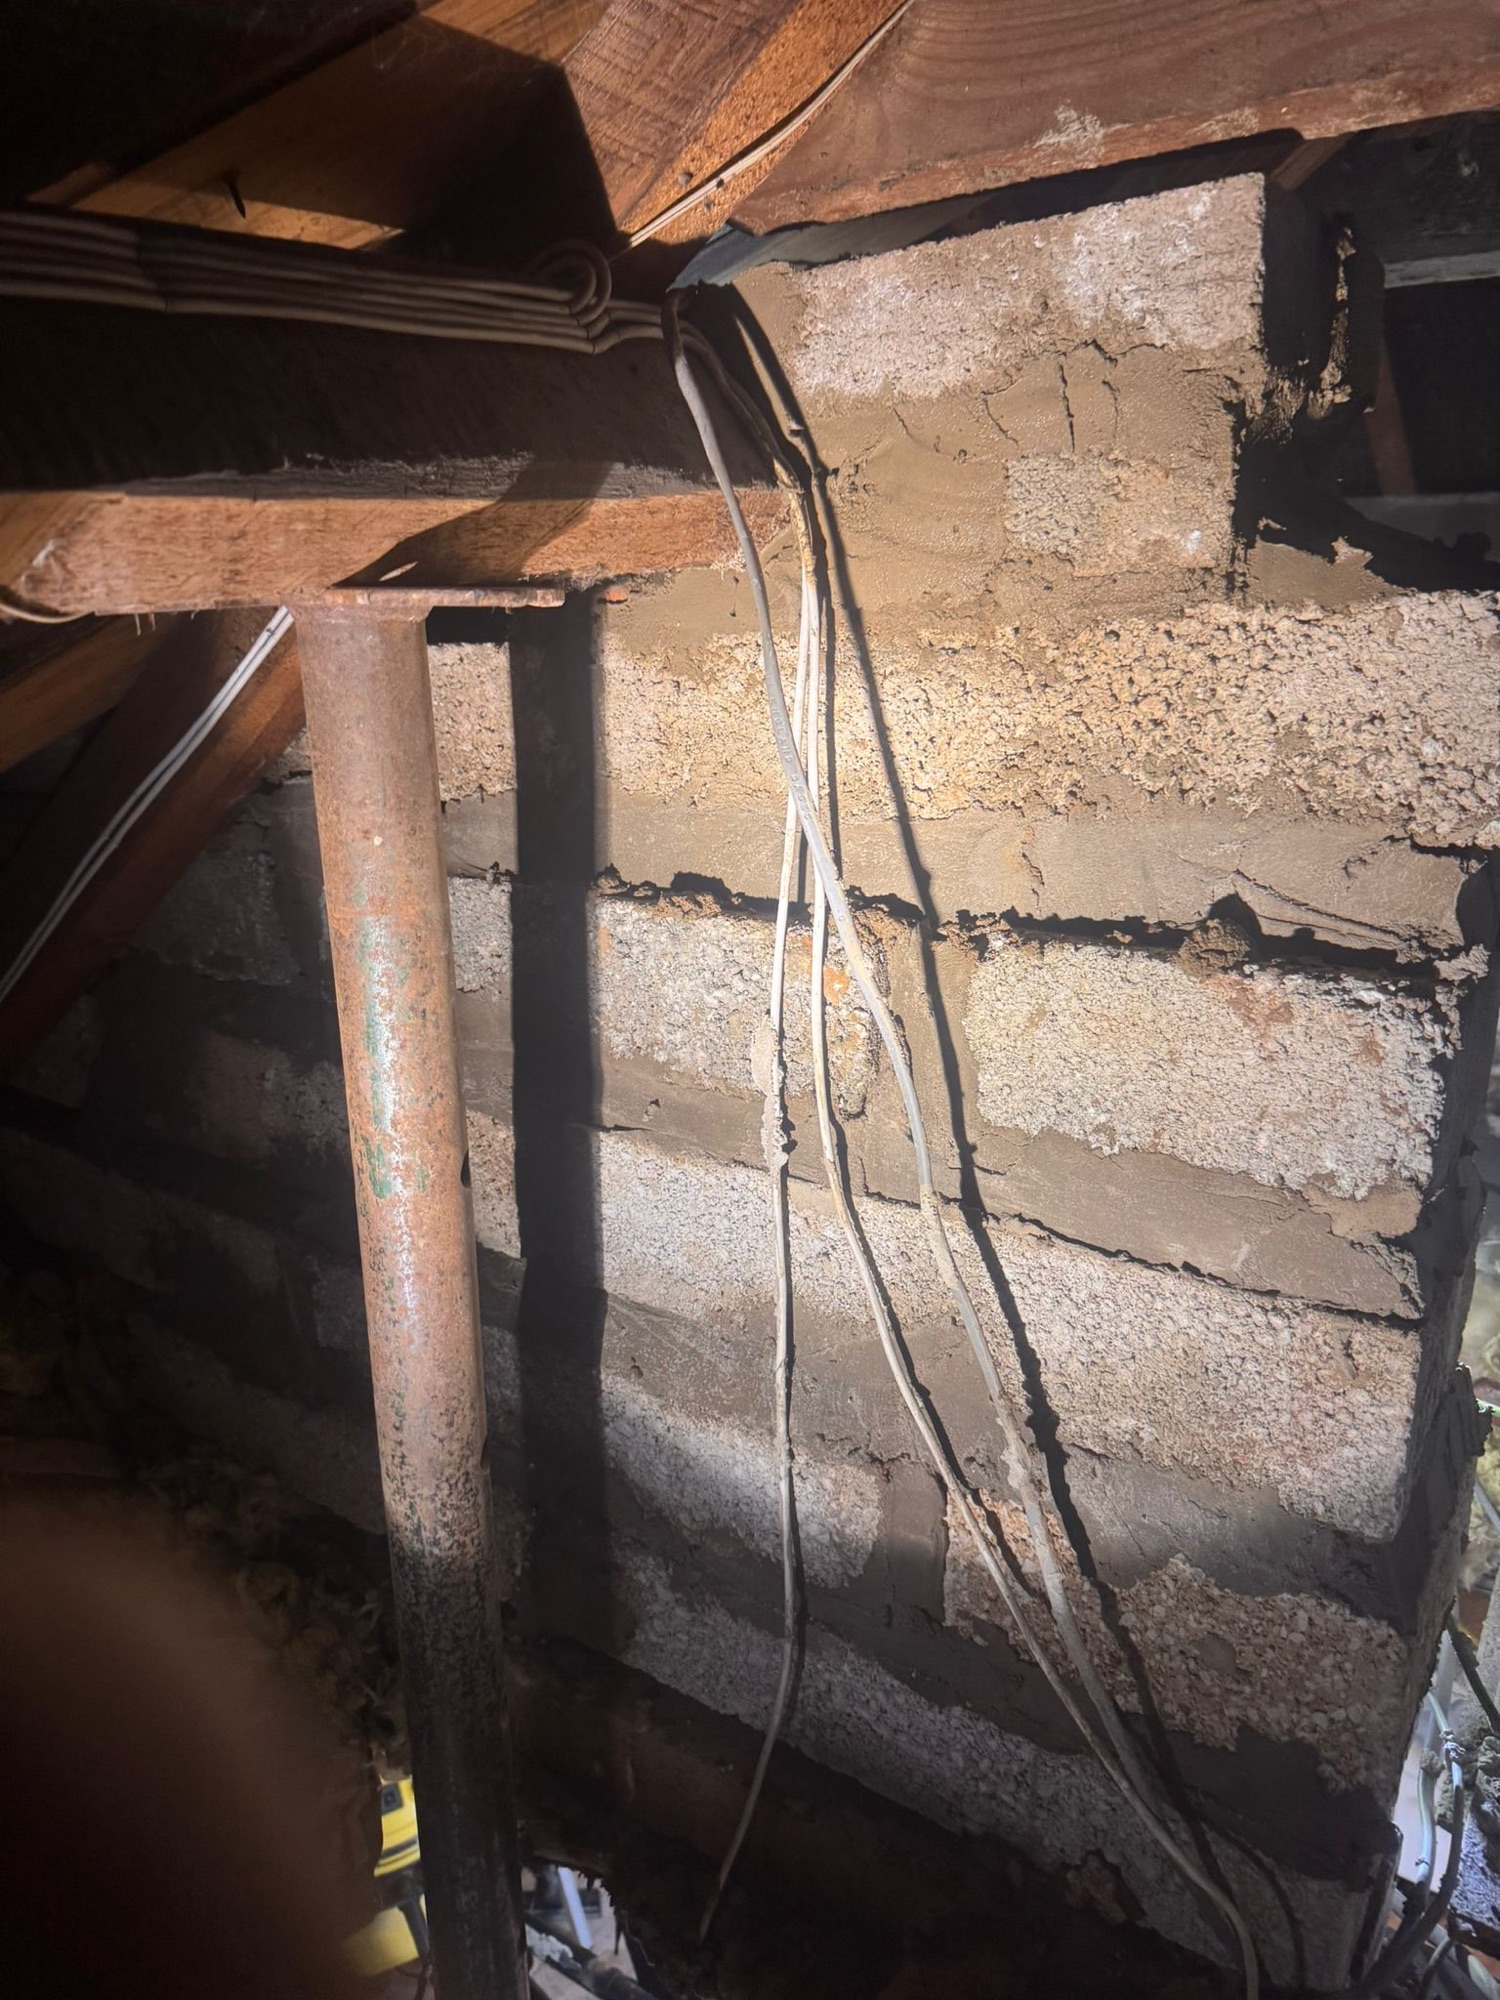
A Note on Quality: During the removal process, we discovered that the blocks supporting the existing roof purlins were already crumbling. It was a good thing we undertook this project when we did; had those supports failed, the structural consequences would have been severe. 

We always break down the costs of our jobs. This gives our clients the option to handle specific finishing tasks themselves—like “making good” the plaster and joinery—to save on their overall budget.

Estimated Costs for this Project:

  • Steel Beams: £500
  • Architectural Plans: £400
  • Structural Engineer Design: £250
  • Labour (Removal & Installation): £2,500 (approx. 4 days work requiring specialist tools/equipment)
  • Waste Disposal: £325
  • Basic Materials: £200 (Pad stones, cement, sand, bricks/blocks)

Optional:

  • “Making Good”: We didn’t perform this for this specific client, but we advise allowing £1,000 for plastering and finishing.

Other Considerations:

Always remember to check for hidden utilities. If radiators or electrical sockets are in the way, you may need specialist trades. In this case, we were able to isolate the electrical socket into the ceiling space ourselves using compliant fittings, which we did at no extra charge to the client.


Need Help with Your Structural Alterations?

Whether you’re looking to create an open-plan living space or need to remove a load-bearing wall, we are here to ensure it’s done safely and professionally.

Call us today on 07737 088243 or email quote@swallowhillhomes.com for a prompt consultation.

Categories
Brickwork Build costs Renovation

Brickwork remediation in East Leake, Leicestershire

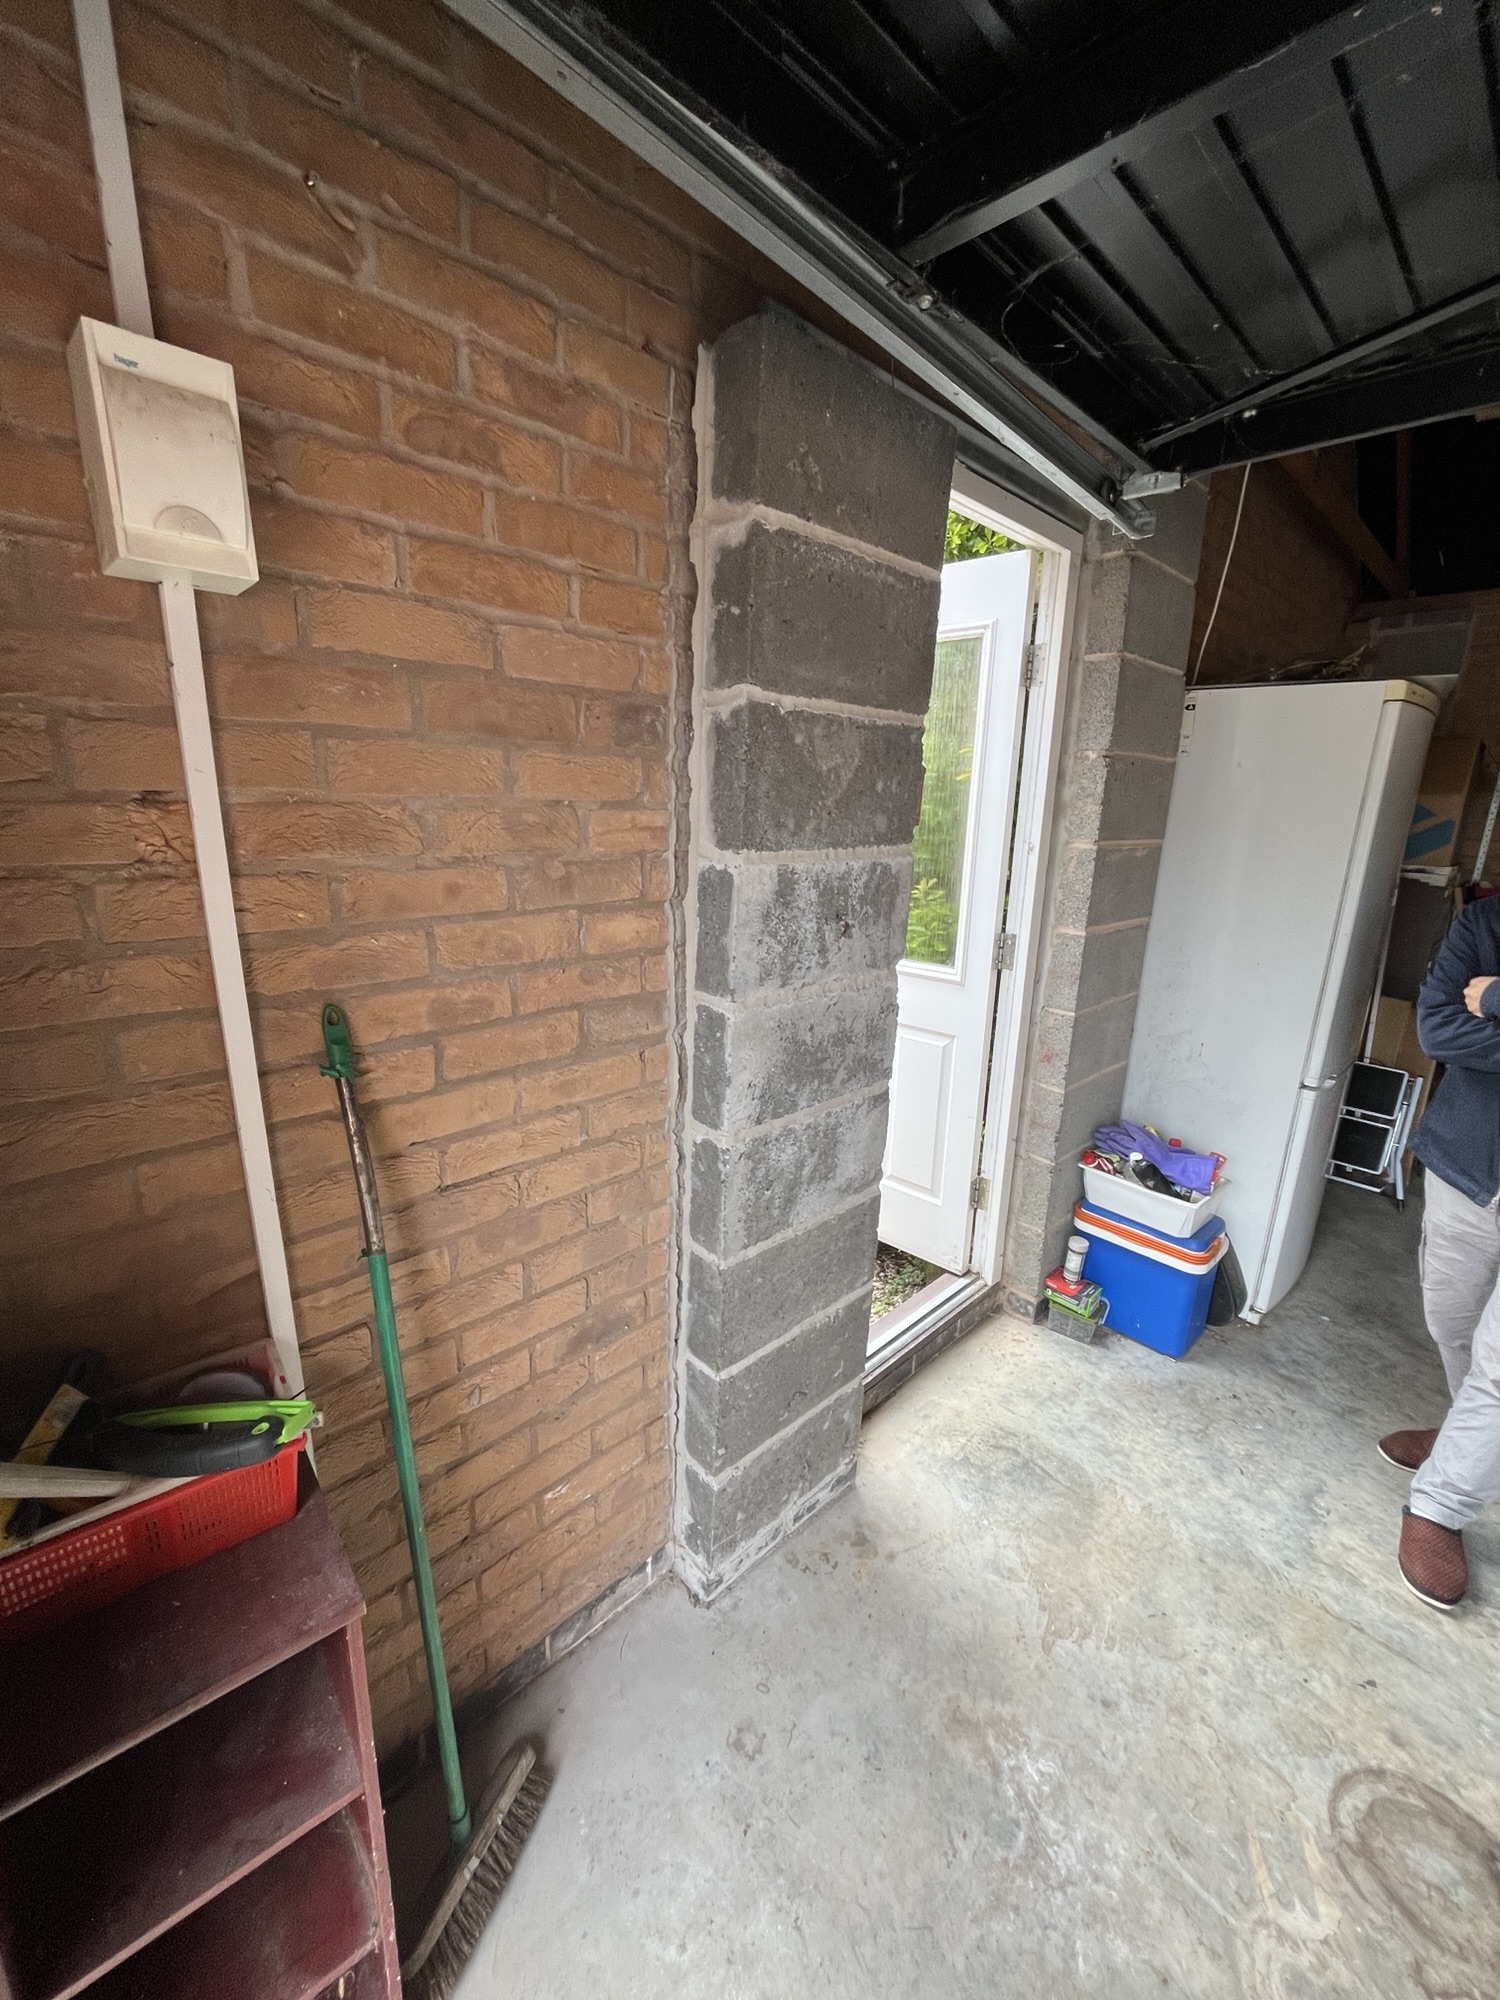
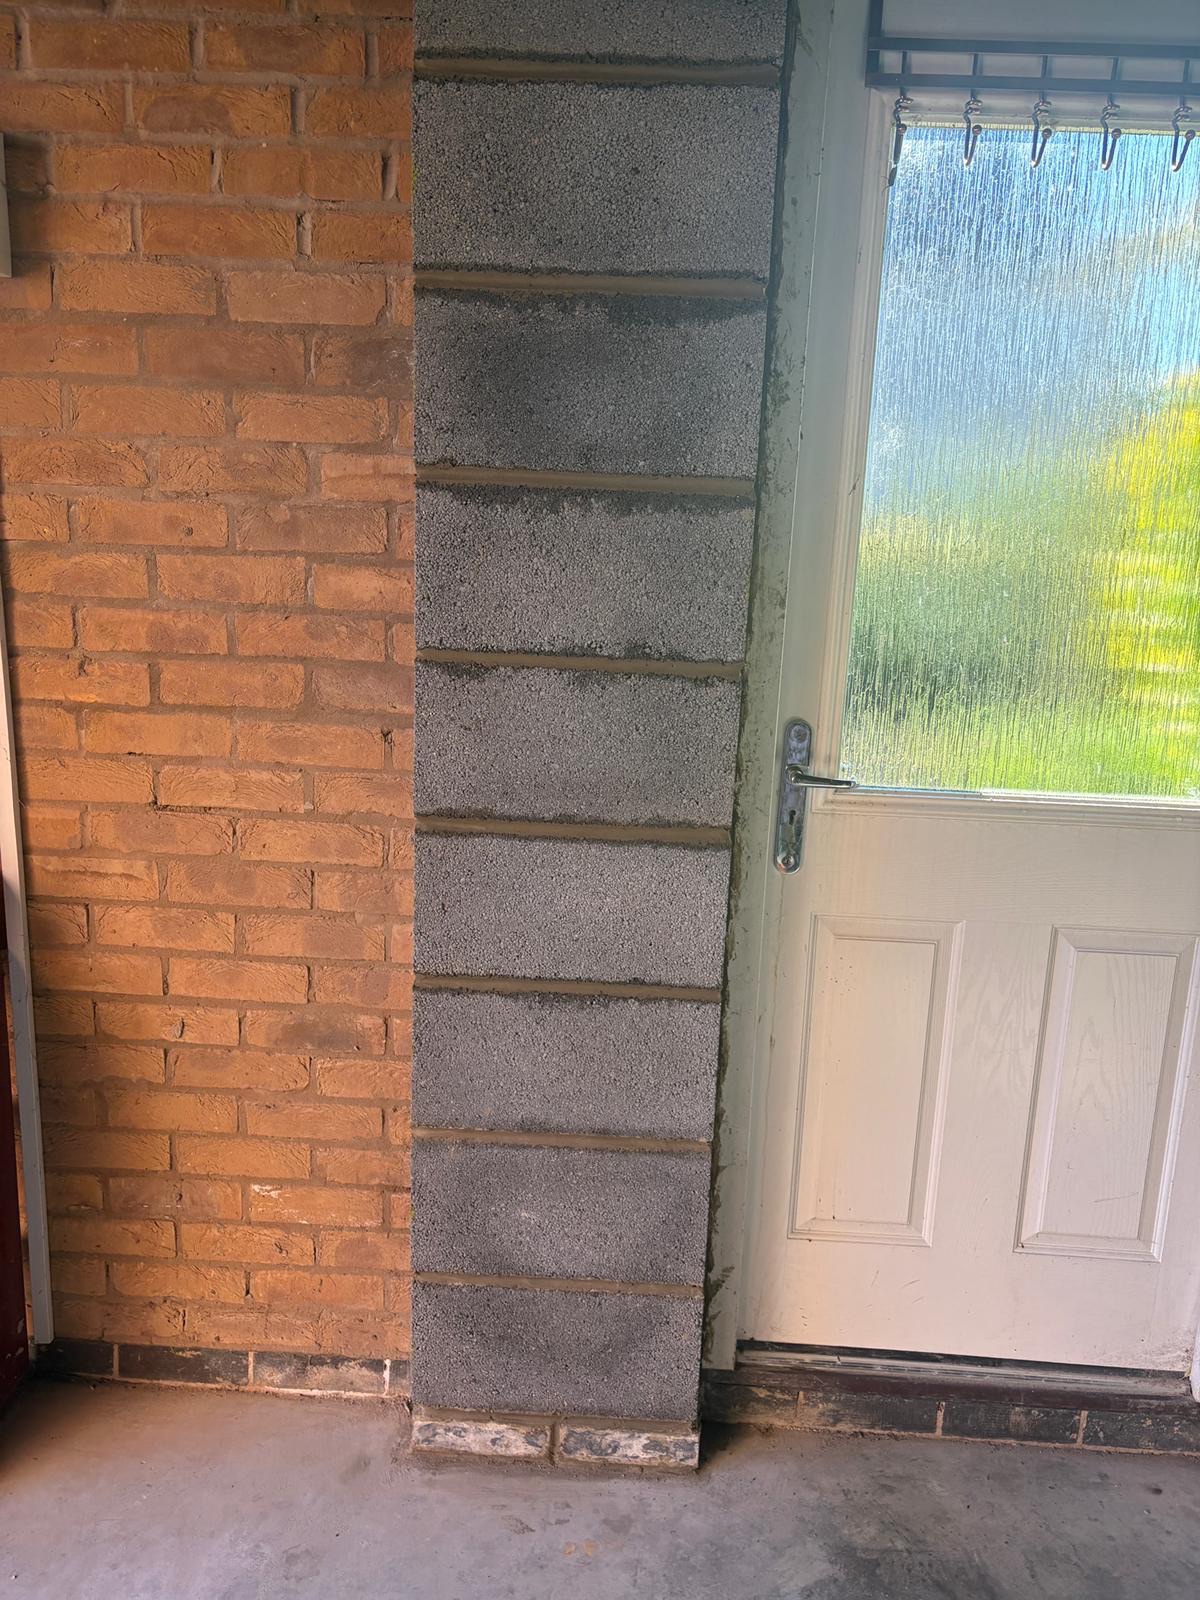
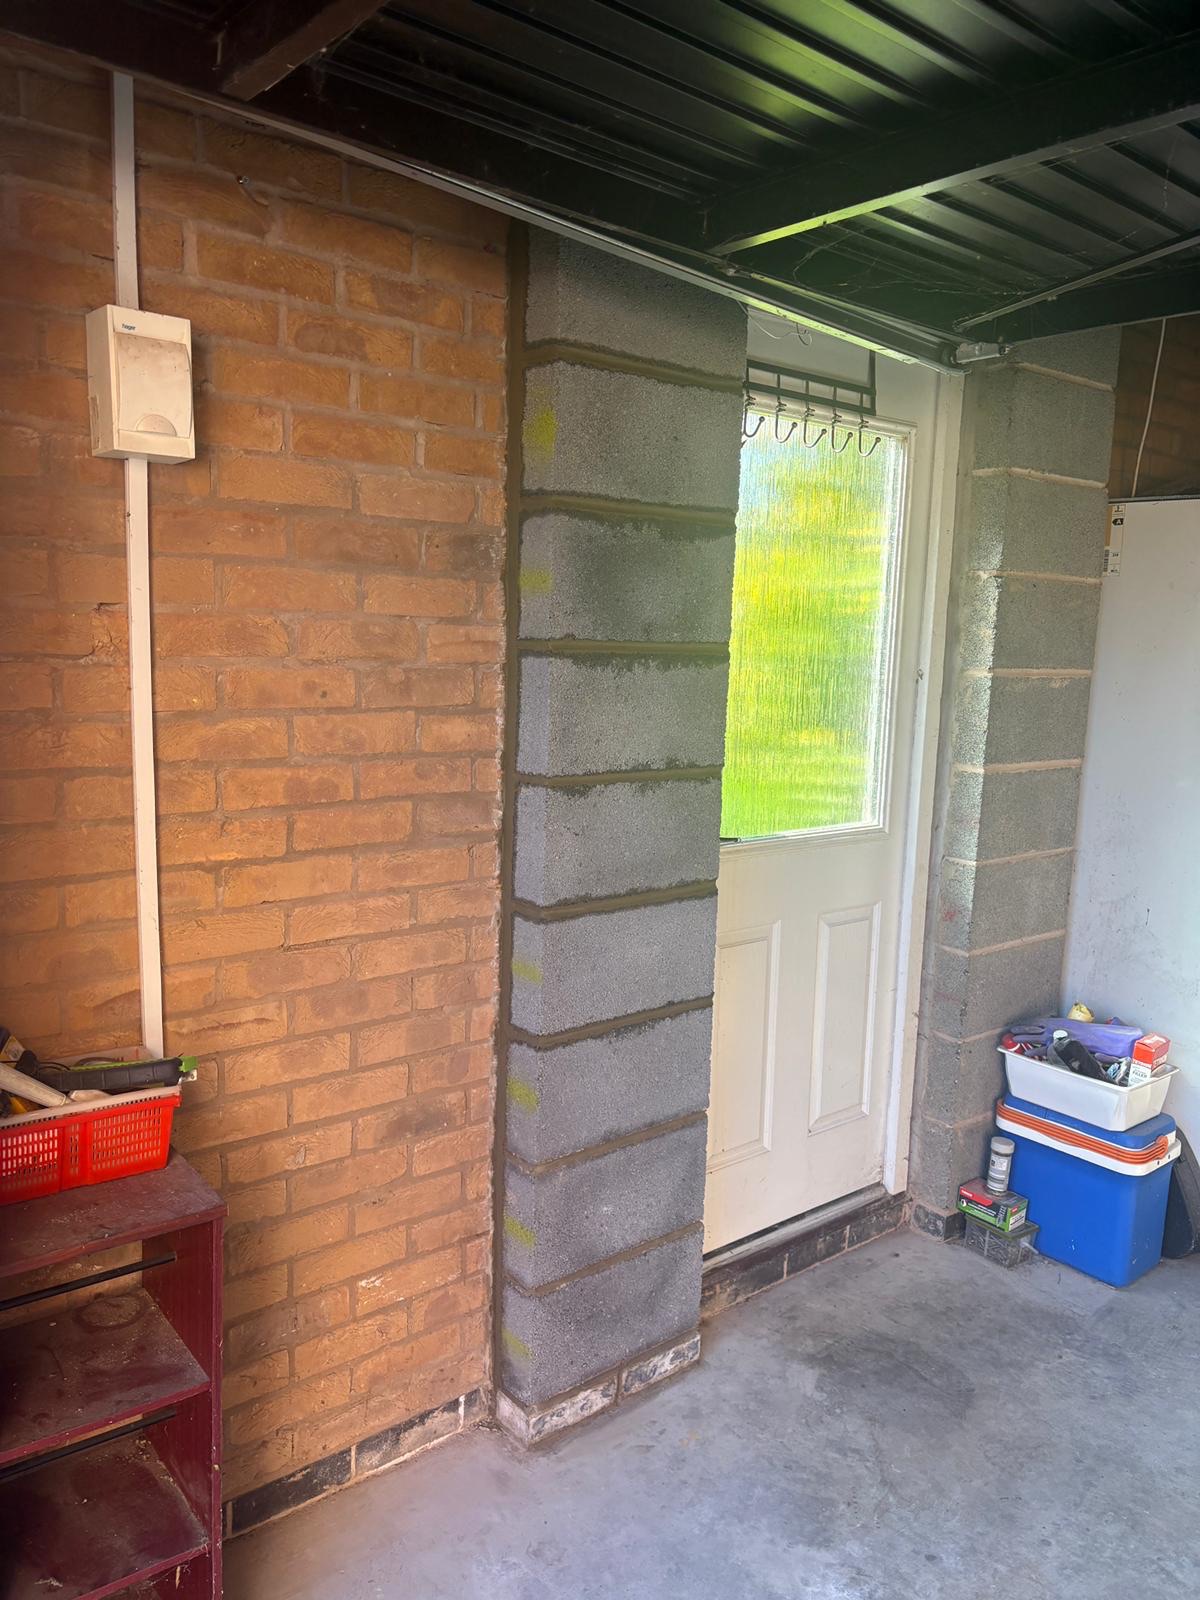
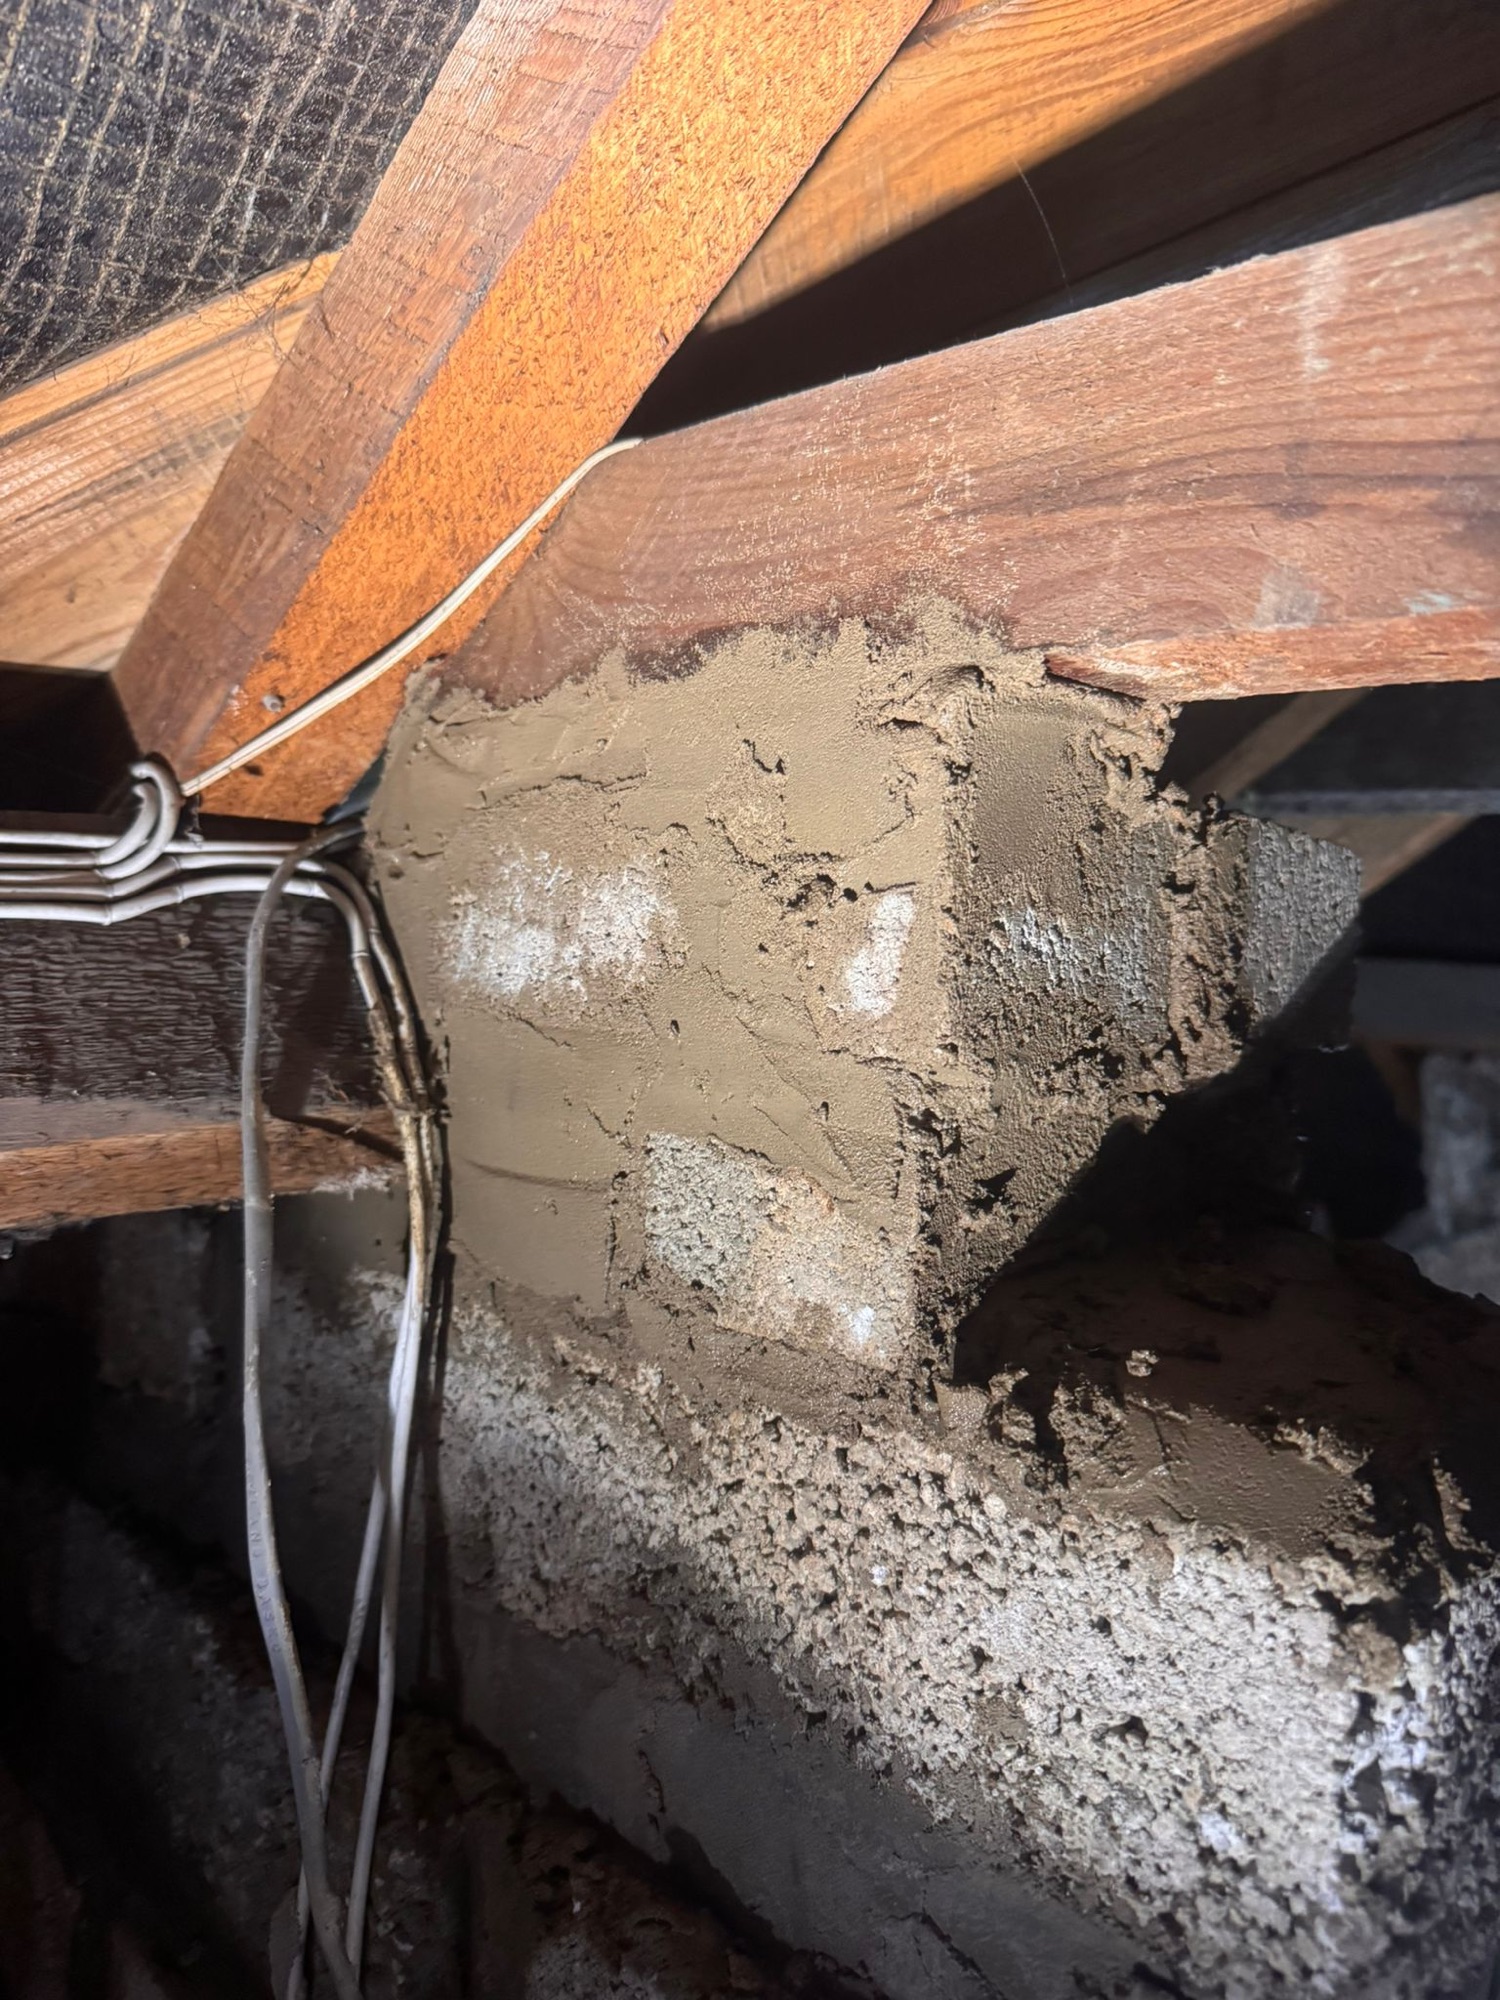
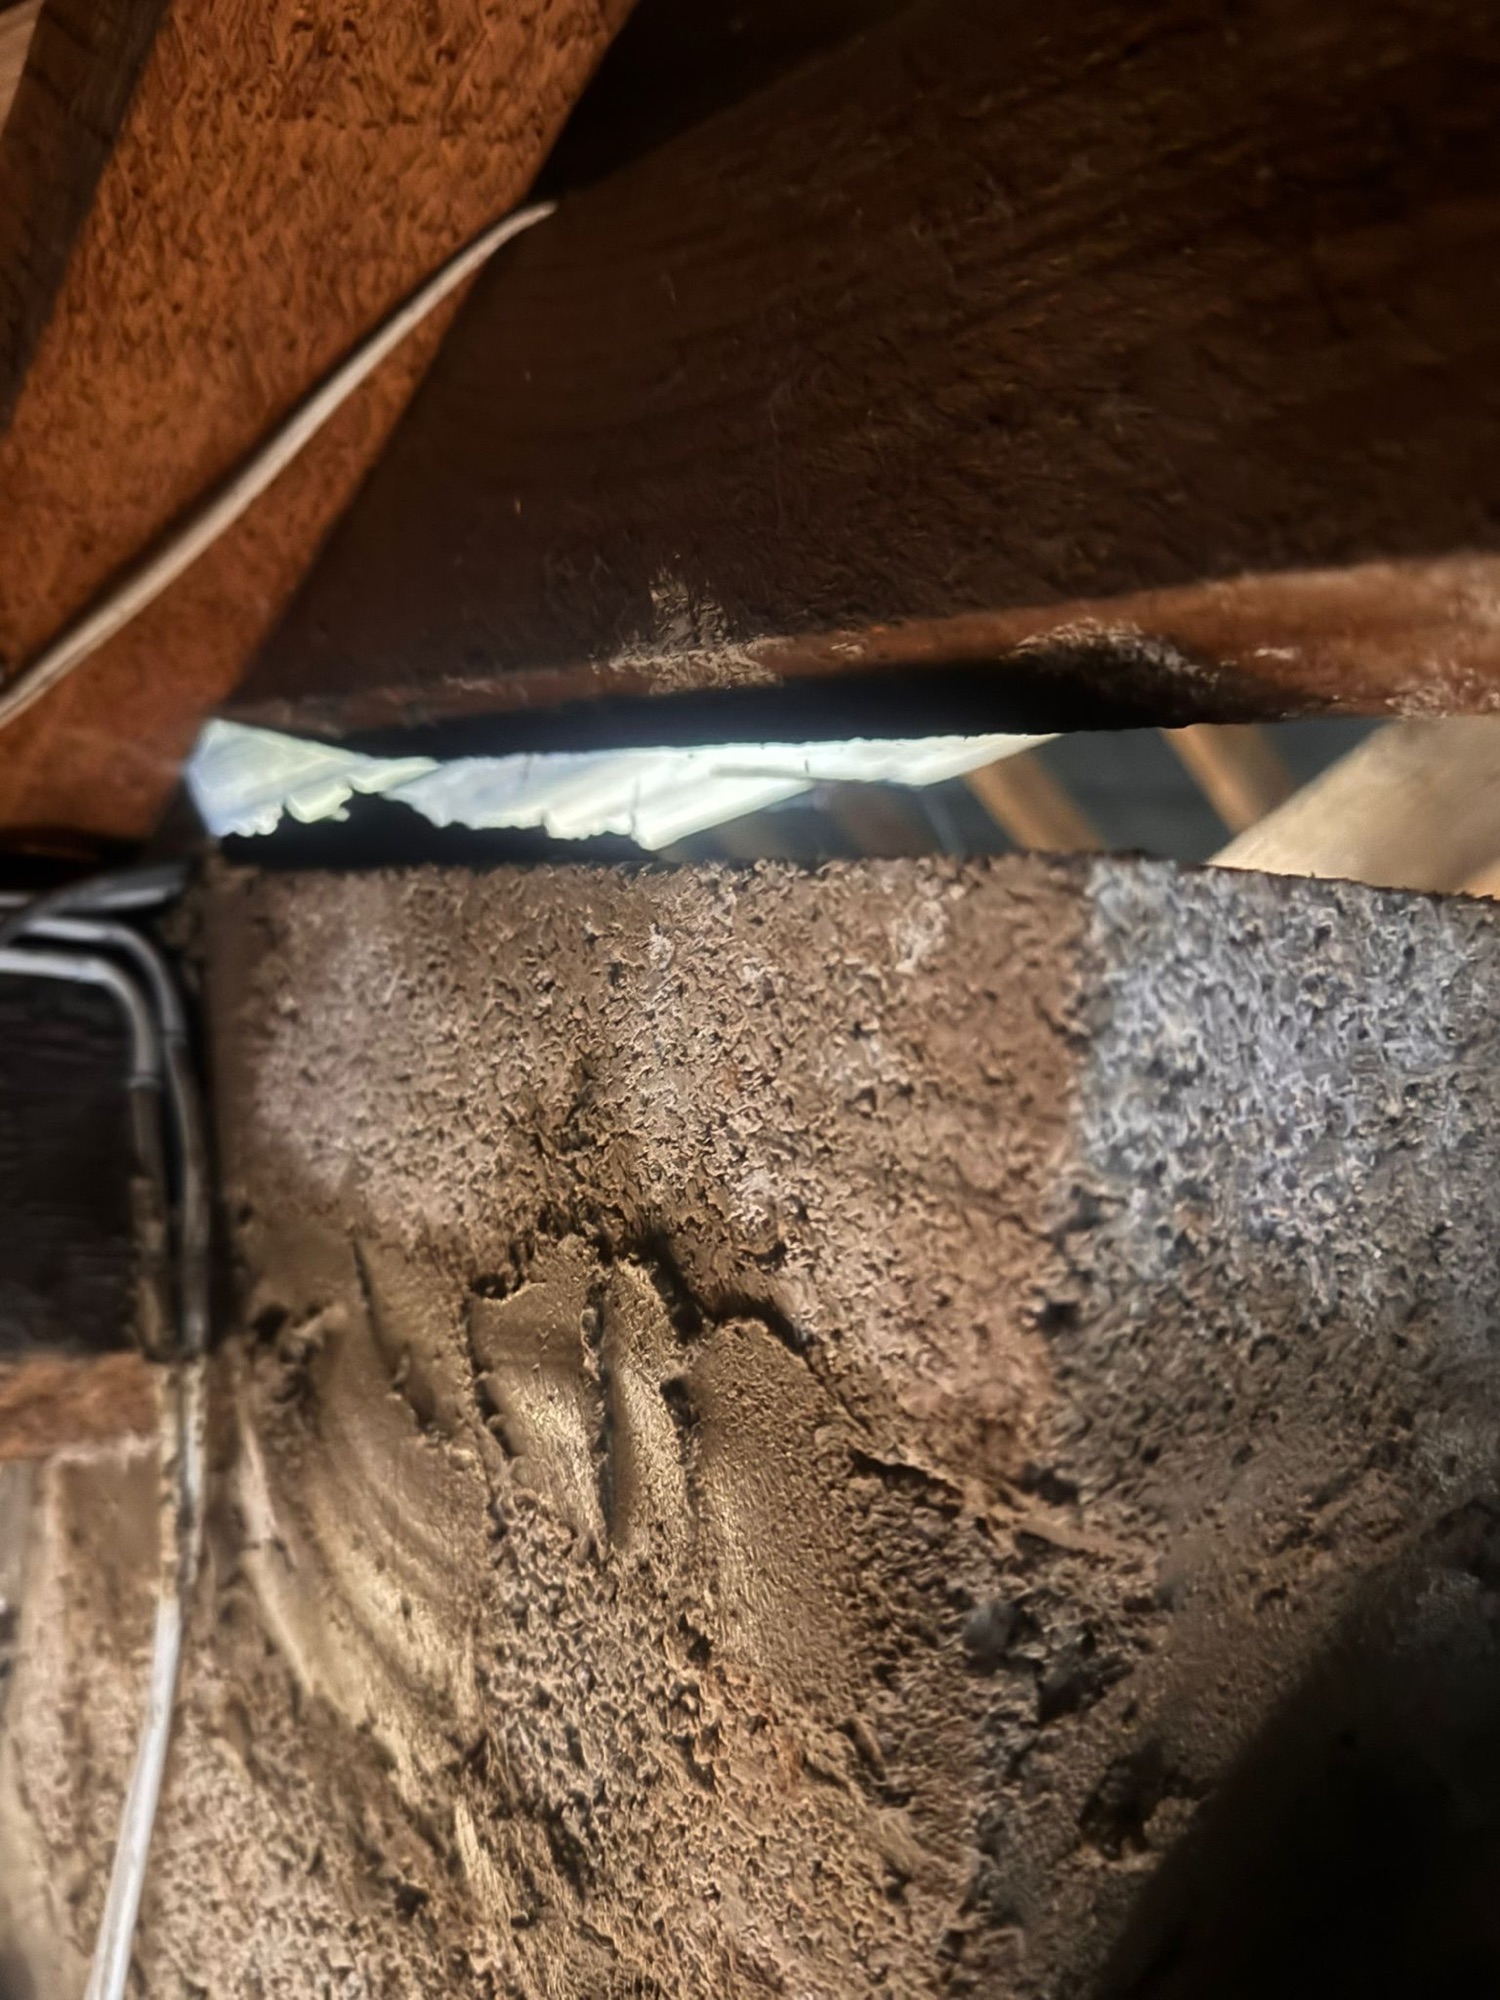
A leaning pillar in a garage might seem like a minor annoyance, but for one of our recent clients, it was a major concern. With their property currently on the market, any sign of structural instability can cause potential buyers to hesitate. They needed a prompt, reliable fix to ensure the garage was safe and the property remained attractive to buyers.
img_6628
previous arrow
next arrow

Structural Integrity: How We Fixed a Leaning Garage Pillar Promptly: A Two-Visit Approach

When we assessed the pillar, it was clear that a quick, one-day fix wouldn’t meet our quality standards.

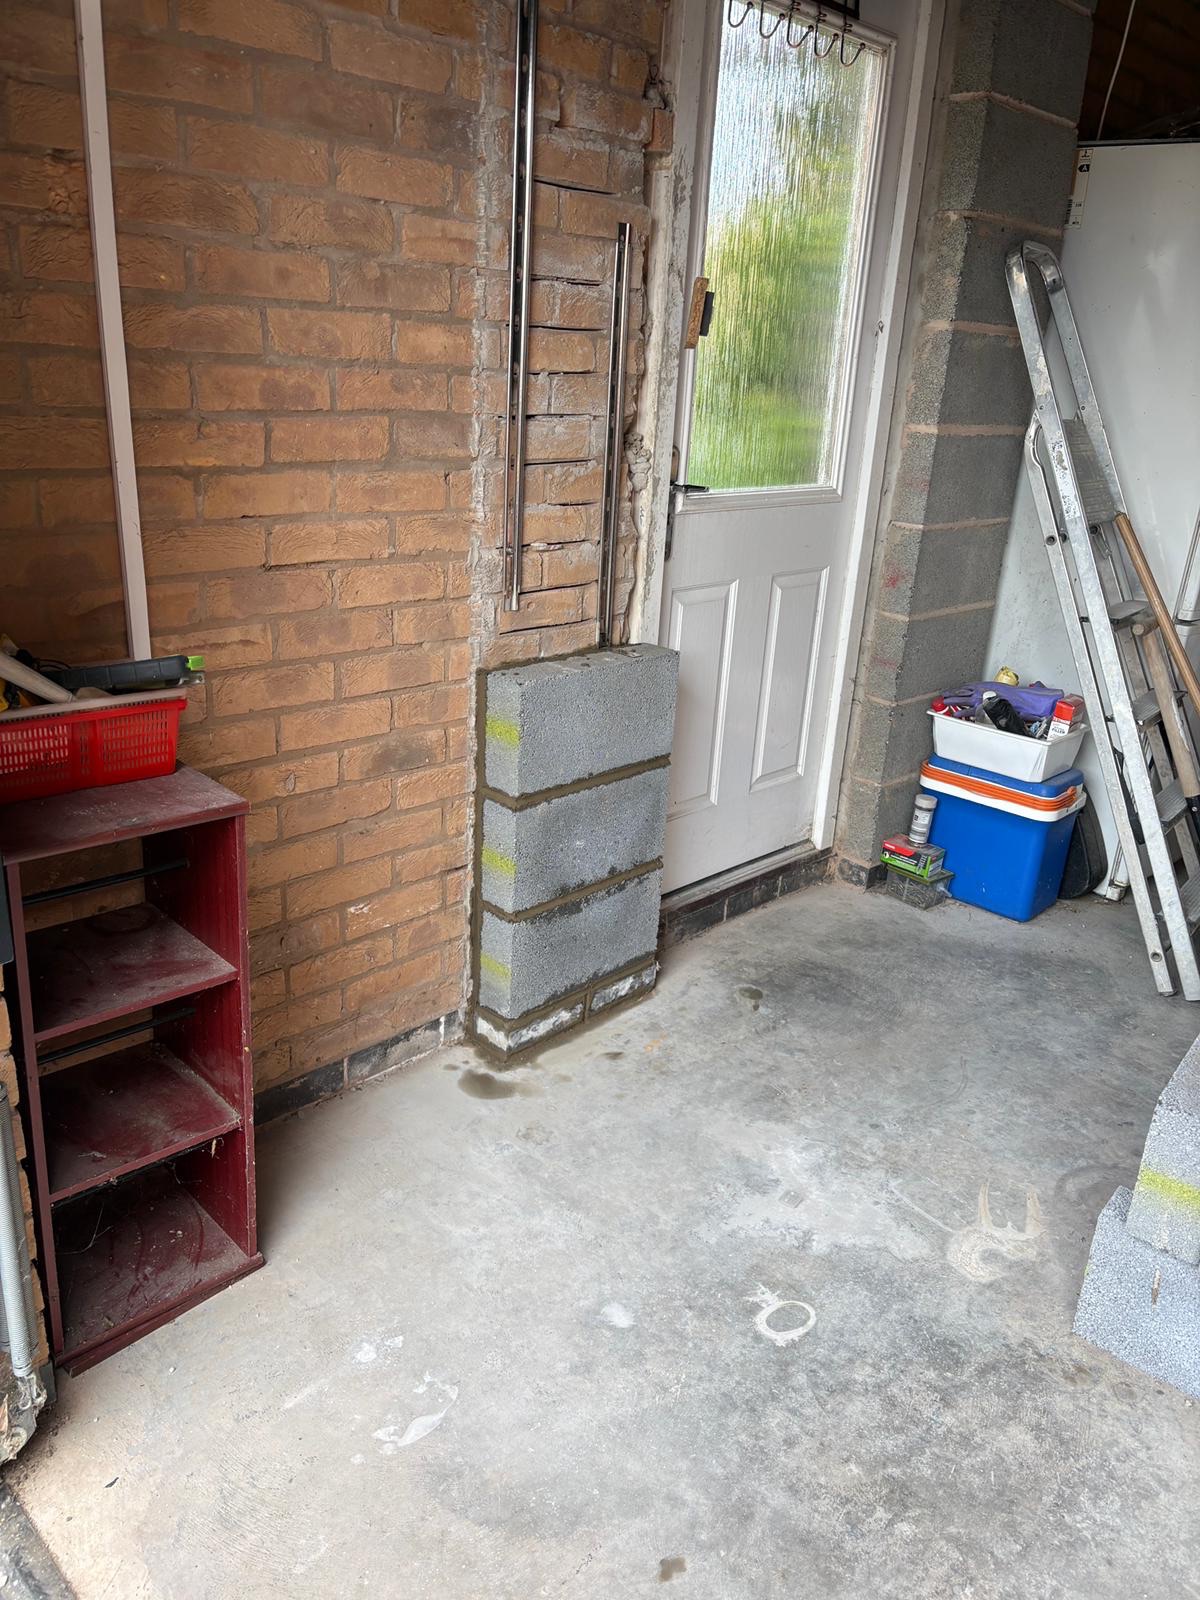
In masonry, if you lay too many courses of brick in a single go, the weight of the upper bricks puts too much pressure on the fresh, wet mortar below. This causes the mortar to “slump” or squeeze out of the joints, which significantly weakens the structural integrity of the final build.

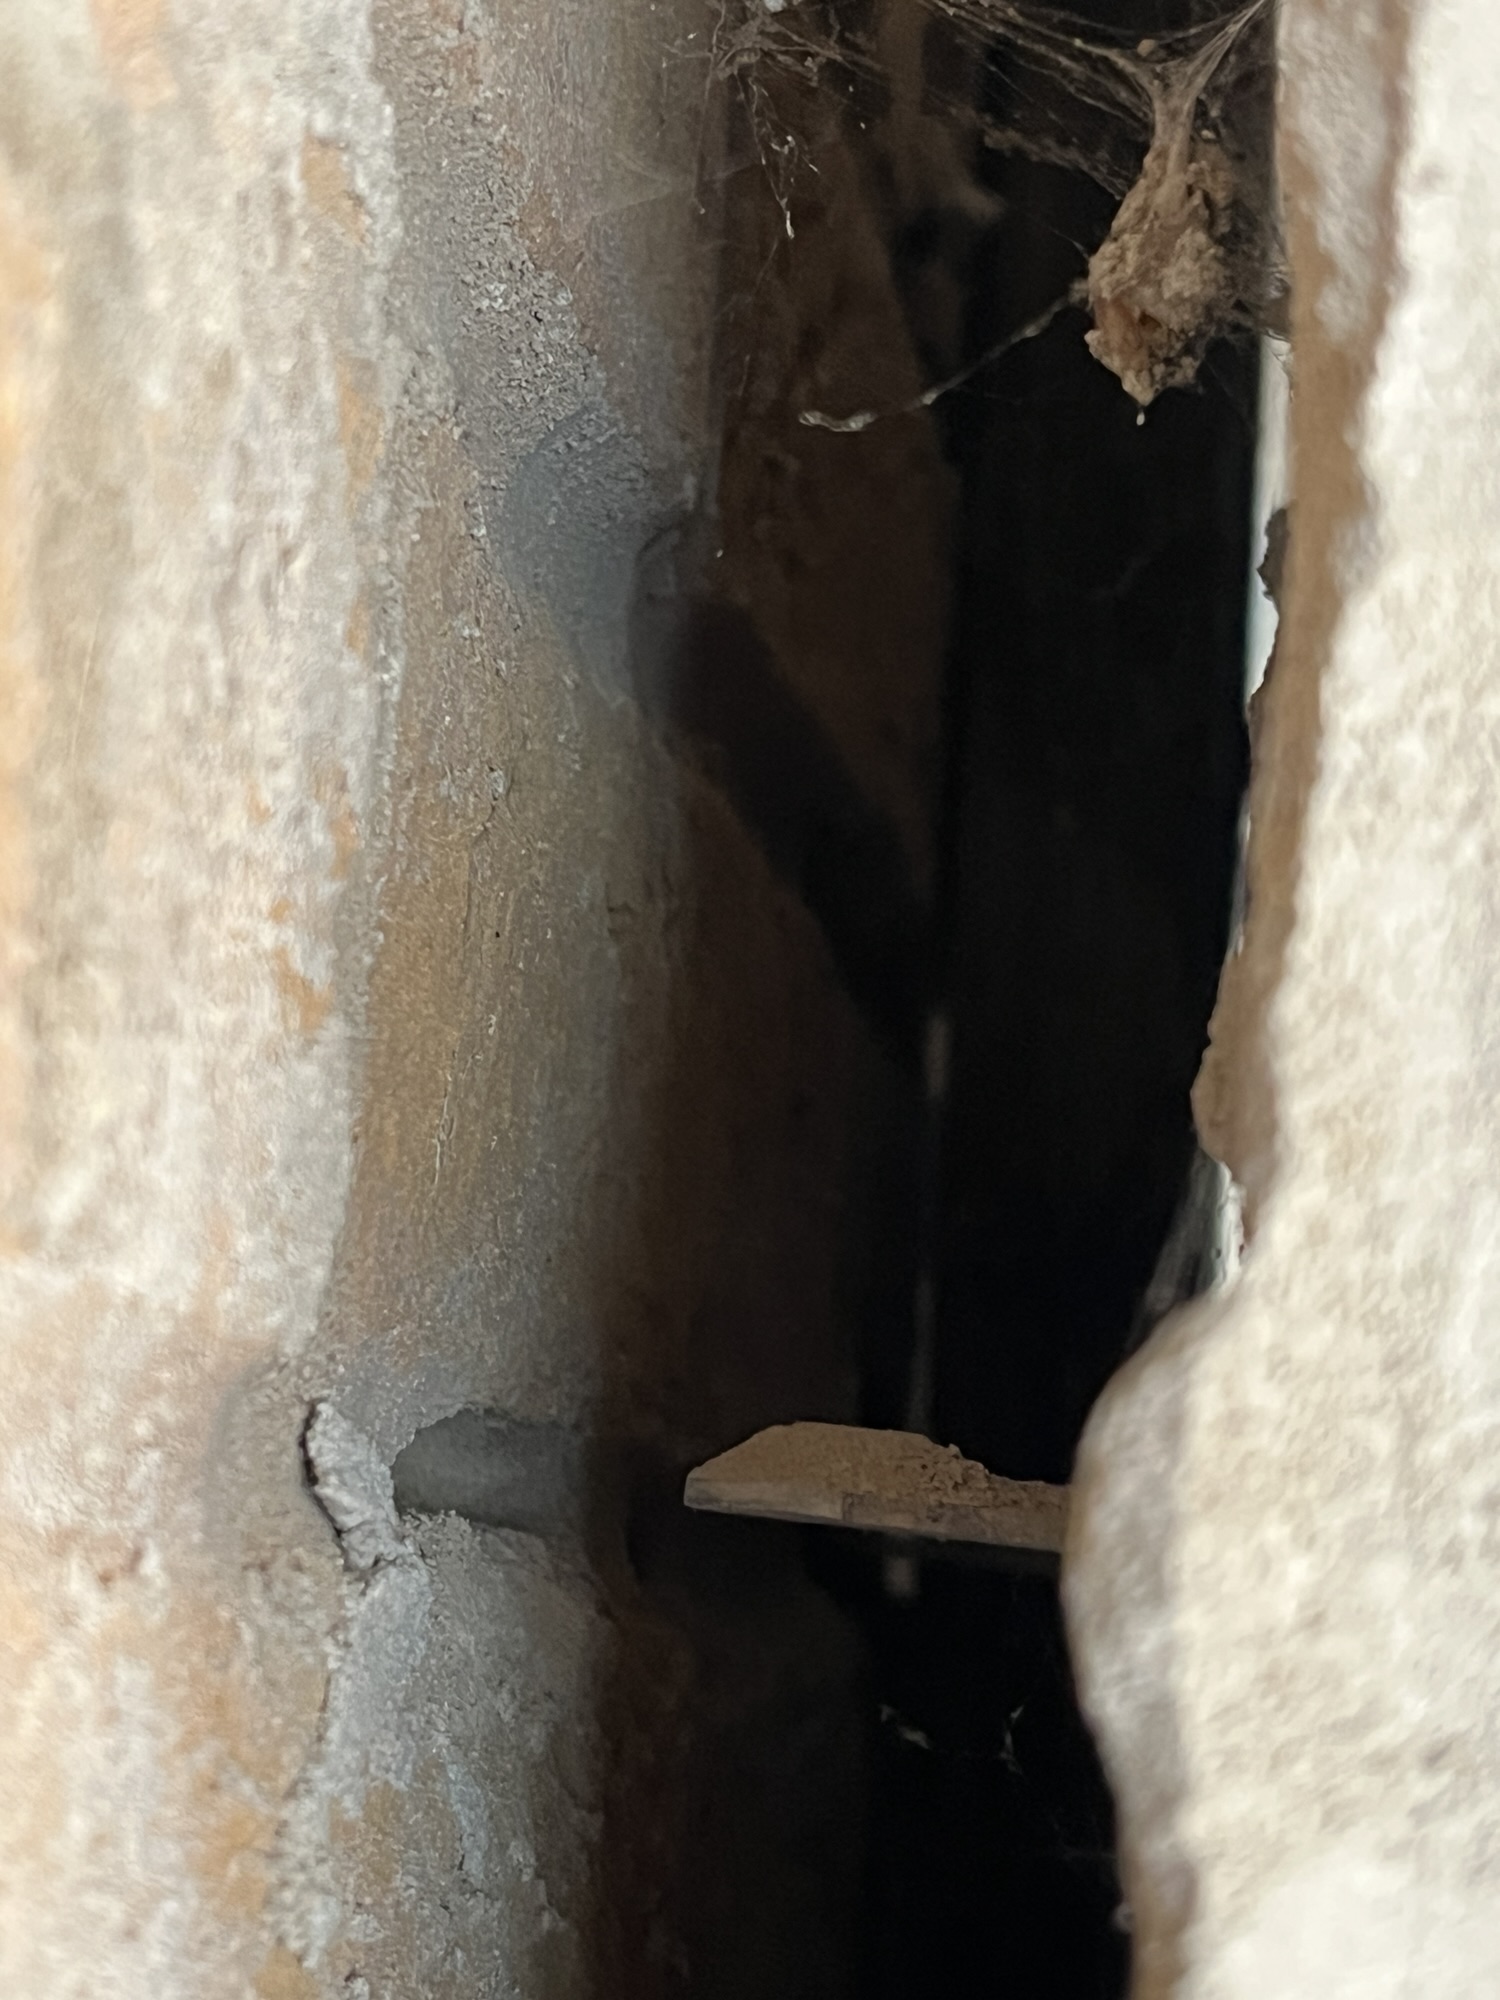
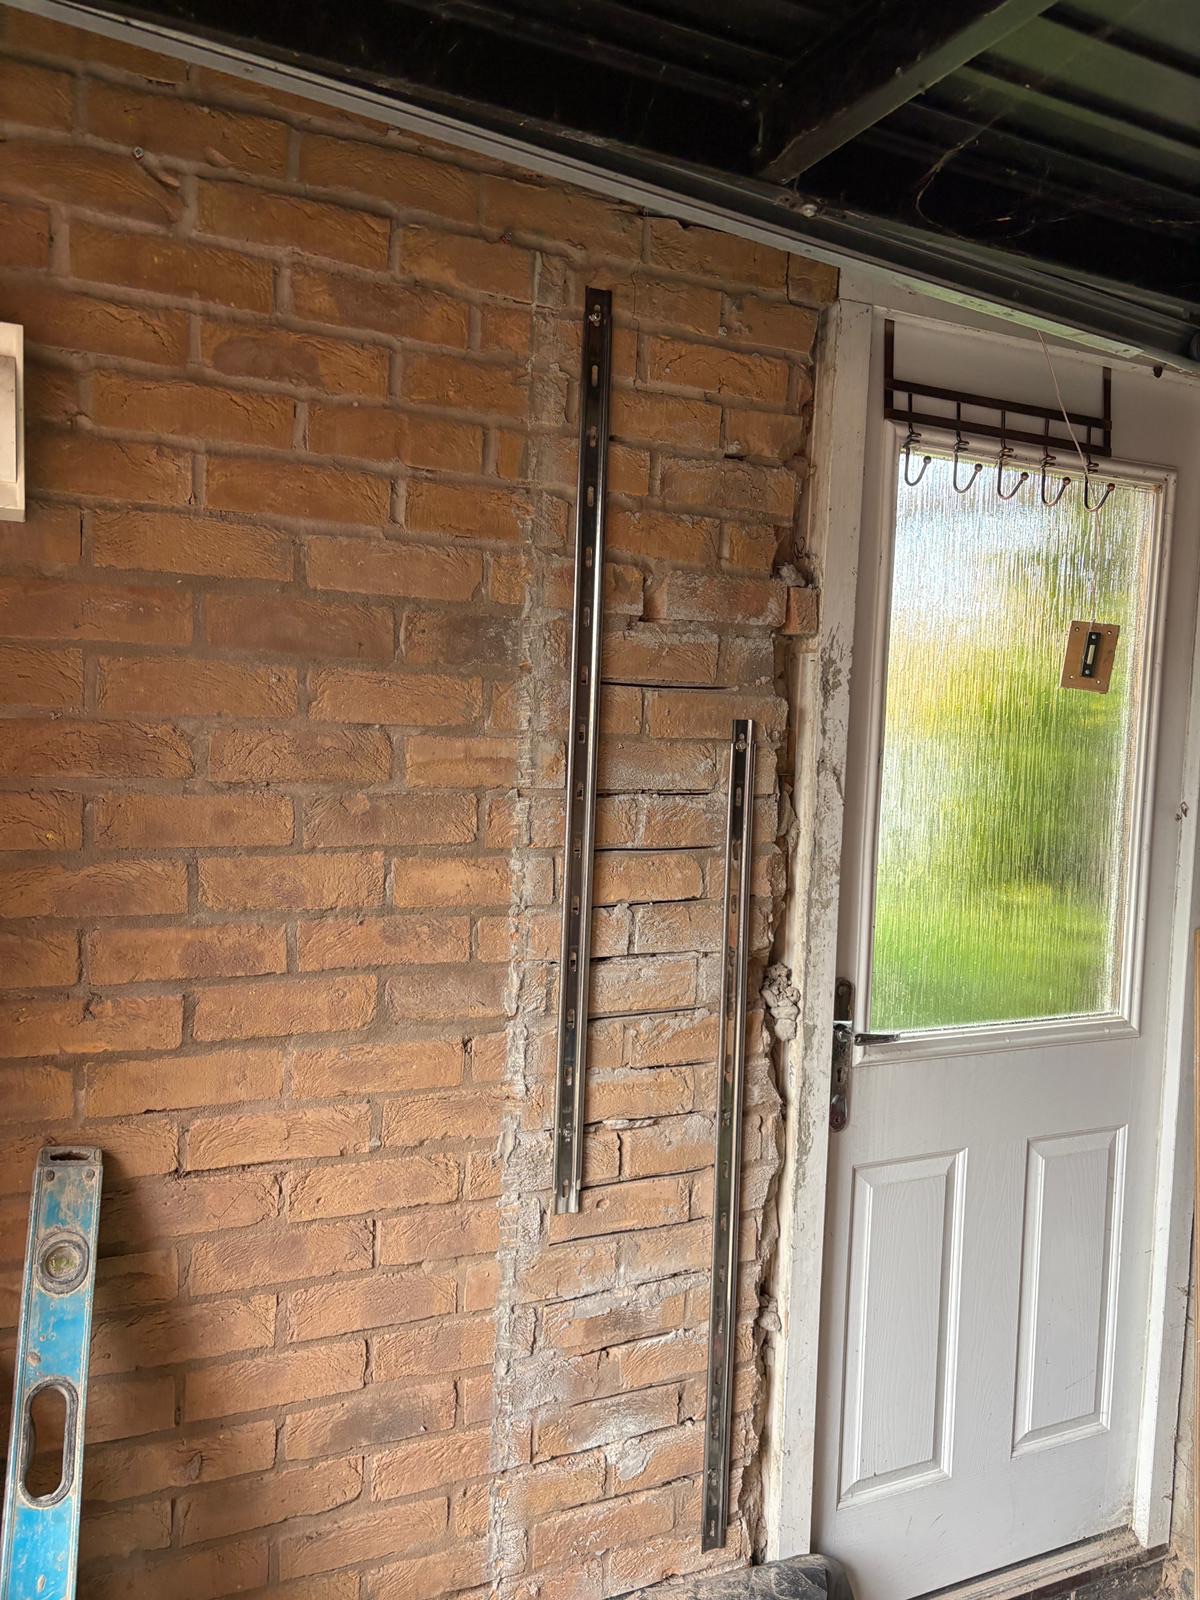
We used Starter bars (also known as dowel bars) because they ensure continuity of reinforcement between the existing wall and the newly laid blocks, safely transferring loads and preventing separation or structural weakness.

To ensure a permanent, high-quality result, we scheduled the job across two visits:

  1. Visit One: We reconstructed the lower 5 courses, allowing the base to set firmly and take the weight of the structure without compromising the mortar joints.
  2. Visit Two: We completed the remaining 5 courses, ensuring the pillar was perfectly plumb, stable, and ready to last for years to come.

This two-step process allows us to guarantee structural strength that a rush job simply cannot offer.

Costs

For this repair, the costs were broken down as follows:

  • Materials: £30
  • Labour: £50–£300 (This varies depending on the location and the specific time required for the repair).

Need Help with Your Brickwork? Whether it’s a structural concern or a cosmetic update, we are here to help you get the job done right.

If you have a project in mind, call us today on 07737 088243 or send your details to quote@swallowhillhomes.com for a prompt consultation.