Categories
Flooring Renovation

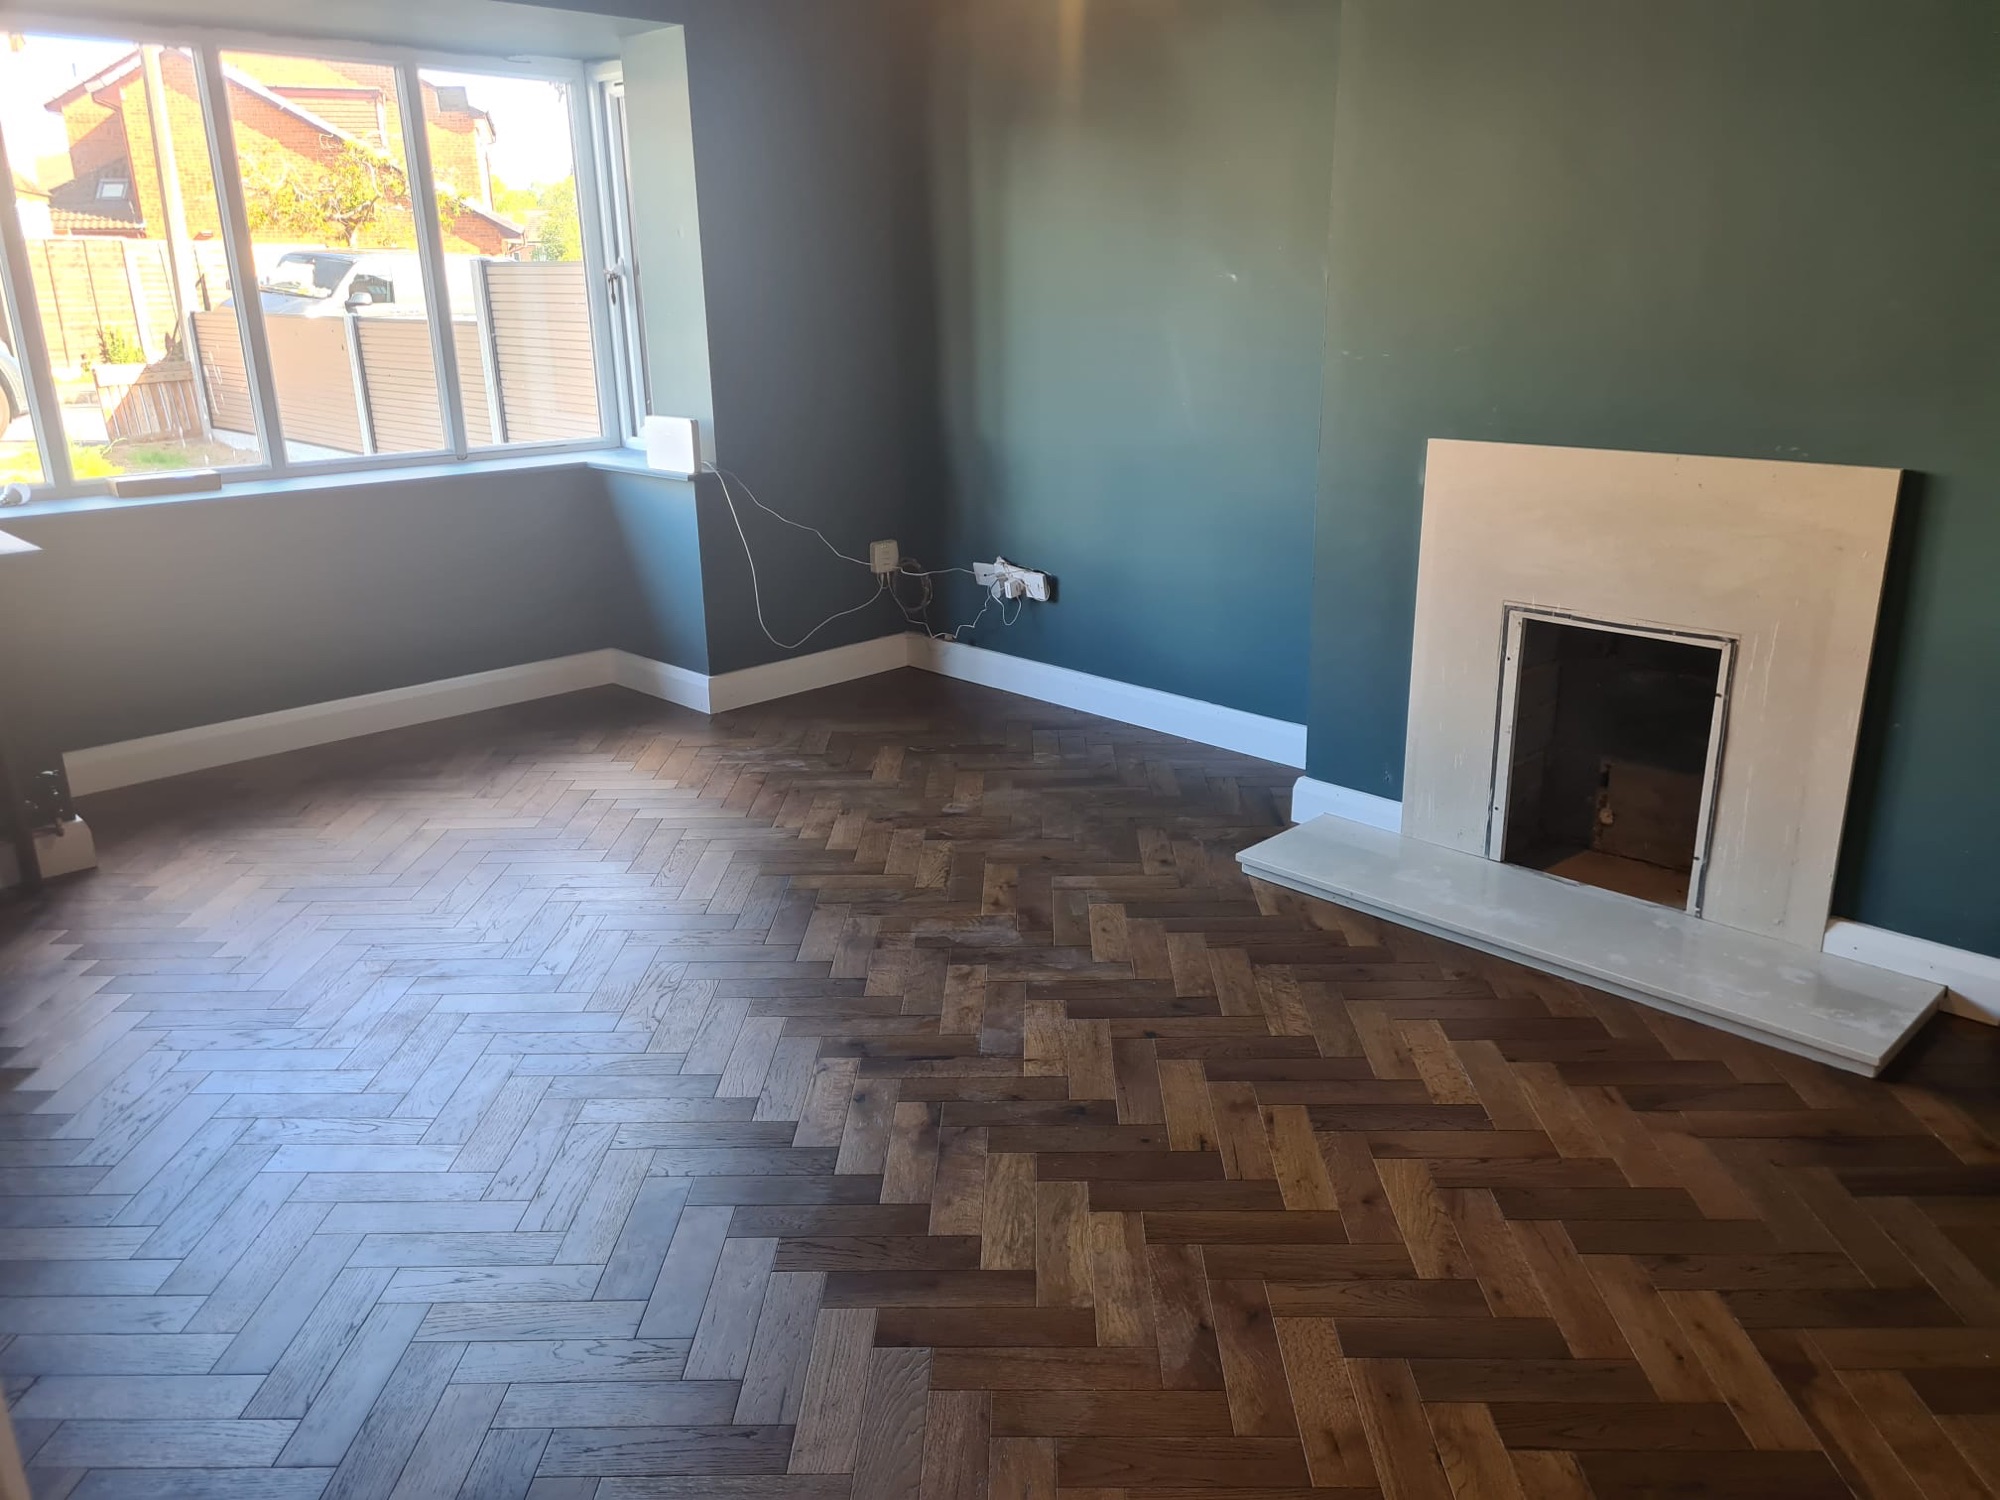
Herringbone Oak parquet floor, Watnall, Nottingham

Installing Herringbone Oak Parquet Flooring

We recently completed the installation of a beautiful Herringbone Oak floor sourced from Stories Flooring. Our second from them in as many months. This project highlights our approach to subfloor preparation, a critical factor in achieving a lasting, high-quality finish.

img_6111
previous arrow
next arrow

A key consideration during preparation was the existing subfloor, which contained original tiles potentially dating from the 1980s. To ensure compliance and safety—and specifically to mitigate the risk associated with disturbing potential asbestos-containing materials (ACMs)—we opted for a non-intrusive overlay solution. This professional decision avoided complex and costly remediation.

We applied F. Ball Stopgap P131 primer and self-levelling compound. This choice allowed us to achieve a perfectly smooth and stable surface with minimal build-up, creating the ideal base for the new parquet system. Precision Installation Technique

Our method for installing this type of parquet flooring is rooted in precision and patience. The most effective technique is a staged adhesive application to manage the elasticity of the glue and ensure optimal alignment:

  1. We initially lay and fix the central key column or the first two rows of the product.
  2. We allow this central element time to fully cure and stabilize before proceeding with the remainder of the floor.

By allowing the adhesive to cure completely in these crucial early stages, we prevent movement and ensure the long-term integrity and alignment of the entire floor.


Cost Guide: Herringbone Parquet Flooring

For full transparency, here is a breakdown of the typical costs per square metre (m²) for a high-quality Herringbone Parquet installation:

  • Preparation (Self-levelling compound): £15
  • Flooring Material: £50
  • Adhesive: £10
  • Professional Labour: £90 – £150

These costs are excluding VAT, this job needed 15% wastage so make sure you allow for it otherwise you’ll need an emergency trip to Leeds to pick up an extra box

Categories
Renovation

Property refurbishment in Sandiacre, Nottingham

Bringing History Into the Modern Era: A Complete Victorian Terrace Renovation in Sandiacre, Nottingham

Owning a 100-year-old Victorian or Edwardian terrace house in Nottingham comes with a lot of pride. These properties are packed with character, beautiful brickwork, and historic charm. However, they also come with a unique set of challenges: drafty rooms, outdated layouts, and decades of old plaster hiding underneath layers of wallpaper.

At Swallow Hill Homes we specialize in breathing new life into these classic homes. We don’t just paper over the cracks; we strip them back to their bones and rebuild them to meet modern living standards.

Here is a sneak peek behind the scenes of our latest total refurbishment project right here in Nottingham.

IMG_6382
PlayPause
previous arrow
next arrow

The Project: A Full-Scale Terrace Transformation

Our clients loved the location and character of this traditional terrace, but the interior needed serious intervention. To do this job right, we started with a blank canvas.

Here is exactly what we are undertaking on this comprehensive renovation:

1. Strip Back to Brick & Structural Upgrades

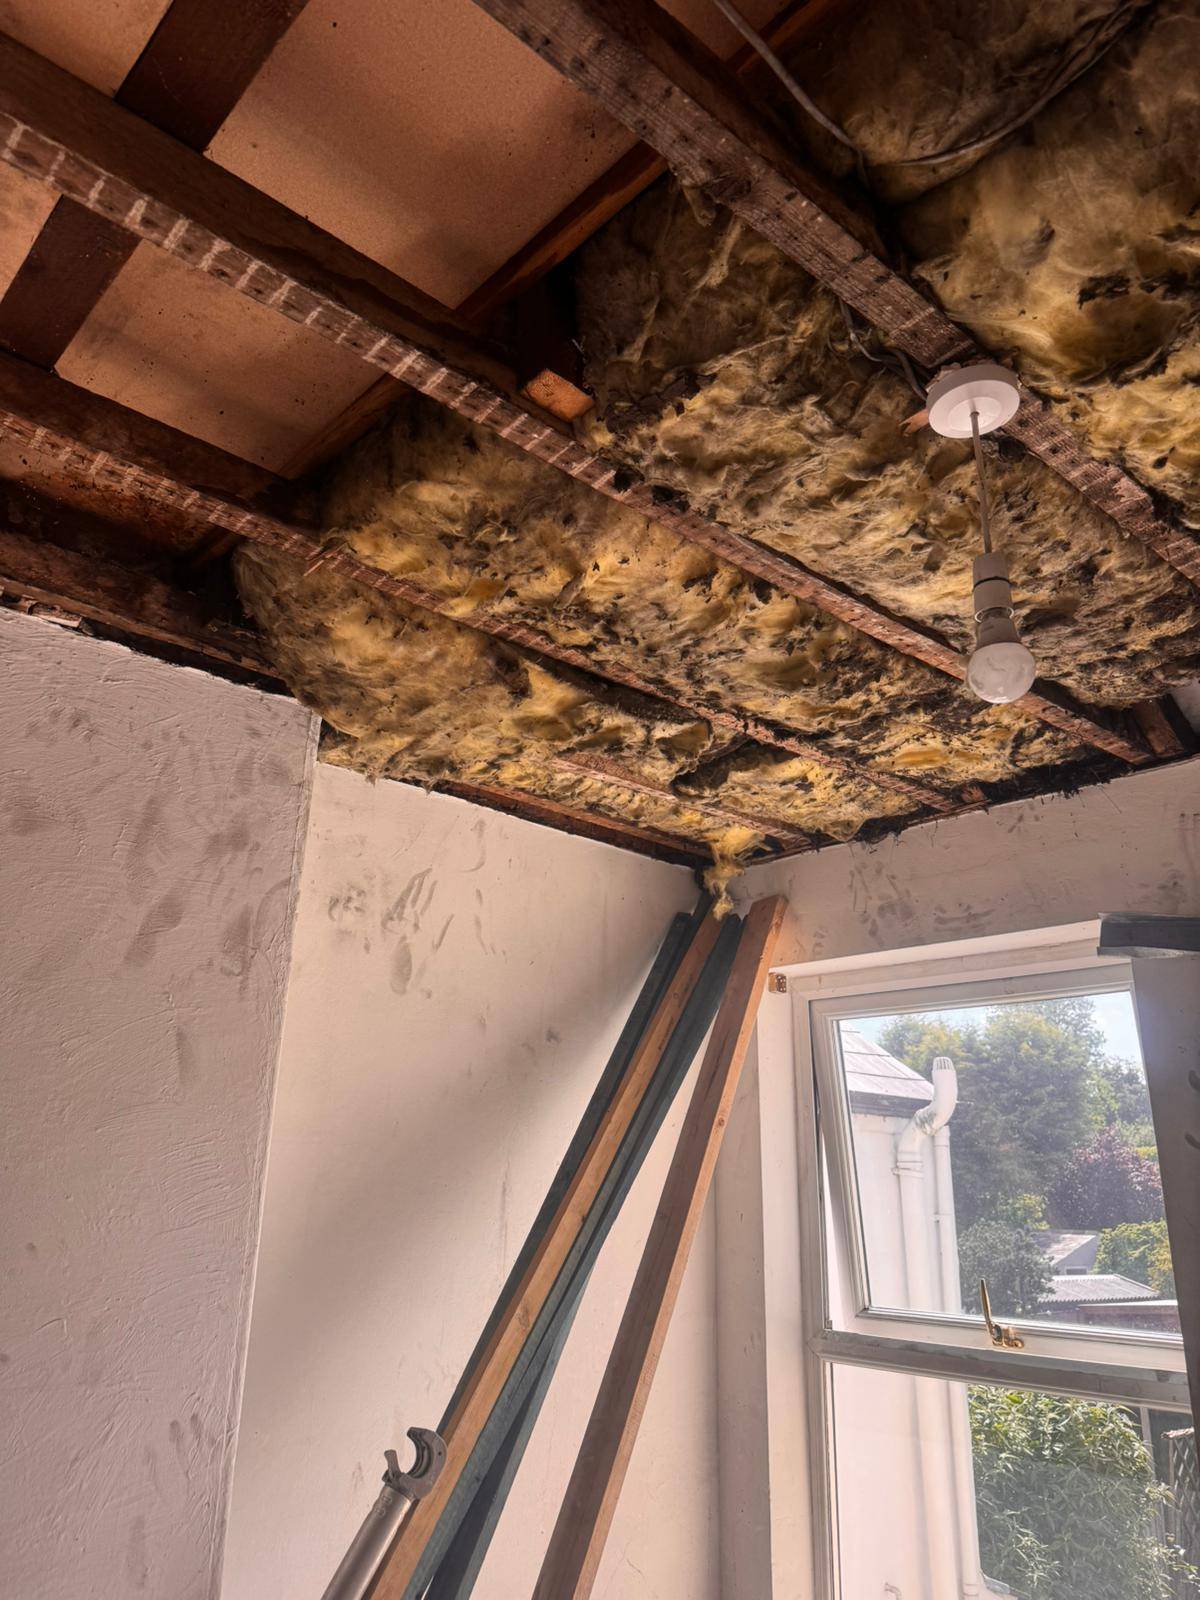
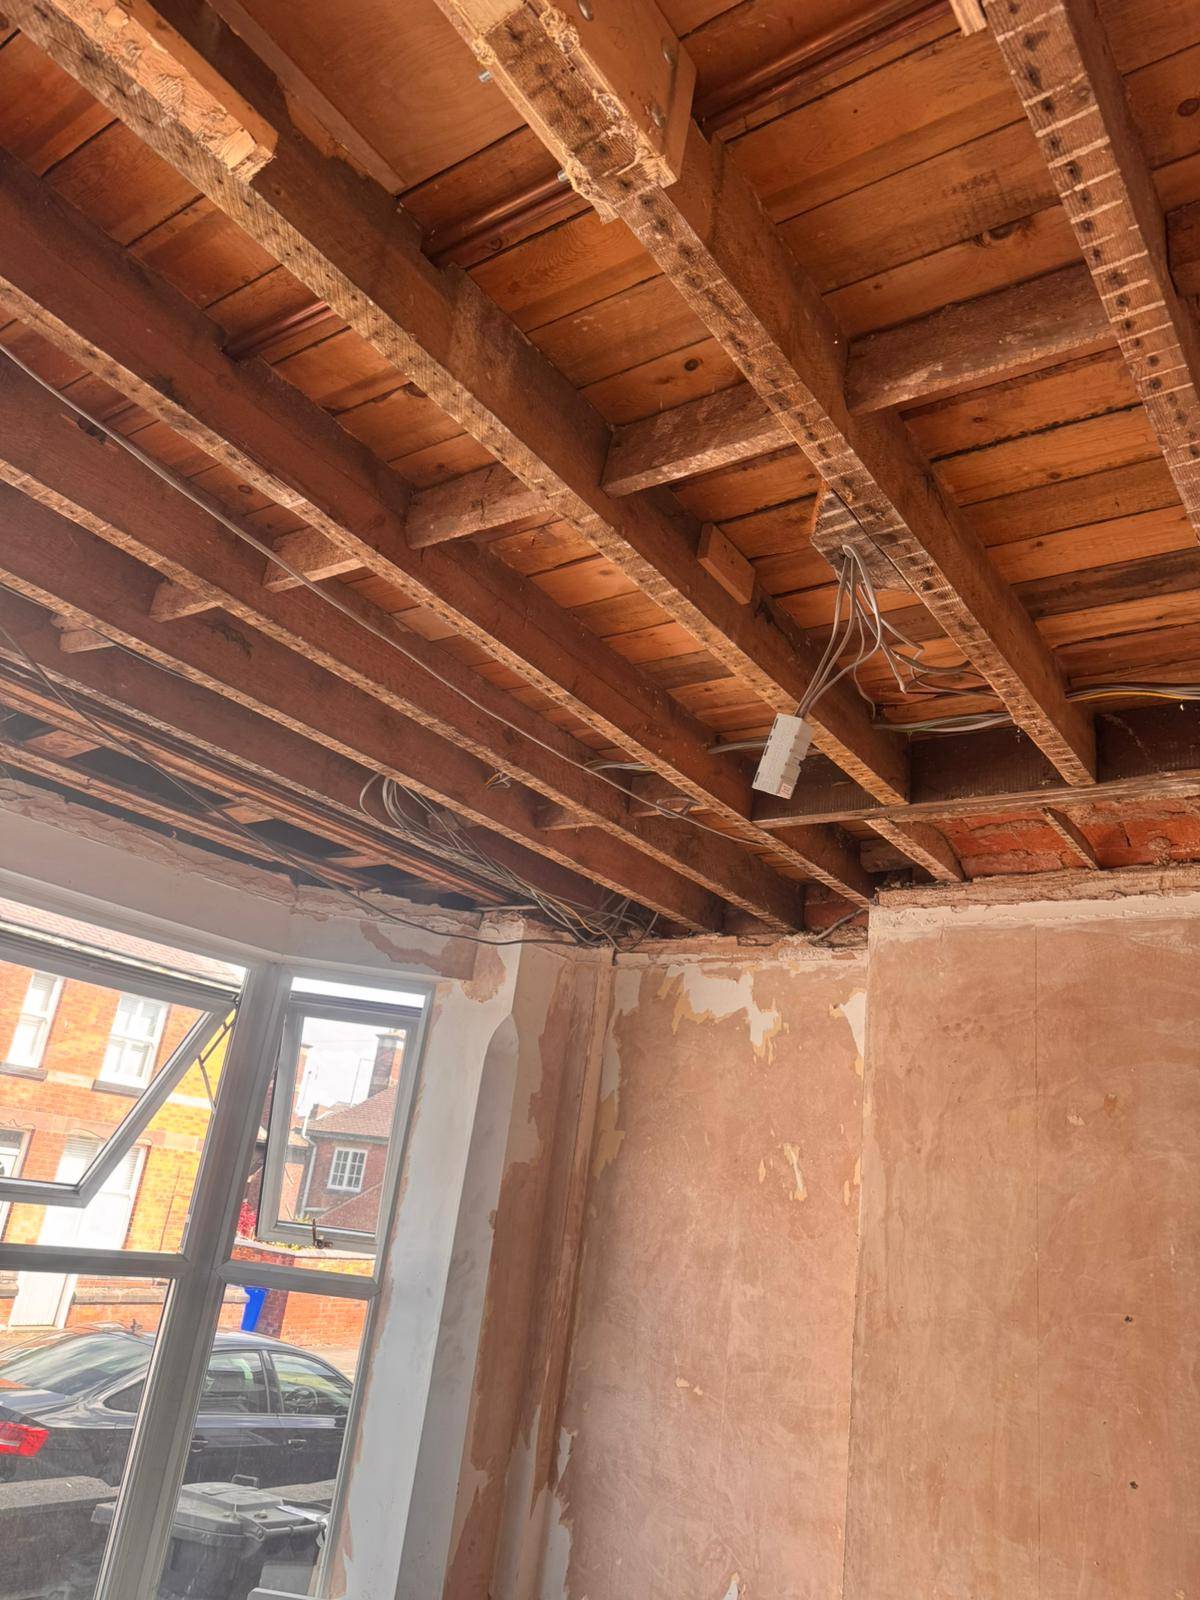
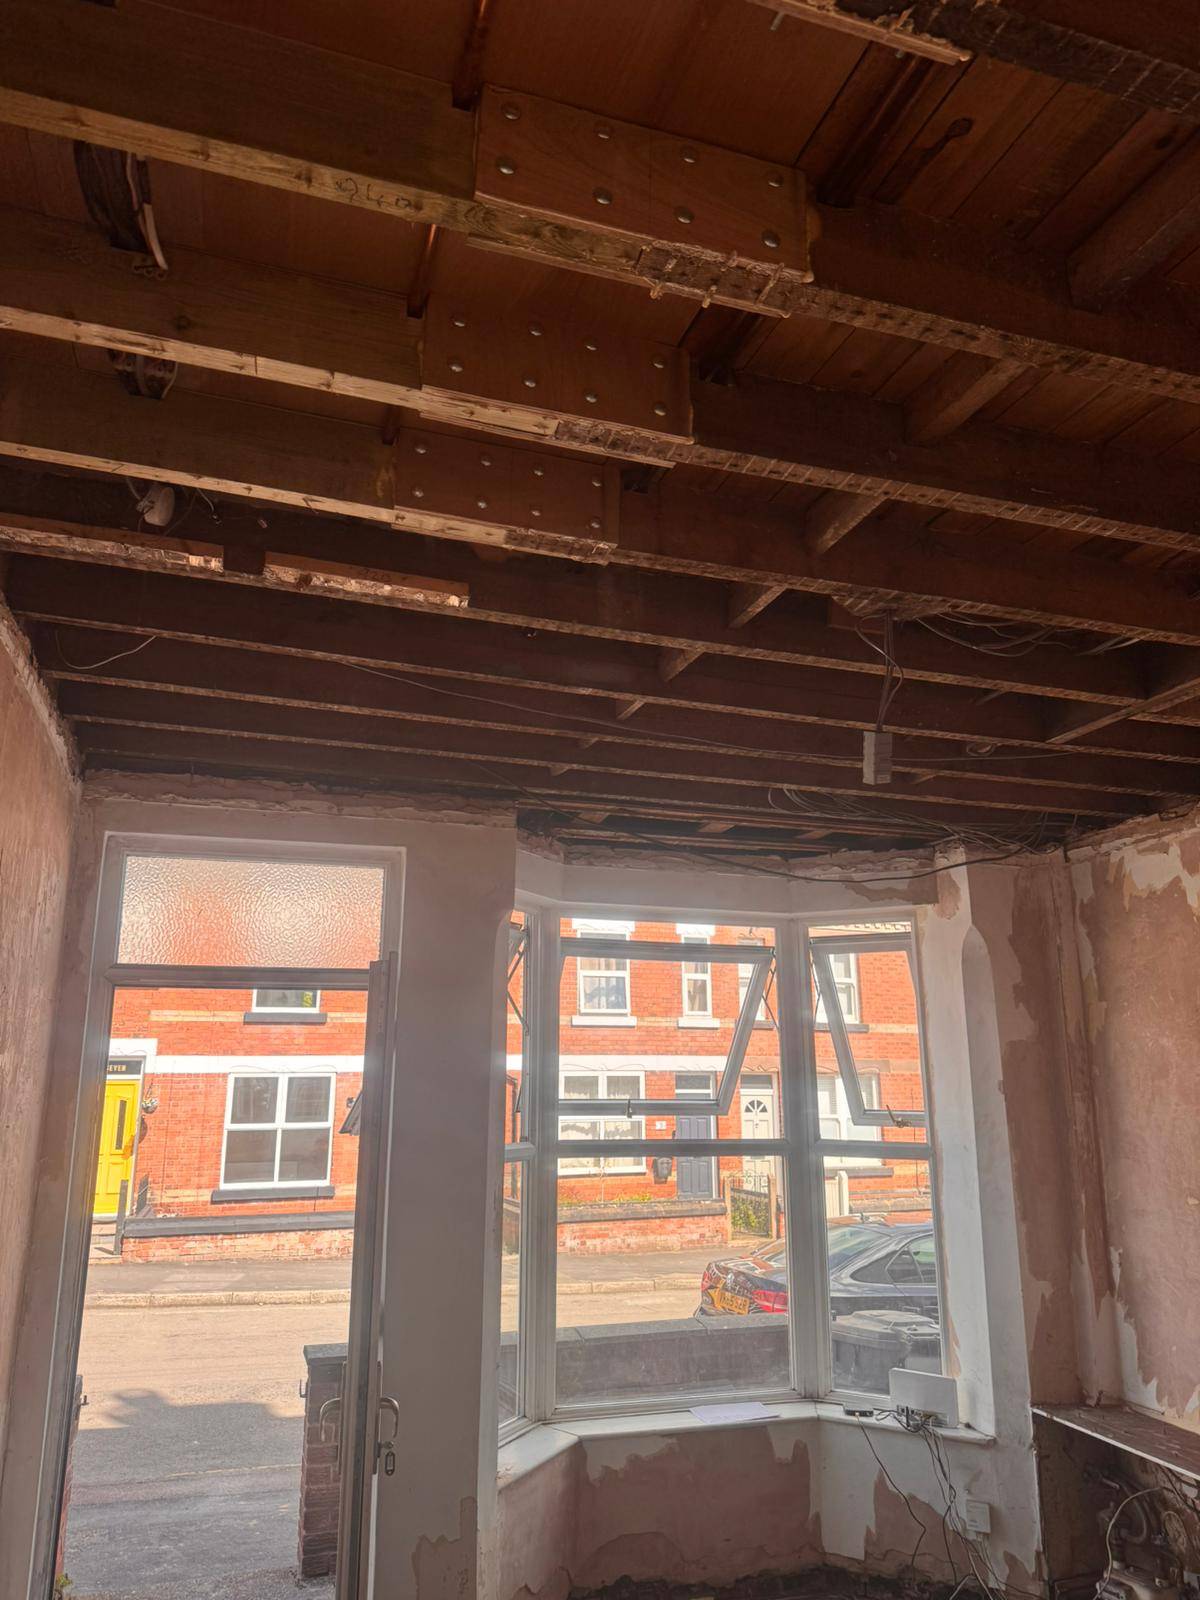
We have completely cleared out the old lath and plaster ceilings and stripped the walls back to the original brickwork. This allows us to inspect the structural integrity of the home. As you can see from our first on-site photos, we have already reinforced the ceiling joists with heavy-duty timber splicing and bolted structural plates to ensure the upper floors are level and secure for the next century.

JDP electrical fitted a new consumer unit for us
New consumer unit to replace the existing 2

2. Comprehensive Insulation & Energy Efficiency

Older solid-wall terrace houses can be difficult to keep warm, leading to massive heating bills. By stripping the ceilings back int he bedroom we have fitted Super Foil SF19 X Foil which has an Roof Thermal Resistance : 2.54R (m2K/W) and is LABC approved. A standard cavity wall in the UK is between 2.3-4.5 so for a very small loss of head height 25mm your adding a huge amount of insulation.

By choosing SuperFOIL insulation you can save yourself Space, Time & Money over traditional forms of insulation. SuperFOIL is dedicated to improving Sustainbility of our products as well as our business as a whole. Our multifoil products are produced using up to 40% recycled materials. This helps save the equivalent of approx. 80 million plastic bottles from ending up in land fill every year! Because SuperFOIL consists of multiple layers of radiant barrier foil, it can protect against heat loss through radiation that non-foil insulation’s offer no protection against. Additionally, by installing as a continuous layer and sealing fully with SuperFOIL Tape, SuperFOIL insulation provides an effective air and vapour barrier. Controlling air leakage such as draughts is paramount to the achieve high levels of energy efficiency. Useful Links: SuperFOIL Brochure-2022

This simple step will make a significant difference to warmth in the bedrooms of this 1920s house into a cozy, energy-efficient home that retains heat and decreases monthly utility costs.

3. Professional Plastering

With the structural work done and insulation in place, our team is getting to work on the boarding and plastering. We use premium finishes (like the British Gypsum BoardFinish ready to go on-site) to achieve perfectly smooth, flawless walls that provide the ultimate foundation for decorating.

4. The Grand Finale: A Bespoke Media Wall

Once the room is plastered and modern flooring is laid, we will be constructing a fully custom, bespoke media wall. This will seamlessly integrate a modern widescreen TV, integrated mood lighting, hidden cabling, and a contemporary fireplace—proving that you can enjoy cutting-edge modern luxury without losing the cozy soul of a traditional terrace.

Progress Photos: Stage 1 (The Strip Out)

Take a look at the raw potential we are working with! These initial photos show the property right after the teardown phase, highlighting the exposed joists, stripped chimney breast, and the starting point of our plastering prep.

Categories
Bathroom

Bathroom remodel

Case Study: Bathroom Reconfiguration and Specialist Upgrades

This project focused on a comprehensive bathroom refurbishment, involving plumbing & electrical modifications to resolve functional issues and enhance the client’s living space. Providing a private bathroom for a family member and a separate space to store shoes that cog up the hallway.

Project Scope and Functional Redesign

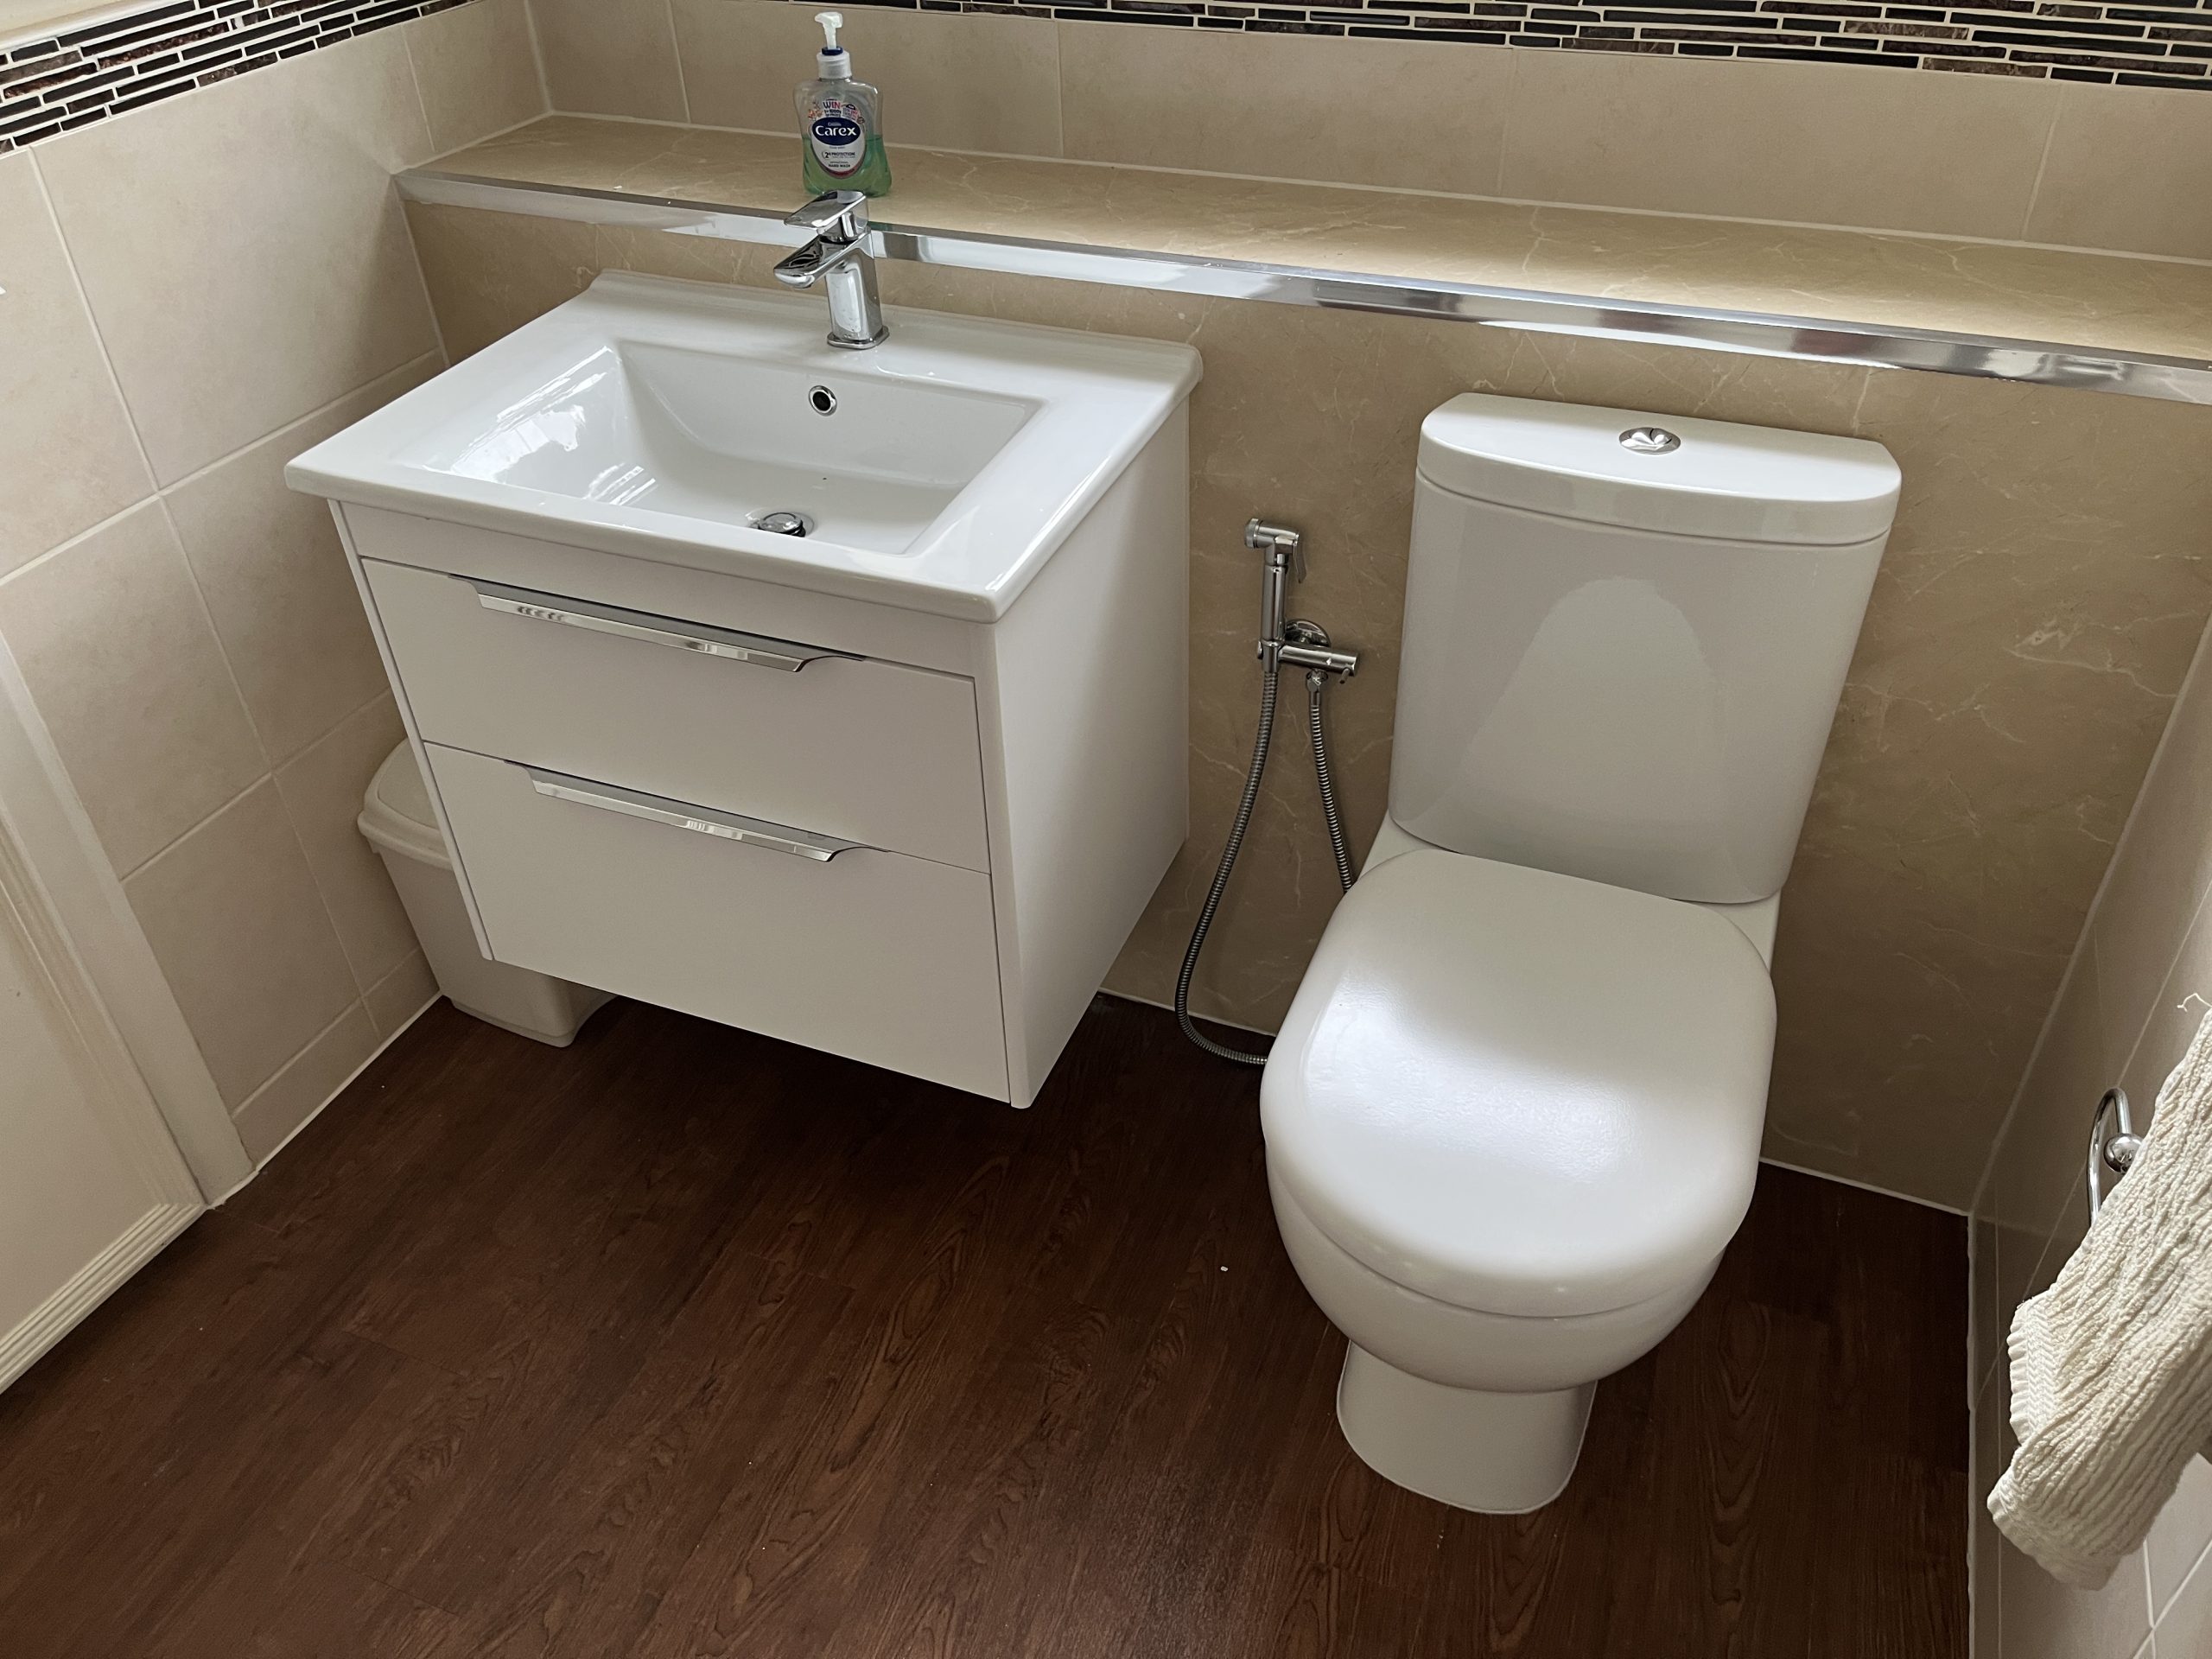
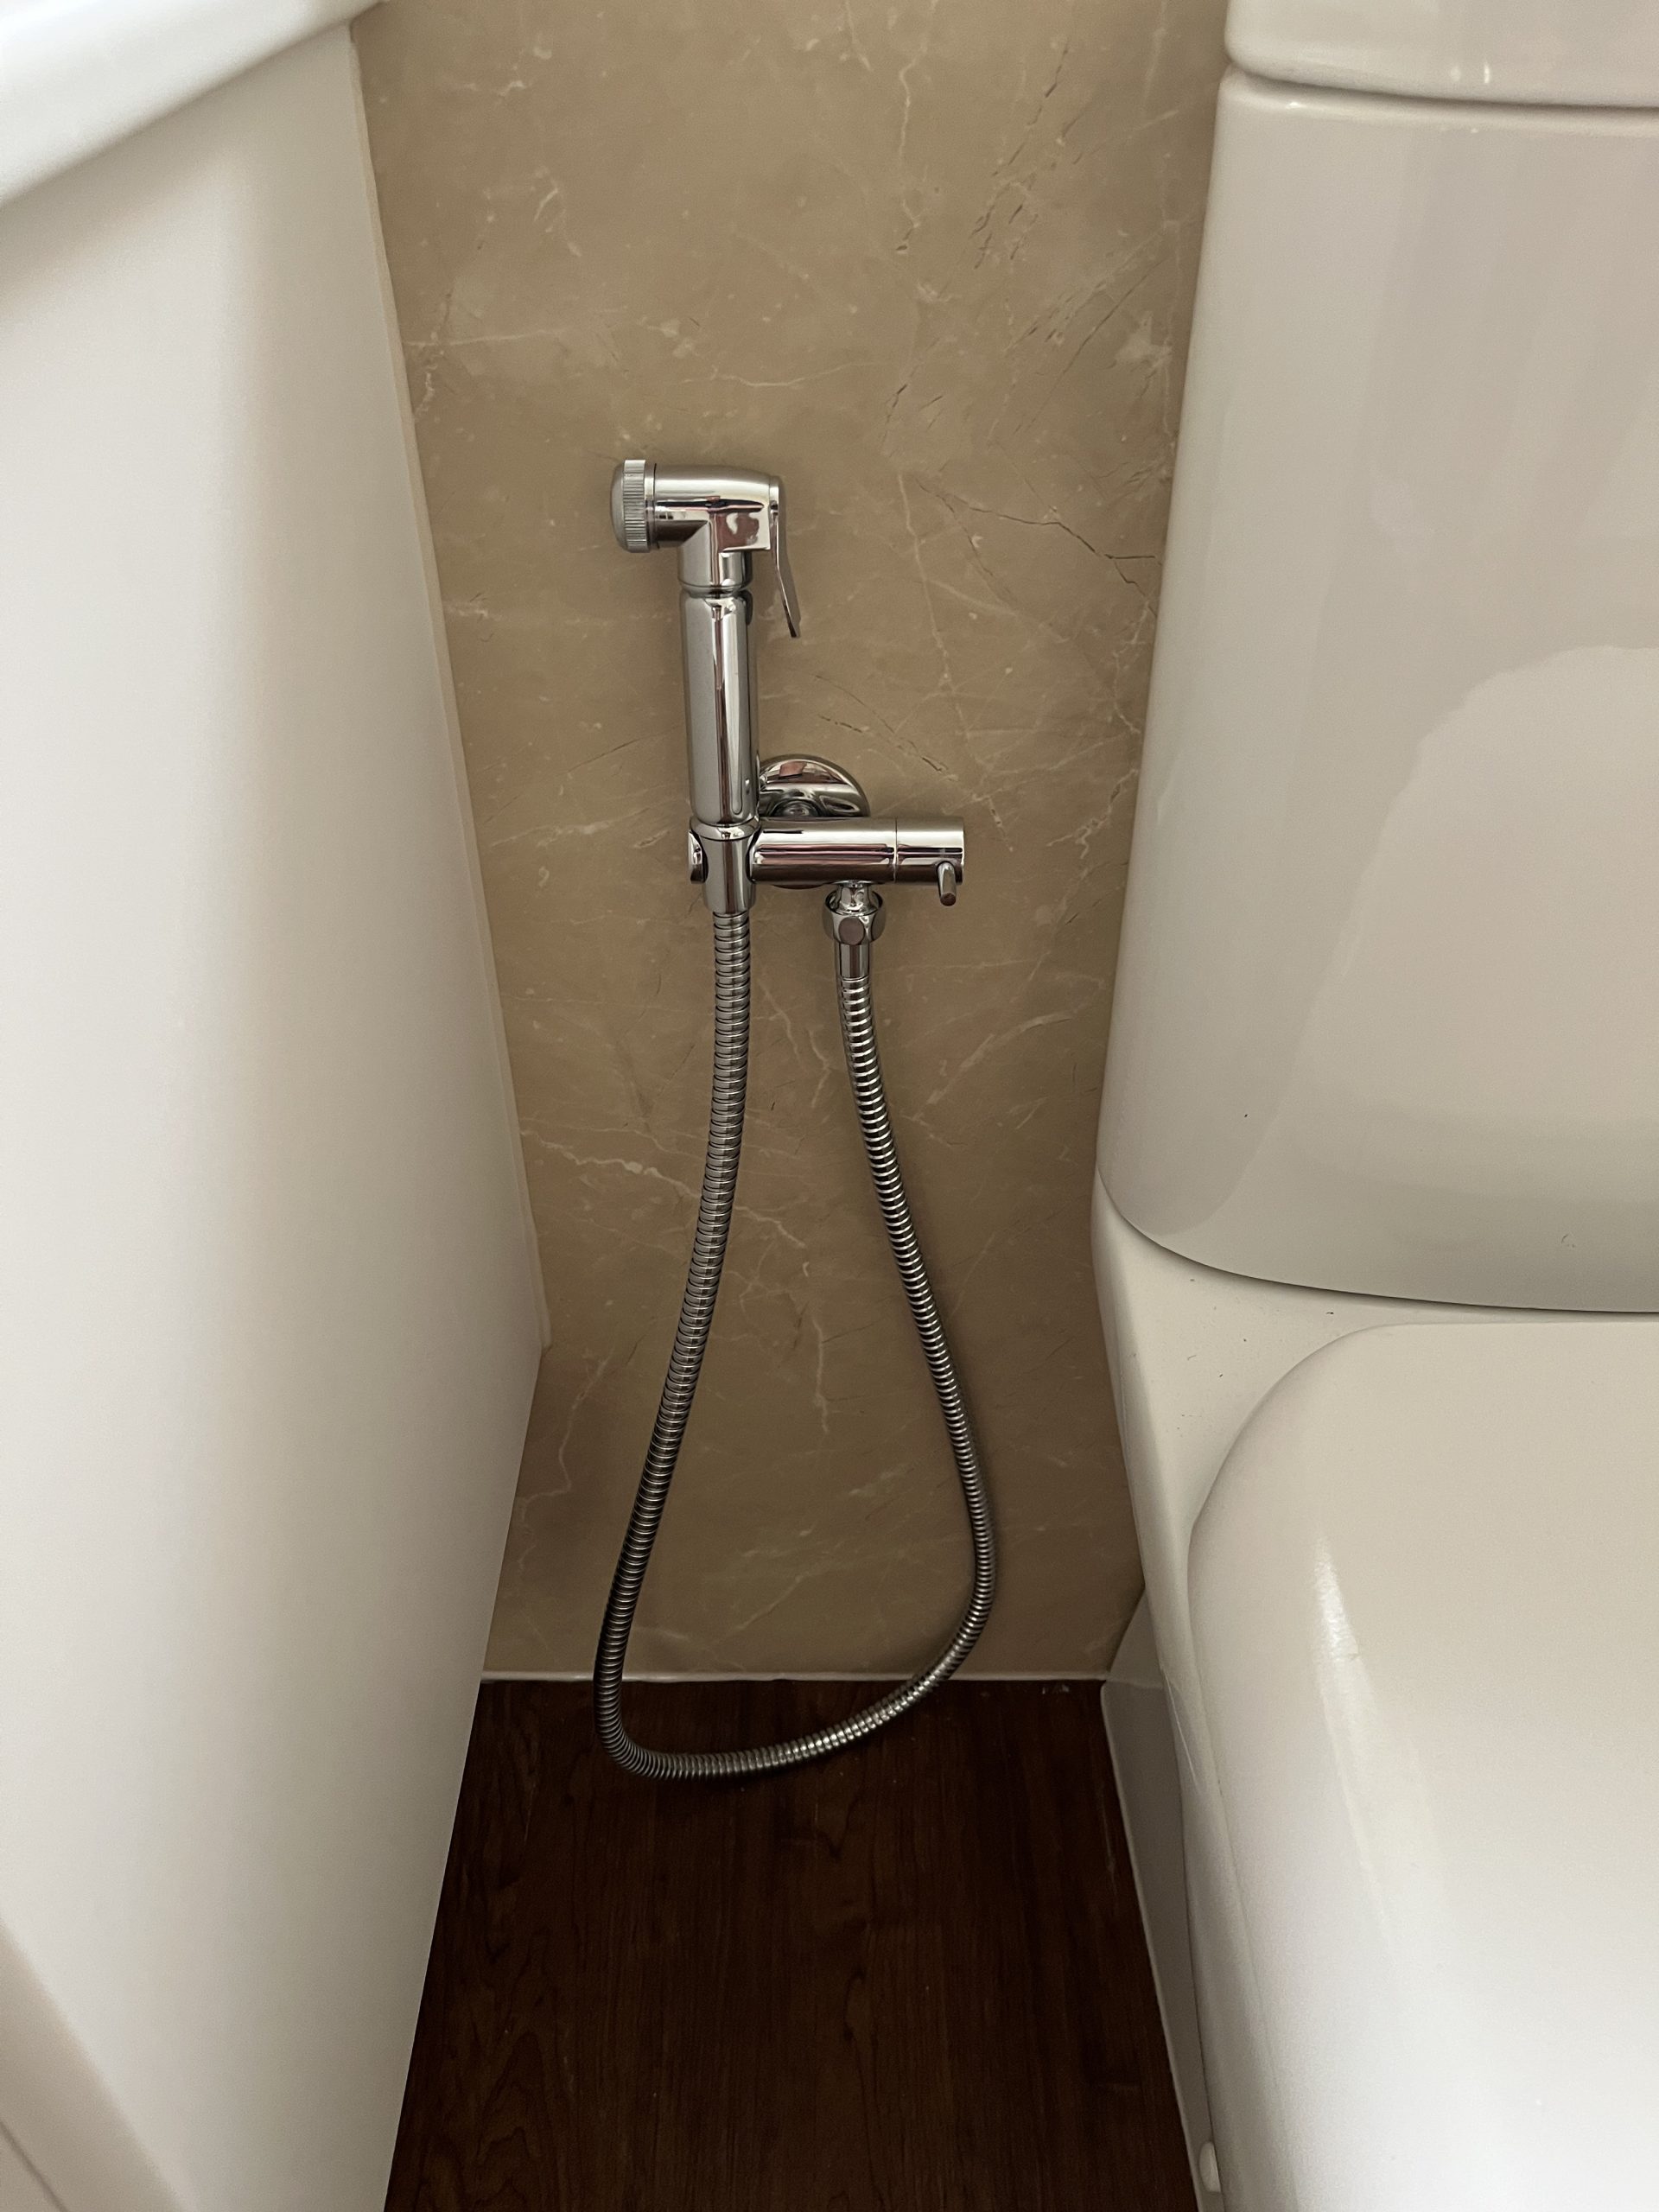
The primary drivers for this renovation were to remedy a leak in the shattaf/shower douche unit and to improve the home’s utility by removing the ‘Jack and Jill’ dual-access feature. By eliminating the second doorway, we successfully partitioned the space to create a dedicated cloakroom/shoe cupboard and a more private, functional single bathroom. This reconfiguration maximized the available floorplan to deliver a new, tailored storage solution.

IMG_6102
previous arrow
next arrow

Electrical and Plumbing Upgrades

The renovation included complex electrical work to ensure safety and regulatory compliance. The existing lighting system was consolidated into a single circuit controlled by dual switches. Our team expertly isolated and divided this legacy system to establish two individual, independent lighting circuits—one for the main bathroom and a separate circuit for the new cloakroom. This precise re-wiring ensures full compliance with modern electrical standards and provides independent control for the segregated areas.

In the plumbing specification, client safety and ease-of-use were paramount. The isolation valve on the shattaf unit was required to be highly accessible and simple to operate. We rejected the original unit and procured a replacement featuring a superior, ergonomic handle. The new isolation valve was installed in line with industry best practice for functionality, correctly positioned on the right-hand side of the toilet.

Finishing Solutions: Efficiency and Aesthetic Integration

To meet the client’s preference for minimal disruption and to avoid the cost and time associated with full re-tiling, we deployed high-quality shower panels. This method provided a seamless, waterproof finish that was selected to harmoniously integrate with the existing tiling, delivering a premium look with enhanced project efficiency.

Project Metrics: Delivery and Investment

This comprehensive refurbishment was executed with controlled precision, demonstrating our ability to deliver complex projects efficiently:

  • Timeline: The project was completed in approximately one week from start to finish.
  • Cost Breakdown (Excluding VAT):
    • Materials: £1,200
    • Labour: £2,800
    • Electrics (including lights and extractor fan): £400
    • Plastering: £300
    • Joinery: £300
    • Total Project Investment (Excluding VAT): £5,000