Categories
Brickwork Extension Internal fit out

Opening up kitchen with steel (RSJ) beams in Selston, Nottinghamshire

Open Plan Living: How We Safely Removed a Wall to Expand a Kitchen

Changing the layout of a property to create an open-plan kitchen is one of the most common requests we receive. It’s a fantastic way to transform how a home feels, but it requires careful structural planning.
img_6819
previous arrow
next arrow

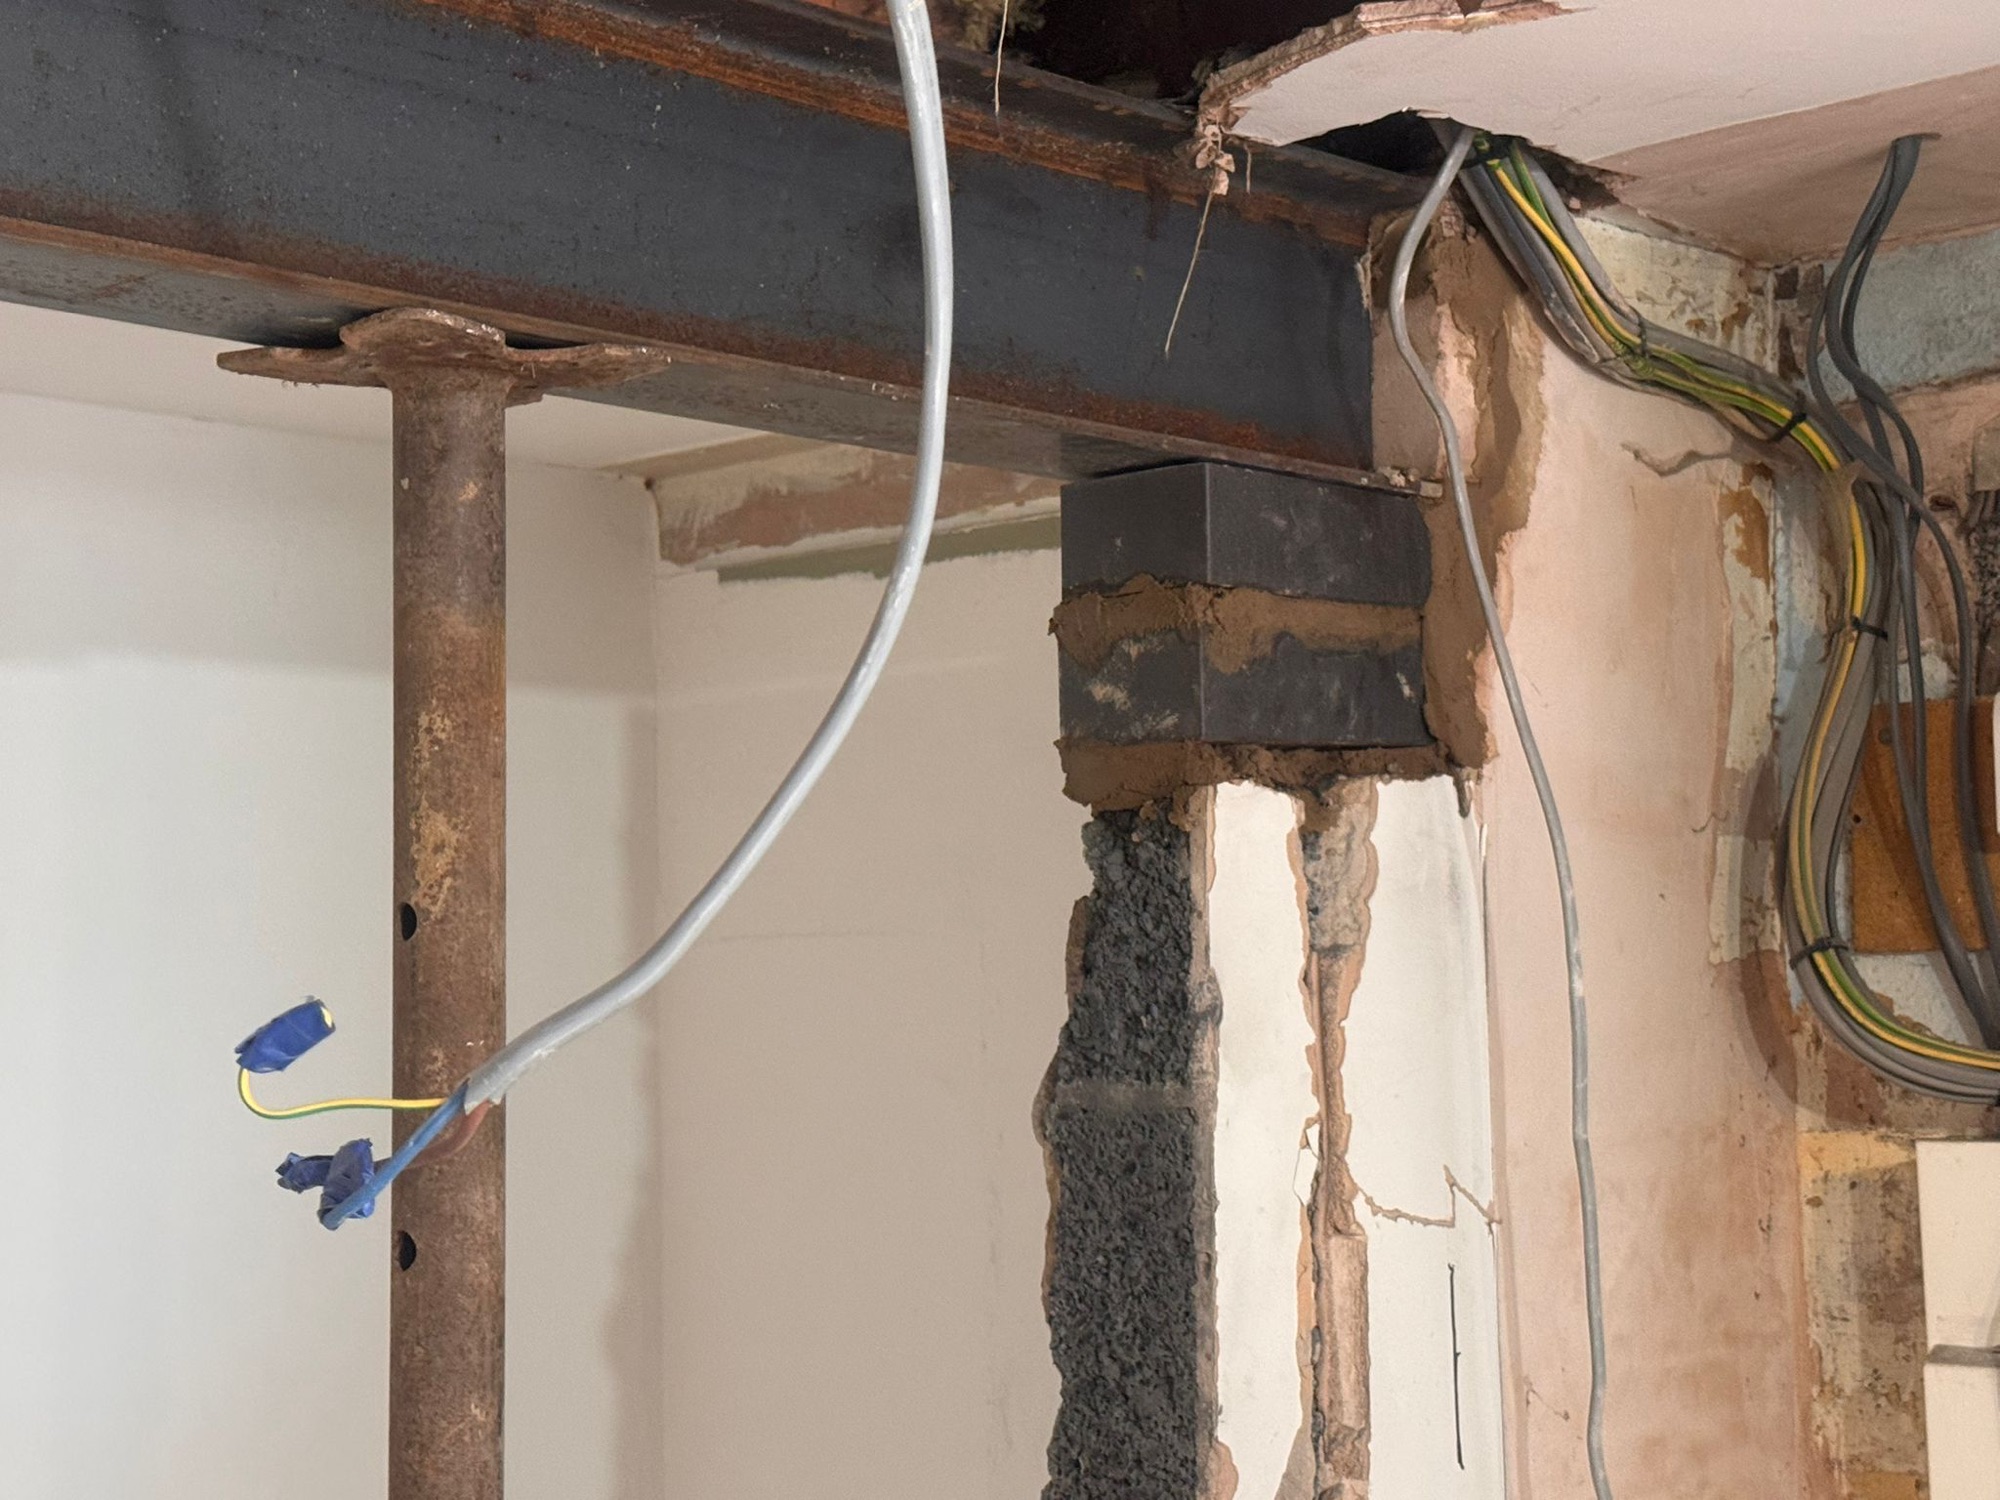
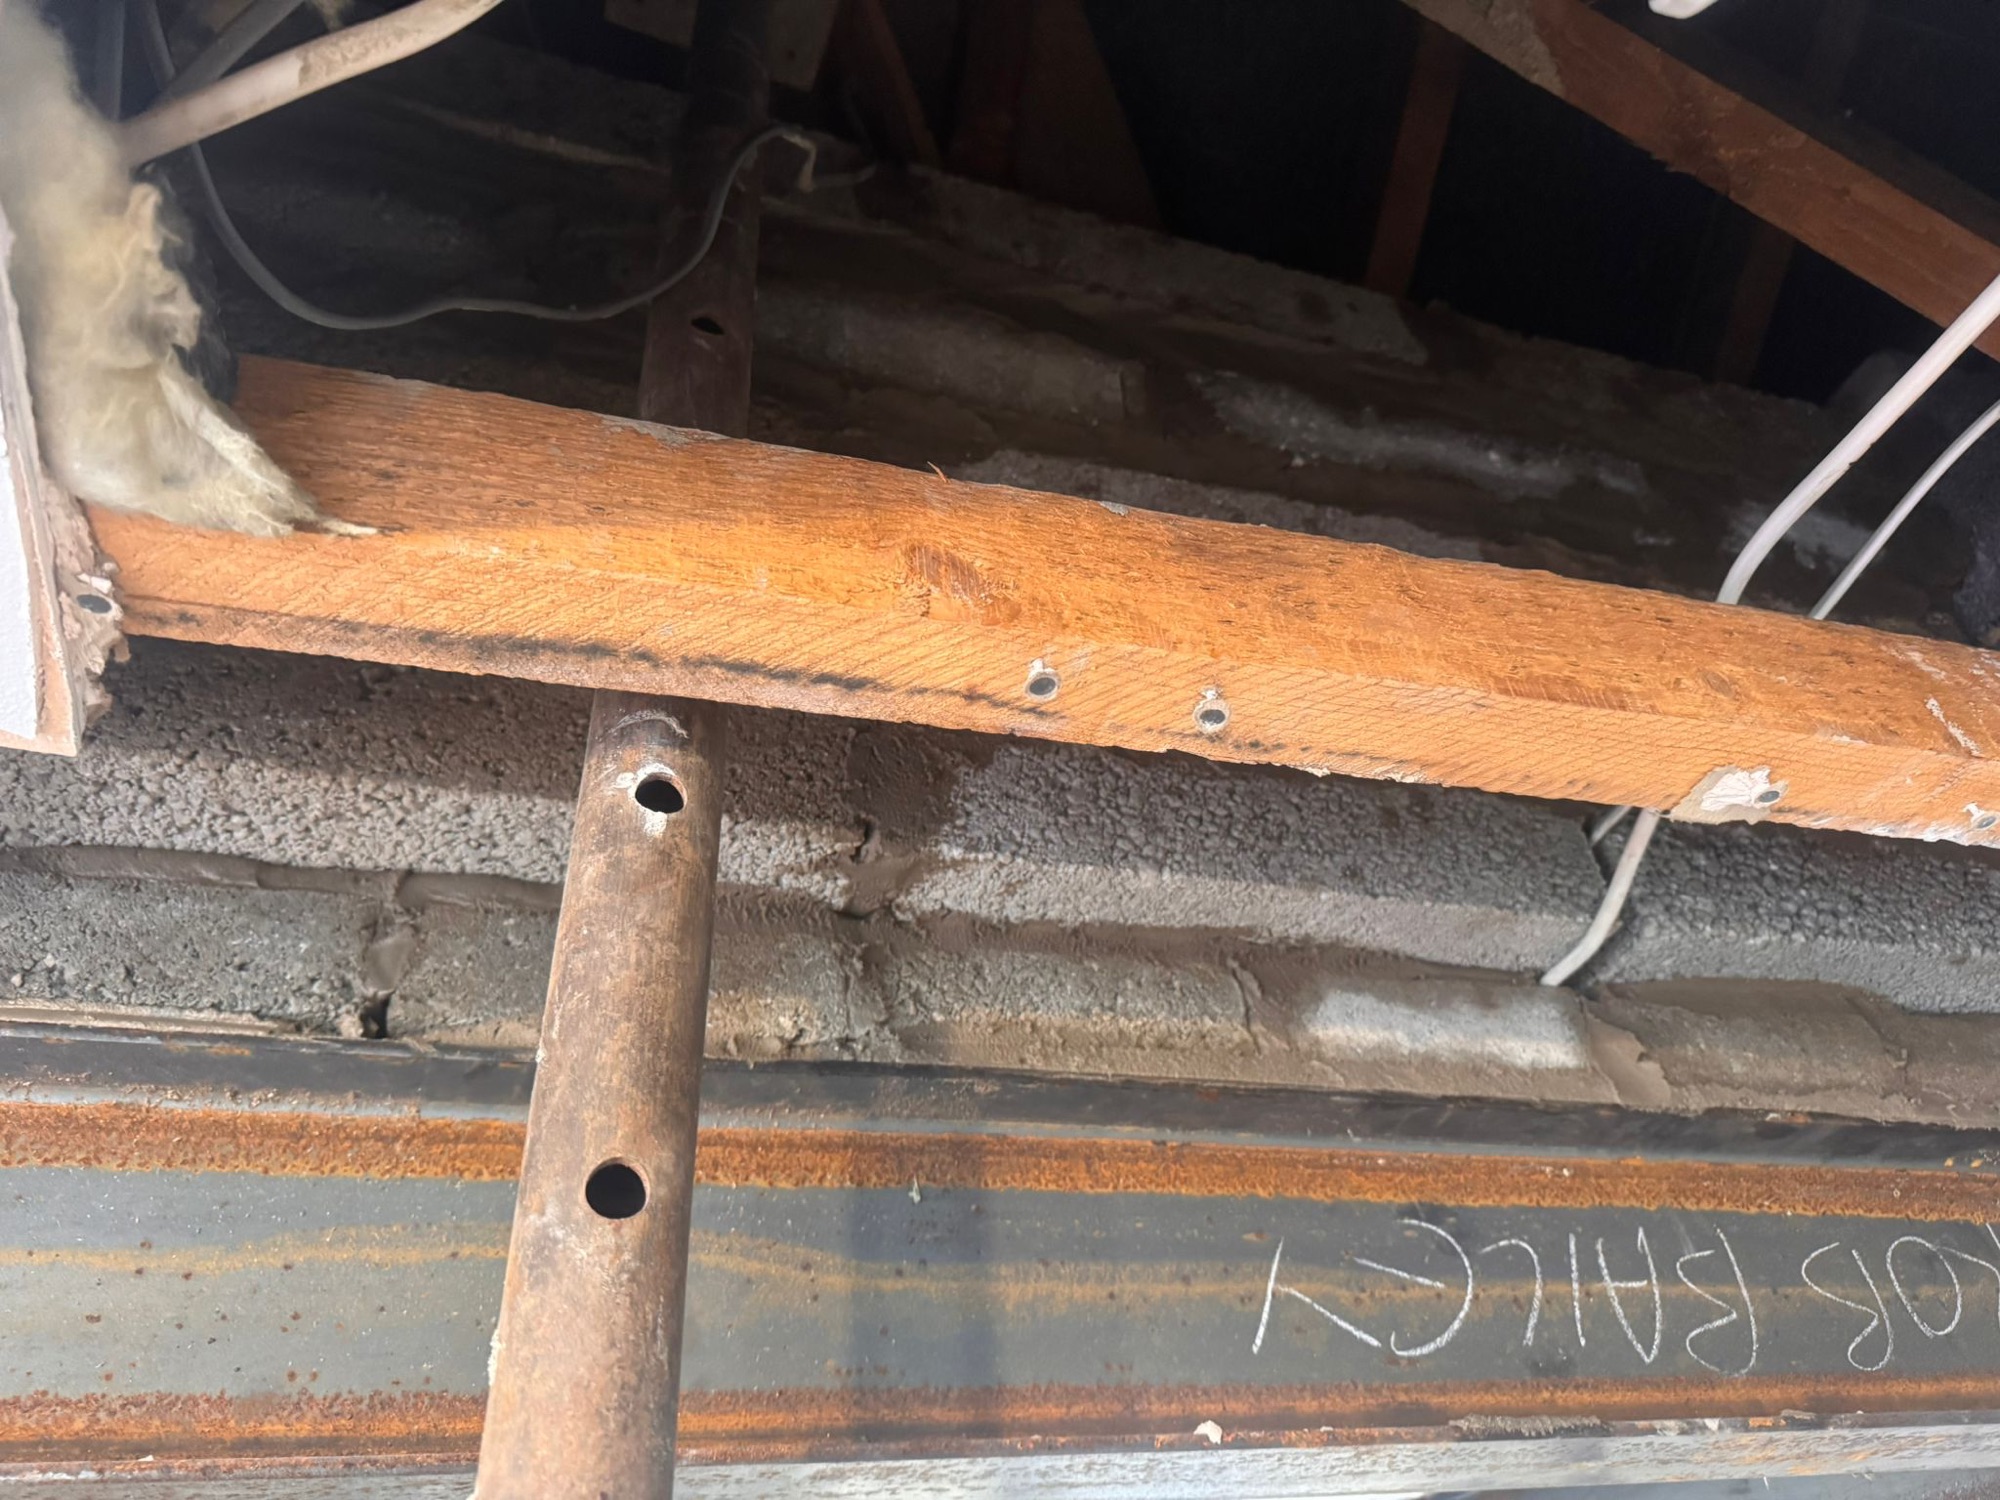
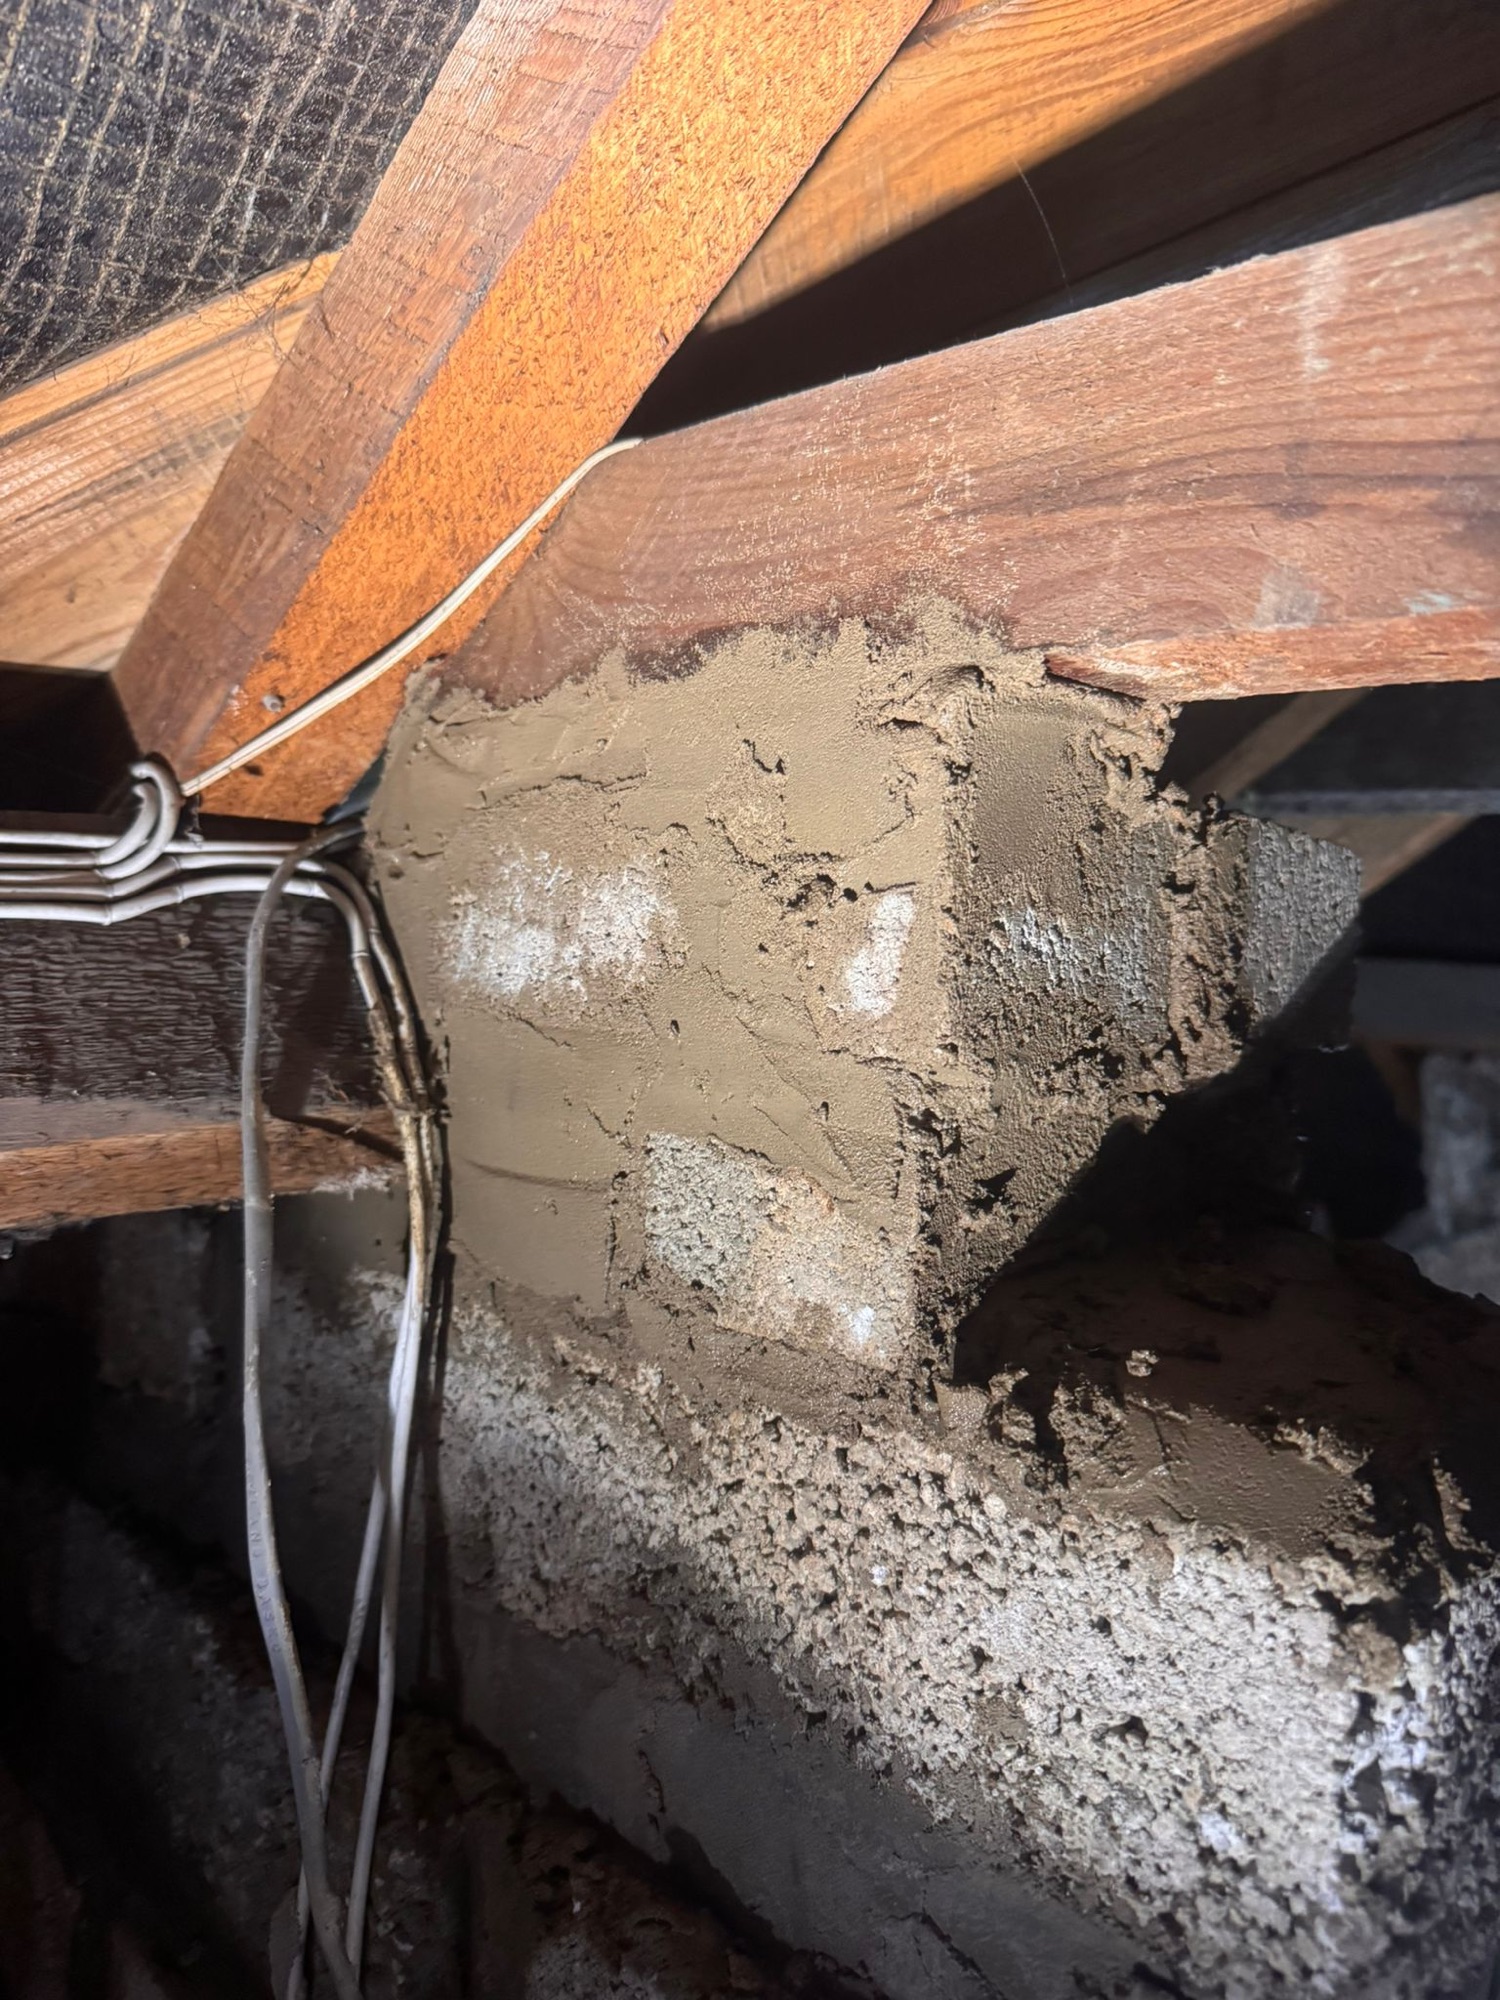
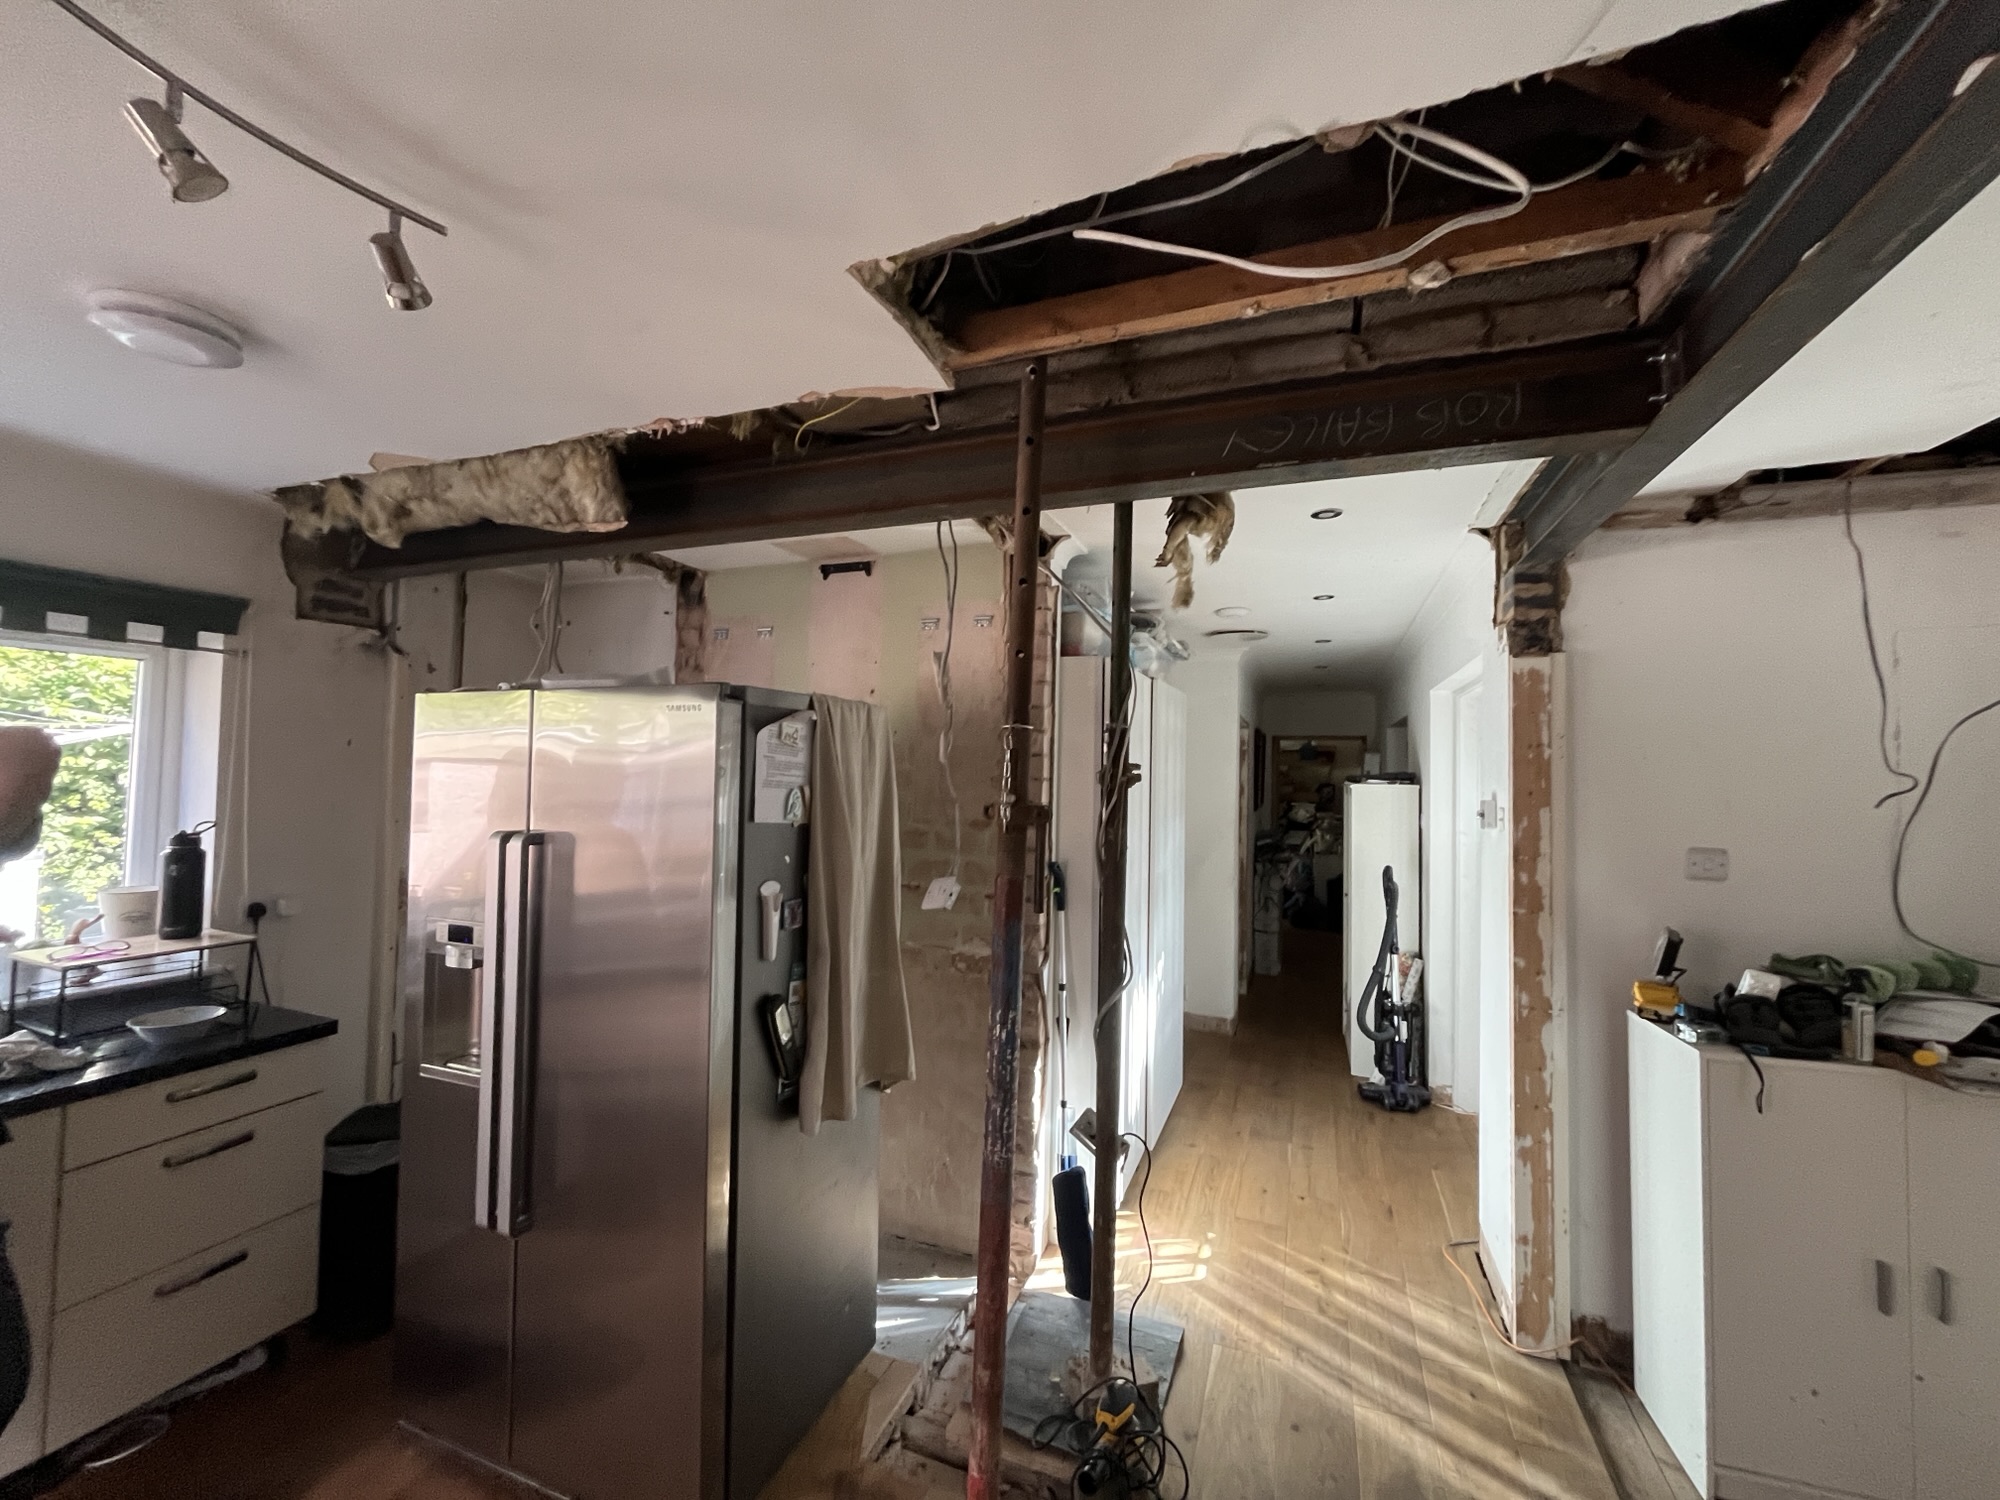
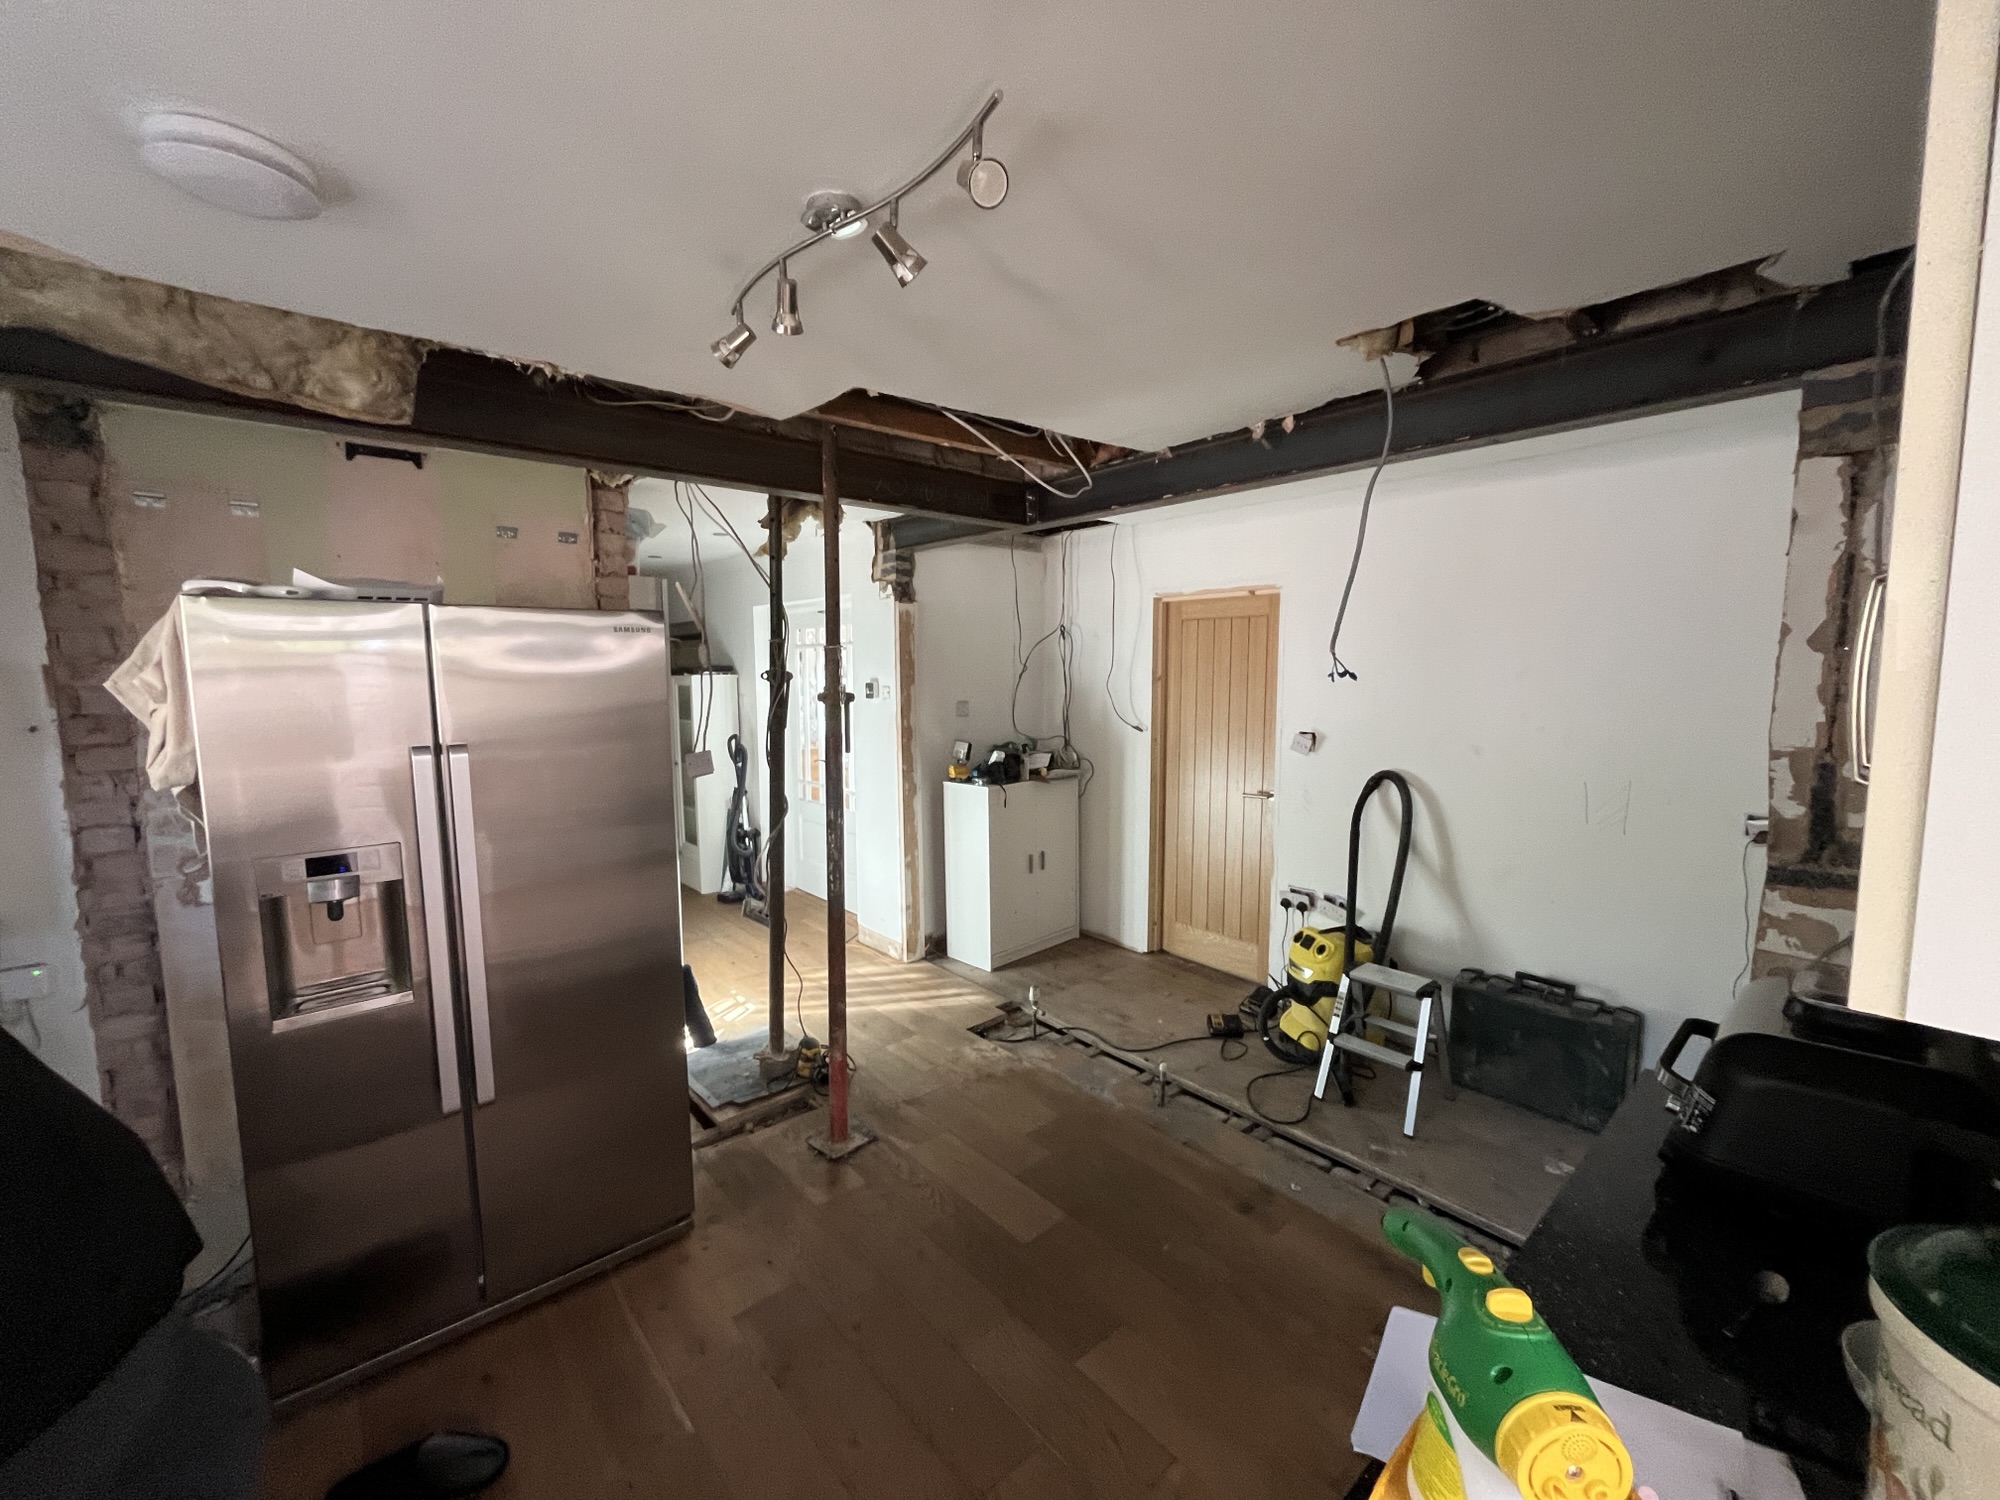
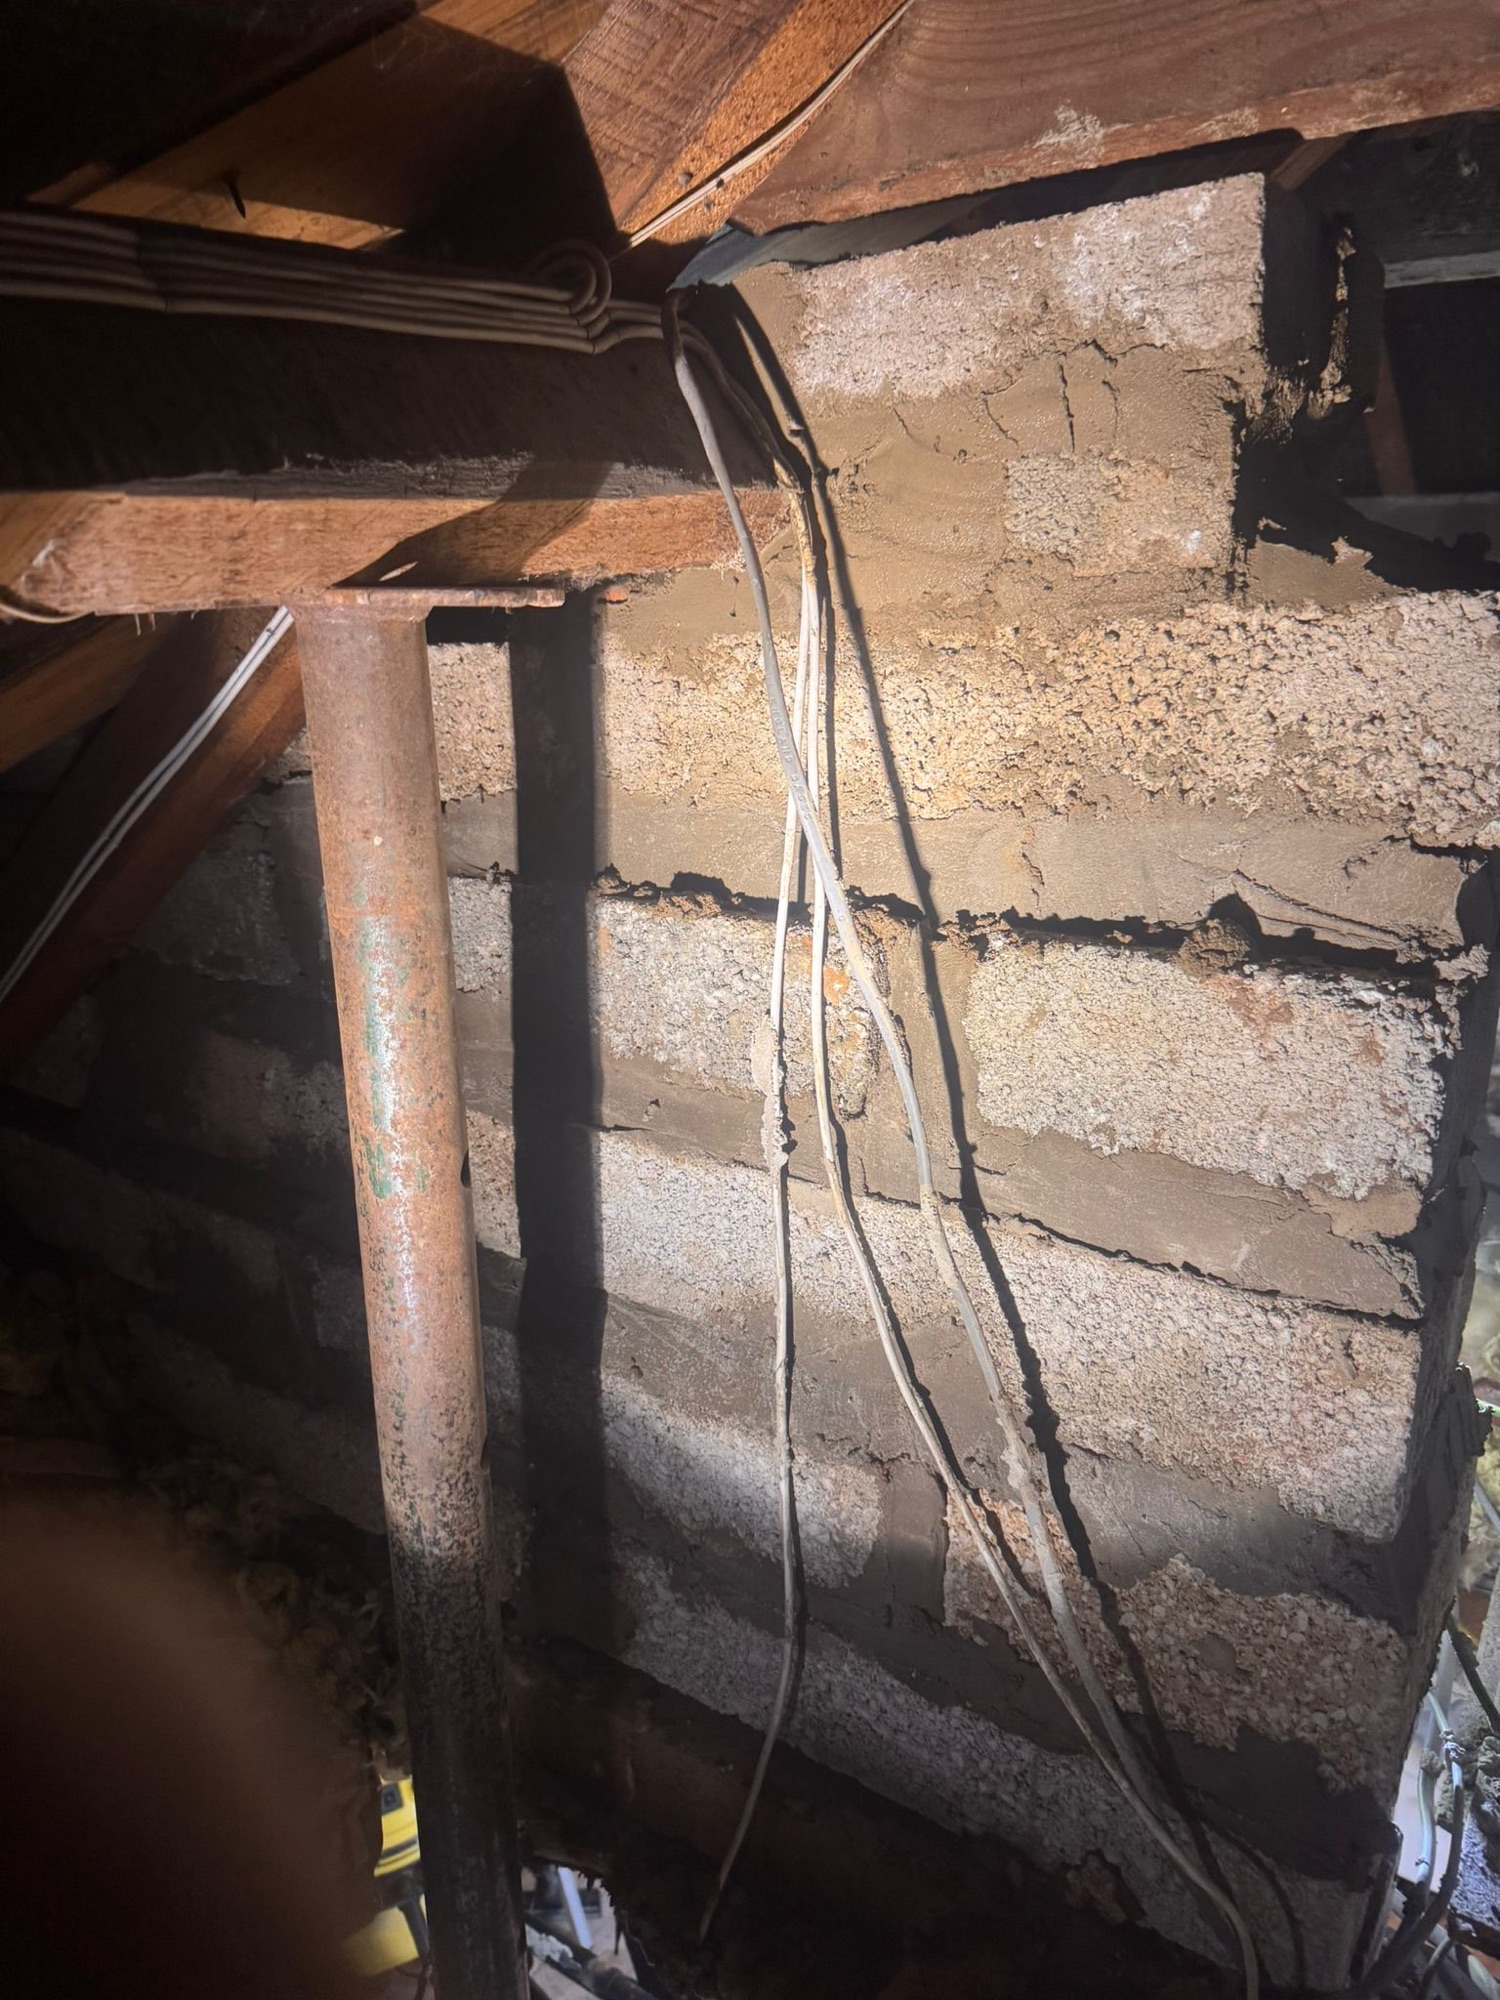
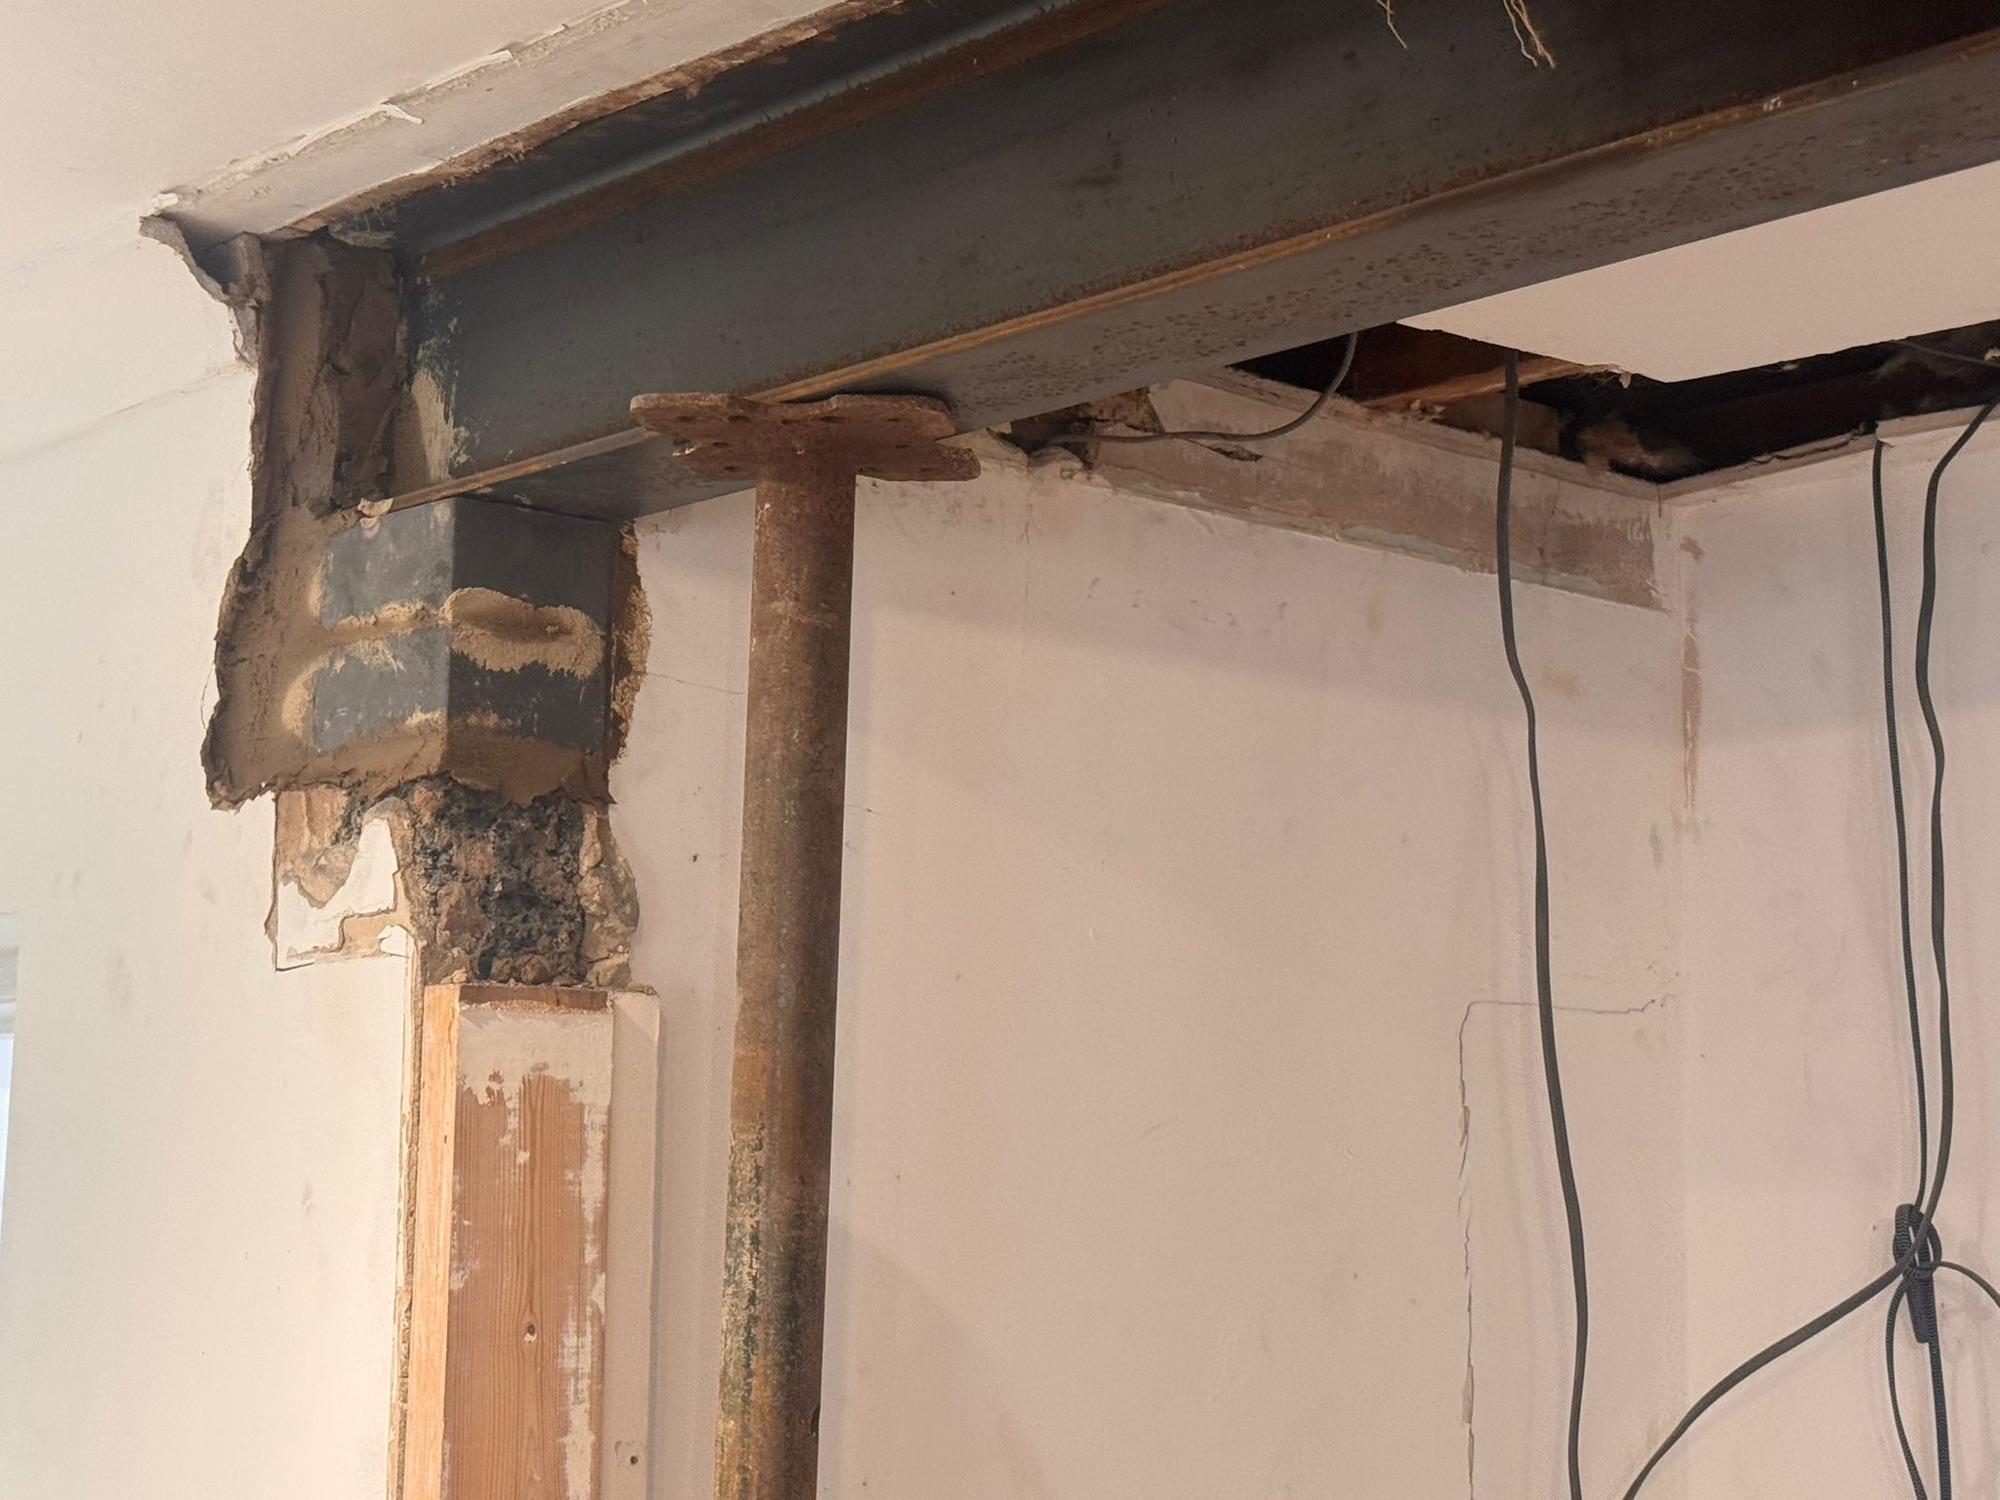
We recently worked on a bungalow where the client wanted to open up their kitchen space. This project had an extra layer of complexity: the property had been extended in the past, and the roof purlins were sitting directly on the internal walls that needed to be removed.

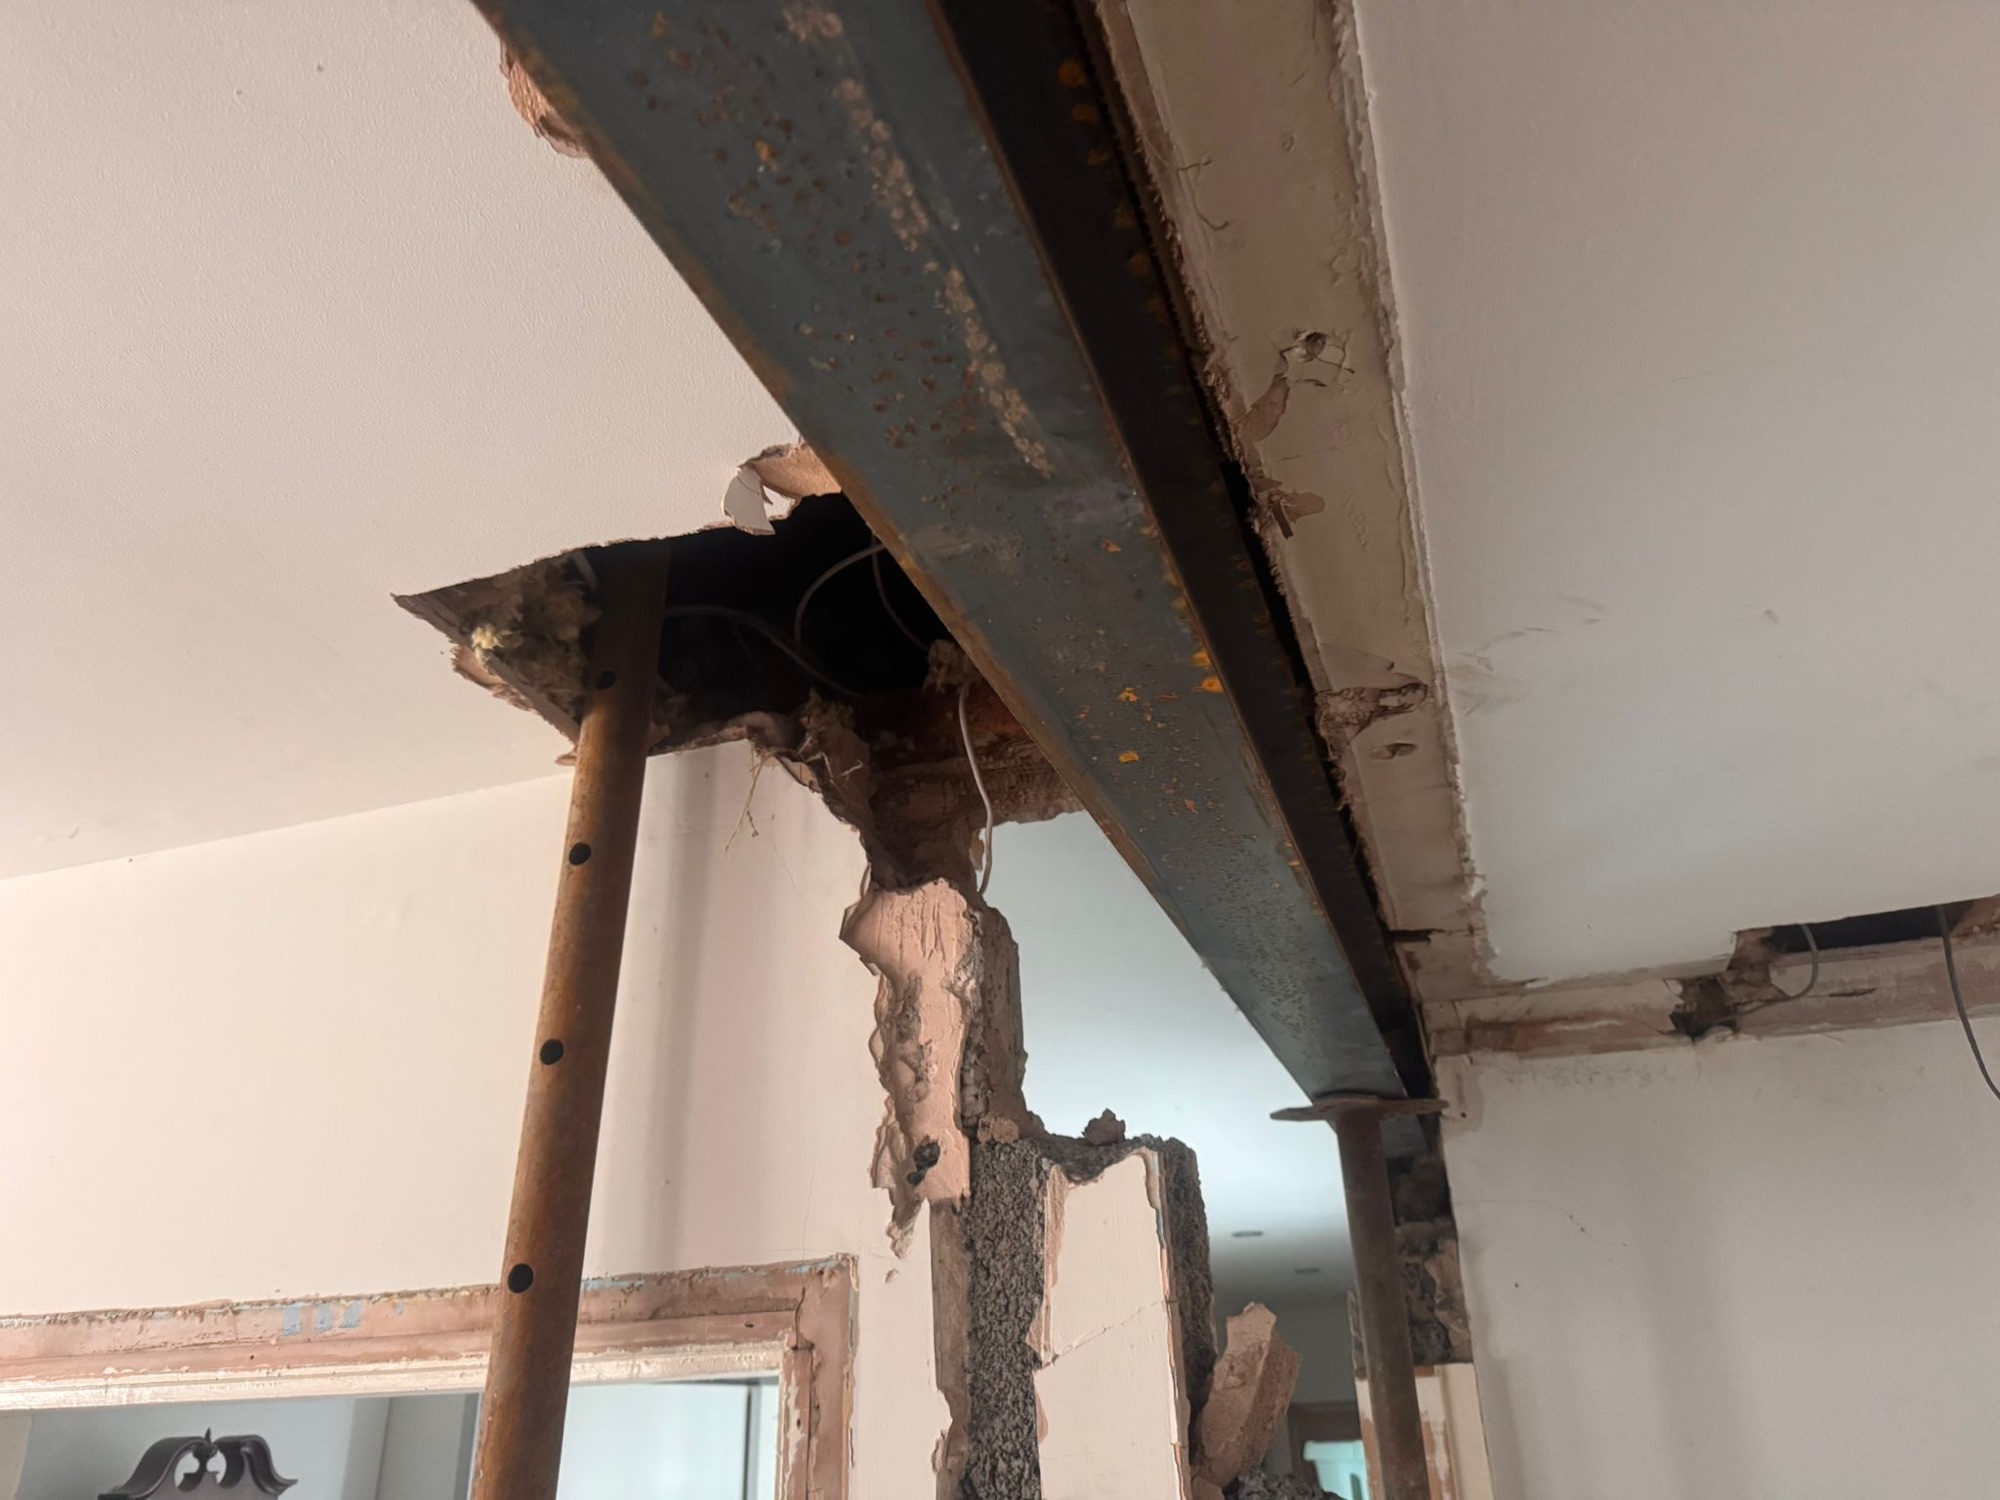
We never cut corners on safety. We started by engaging an Archetectural technician to provide cost-effective drawings, and we had a structural engineer specify two steel RSJ beams to take the load safely. 

The installation required a precise, multi-step approach:

  1. Preparation: Once the steel beams arrived, we propped up the roof using Acro props in multiple locations to ensure stability.
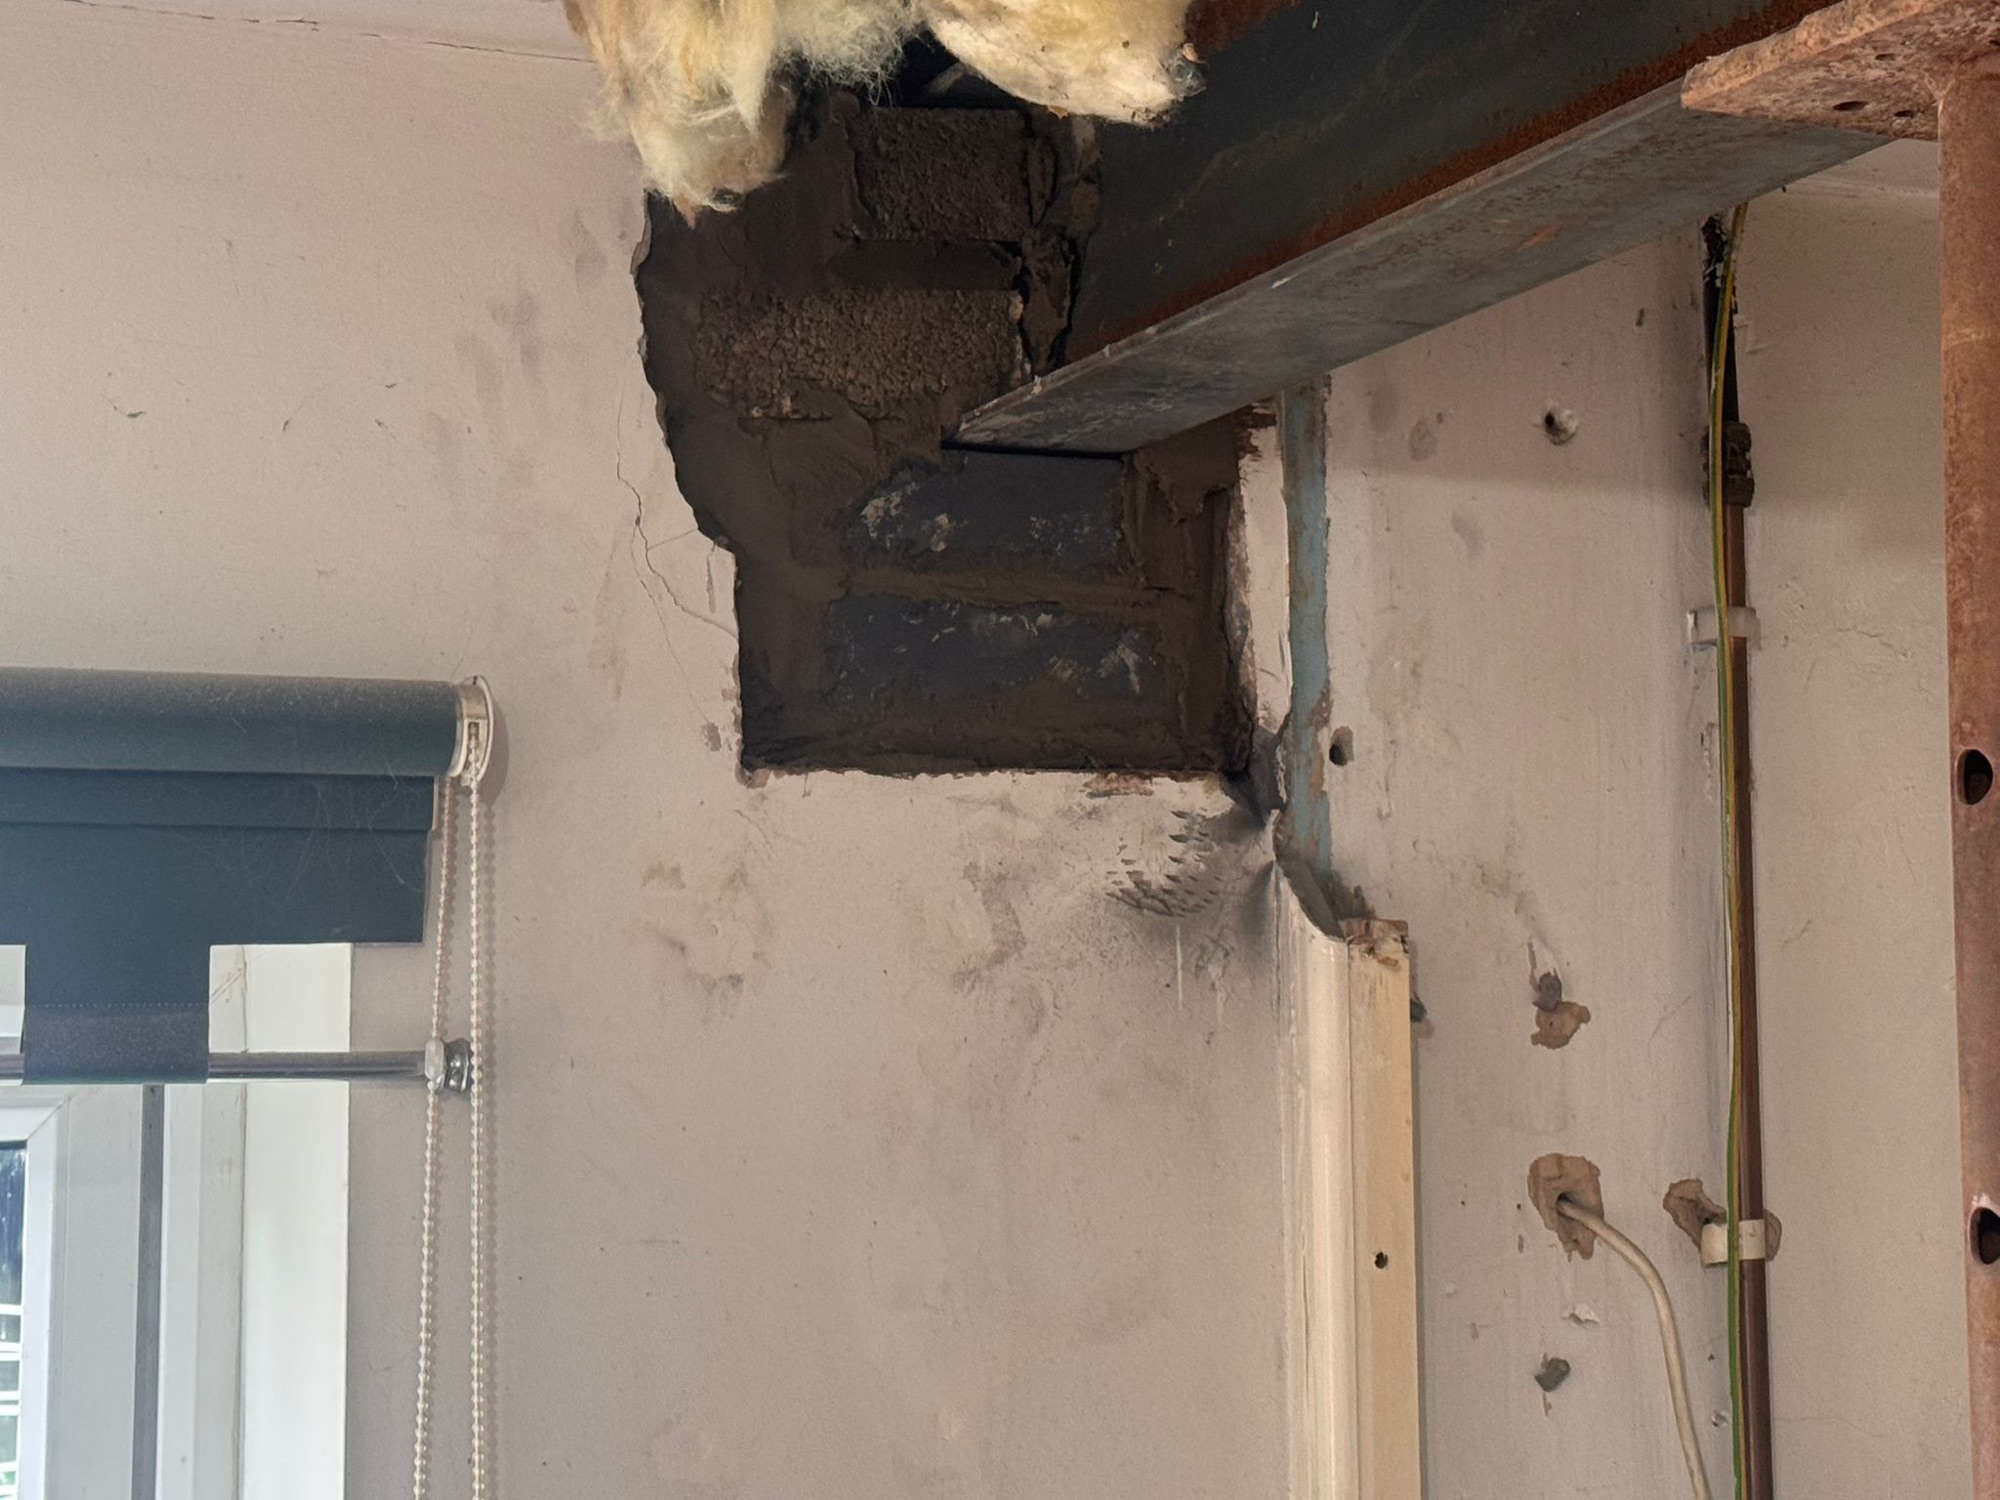
  2. Structural Installation: We removed the top section of brickwork and installed the two lintels (3.6m and 3.8m respectively) onto new pad stones, which spread the load evenly.
  3. Removal: Only once the structure was fully supported by the new steelwork did we remove the old block walls and clear the waste.

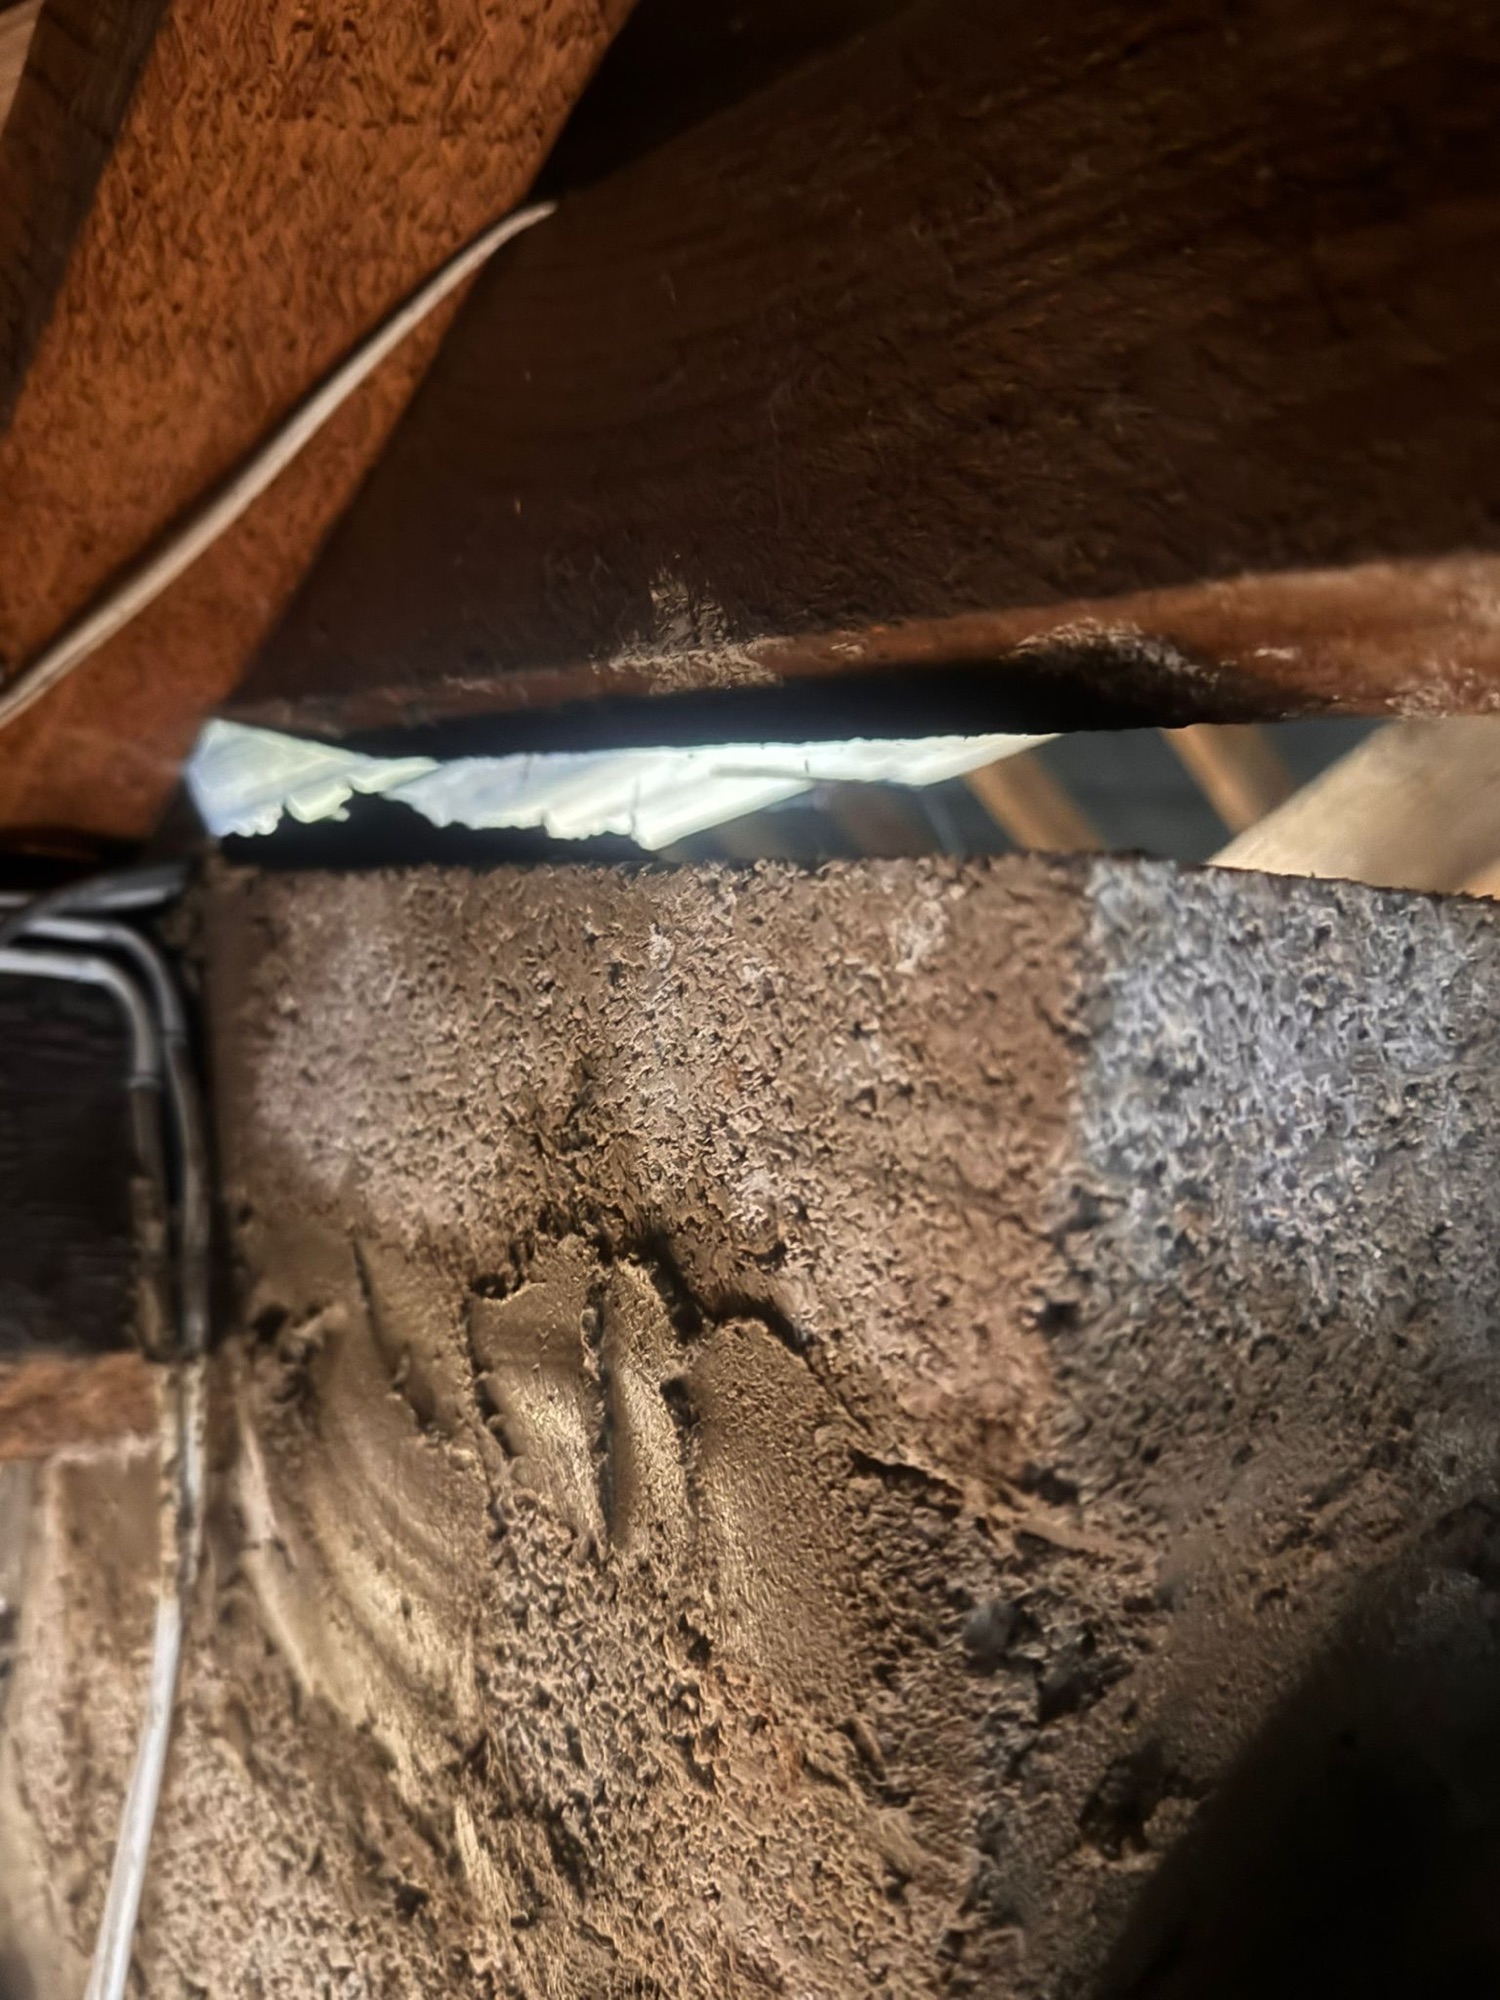
A Note on Quality: During the removal process, we discovered that the blocks supporting the existing roof purlins were already crumbling. It was a good thing we undertook this project when we did; had those supports failed, the structural consequences would have been severe. 

We always break down the costs of our jobs. This gives our clients the option to handle specific finishing tasks themselves—like “making good” the plaster and joinery—to save on their overall budget.

Estimated Costs for this Project:

  • Steel Beams: £500
  • Architectural Plans: £400
  • Structural Engineer Design: £250
  • Labour (Removal & Installation): £2,500 (approx. 4 days work requiring specialist tools/equipment)
  • Waste Disposal: £325
  • Basic Materials: £200 (Pad stones, cement, sand, bricks/blocks)

Optional:

  • “Making Good”: We didn’t perform this for this specific client, but we advise allowing £1,000 for plastering and finishing.

Other Considerations:

Always remember to check for hidden utilities. If radiators or electrical sockets are in the way, you may need specialist trades. In this case, we were able to isolate the electrical socket into the ceiling space ourselves using compliant fittings, which we did at no extra charge to the client.


Need Help with Your Structural Alterations?

Whether you’re looking to create an open-plan living space or need to remove a load-bearing wall, we are here to ensure it’s done safely and professionally.

Call us today on 07737 088243 or email quote@swallowhillhomes.com for a prompt consultation.

Categories
Brickwork Build costs Renovation

Brickwork remediation in East Leake, Leicestershire

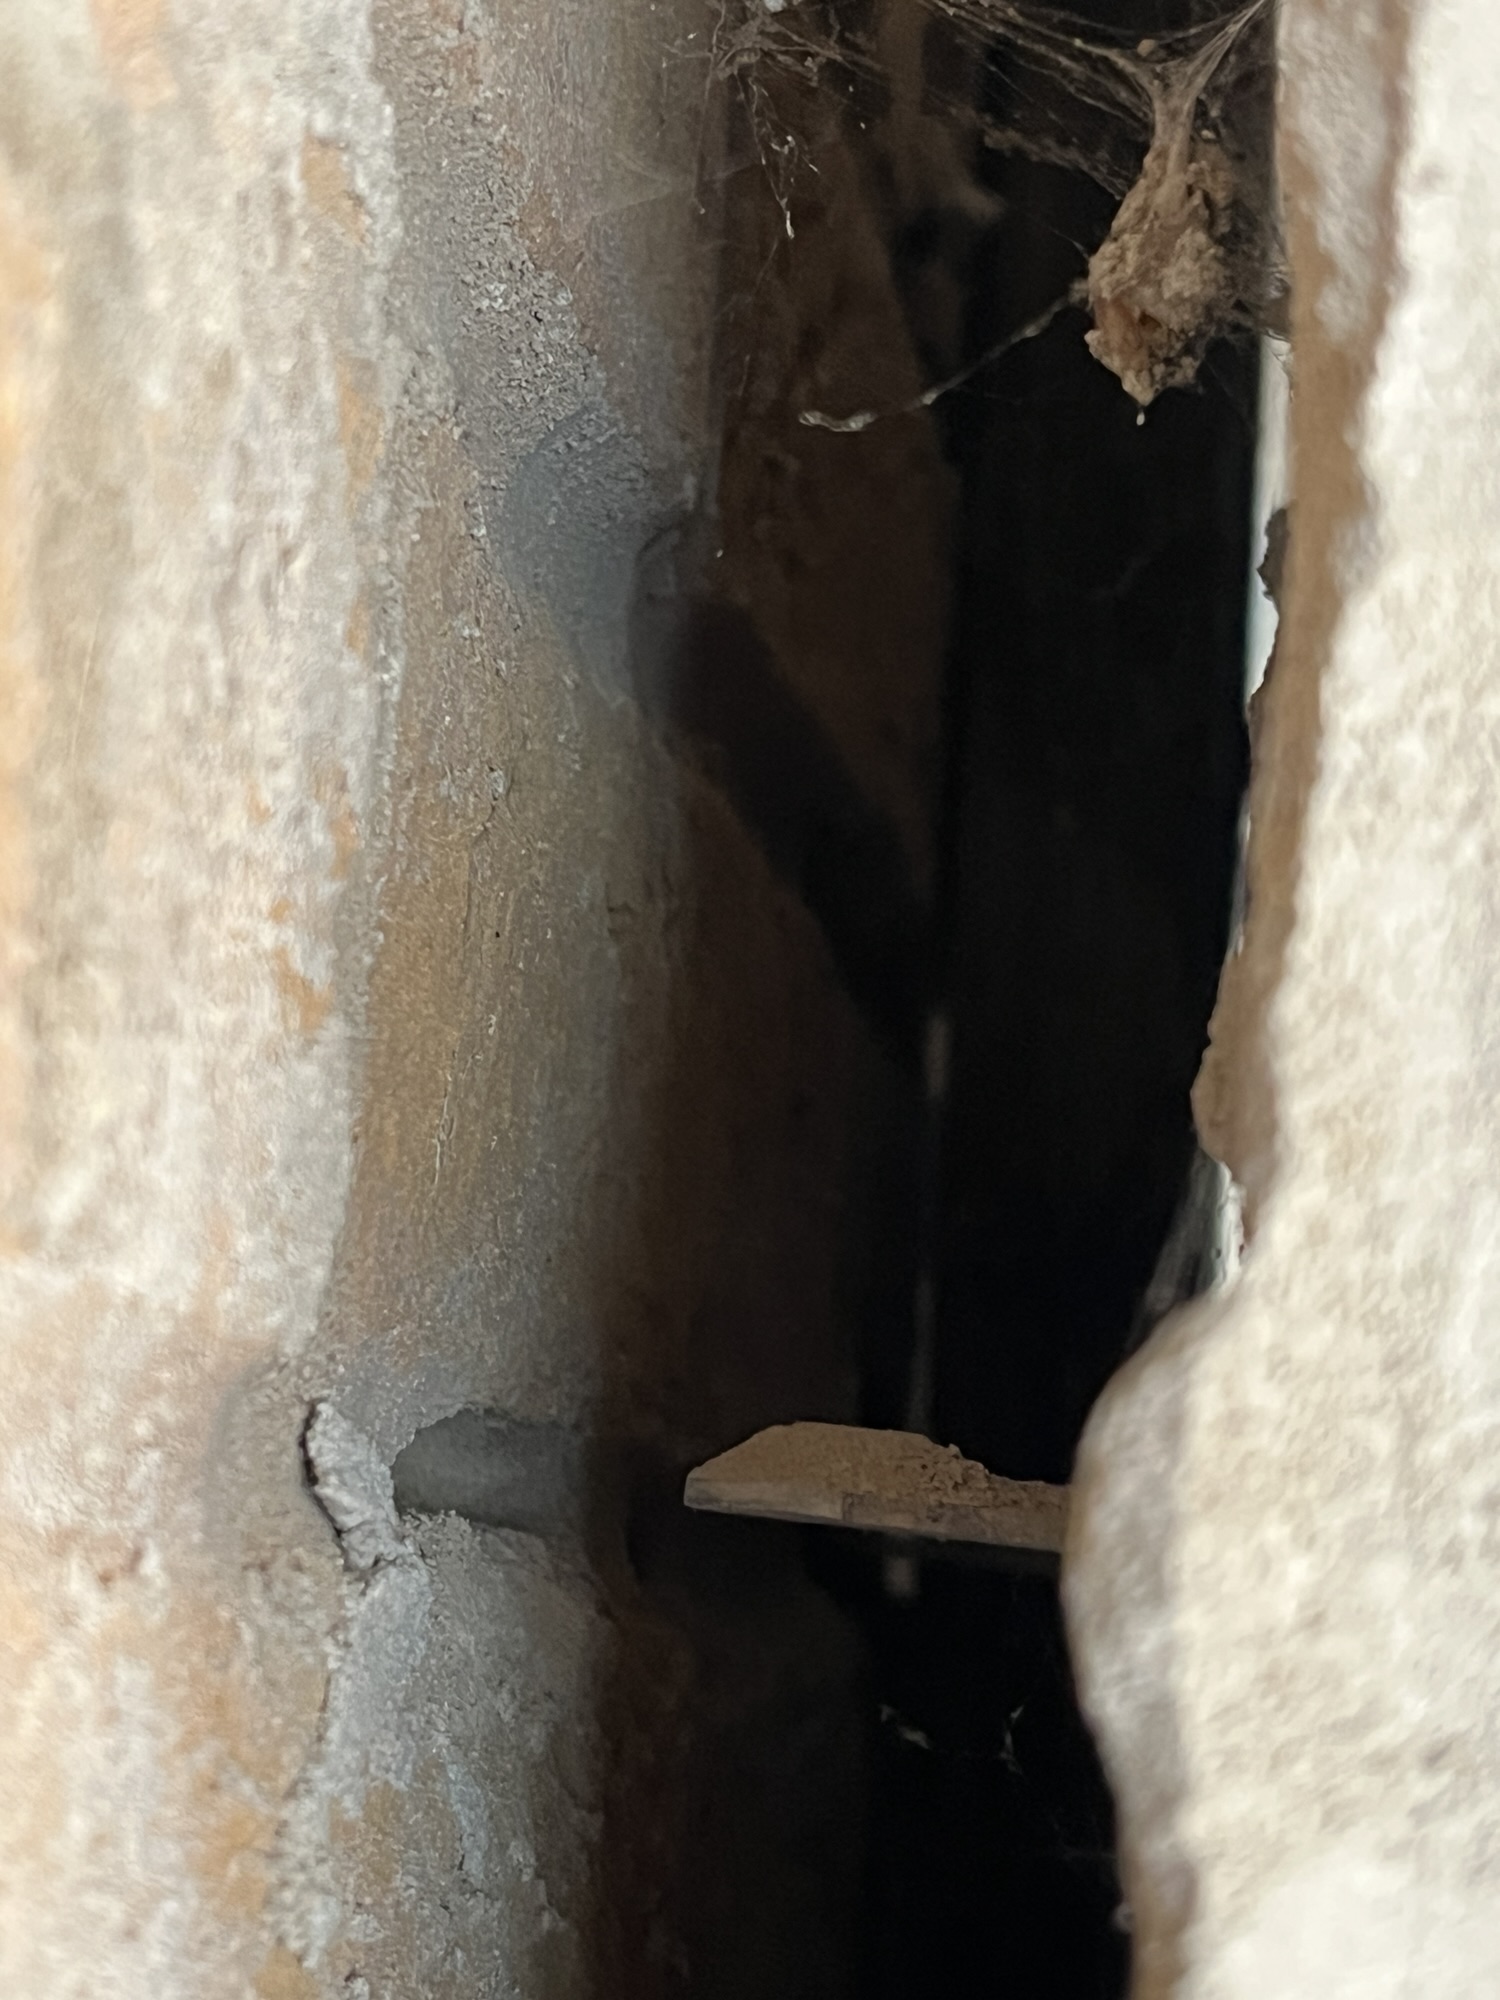
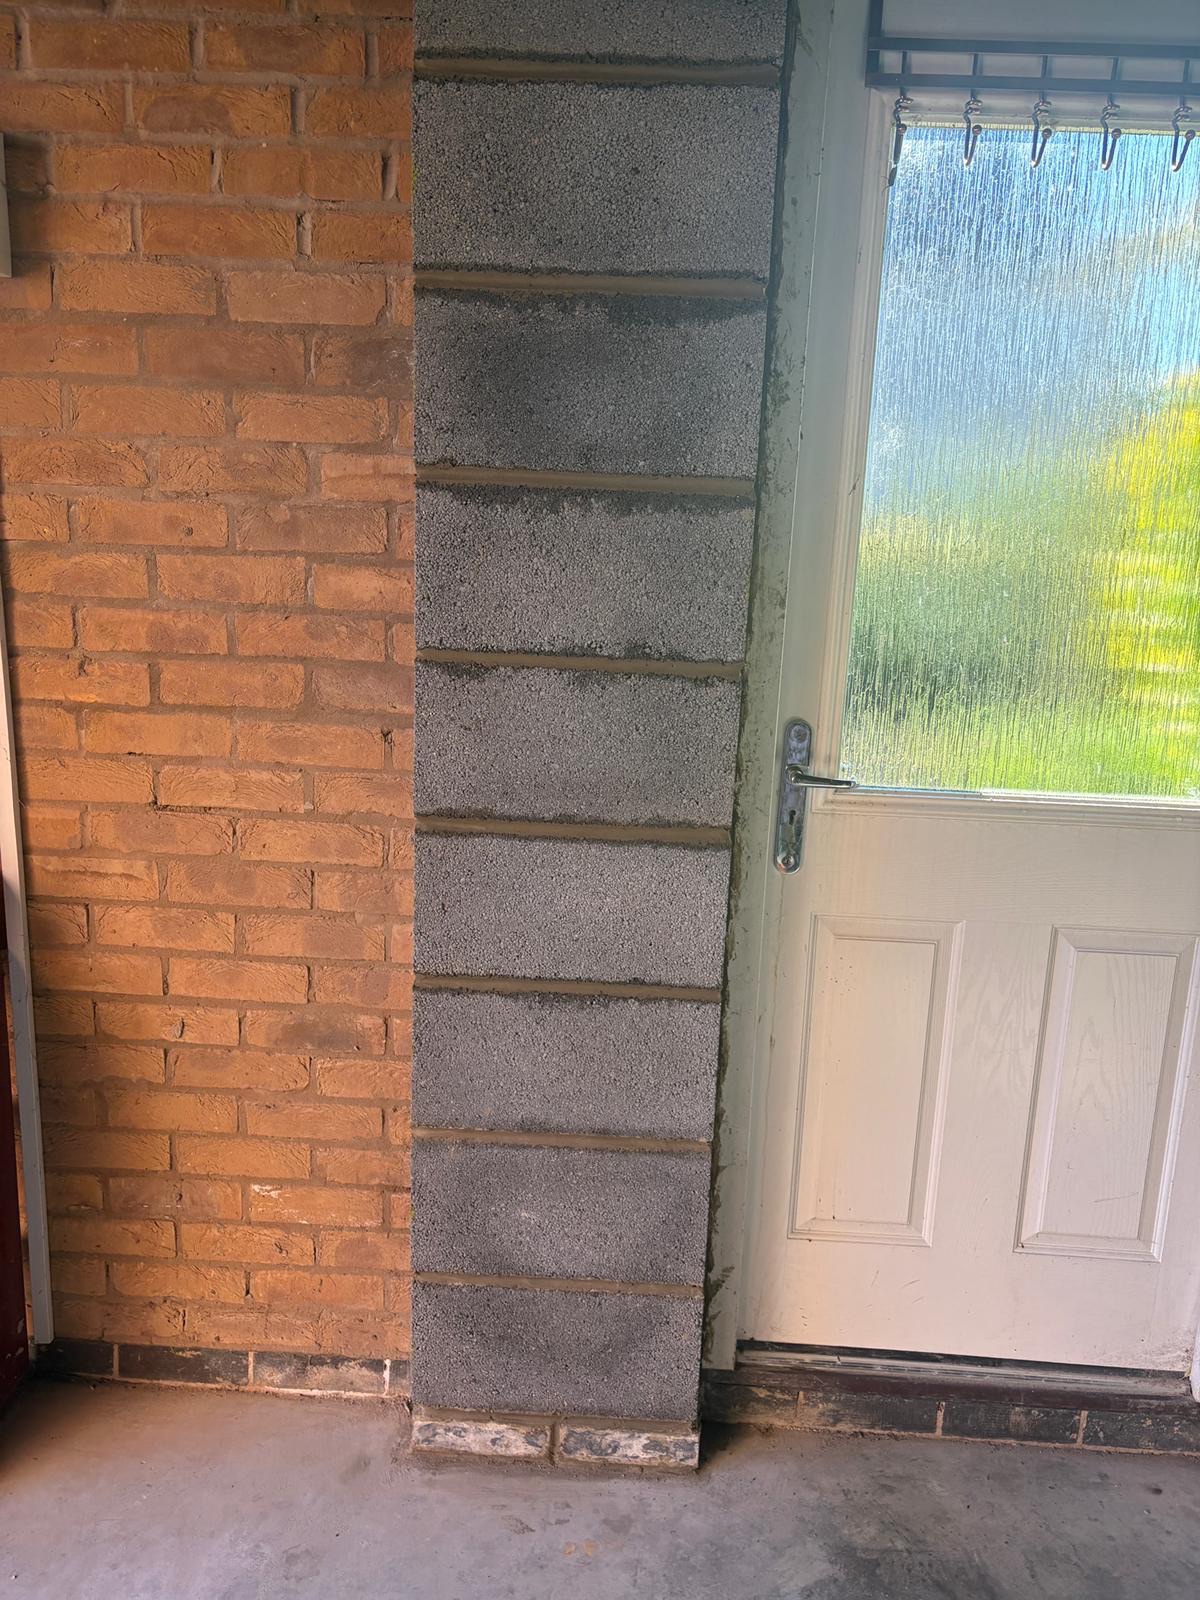
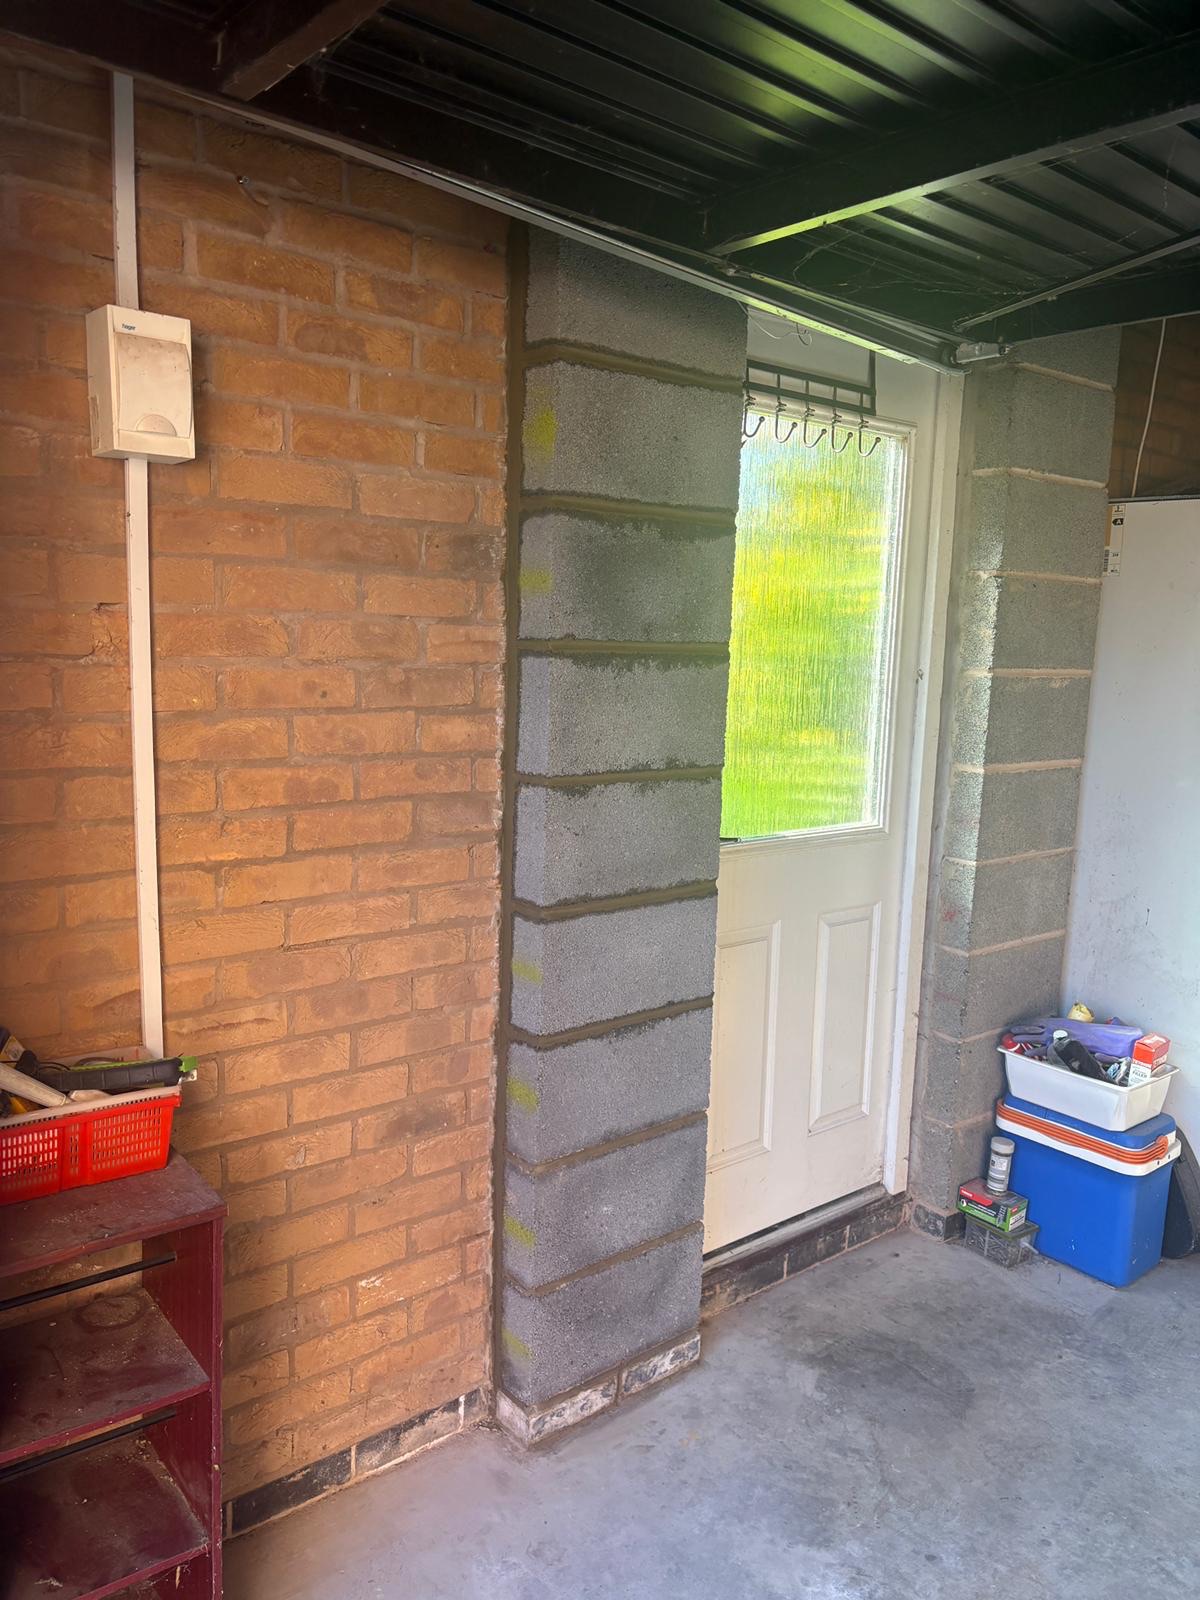
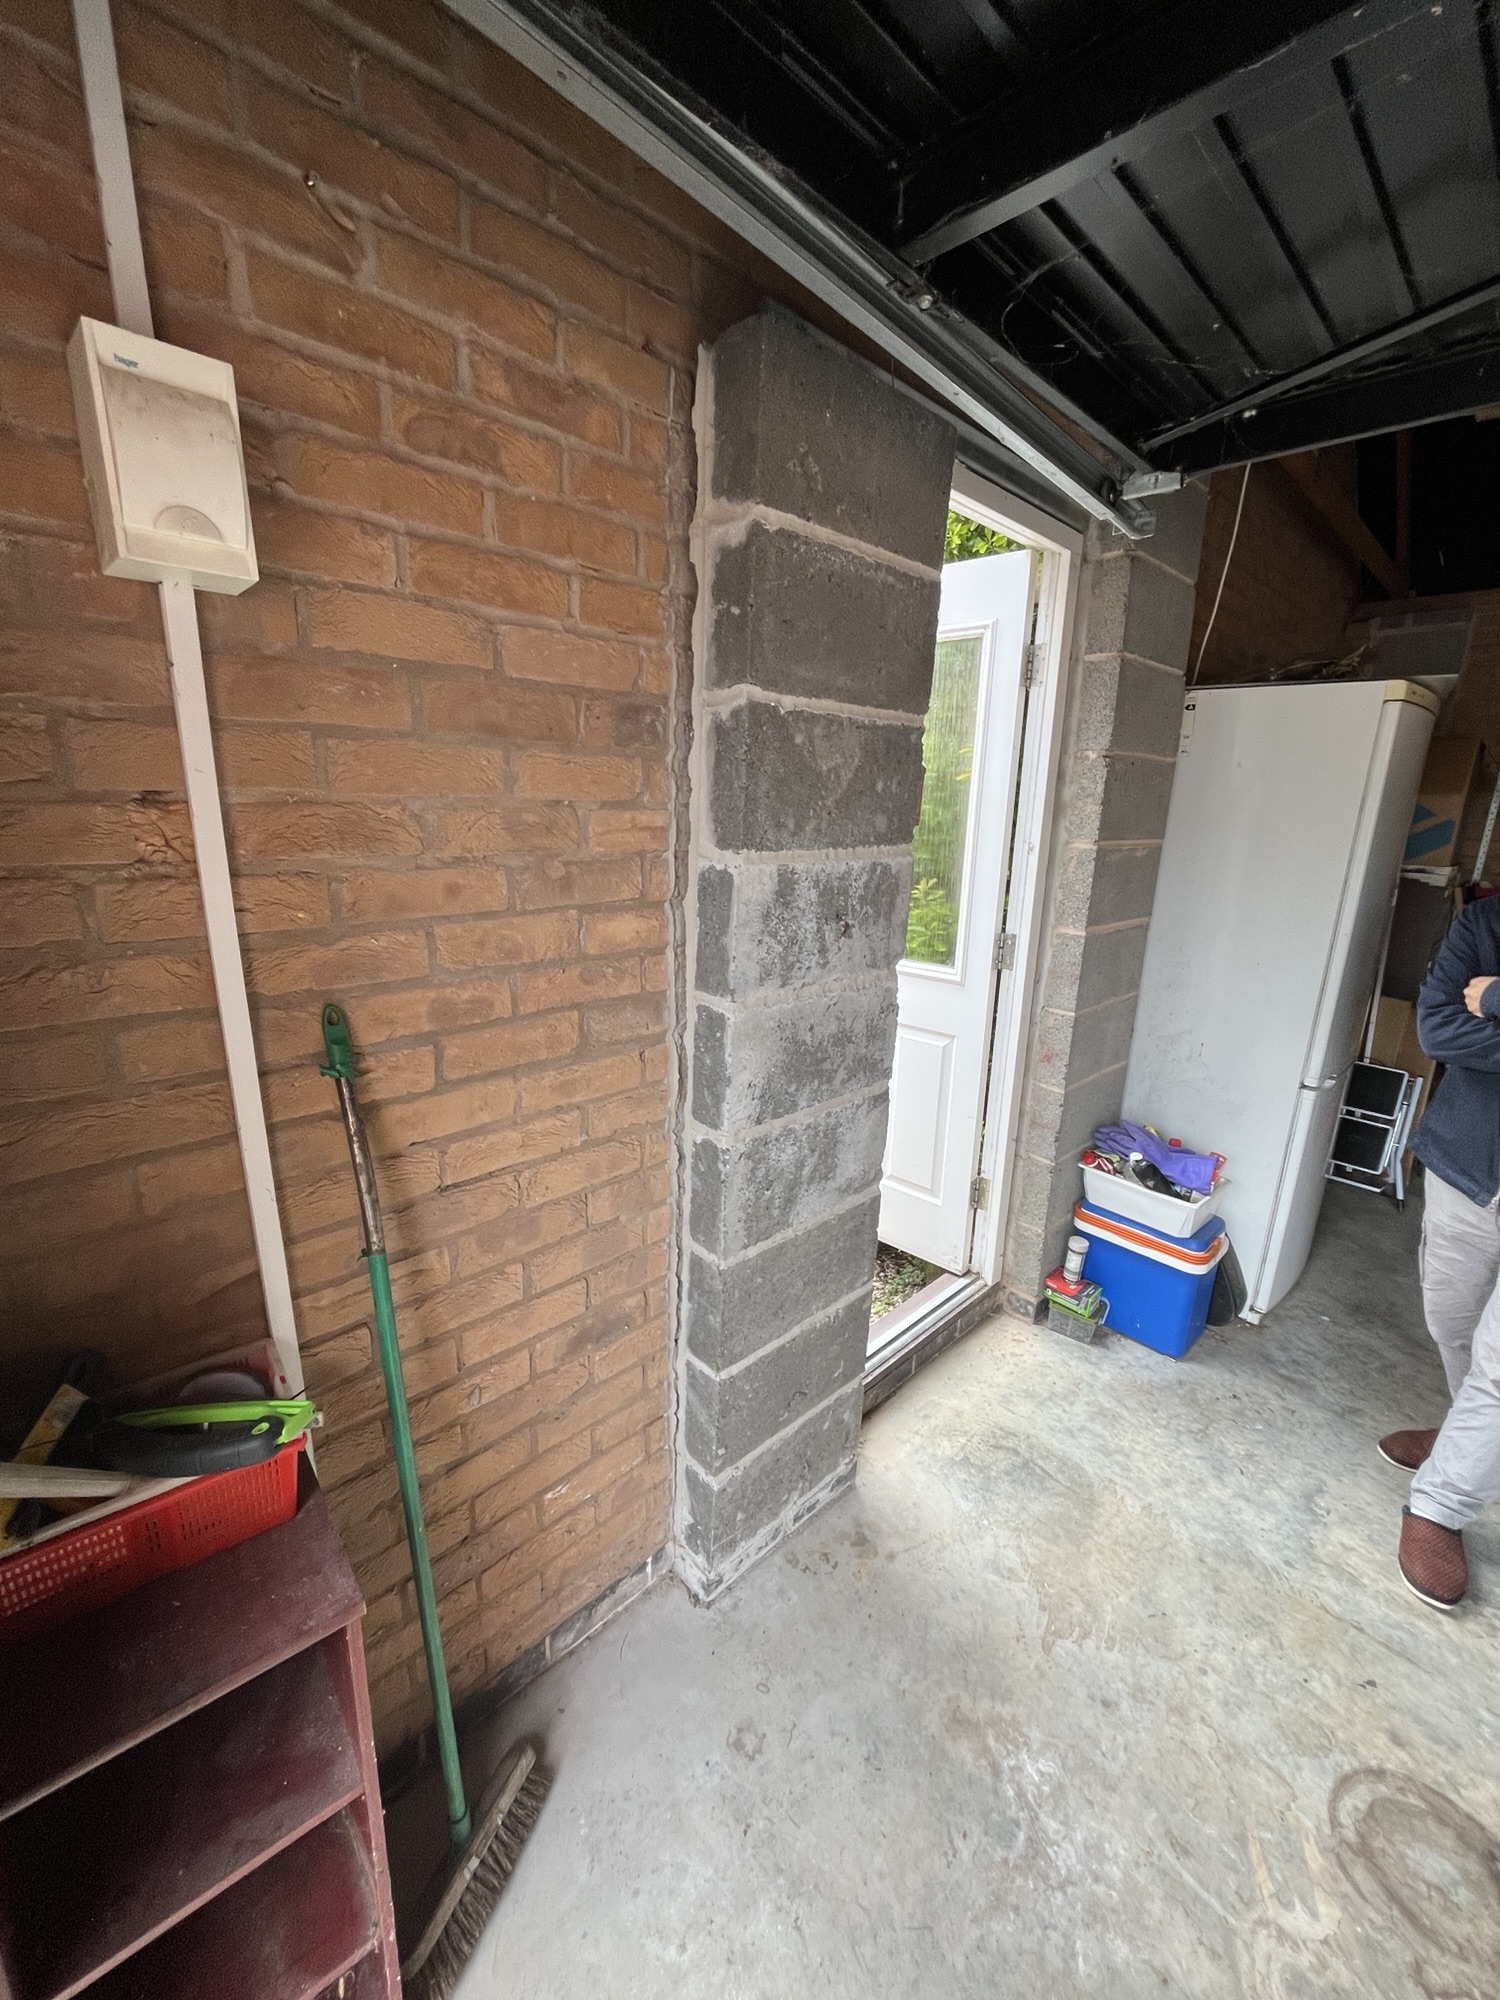
A leaning pillar in a garage might seem like a minor annoyance, but for one of our recent clients, it was a major concern. With their property currently on the market, any sign of structural instability can cause potential buyers to hesitate. They needed a prompt, reliable fix to ensure the garage was safe and the property remained attractive to buyers.

img_6628
previous arrow
next arrow

Structural Integrity: How We Fixed a Leaning Garage Pillar Promptly: A Two-Visit Approach

When we assessed the pillar, it was clear that a quick, one-day fix wouldn’t meet our quality standards.

In masonry, if you lay too many courses of brick in a single go, the weight of the upper bricks puts too much pressure on the fresh, wet mortar below. This causes the mortar to “slump” or squeeze out of the joints, which significantly weakens the structural integrity of the final build.

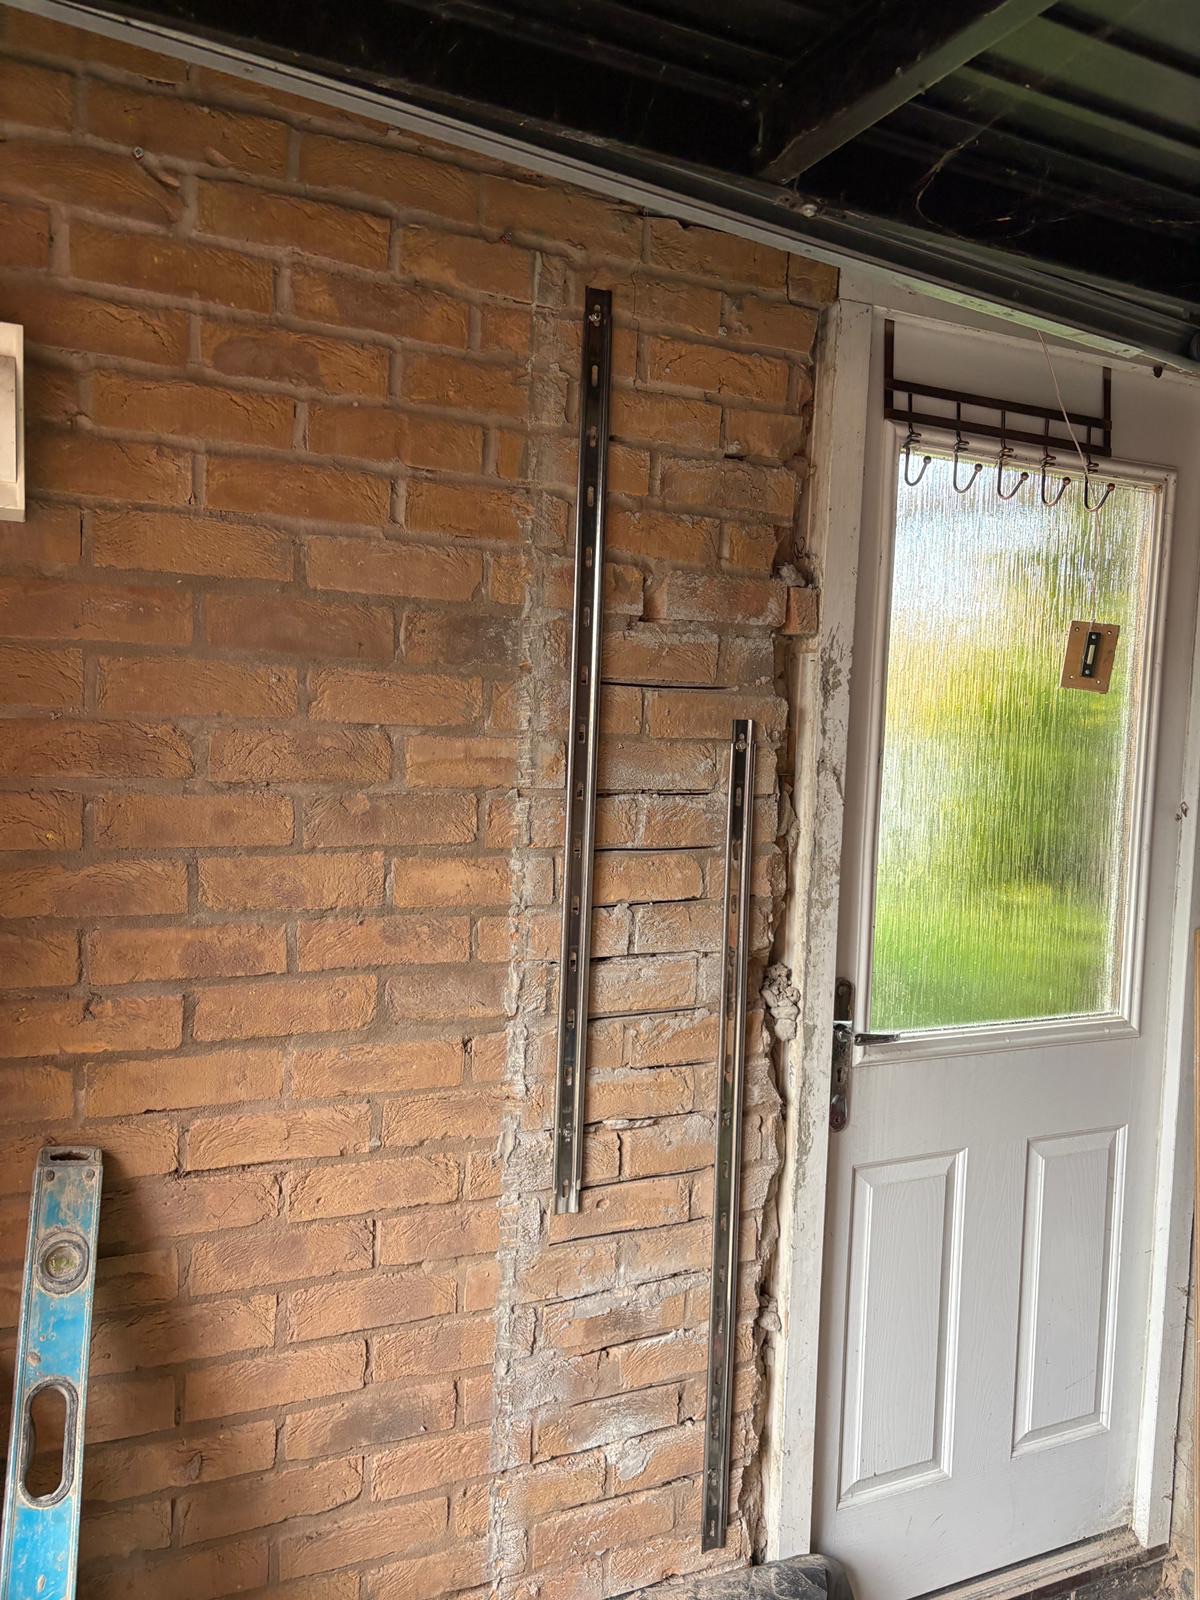
We used Starter bars (also known as dowel bars) because they ensure continuity of reinforcement between the existing wall and the newly laid blocks, safely transferring loads and preventing separation or structural weakness.

To ensure a permanent, high-quality result, we scheduled the job across two visits:

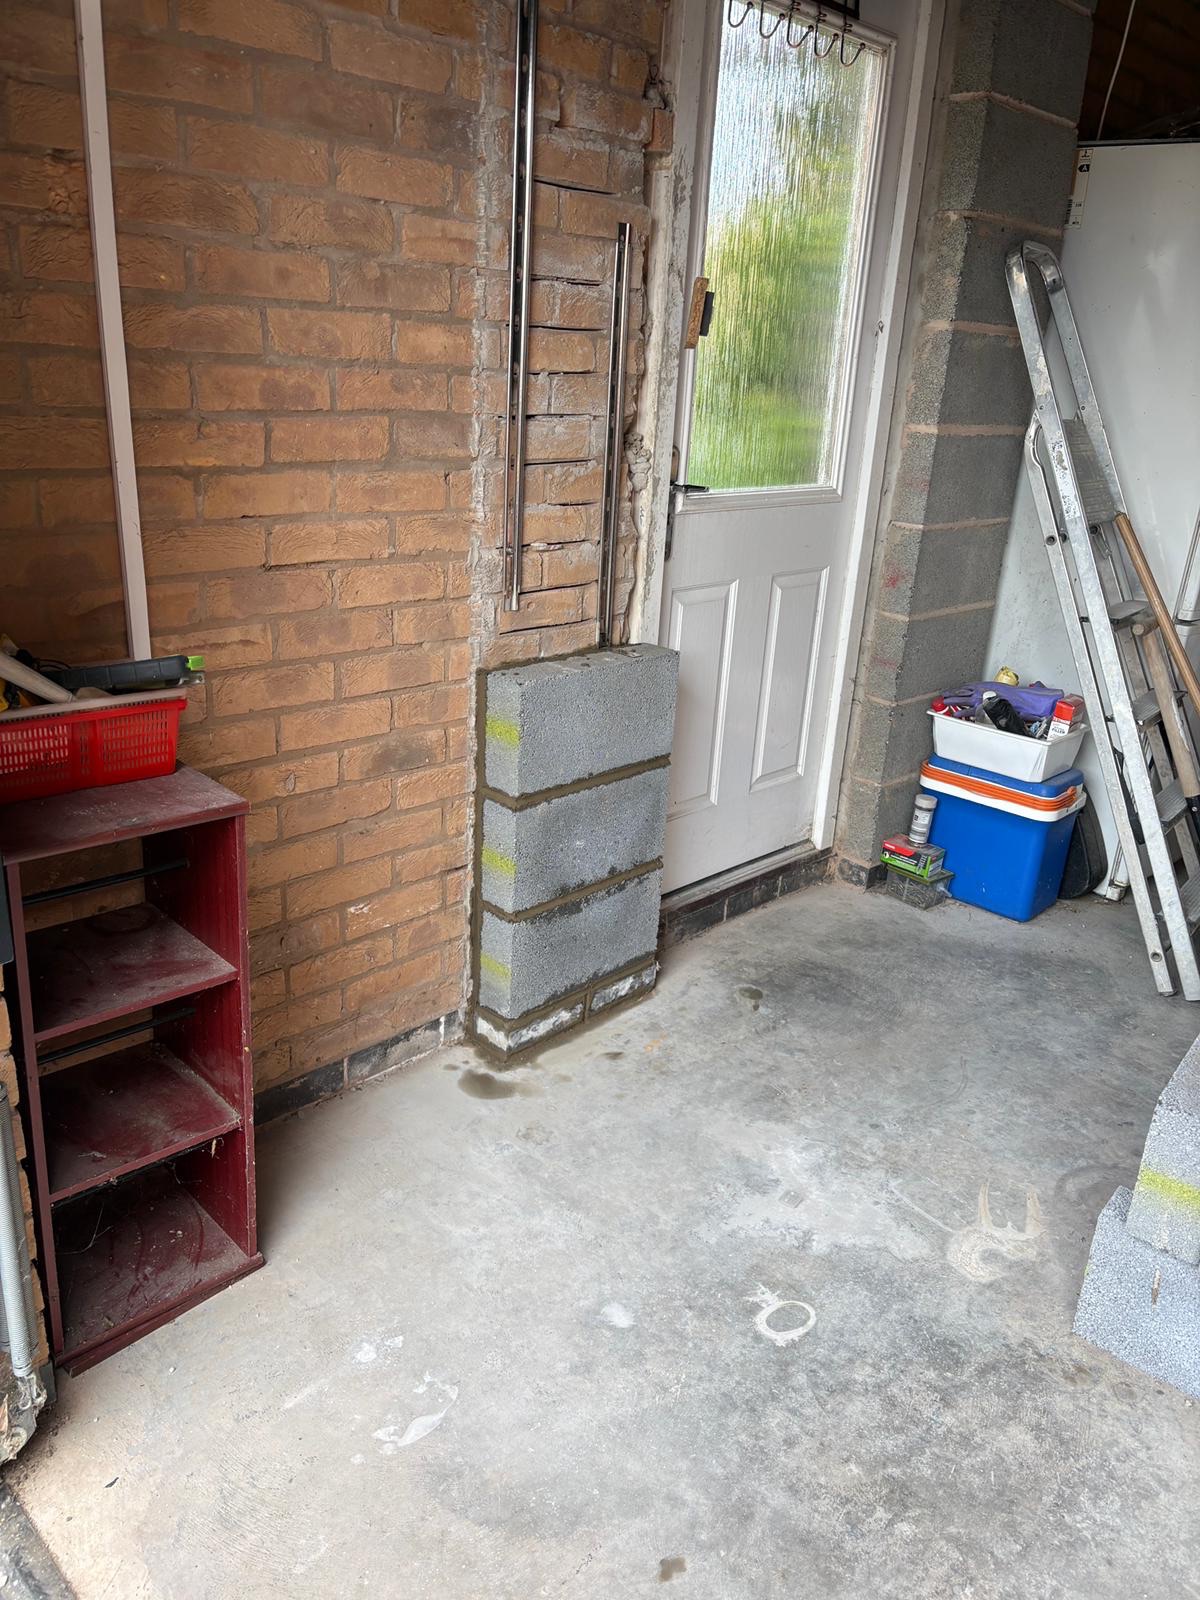
  1. Visit One: We reconstructed the lower 5 courses, allowing the base to set firmly and take the weight of the structure without compromising the mortar joints.
  2. Visit Two: We completed the remaining 5 courses, ensuring the pillar was perfectly plumb, stable, and ready to last for years to come.

This two-step process allows us to guarantee structural strength that a rush job simply cannot offer.

Costs

For this repair, the costs were broken down as follows:

  • Materials: £30
  • Labour: £50–£300 (This varies depending on the location and the specific time required for the repair).

Need Help with Your Brickwork? Whether it’s a structural concern or a cosmetic update, we are here to help you get the job done right.

If you have a project in mind, call us today on 07737 088243 or send your details to quote@swallowhillhomes.com for a prompt consultation.
Categories
Groundwork

Repairing a leaking fish pond in Chilwell, Nottingham

Our customer messaged us to say there pond was leaking and could we help.

img_6610
previous arrow
next arrow

Expert Guide: How to Properly Repair a Leaking Fish Pond

A leaking pond can be a major headache, but you don’t always need a full overhaul to get it back in shape. Whether you are dealing with a crack in a concrete base or a tear in a liner, the key to a lasting repair is in the preparation and the quality of your materials.

1. First, Confirm It’s a Leak

Before you start the heavy lifting, make sure the water loss isn’t just natural evaporation. In this case the cracks we’re visible.

  • The Pump Test: Turn off your pump. If the water level stops dropping, the issue is likely in your plumbing or waterfall, not the pond structure itself.
  • The Perimeter Check: If the water level keeps falling with the pump off, you have a structural leak. Check the perimeter for boggy ground or unusually lush plant growth—this is often where water is escaping the basin.

2. Professional Preparation is Key

As we’ve found in our recent repairs, the “seal” is only as good as the surface it’s applied to.

  • The “Grind Out”: For cracks in concrete or solid structures, don’t just smear sealant over the top. Use a grinder to widen the crack slightly. This creates a clean “key” or groove, giving your sealant a much better surface to adhere to.
  • Deep Cleaning: Once ground out, clear all debris, algae, and loose concrete from the crack. The surface must be clean and bone-dry before you apply any product.

3. Choosing the Right Material

Avoid generic household silicone. For pond repairs, we recommend a high-quality marine-grade product, such as the MS300 Marine Sealant.

  • Why it works: Look for a sealant that remains slightly flexible after curing. Ponds can shift slightly with temperature changes and ground settlement; a flexible sealant will move with the structure, preventing the crack from reopening immediately.
  • Application: Apply the sealant firmly into the groove, ensuring it fills the entire void. Use a smoothing tool for a clean, watertight finish that won’t collect debris.

4. Maintenance and Prevention

Once the repair is cured, regular maintenance will keep your pond healthy and leak-free:

  • Routine Inspection: Every month, check the basin and pipes for signs of stress.
  • Vegetation Control: Prune back nearby trees and shrubs. Aggressive root growth is a common culprit for structural cracks and liner punctures.
  • Debris Removal: Keep the pond clear of heavy litter and dead plant matter, which can block pipes and contribute to water stagnation.

Cost

  • Materials £15-£30
  • Labour up to £200 depending on location.

Need our help, call us on 07737 988 243

Categories
Flooring Renovation

Herringbone Oak parquet floor, Watnall, Nottingham

Installing Herringbone Oak Parquet Flooring

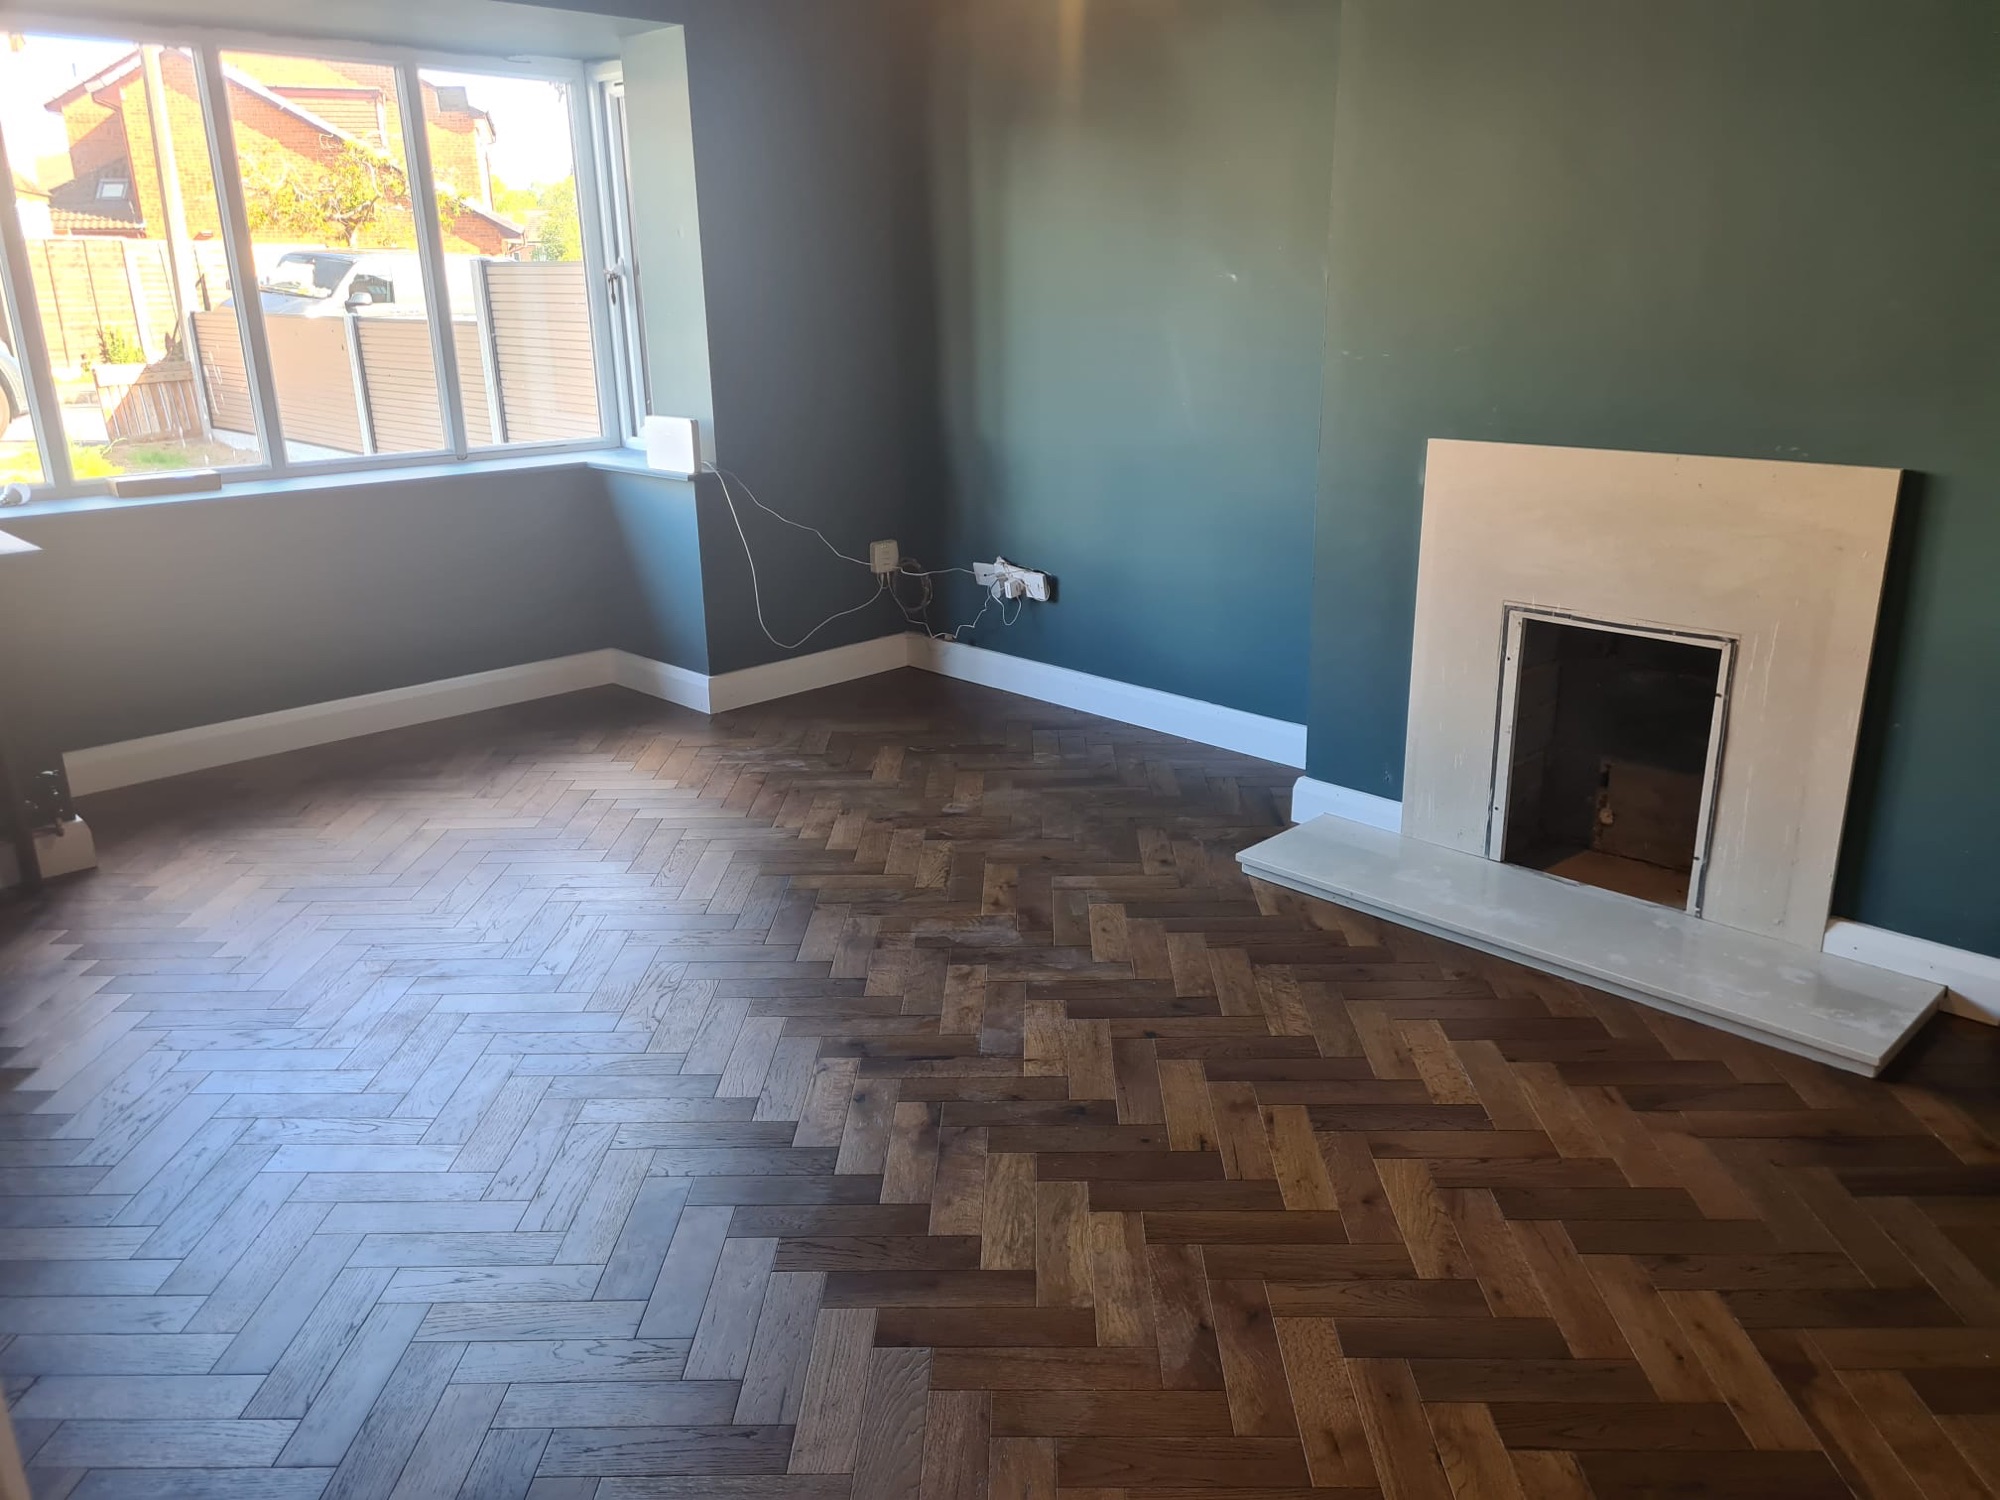
We recently completed the installation of a beautiful Herringbone Oak floor sourced from Stories Flooring. Our second from them in as many months. This project highlights our approach to subfloor preparation, a critical factor in achieving a lasting, high-quality finish.

img_6111
previous arrow
next arrow

A key consideration during preparation was the existing subfloor, which contained original tiles potentially dating from the 1980s. To ensure compliance and safety—and specifically to mitigate the risk associated with disturbing potential asbestos-containing materials (ACMs)—we opted for a non-intrusive overlay solution. This professional decision avoided complex and costly remediation.

We applied F. Ball Stopgap P131 primer and self-levelling compound. This choice allowed us to achieve a perfectly smooth and stable surface with minimal build-up, creating the ideal base for the new parquet system. Precision Installation Technique

Our method for installing this type of parquet flooring is rooted in precision and patience. The most effective technique is a staged adhesive application to manage the elasticity of the glue and ensure optimal alignment:

  1. We initially lay and fix the central key column or the first two rows of the product.
  2. We allow this central element time to fully cure and stabilize before proceeding with the remainder of the floor.

By allowing the adhesive to cure completely in these crucial early stages, we prevent movement and ensure the long-term integrity and alignment of the entire floor.


Cost Guide: Herringbone Parquet Flooring

For full transparency, here is a breakdown of the typical costs per square metre (m²) for a high-quality Herringbone Parquet installation:

  • Preparation (Self-levelling compound): £15
  • Flooring Material: £50
  • Adhesive: £10
  • Professional Labour: £90 – £150

These costs are excluding VAT, this job needed 15% wastage so make sure you allow for it otherwise you’ll need an emergency trip to Leeds to pick up an extra box

Categories
Renovation

Room refurbishment, Ruddington, NG11, Nottinghamshire

Categories
Brickwork

Garden brick walls. Ng9, Beeston

Neat brickwork in Forterra Hampton rural blend, the bricklayers like these bricks because they pick up the moisture at a steady rate.

They are classed as engineering bricks so can be used in the ground.

Small brick wall using Hampton Rural blend bricks.
Engineering Brick Coping: Durability and Cost
 
For finishing the top of the wall, we used engineering bricks on edgeThis is a detail often employed due to the brick’s high durability and low water absorption, making it excellent for capping walls or for demanding structural applications like the blue engineering brick upstands we utilize below the DPC level for porch structures.
 
It is essential to remember that for structural integrity and a clean stop-end, the final end needs to be solid. The going rate for a solid engineering brick to be approximately £2.25.

Hampton Rural Blend

Benefits of Hampton Rural Blend The Ecostock range is manufactured using the latest technology in sustainability and production efficiency. Forterra produce three kinds of this soft mud brick at their state-of-the-art factory in Measham, Leicestershire: stock pressed with a smooth, sand faced finish; stock thrown, which have a traditional handmade appearance; and waterstruck, which have a smooth but irregular surface. Ecostock bricks are available in wide selection of red, buff and yellow colours.

Categories
External Fencing Groundwork

Hedge removal and new fence installation.

We removed a conifer hedge back in February for the customer before the start of the bird nesting season. Pruning trees or bushes after the 1st of April without appropriate ecological supervision could get a builder like ourselves into trouble.

The customer chose composite fence panels from Charles and Ivy.

We installed these into concrete posts and gravel boards for longevity.

The last eight weeks have been very dry. It is is very important to water newly laid turf regularly if it is not raining frequently. Here is a guide to looking after your new turf.

The first few weeks after laying new turf are crucial for root establishment. Here is detailed advice for caring for your new lawn, focusing on watering, traffic, and mowing:1. Watering (The Most Critical Step)The first few weeks after laying new turf are crucial for root establishment. Here is detailed advice for caring for your new lawn, focusing on watering, traffic, and mowing:
 
1. Watering (The Most Critical Step)
  • Initial Watering (First 1-3 Weeks): New turf is a living plant that needs consistent moisture to root deeply.
    • Frequency: Water the entire lawn evenly and thoroughly every day, especially during hot or dry weather. Some advice suggests watering at least twice a day for the first seven days.
    • Technique: Use a sprinkler to ensure even coverage. The water must soak down through the turf to moisten the soil below.
    • Timing: Water early in the morning or early evening to allow the water to reach the roots before the sun causes it to evaporate.
    • Watch for Edges: Concrete edging, posts, and paving slabs absorb water quickly, so be sure to water areas near them more often.
  • Avoid Overwatering: While the turf needs water, ensure the ground is moist but not waterlogged or soggy, as this can starve the roots of oxygen and make the grass turn yellow or die.
  • Reducing Frequency: As the turf starts to knit together (around 3 to 4 weeks), reduce watering frequency. It is better to water thoroughly every two to three days than to water a little bit every day.
2. Traffic and Compaction
  • Keep Off: Avoid walking on the new turf as much as possible for the first few weeks, ideally three to four weeks. Walking on it can cause soil compaction, create dents and divots, and disrupt root formation.
  • Necessary Access: If you must cross the lawn (e.g., for watering), place wooden planks or boards down to use as a walkway to distribute your weight.
  • Pets and Play: Keep pets and children’s play equipment off the lawn until it is fully established and settled.
  • Frost: Avoid walking on the lawn during frosty weather as this can damage the grass blades.
3. Mowing
  • When to Start: Do not mow until the turf has rooted well and the blades of grass are at least 25mm high. This is typically around three weeks after laying.
  • Check Rooting: To check if it’s ready, gently tug on a few blades of grass. If the turf lifts, wait a few more days. If the turf feels stuck, the roots have started to take and it is ready for its first cut.
  • First Cut: Use the highest setting on your lawnmower and ensure the blades are sharp for a clean cut. Only cut off about a quarter to no more than one-third of the grass length at one time.
  • Ongoing Mowing: When the grass is growing, cut “a little and often” rather than cutting it once a week, as frequent light trimming prevents the coarse grass from dominating the lawn.
4. Fertilising and General Care
  • Fertiliser: Your new turf is usually pre-fertilised, so it generally will not require additional fertiliser for at least three months, or a minimum of six weeks after laying. Phosphorous is considered the most crucial nutrient during this establishment phase to encourage root growth.
  • Cuttings: Collect the clippings using a grass box or rake them up and remove them to ensure sunlight reaches the turf.
  • Brown Patches: If your turf is turning yellow or brown, it is likely due to insufficient water during a dry or hot spell. Increasing your watering will usually return the lawn to a healthy state.
Categories
Uncategorised

The small jobs….

Friday was spent ticking lots of little jobs off for a customer in Edwalton who was moving to a new property.

  • Fit extension lead through cupboard
  • Shorten pendant light fittings
  • Wire up an electric oven using 4mm cable
  • Fit a dummy alarm box with integral flashing light
  • Extend the TV into the bedroom
  • Remove handrails and seat from the bathroom
  • Swap which side the fridge opens
  • Take apart and store galvanised handrail using a large size hexagonal tool fitted on a wrench

Thorough preparation meant that we arrived prepared and managed to tick all the “to do” items off of our customers list apart from staining the front fence. We cleared the rubbish in the garden and took it to Beeston tip.

Overall a very satisfying day.

The customer gave us a really good testimonial

Absolutely brilliant, even though Rob’s company is a highly regarded “proper” building firm, he was more than happy to accommodate my small but important to me list of works. I am so grateful I found such a good, honest and hard working professional.