Categories
Flooring Renovation

Herringbone Oak parquet floor, Watnall, Nottingham

Installing Herringbone Oak Parquet Flooring

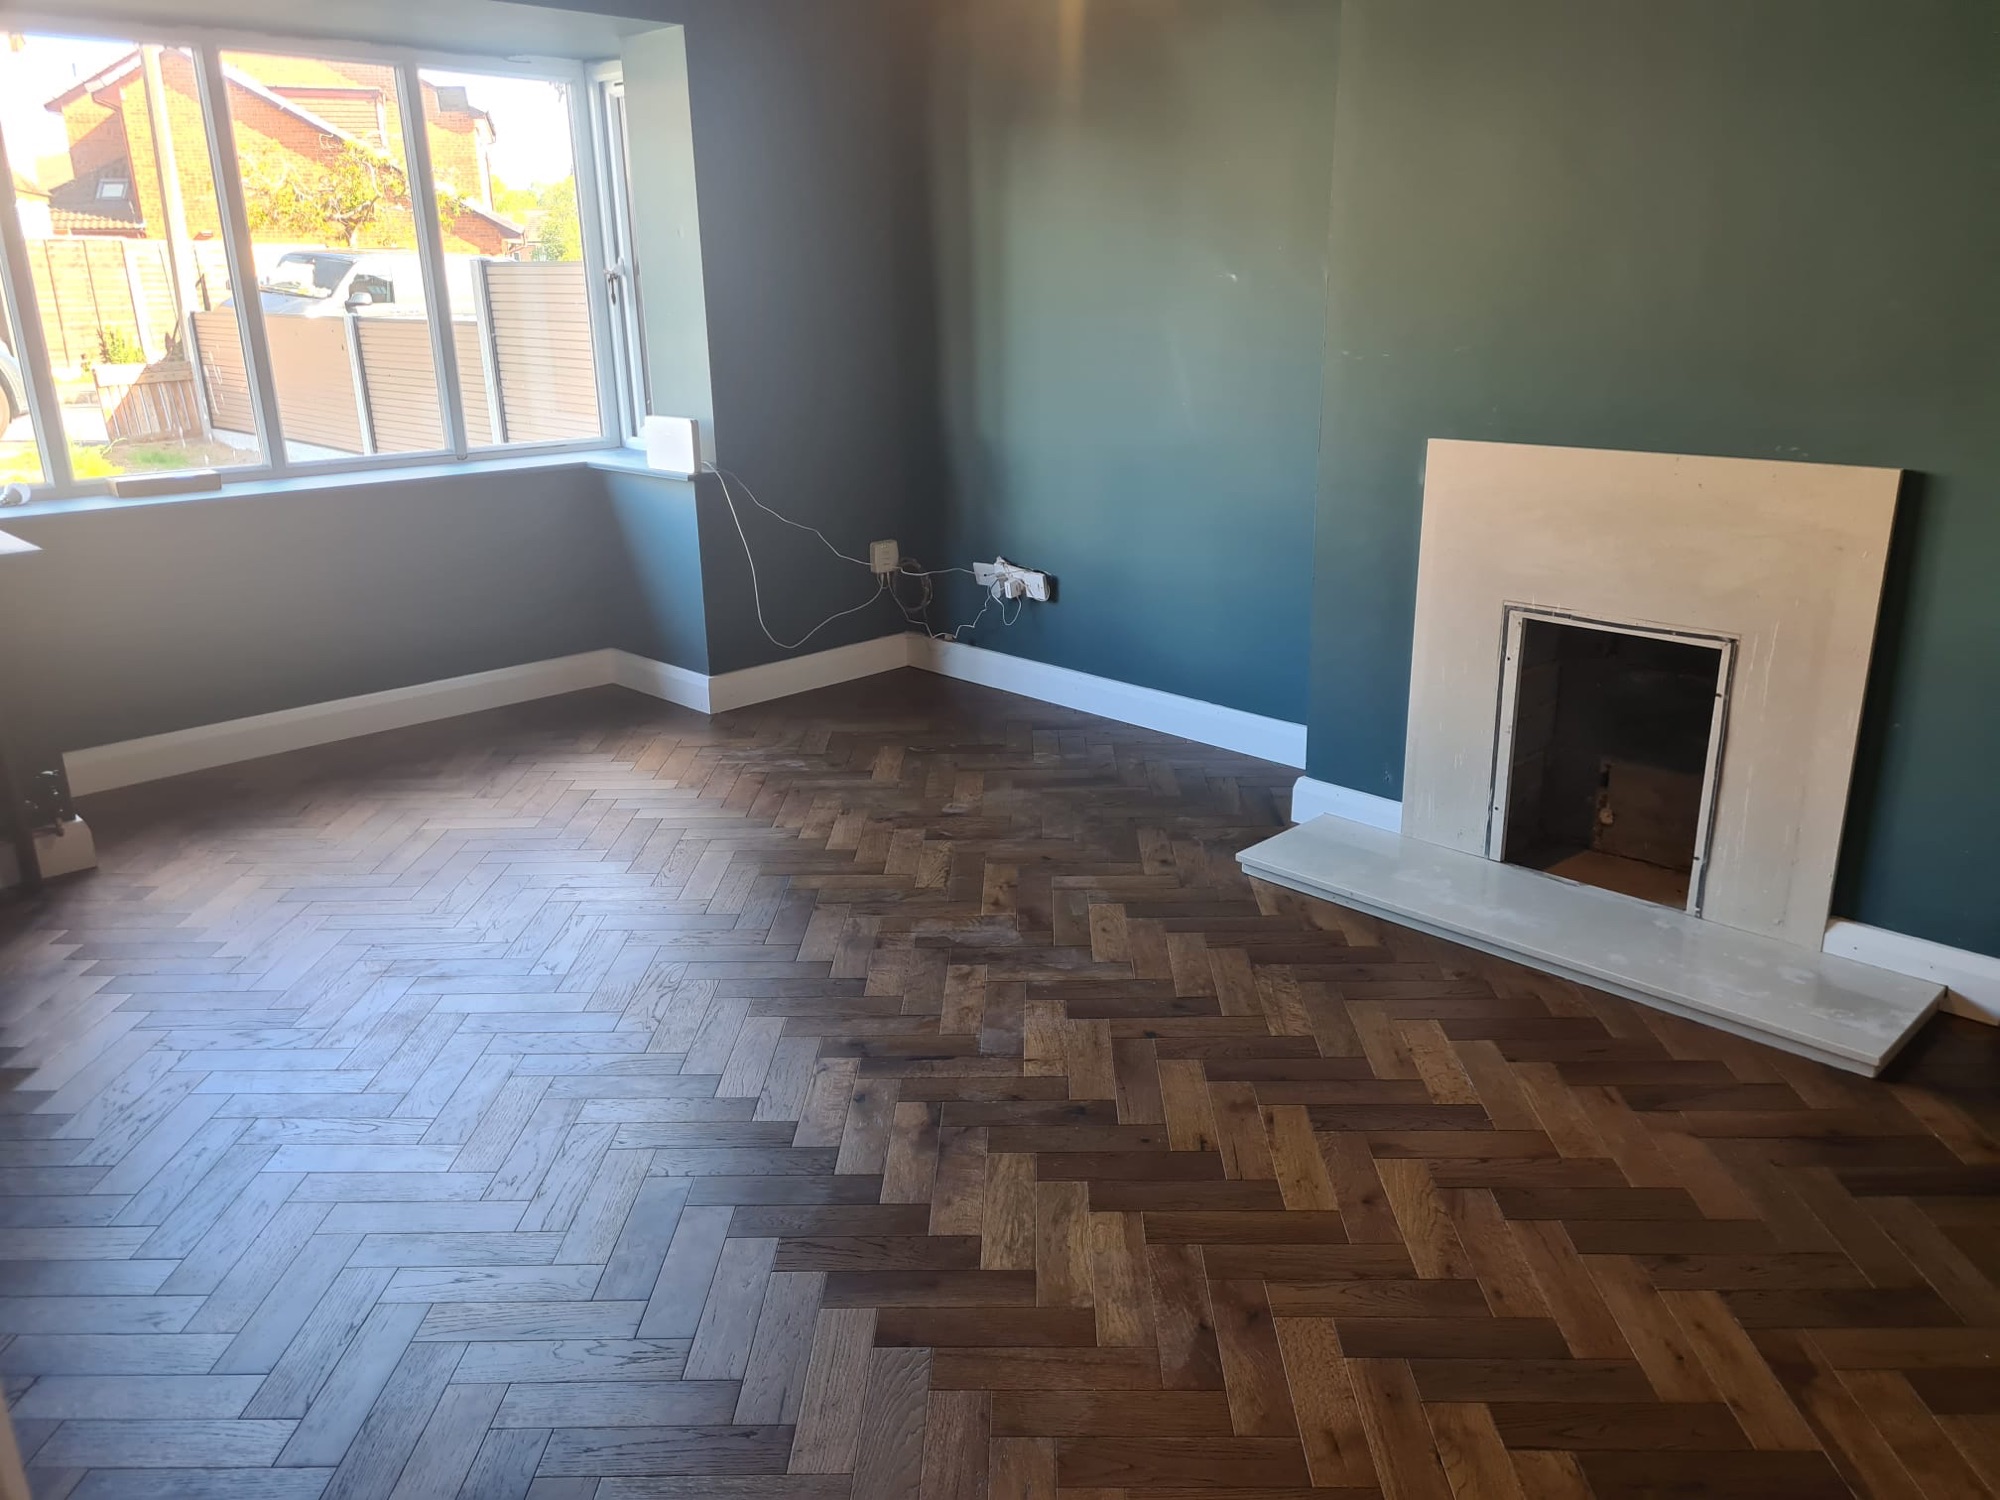
We recently completed the installation of a beautiful Herringbone Oak floor sourced from Stories Flooring. Our second from them in as many months. This project highlights our approach to subfloor preparation, a critical factor in achieving a lasting, high-quality finish.

img_6111
previous arrow
next arrow

A key consideration during preparation was the existing subfloor, which contained original tiles potentially dating from the 1980s. To ensure compliance and safety—and specifically to mitigate the risk associated with disturbing potential asbestos-containing materials (ACMs)—we opted for a non-intrusive overlay solution. This professional decision avoided complex and costly remediation.

We applied F. Ball Stopgap P131 primer and self-levelling compound. This choice allowed us to achieve a perfectly smooth and stable surface with minimal build-up, creating the ideal base for the new parquet system. Precision Installation Technique

Our method for installing this type of parquet flooring is rooted in precision and patience. The most effective technique is a staged adhesive application to manage the elasticity of the glue and ensure optimal alignment:

  1. We initially lay and fix the central key column or the first two rows of the product.
  2. We allow this central element time to fully cure and stabilize before proceeding with the remainder of the floor.

By allowing the adhesive to cure completely in these crucial early stages, we prevent movement and ensure the long-term integrity and alignment of the entire floor.


Cost Guide: Herringbone Parquet Flooring

For full transparency, here is a breakdown of the typical costs per square metre (m²) for a high-quality Herringbone Parquet installation:

  • Preparation (Self-levelling compound): £15
  • Flooring Material: £50
  • Adhesive: £10
  • Professional Labour: £90 – £150

These costs are excluding VAT, this job needed 15% wastage so make sure you allow for it otherwise you’ll need an emergency trip to Leeds to pick up an extra box

Categories
Brickwork Renovation

Wall repointing in Bestwood, Nottingham

Case Study: Saving a Failing Brick Wall in Bestwood, Nottingham

At Swallow Hill Homes, we take pride in doing things right the first time. Unfortunately, we often get called out to fix projects where standard building practices weren’t followed by previous contractors.

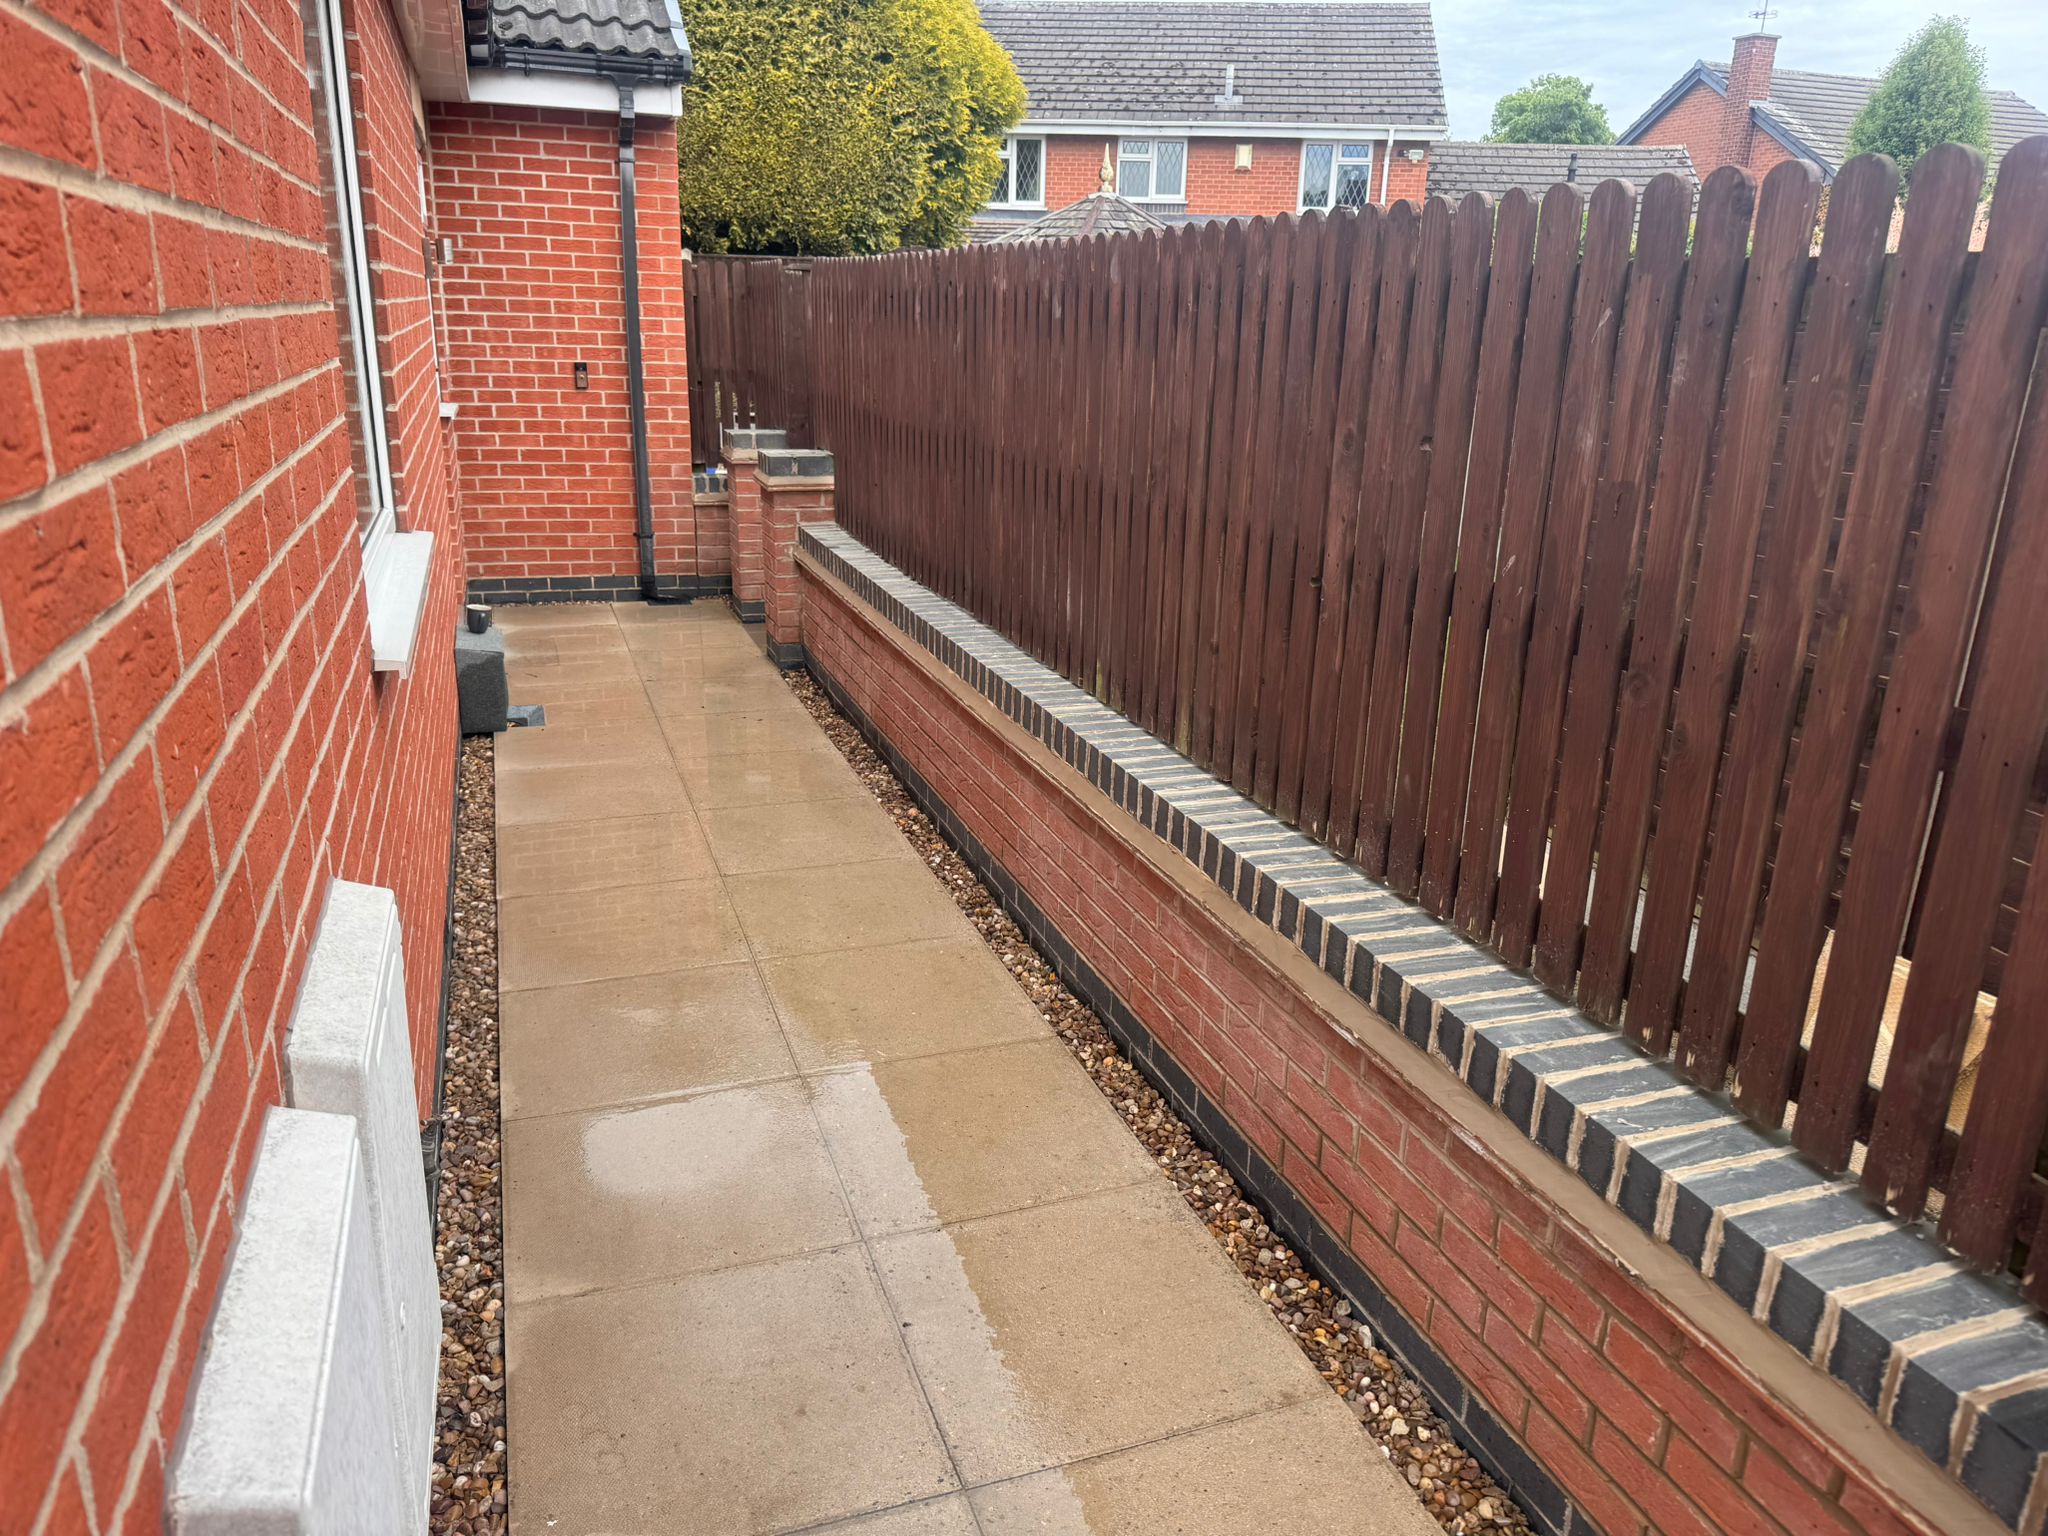
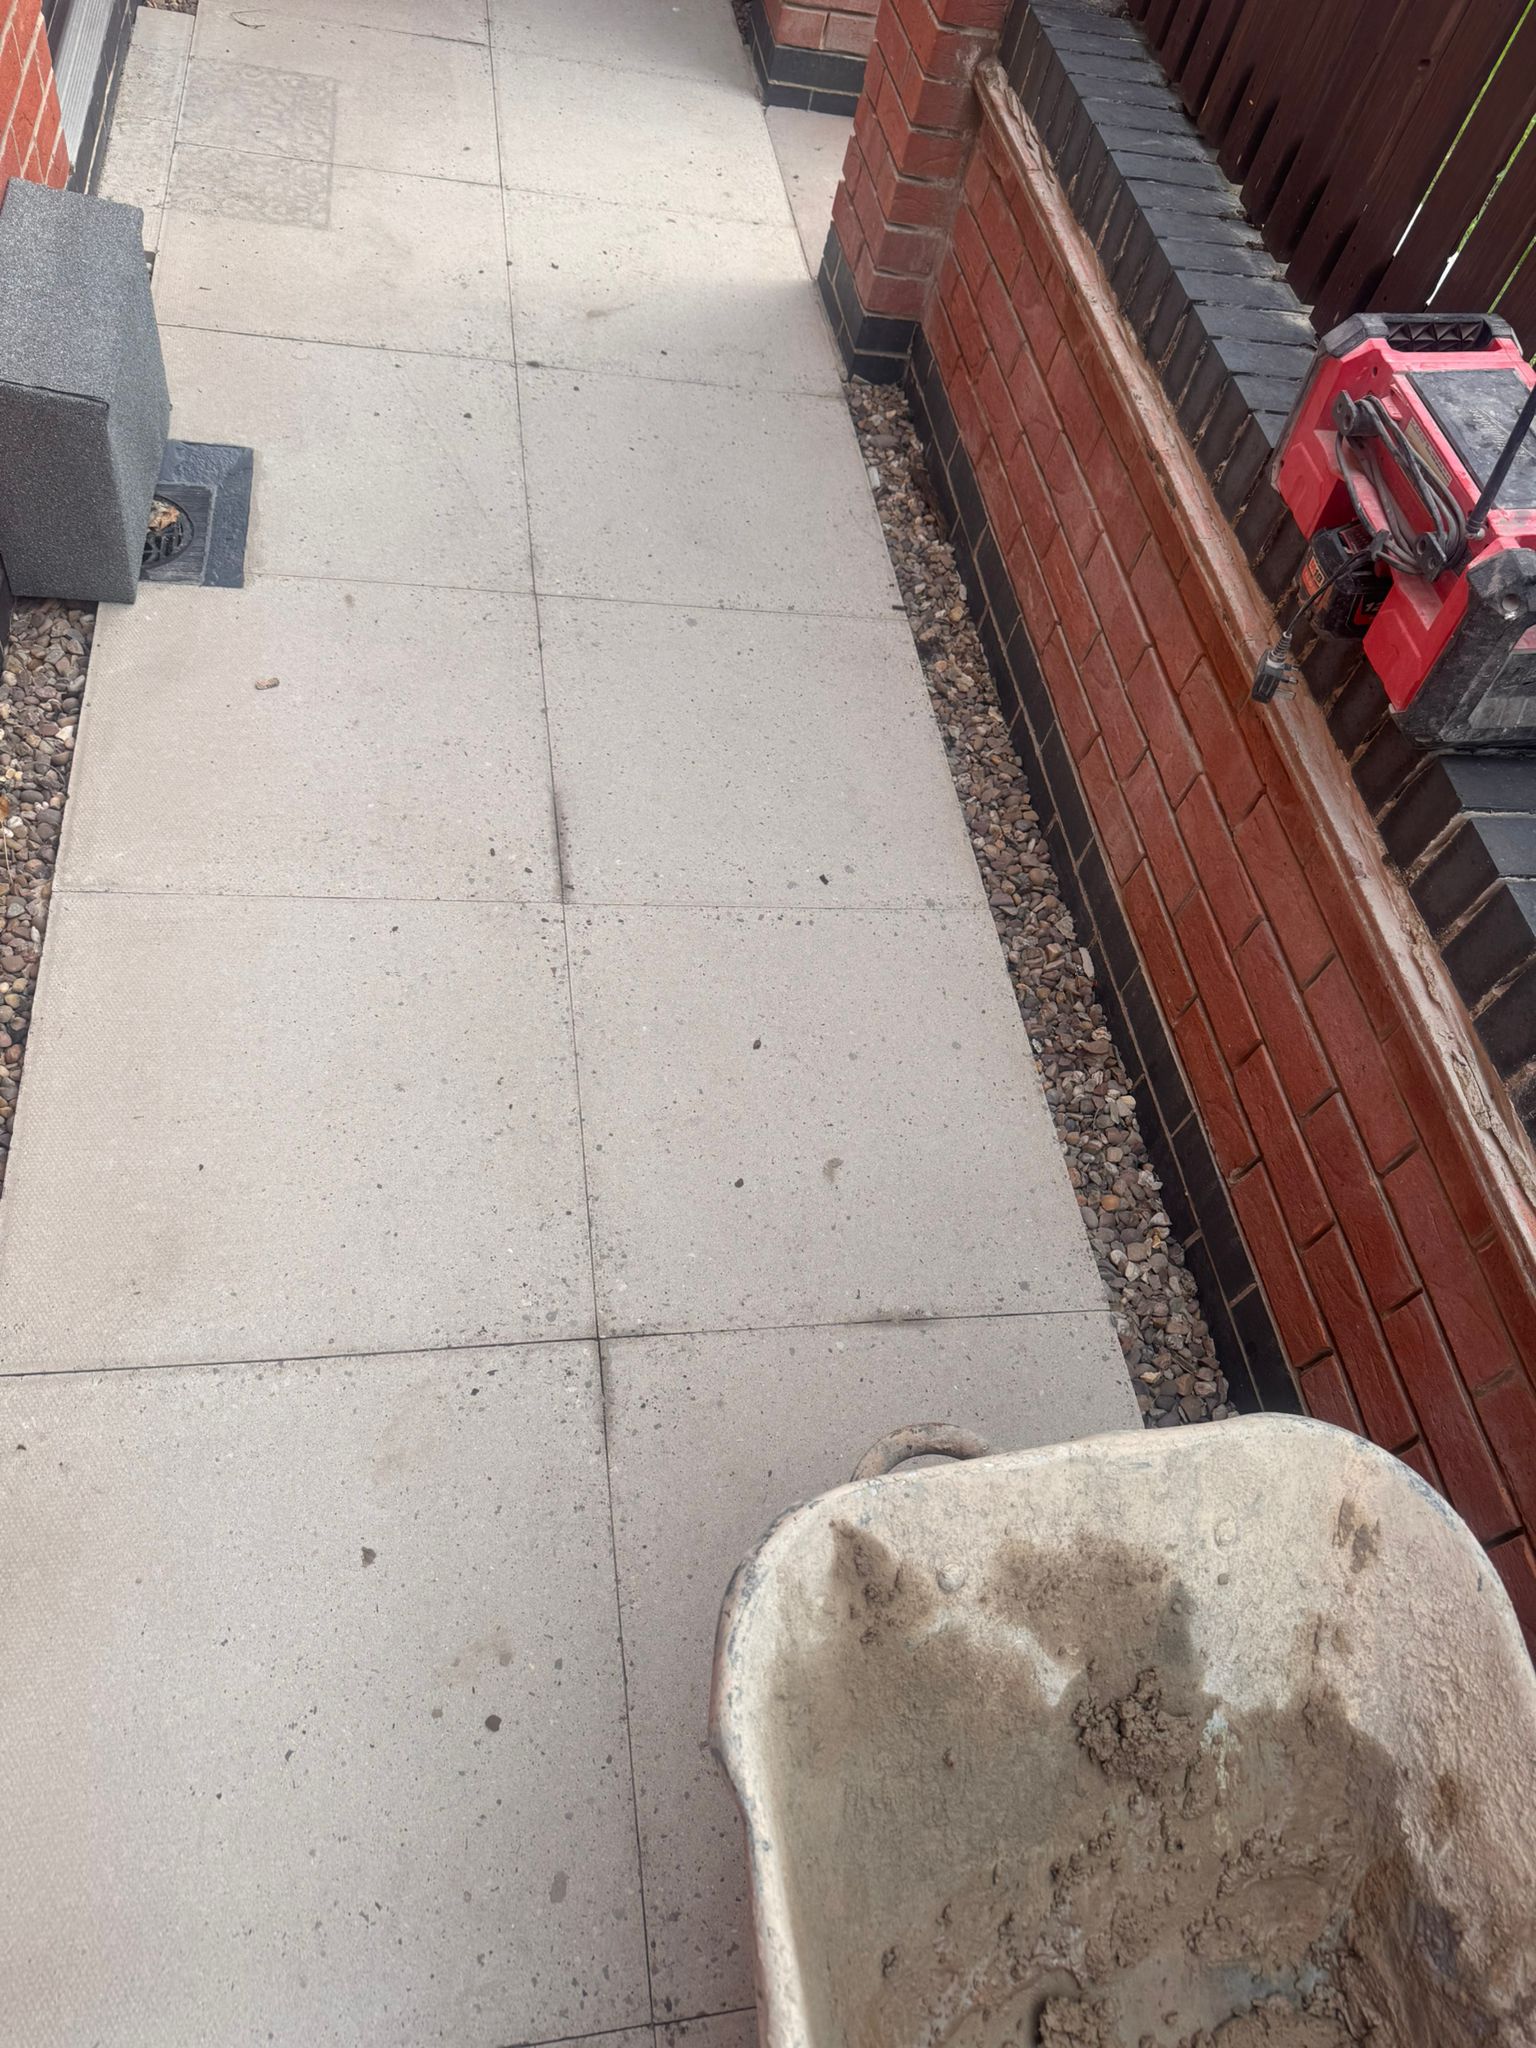
Recently, we were called to a property in Bestwood, Nottingham, to tackle a garden and boundary wall with rogue pointing. The issue? The original builder had used a weak, poorly proportioned mortar mix, causing it to prematurely crumble, degrade, compromising the structure’s appearance and longevity.
Here is how our expert brickwork team stepped in to transform and save the wall.

IMG_6503
previous arrow
next arrow

#The Problem: Weak Mortar & Poor Workmanship
When mortar is mixed with too much sand or too little cement, it lacks the structural integrity to withstand the unpredictable British weather. Over time, water penetrates the weak joints, freezes, and completely erodes the mortar.

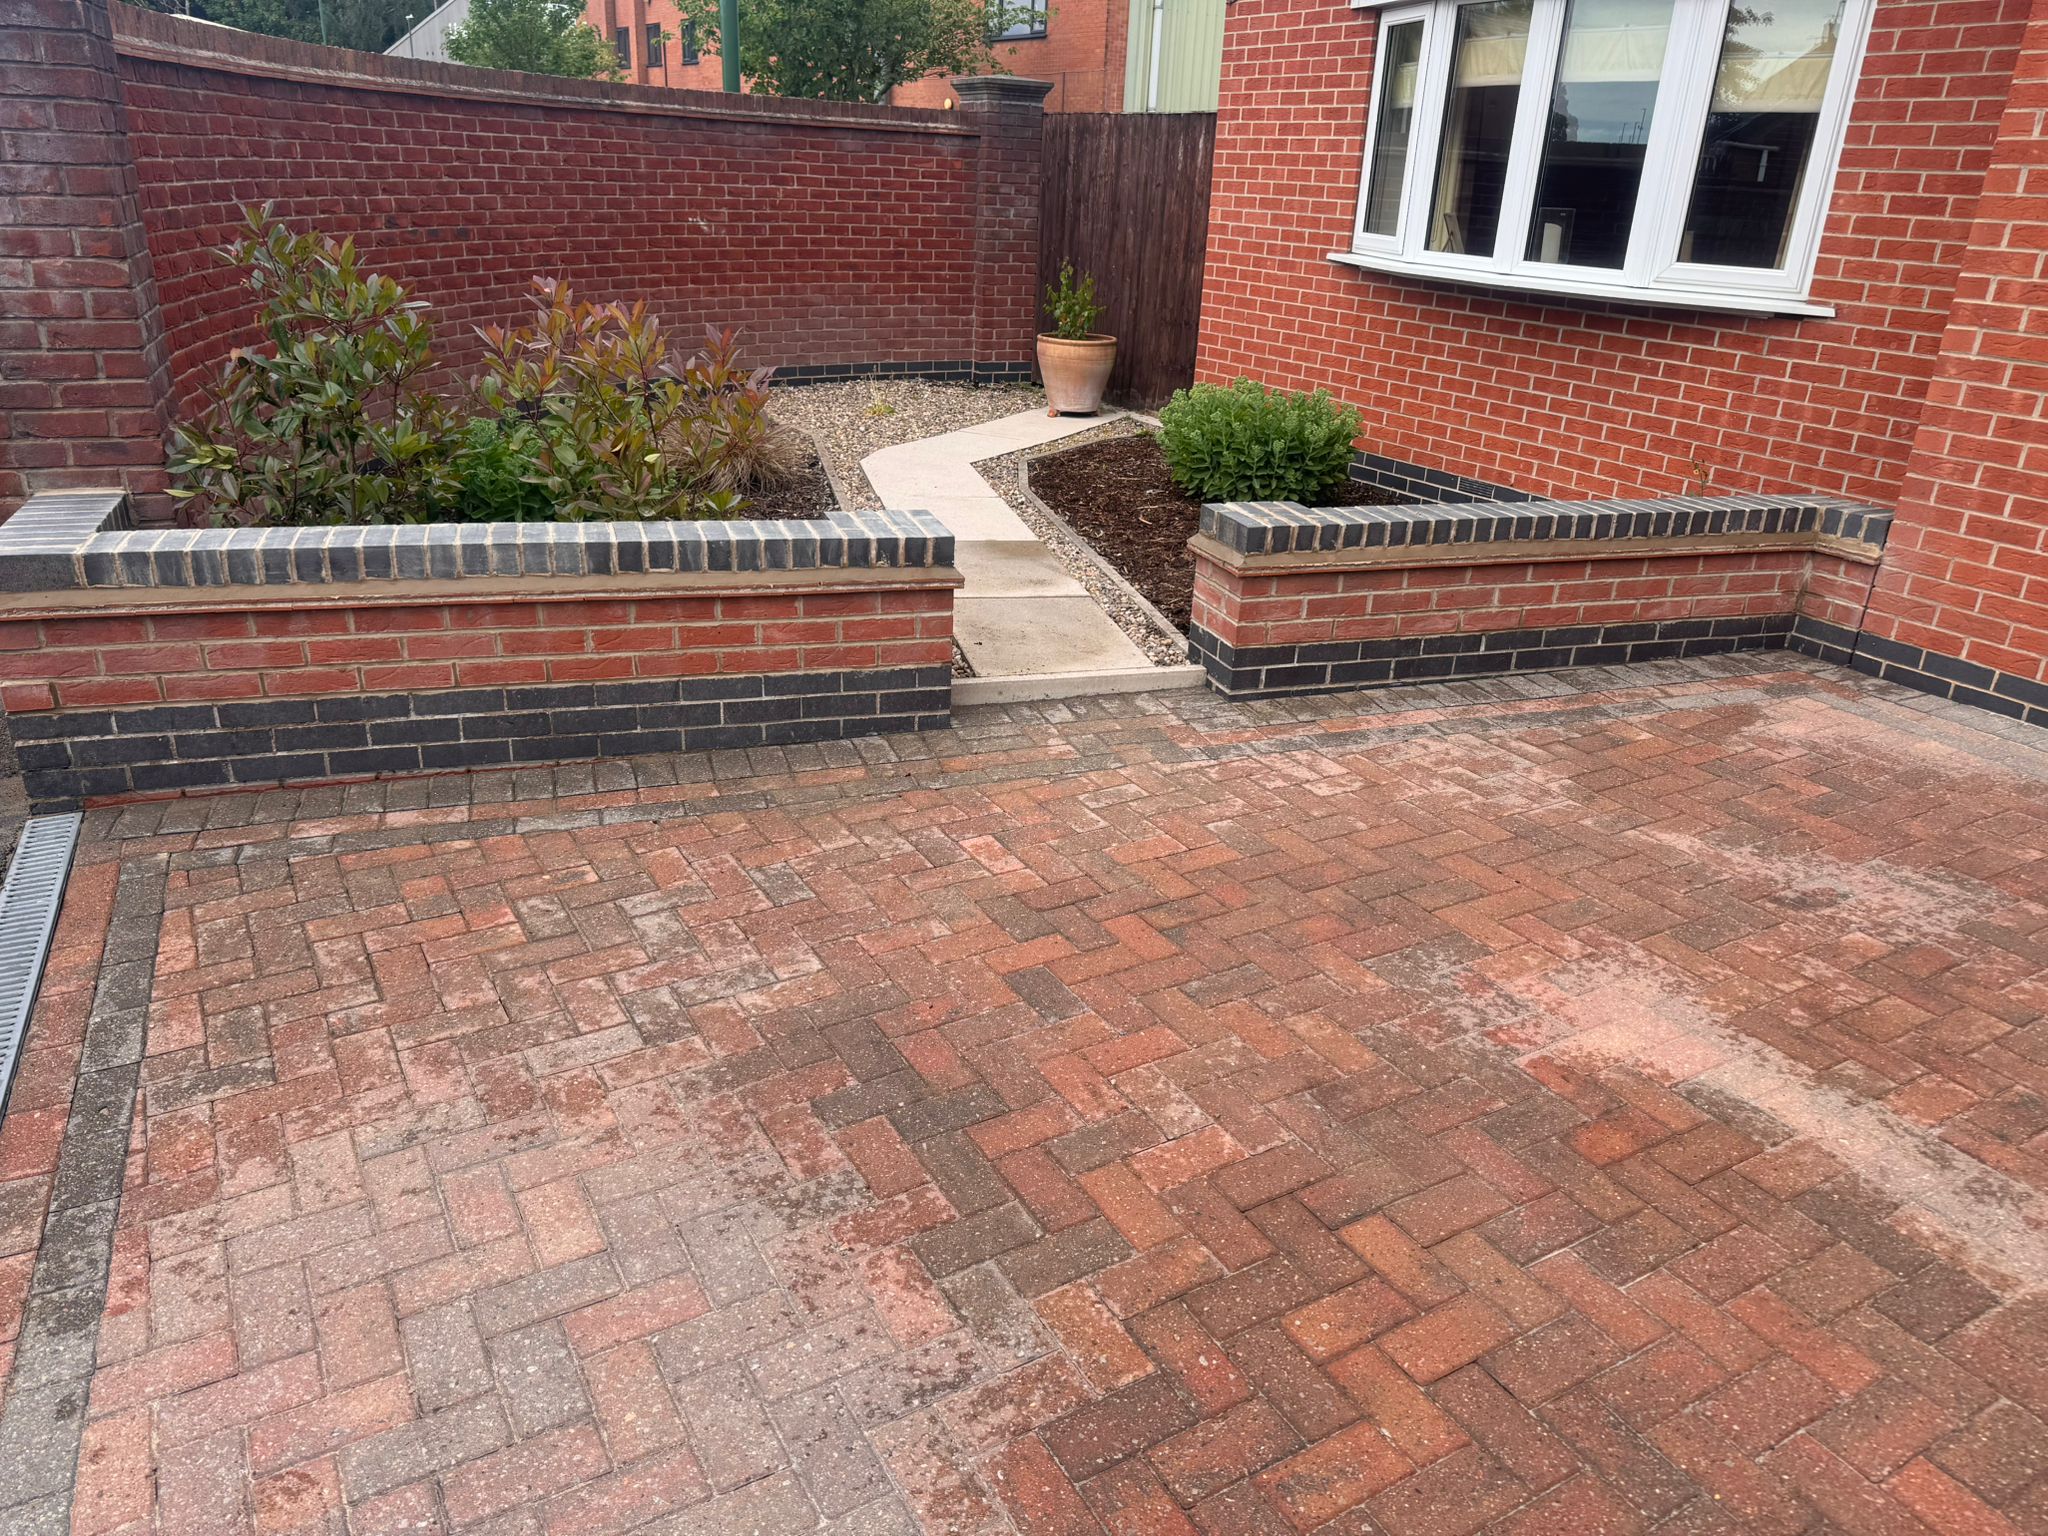
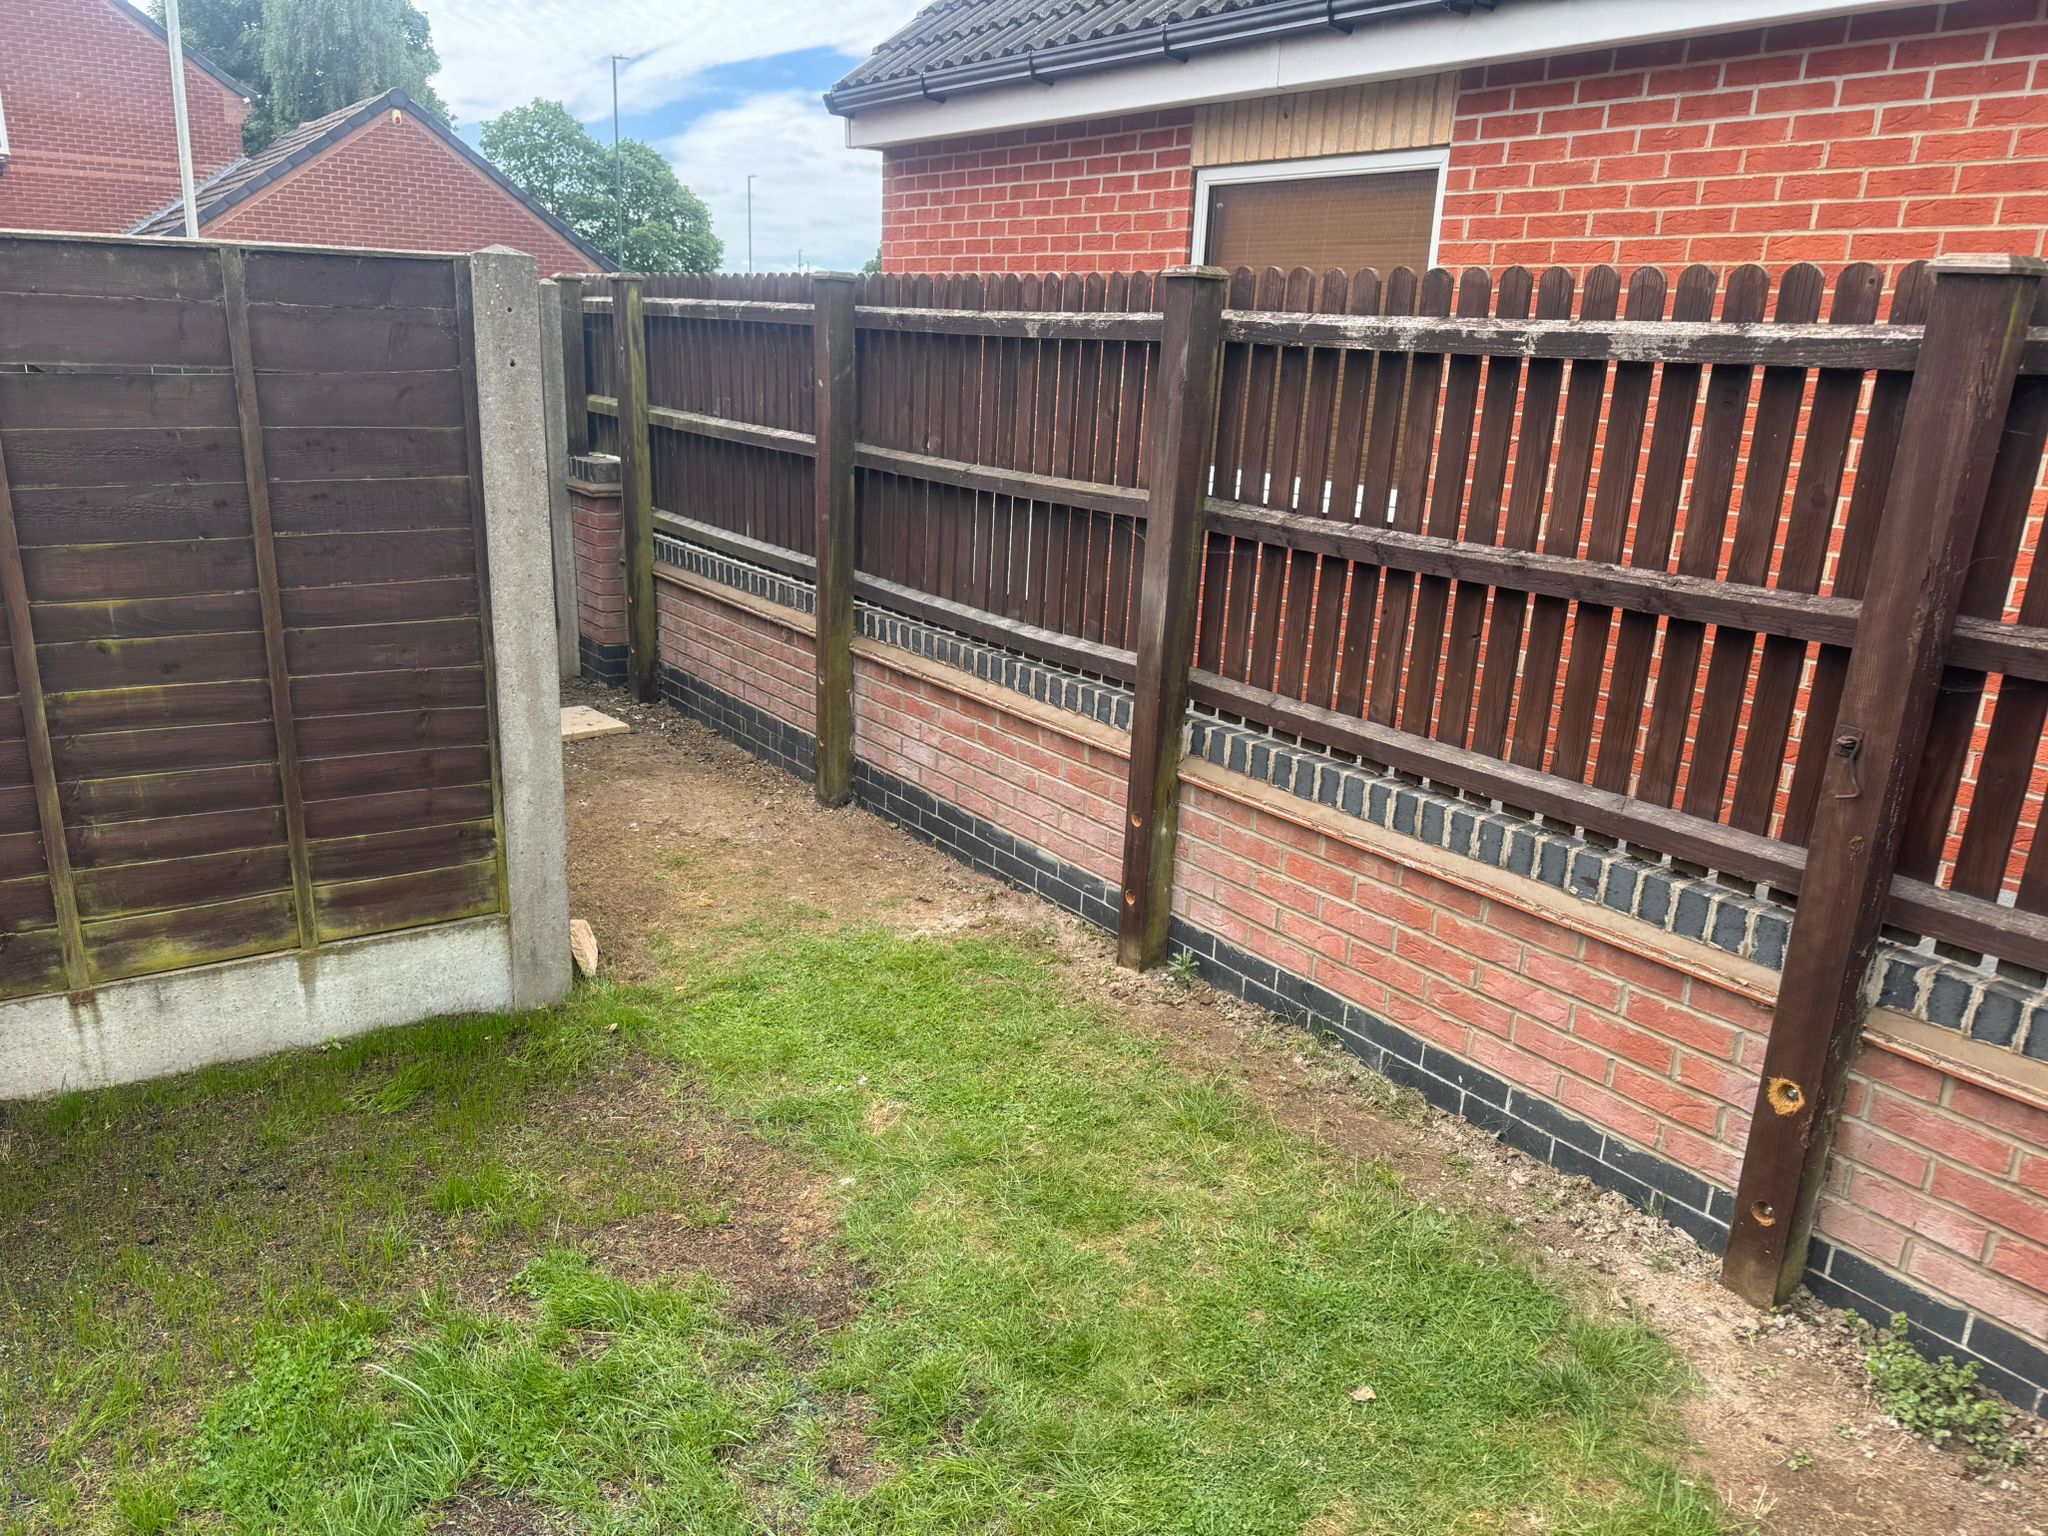
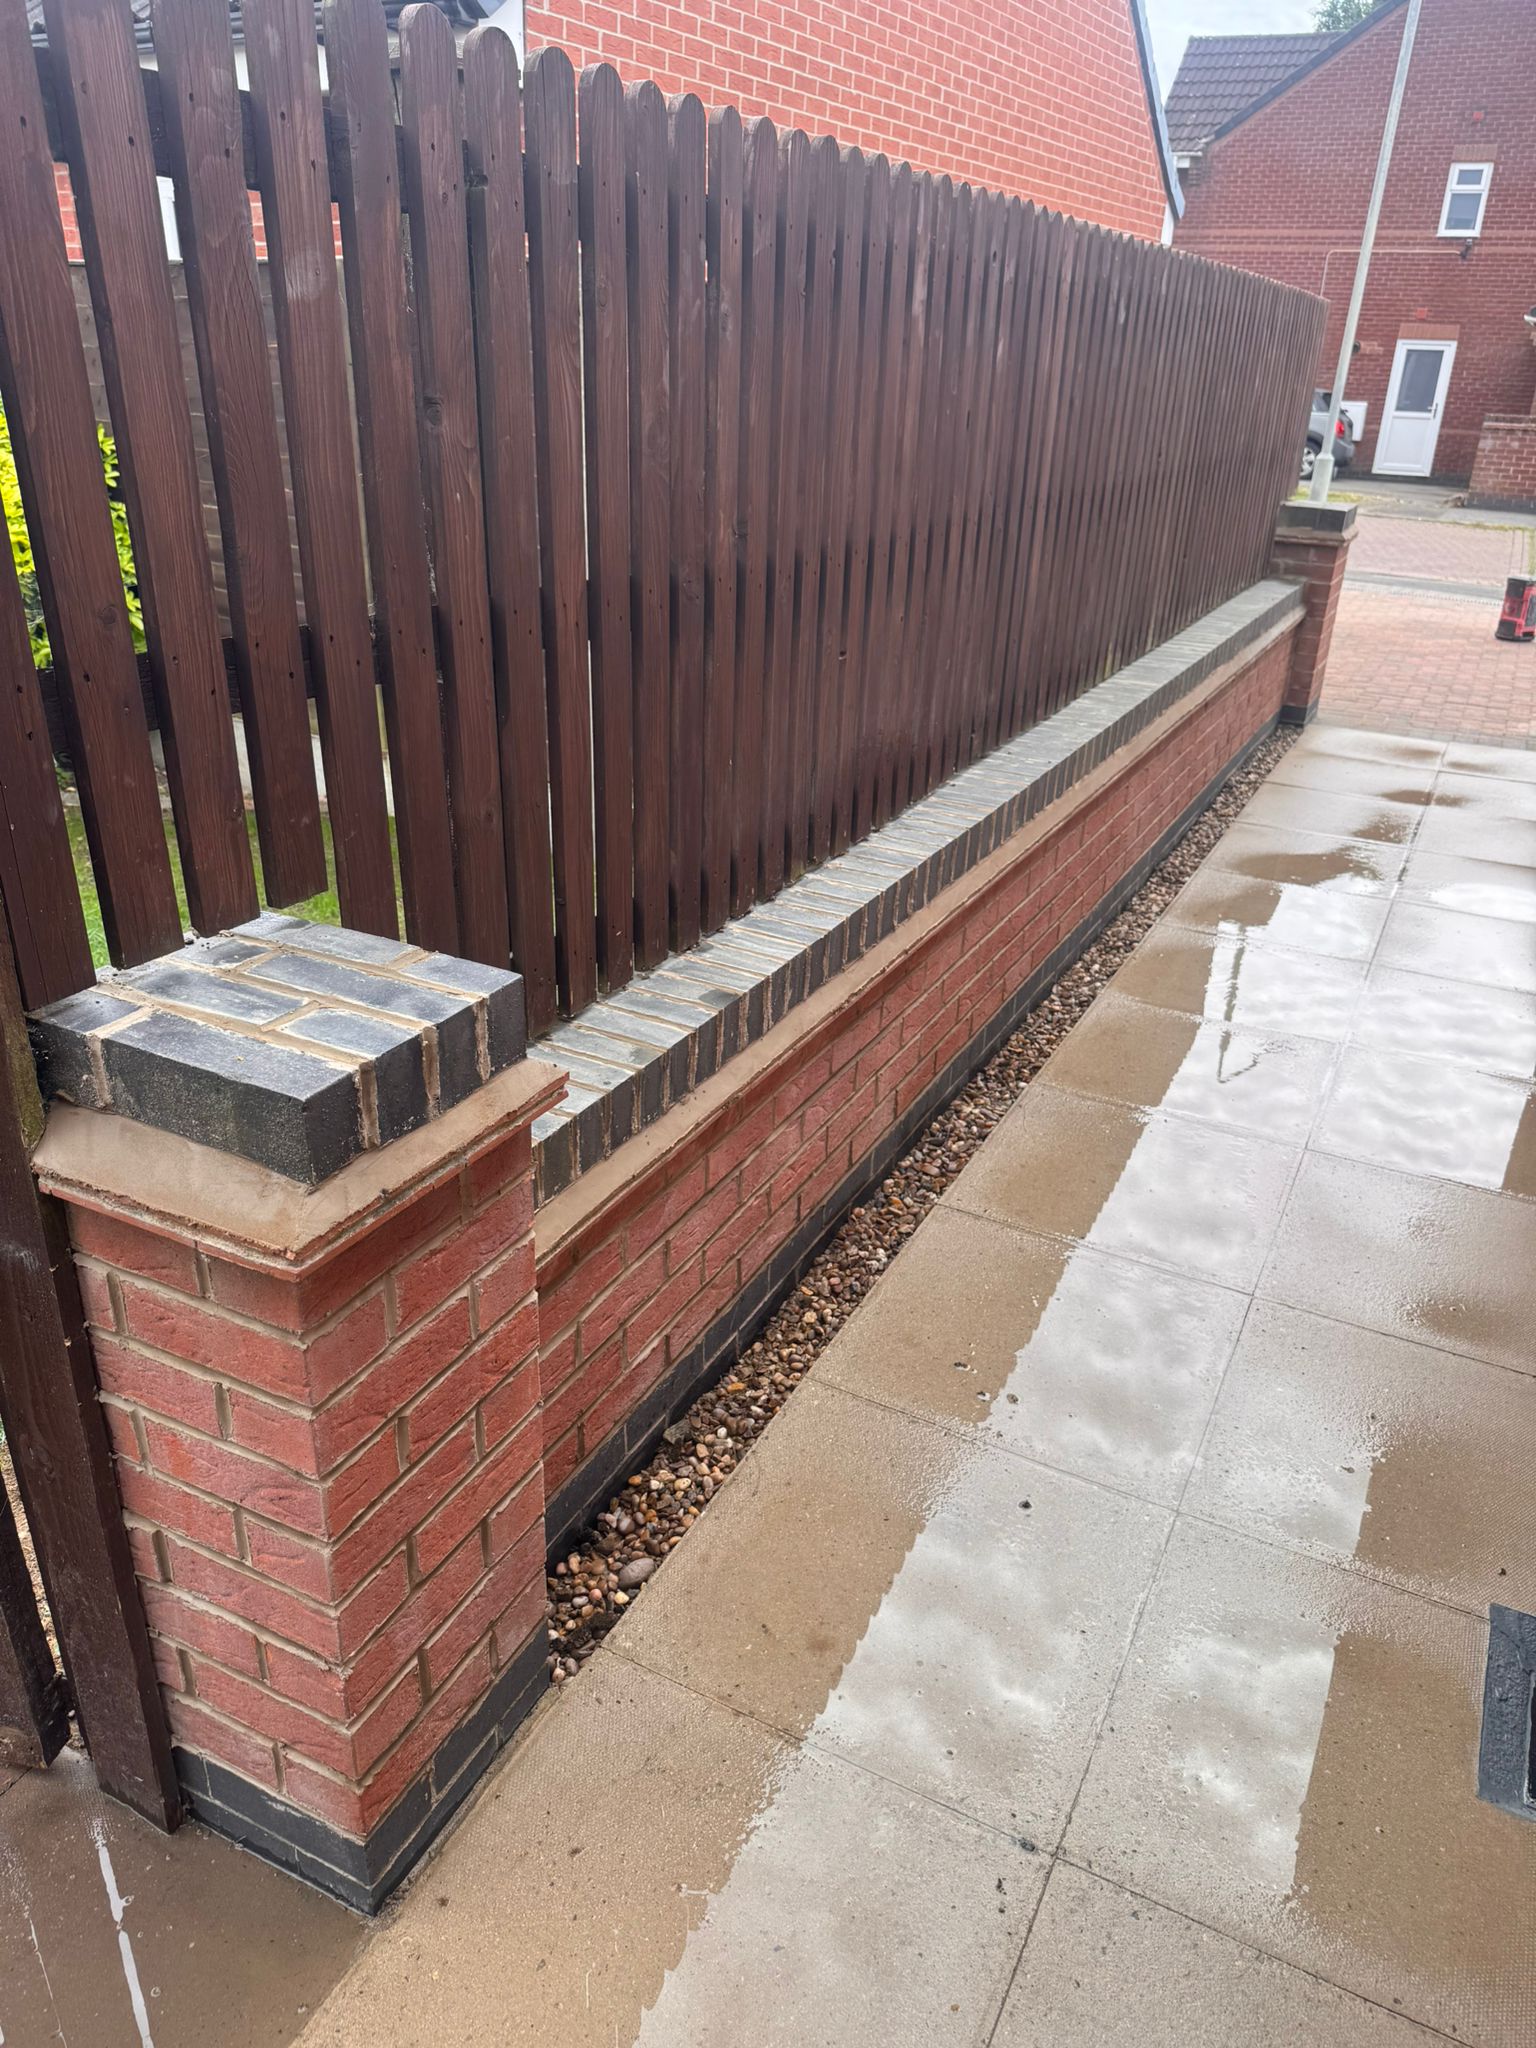
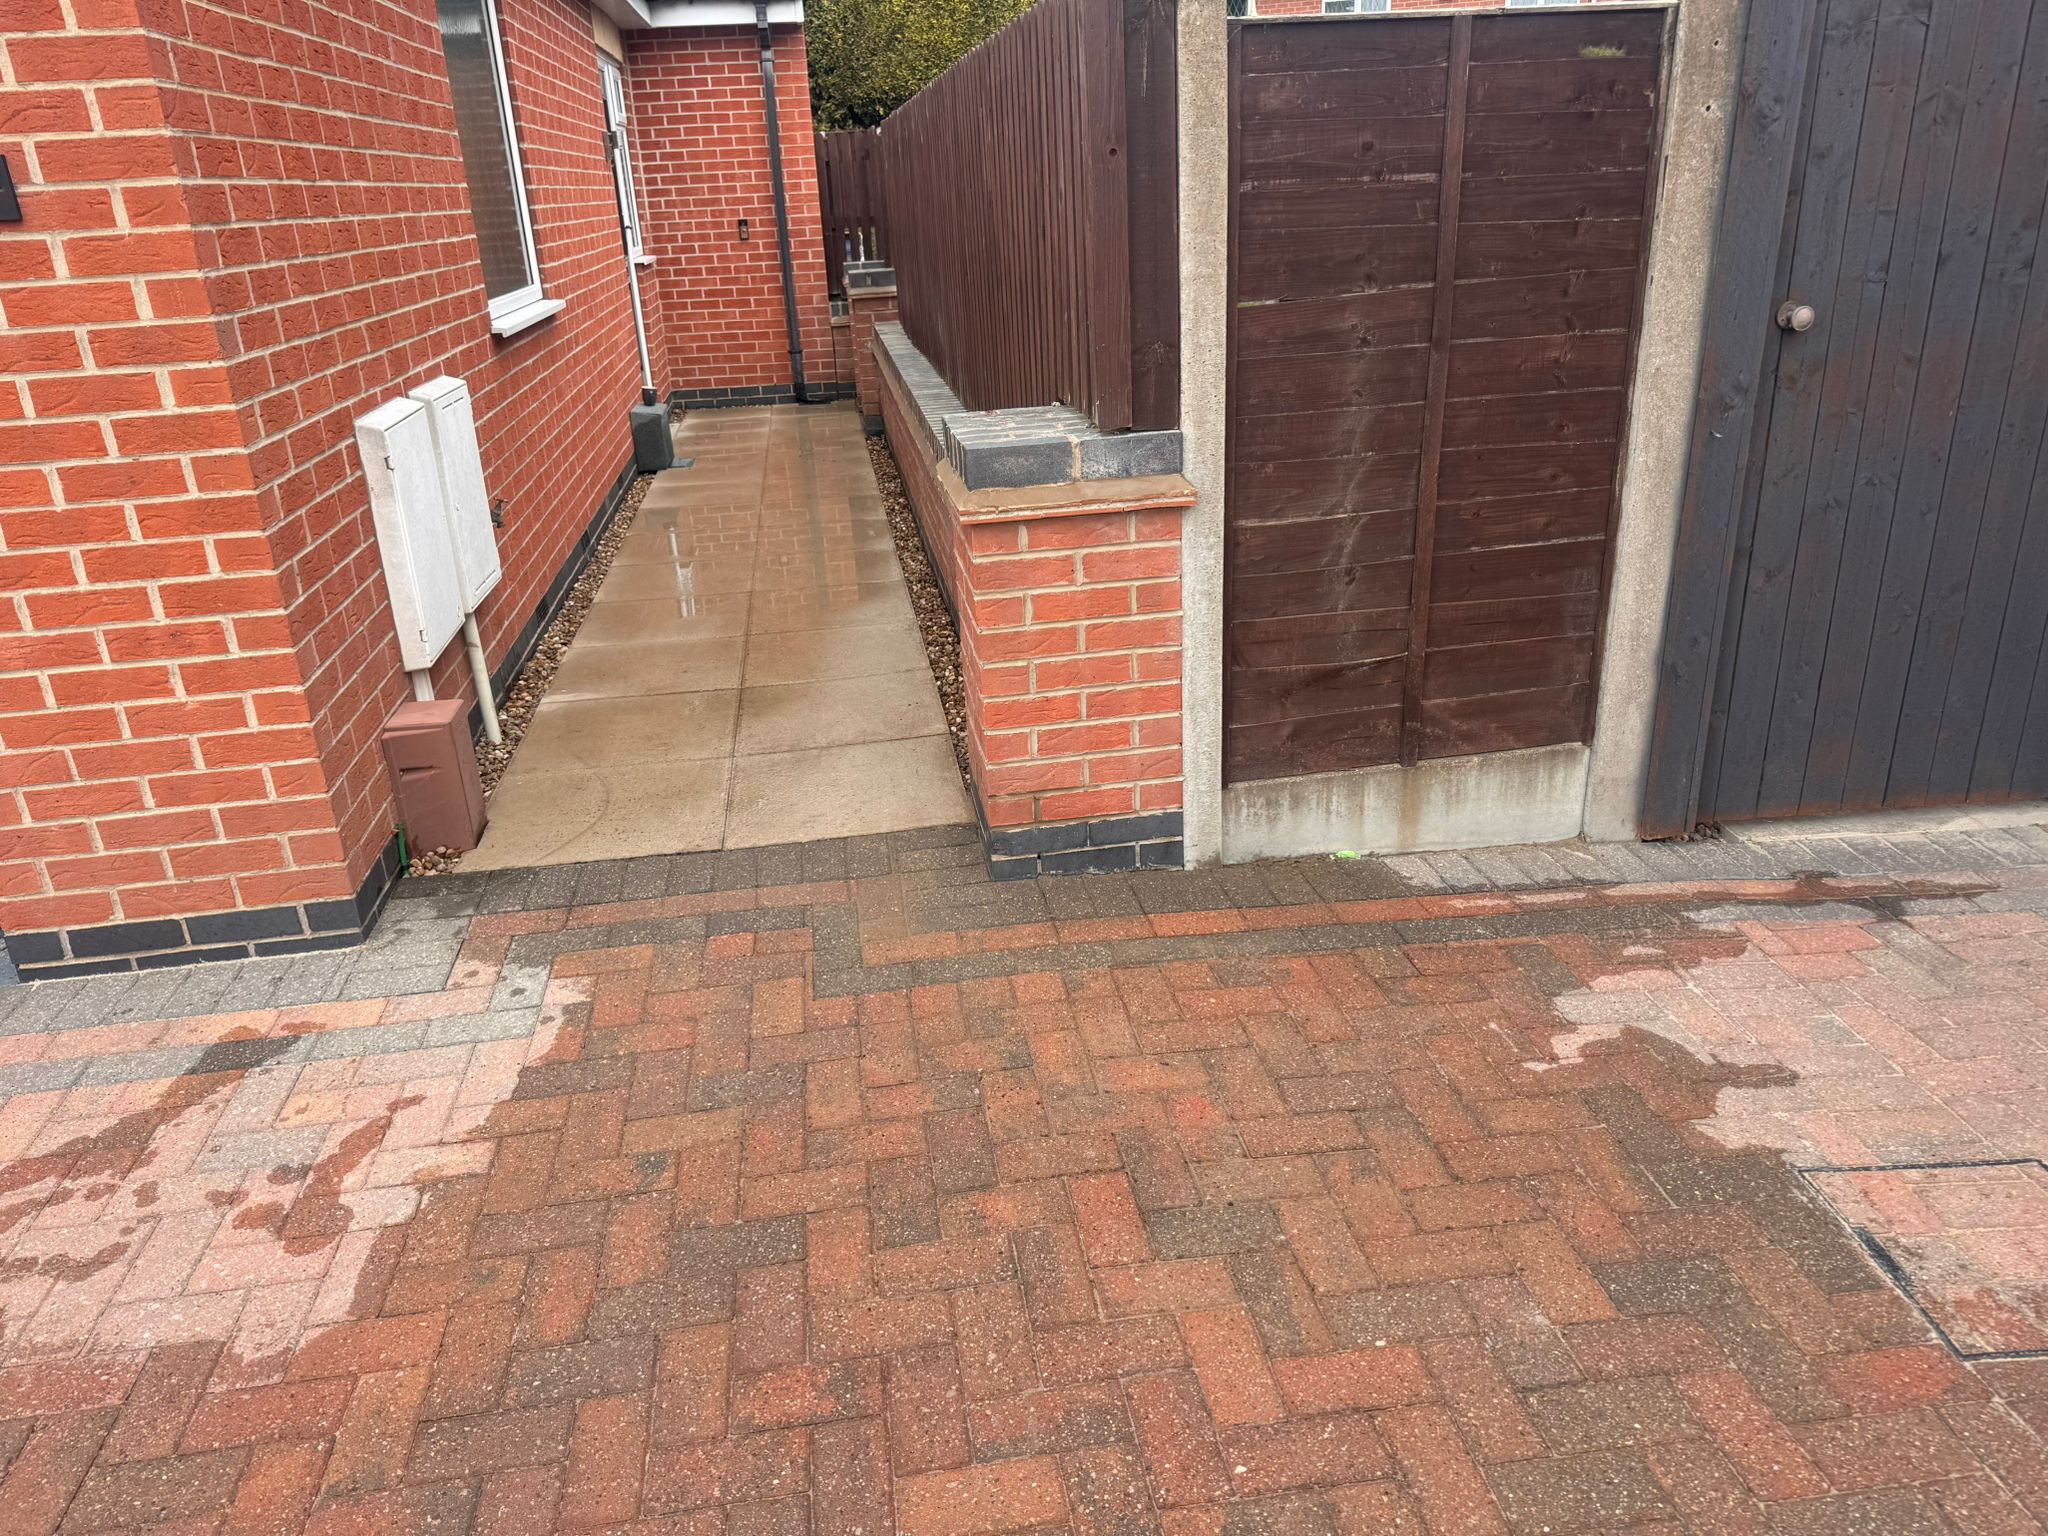
As you can see from the photos, this wall features a combination of classic red brick, dark blue engineering brick headers, and a striking timber fence insert. A wall with this much architectural detail deserves to stand the test of time!

Our Approach: Precision Repointing & The Perfect Finish
To fix the wall properly, our team had to meticulously rake out the failing, crumbly mortar without damaging the surrounding brickwork.

The Right Materials:We used regular cement and yellow sand for the new mortar mix. This not only ensured maximum strength and durability but also perfectly complemented the tones of the existing brickwork for a flawless aesthetic finish.

Patience for Quality: Quality building work requires the right conditions. We deferred this project from the previous week due to forecasted rain. Why? Because the cement from fresh mortar can easily wash out, this stains the brickwork. We also don’t want too hot a day as the mortar may dry too quickly. Waiting for the perfect dry window guaranteed a pristine, long-lasting finish.

The Result
As shown in the project gallery, the wall is now structurally sound, fully weatherproofed, and looking as sharp as the day the house was built. From the intricate retaining walls near the block-paved driveway to the long boundary wall running alongside the paving slabs, the entire property has received a massive curb-appeal upgrade.

Looking for Reliable Bricklayers in Nottingham?
Whether you need a brand-new garden wall, structural repairs, extensions, or precision repointing work, Swallow Hill Homes is here to help. We bring master tradesmen, a strict eye for detail, and honest communication to every single job.

  • Get a Free, No-Obligation Quote Today
  • We cover Bestwood, Arnold, Hucknall, Wollaton, and the wider Nottingham area.
  • 📞 **Call us at:07737 988 243
  • ✉️ **Email us at:** quote@swallowhillhomes.com

Nottingham Bricklayers, Bestwood Builder, Repointing Nottingham, Swallow Hill Homes Project.

To make pointing mortar, use a standard 4 parts sand to 1 part cement mix for modern bricks, or a 3 parts sand to 1 part NHL 3.5 lime mix for older, historic properties. Combine dry ingredients thoroughly in a mixing tray before slowly adding water until it reaches a workable, crumbly-yet-sticky consistency.

Categories
Build costs New build

How much does an extension cost in Nottingham in 2026?

We frequently receive inquiries from homeowners looking to extend their existing properties. The core question is always: “How much does an extension cost?”

How much does it cost to build these days?

1. Estimated Build Costs Per Square Meter (Excluding VAT)

To help you budget, we recommend the following allowances for extensions on existing residential properties. These prices are based on the total build area (external dimensions), not the internal floor plan, as current building regulations typically require walls to be up to 35cm deep.

  • Lower Range: £2,000 per square meter
    • Specification: Very basic finish and simple design.
  • Mid Range: £2,500 per square meter
    • Specification: Includes quality features like underfloor heating and tiled floors.
  • Top Range: £3,000+ per square meter
    • Specification: For high-end designs, such as large open-plan areas, large bi-fold doors, and integrated home automation systems.

2. Essential “Soft Costs” and Regulations

Beyond the physical build, you must budget for necessary professional and regulatory fees:

  • Architectural Services: An architect or architectural technician is normally required for drawings and plans, costing in the region of £1,000–£2,000. A professional builder, like us, will have trusted partners we can recommend.
  • Building Control: Required for any structural changes or the addition of sanitary facilities (like a toilet). Building Control ensures all work complies with minimum legal standards for safety, health, and energy efficiency.
  • VAT: Most established builders, including ourselves, are VAT registered and legally required to add VAT to the final price.
  • Planning Permission: If you are wondering if you need planning permission for an extension, the government runs a very useful section clarifying when permission is needed on the official planning portal.

3. What Factors Push the Price Up?

Certain design choices or structural requirements will inevitably increase your overall expenditure:

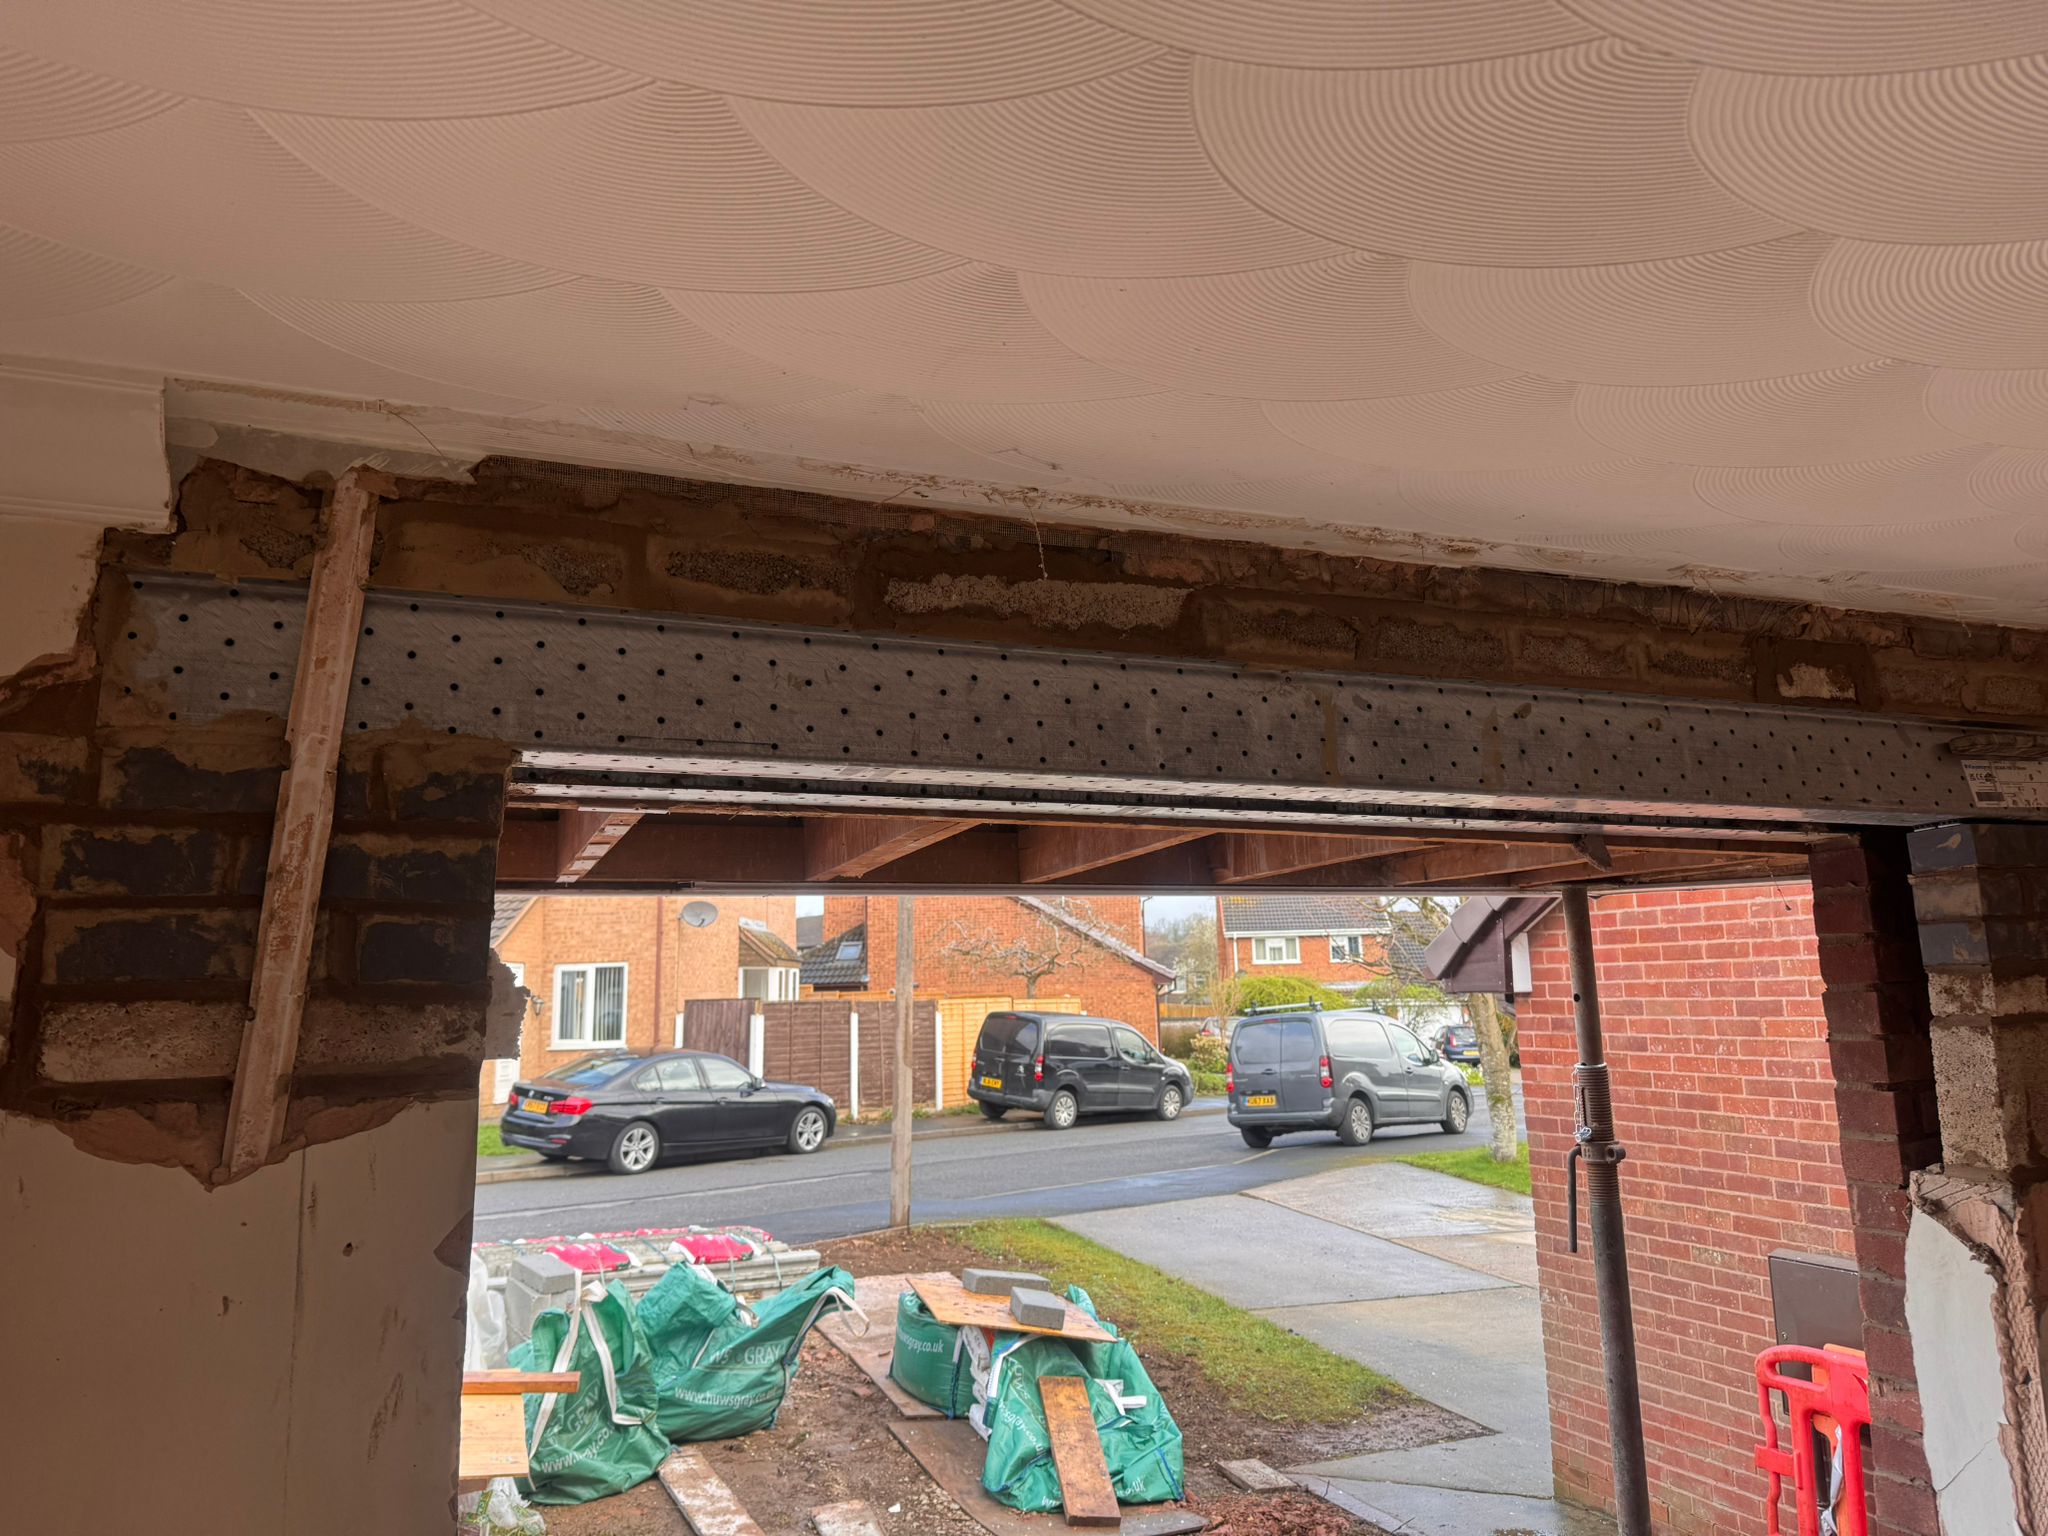
  • Large Steel Beams: These tend to require vertical steel supports to bear the load. Going above 4 meters often necessitates installing a pad stone (a large concrete base) beneath the existing property footings. Allow approximately £1,000 per meter once you exceed 4 meters.
  • Roof Lanterns: These are highly sought after for natural light and are not as expensive as many people think. They typically start from about £3,500 installed.
  • New Kitchens: A high-quality kitchen, including quartz worktops and appliances, generally starts at about £25,000.
  • Unexpected Work (The Contingency): When working on any existing house—especially older properties—unforeseen issues can be uncovered once demolition or excavation begins. This can strain the builder-client relationship. It is always prudent to include a 5–10% contingency fund at the start of your project to cover these necessary surprises.

4. When to Pay the Builder

Understanding the payment structure is critical for protecting both parties:

  • Deposit: Most reputable builders will ask for a small deposit to secure your slot in their diary. We would caution against paying more than 10% of the project value upfront as a deposit. Paying a large amount in advance might signal that the builder is using your funds to cover other jobs.
  • Payment Schedule: We typically ask for weekly or monthly payments to ensure consistent financial flow. On our projects, we provide a weekly tracker so both the client and Swallow Hill Homes can see precisely what work has been authorised and completed.
  • Contract: A formal contract is strongly recommended for all larger projects. This clarifies payment terms and establishes a clear process should the relationship encounter difficulties.

5. Should I Choose the Lowest Quote?

While bu

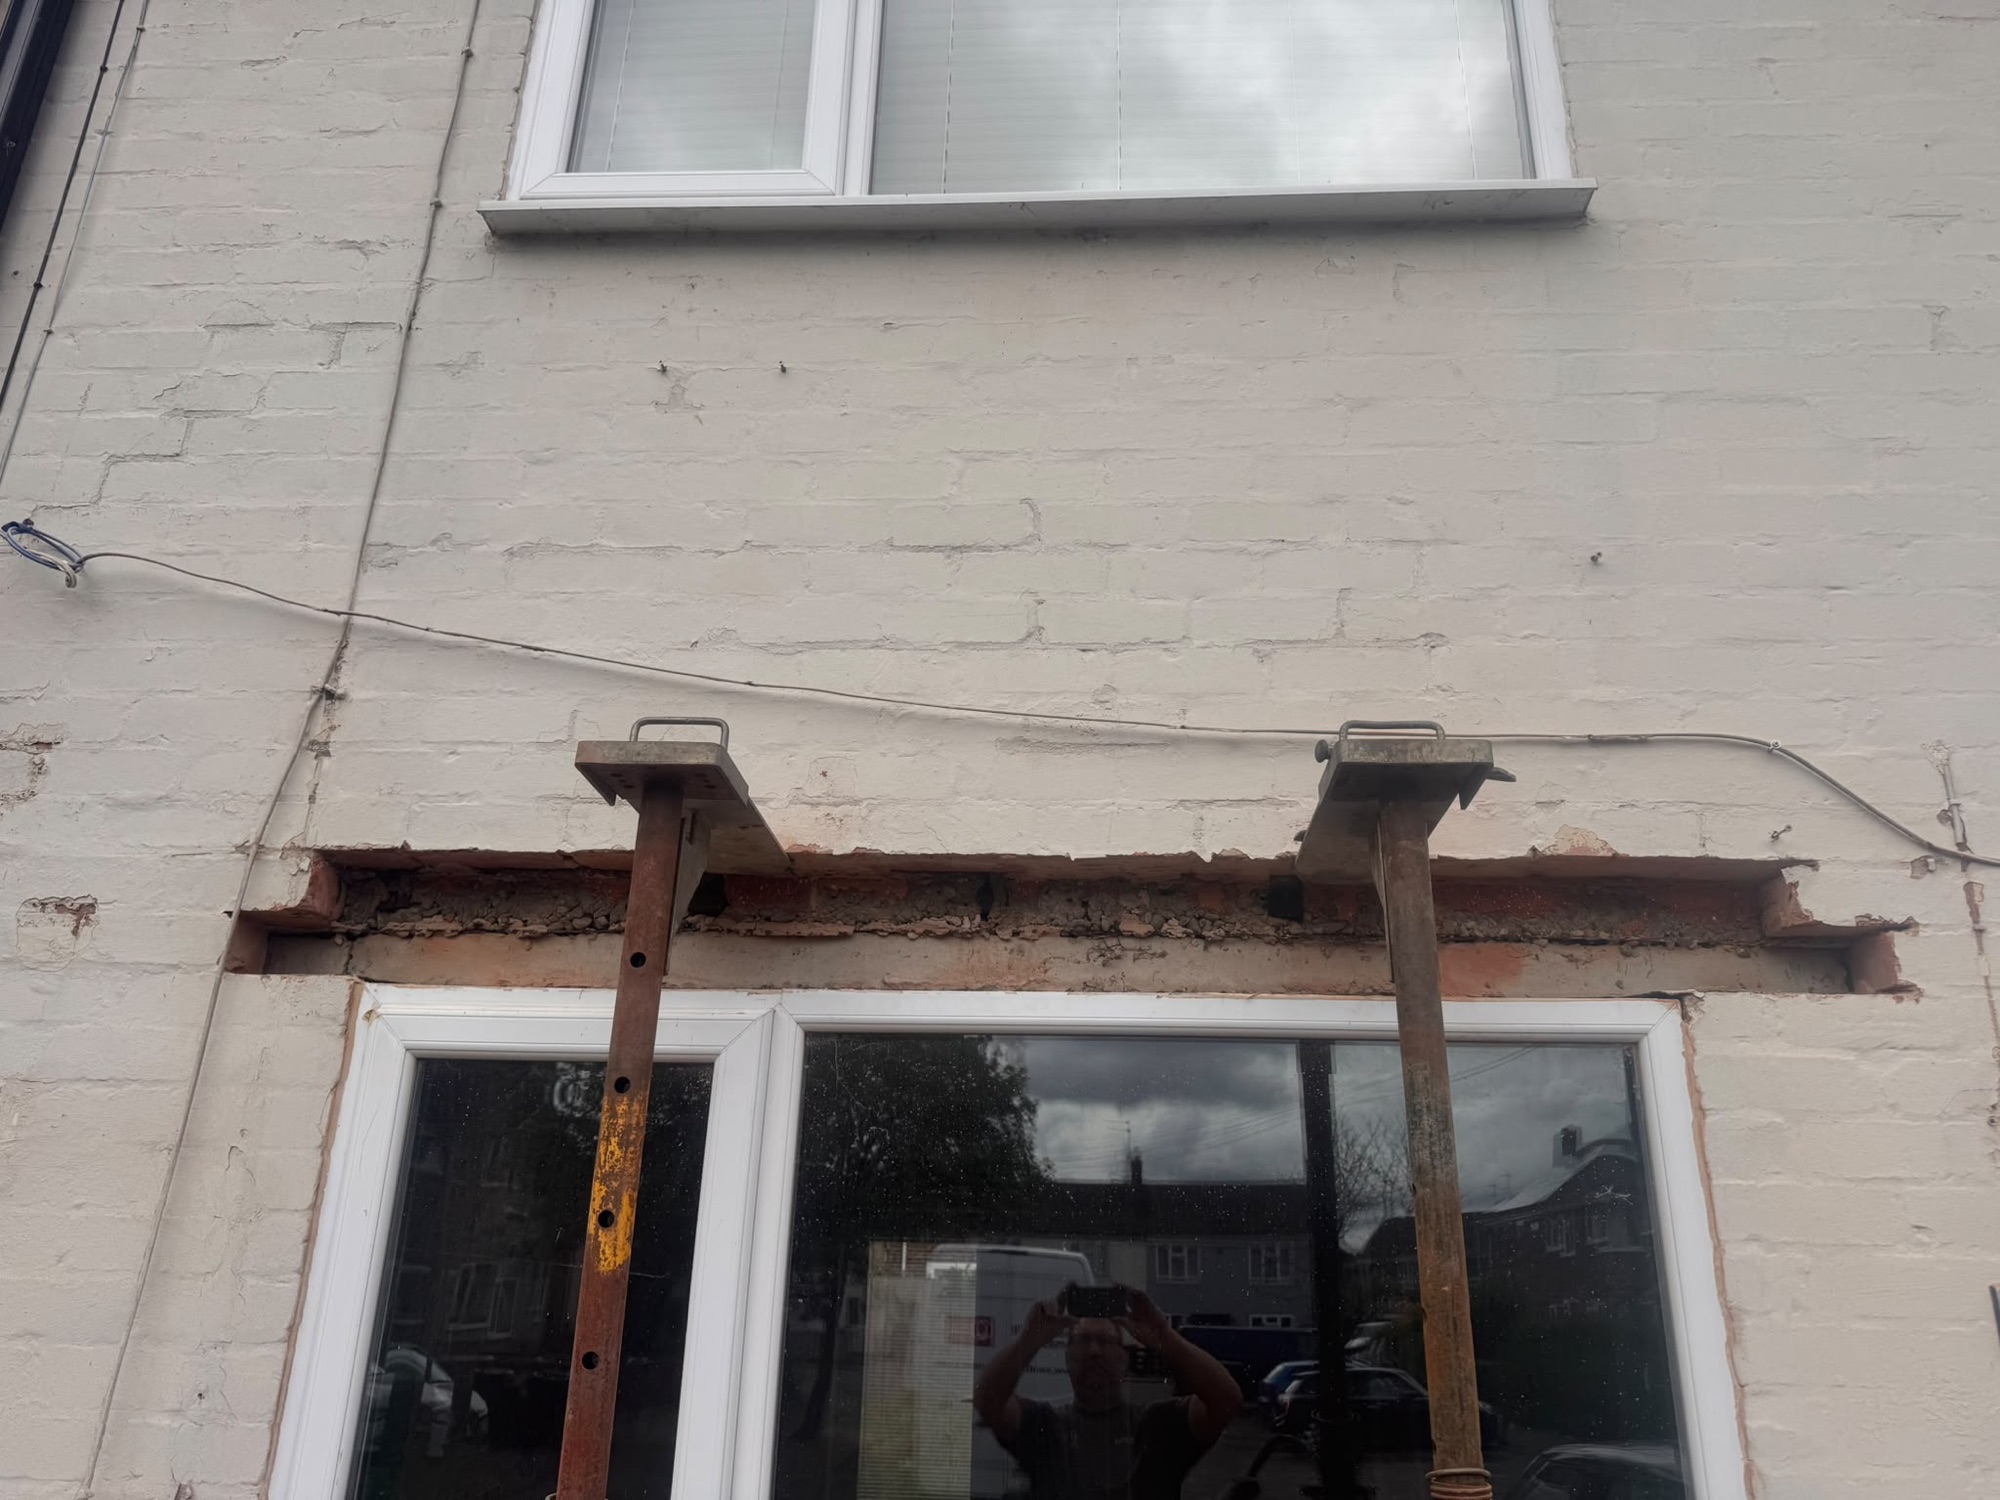
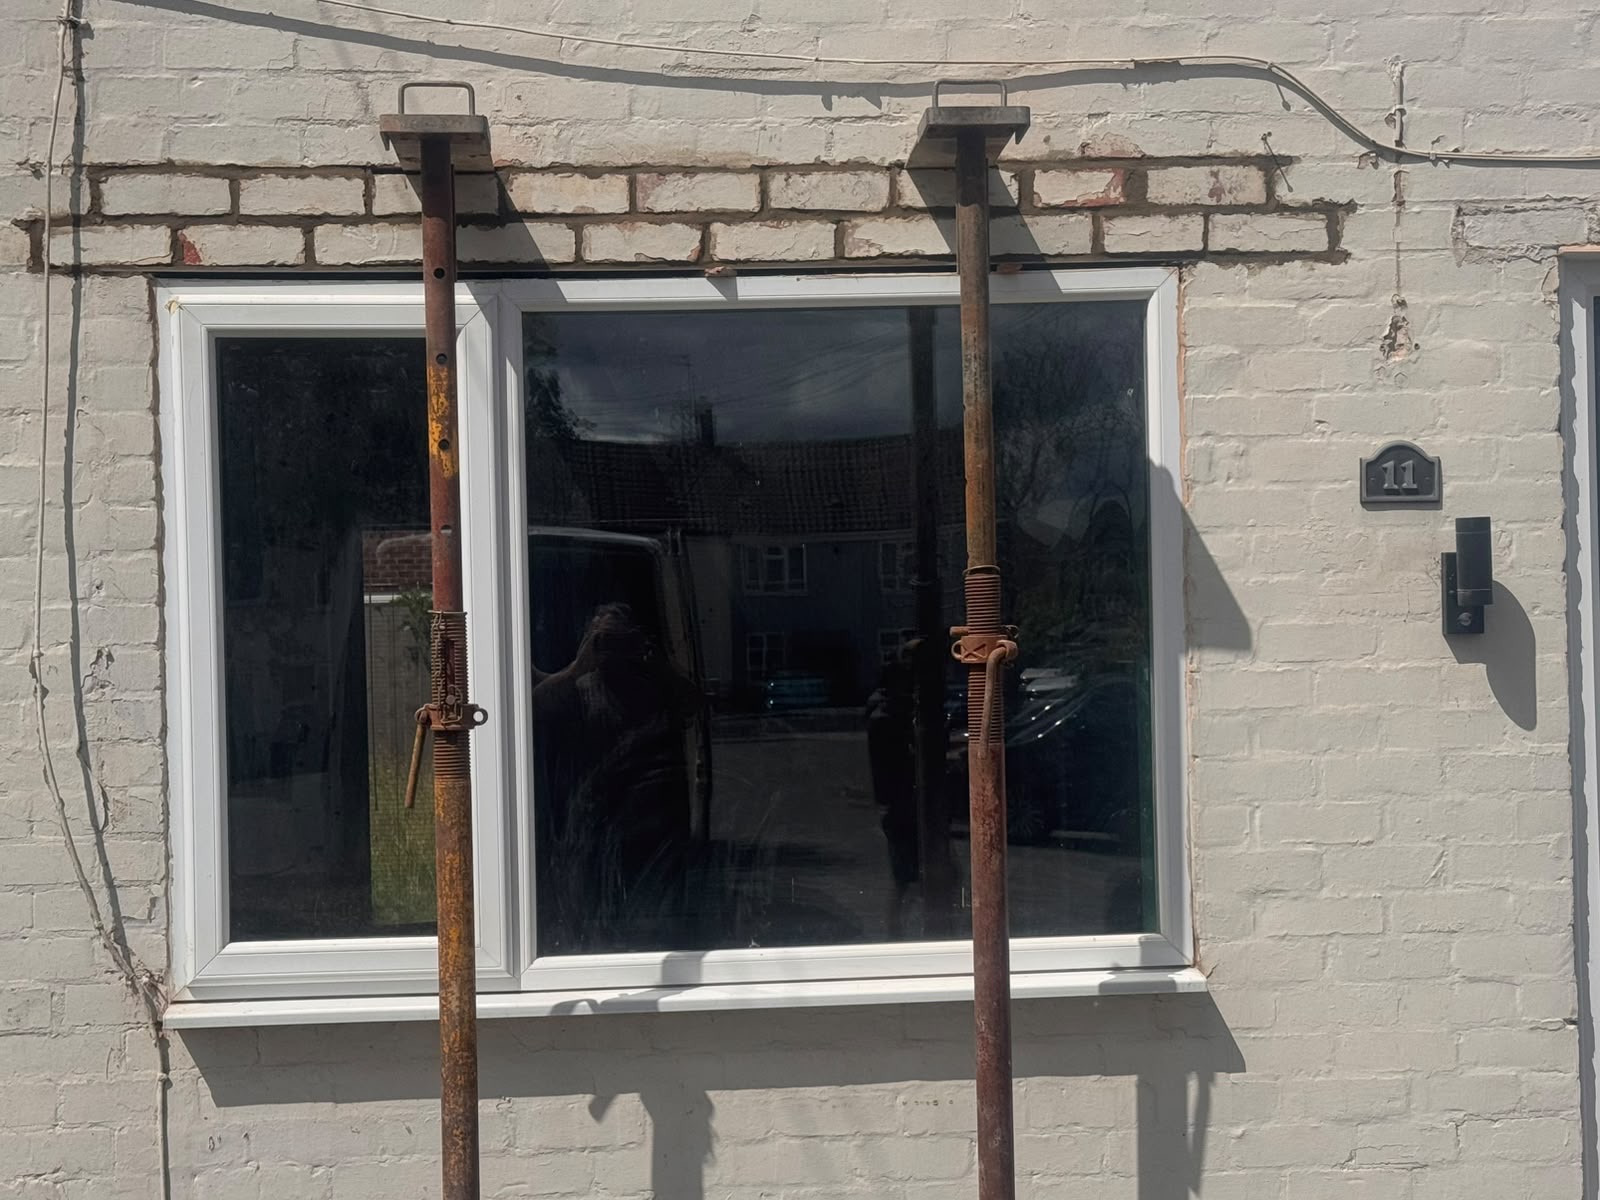
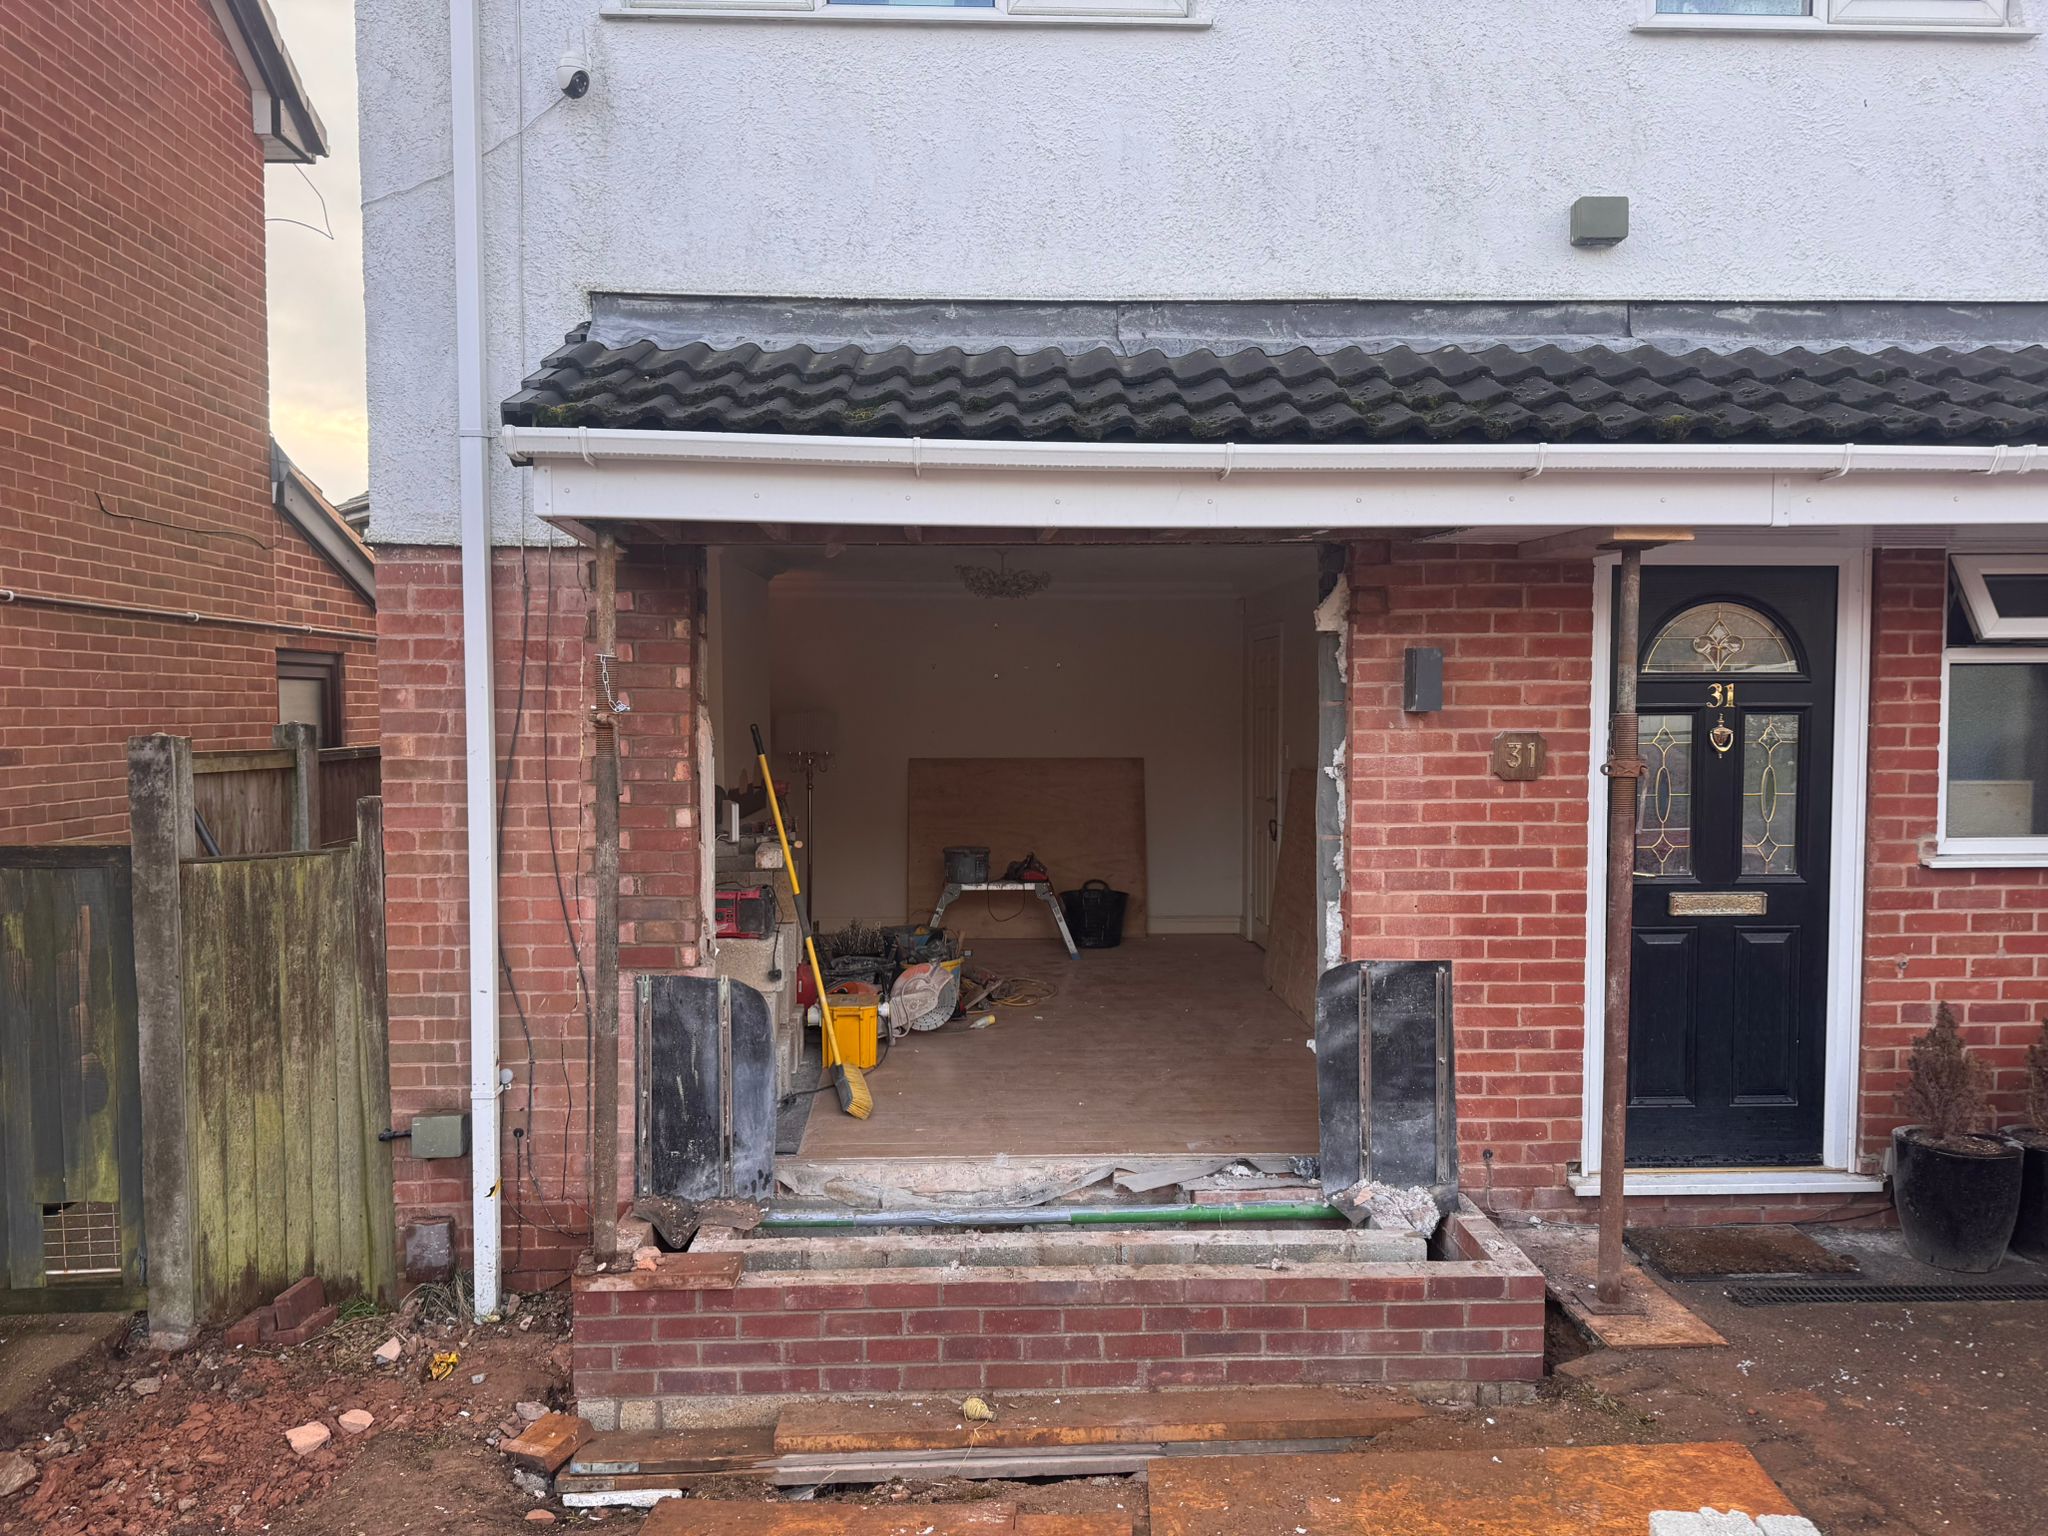
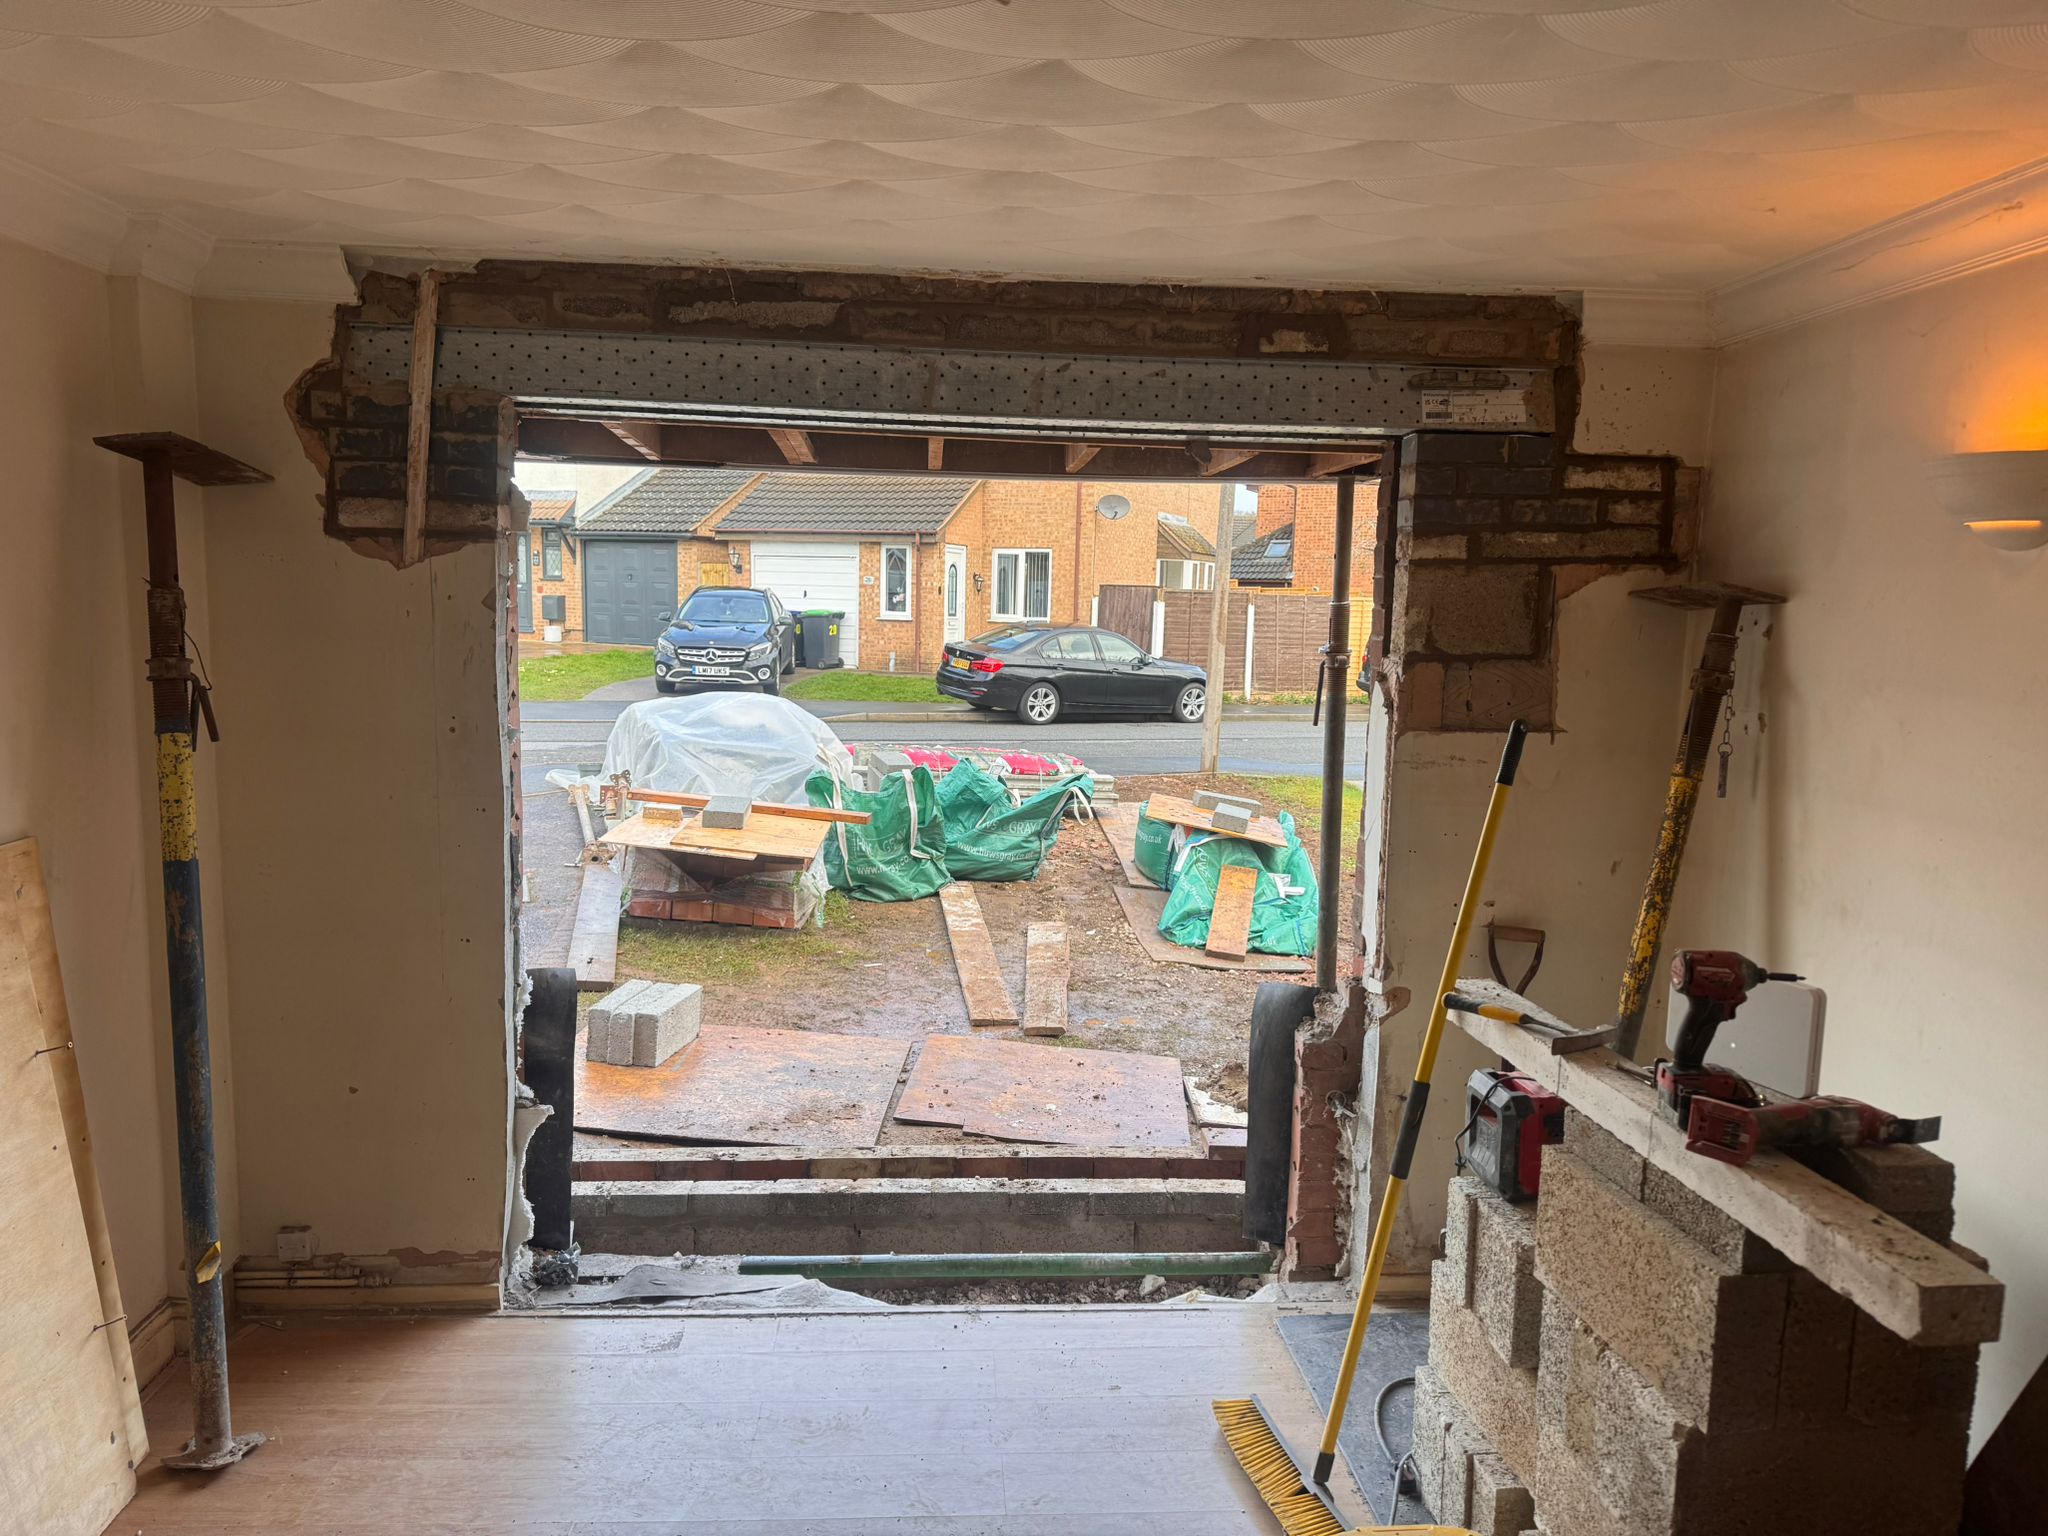
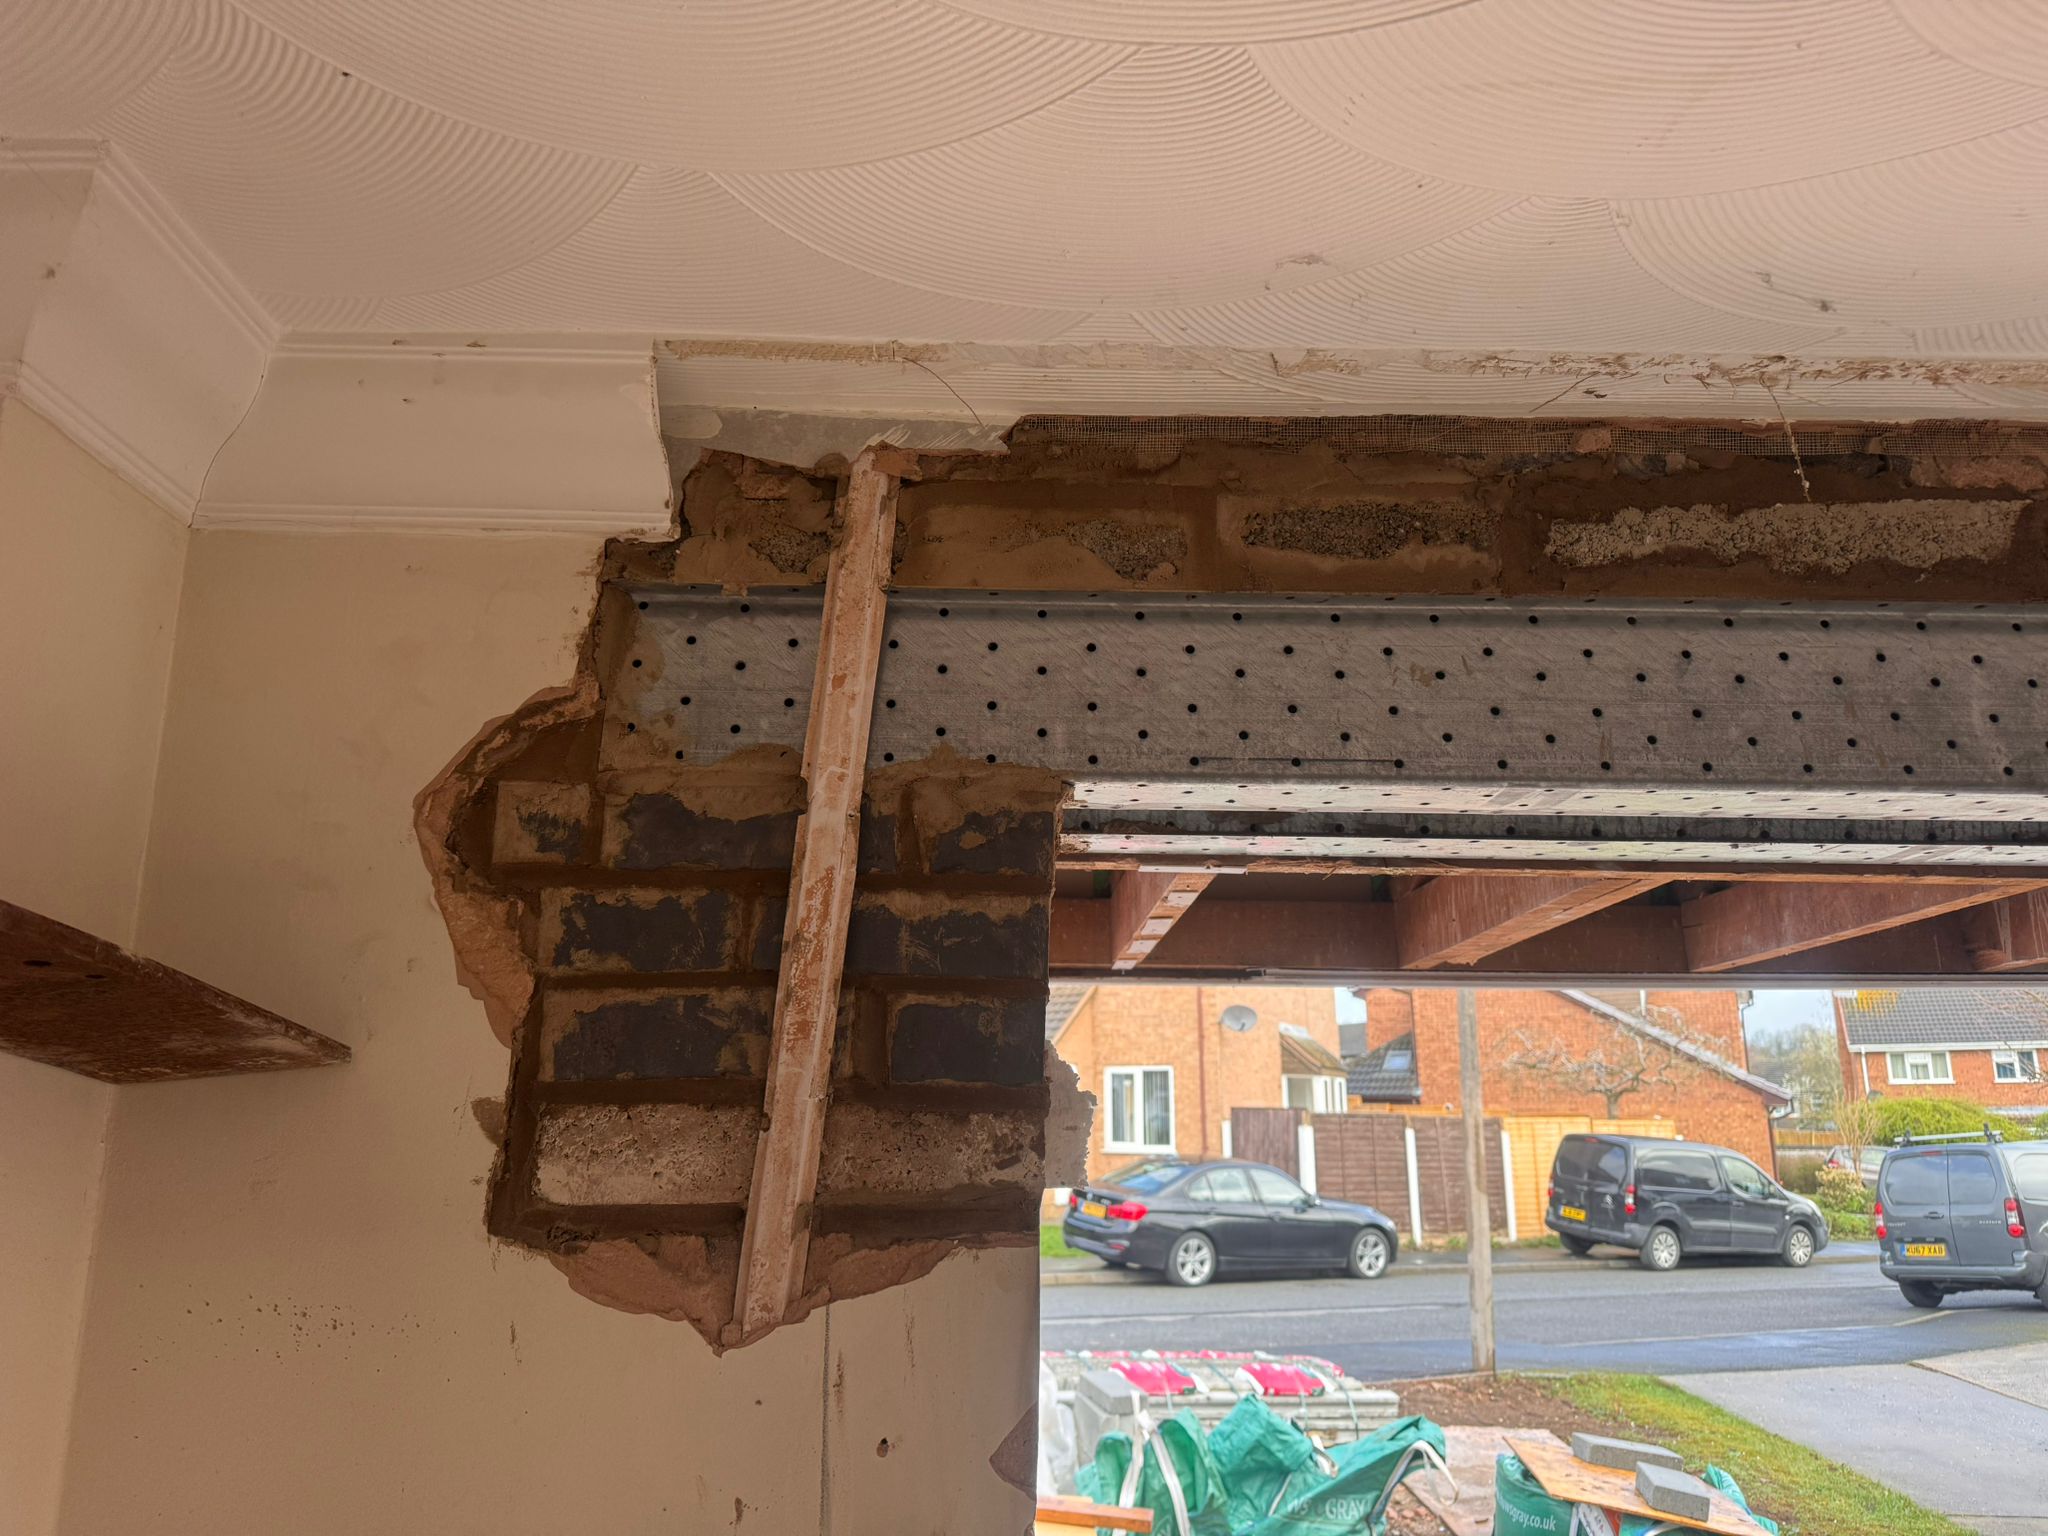
Steel RSJ’s

dgets are often tight, be cautious about accepting the lowest quote. If one quote is substantially cheaper than all others, you must ask how that contractor intends to maintain the quality you desire for your home. We are members of the Federation of Master Builders (FMB), a seal of quality.

For larger jobs, we highly advise checking customer references of previous jobs or arranging to see their completed work. Remember: if something feels too good to be true, it usually is.

6. Do I Need a Warranty?

The level of assurance depends on your trust in your chosen builder. Building Control is legally there to ensure all construction projects comply with minimum legal standards for safety and quality. They check plans and inspect key work stages (like foundations and fire safety) for compliance with Building Regulations.

7. Where to Go for Ideas


Interested in getting a quote for your project?

We serve Beeston, Nottingham, Bramcote, Wollaton, Eastwood, Kimberley, Ilkeston, West Bridgford, Edwalton, and Wilford.

Contact Rob Bailey, Director, at 07737 988 243 or email rob.bailey@swallowhillhomes.com to discuss your project.
Beeston, Nottingham, Bramcote, Wollaton, Eastwood, Kimberley, ilkeston, West Bridgford, Edwalton, Wilford, FMB

Categories
Brickwork Renovation

Bay window construction, Hucknall, Nottinghamshire

The customer wanted the bay window expanding as the current window limited the amount of light coming into the room.

penhale window 1
previous arrow
next arrow

At Swallow Hill Homes, we believe in transforming houses into dream homes, often by maximizing the use of existing space and bringing more natural light inside. Our recent project at Penhale Drive, Hucknall, Nottingham, is a perfect example of this dedication, converting a simple bay window canopy into a spacious, full walk-in bay.

The client’s vision was to dramatically change their living room by extending the opening and creating a fully integrated bay space they could walk into. However, a seemingly straightforward extension presented a complex structural challenge: the foundations.

The property had a large, 1.7-meter-high Leylandi hedge situated close to where the new footing needed to be laid. When dealing with clay soil—the ground condition we expected on site—the removal of mature vegetation like this can cause significant issues due to potential soil heave as the ground rehydrates. Building Control (Turton) rightly required a detailed structural engineer’s design for the footing.

To ensure the structural integrity of the new addition and to avoid any long-term issues, such as undermining the existing house foundations, we brought in the expertise of Wayne Cheung, a Chartered Engineer from DFG Consulting. Our plan was to dig a new footing down to the level of the existing building’s foundation, which we estimated to be around 90-100cm below ground level.

Wayne’s team provided a comprehensive structural report and calculations, which allowed us to proceed with confidence. The design specifically incorporated 100mm of heave protection along the edge of the new footing to mitigate the risks associated with the removal of the dense Leylandi roots. This proactive approach ensures the new structure remains stable for decades to come, even with the presence of expansive clay soils.

We prioritise getting the groundwork right, as a solid foundation is essential for any renovation. After securing the necessary structural design, and with the hedge and roots quickly removed, we were able to press ahead with pouring the concrete footing in a timely manner. The structural package was delivered swiftly on March 17, 2026, allowing us to maintain our momentum on site.

The transformation from a modest canopy to a full bay window creates a stunning new focal point in the living room, adding valuable, usable space and flooding the room with light. The entire refurbishment of the living room at Penhale Drive was scheduled for completion over a five-week duration, starting in March 2026.

This project demonstrates Swallow Hill Homes’ commitment to delivering clients’ visions while expertly navigating technical and structural complexities. Whether it is a kitchen extension, a full renovation, or simply expanding a window space, we rely on precise planning and expert structural guidance to deliver uncompromising quality. If you are looking to enhance your home with high-end craftsmanship, from concept to compliant completion, contact us today.


Categories
Renovation

Property refurbishment in Sandiacre, Nottingham

Bringing History Into the Modern Era: A Complete Victorian Terrace Renovation in Sandiacre, Nottingham

Owning a 100-year-old Victorian or Edwardian terrace house in Nottingham comes with a lot of pride. These properties are packed with character, beautiful brickwork, and historic charm. However, they also come with a unique set of challenges: drafty rooms, outdated layouts, and decades of old plaster hiding underneath layers of wallpaper.

At Swallow Hill Homes we specialize in breathing new life into these classic homes. We don’t just paper over the cracks; we strip them back to their bones and rebuild them to meet modern living standards.

Here is a sneak peek behind the scenes of our latest total refurbishment project right here in Nottingham.

IMG_6382
PlayPause
previous arrow
next arrow

The Project: A Full-Scale Terrace Transformation

Our clients loved the location and character of this traditional terrace, but the interior needed serious intervention. To do this job right, we started with a blank canvas.

Here is exactly what we are undertaking on this comprehensive renovation:

1. Strip Back to Brick & Structural Upgrades

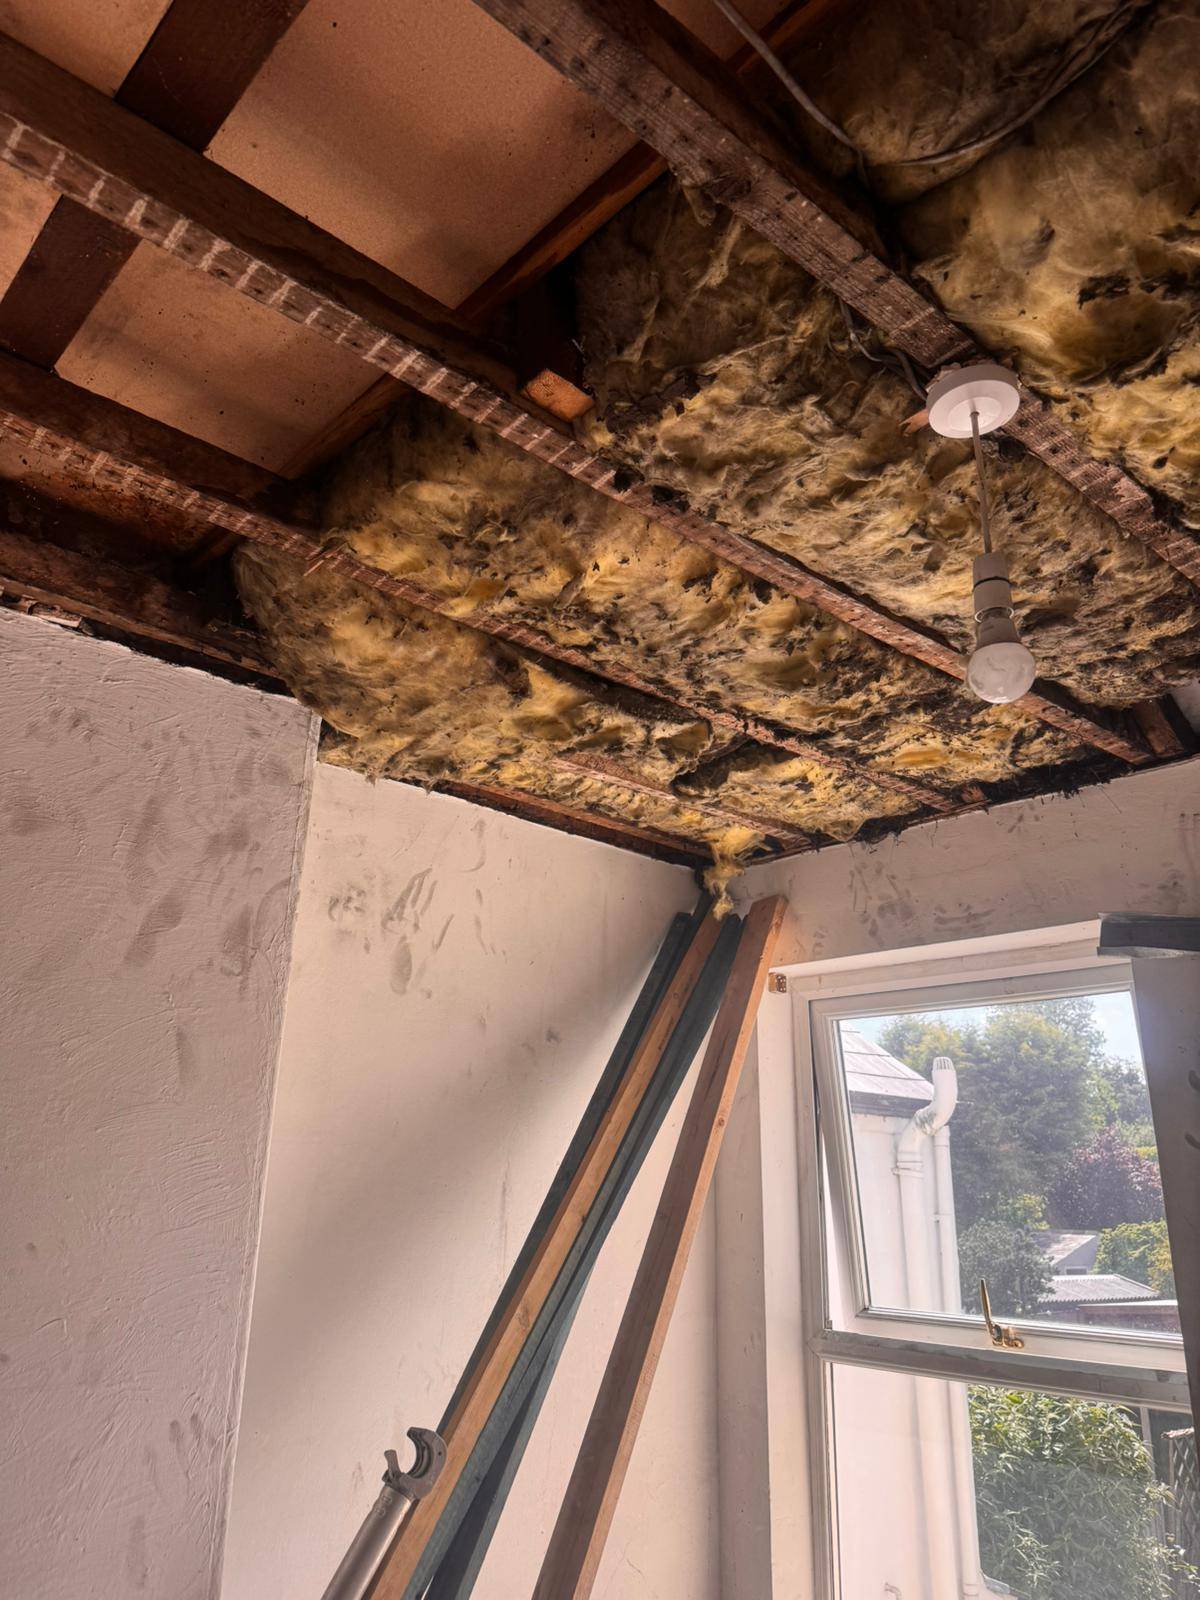
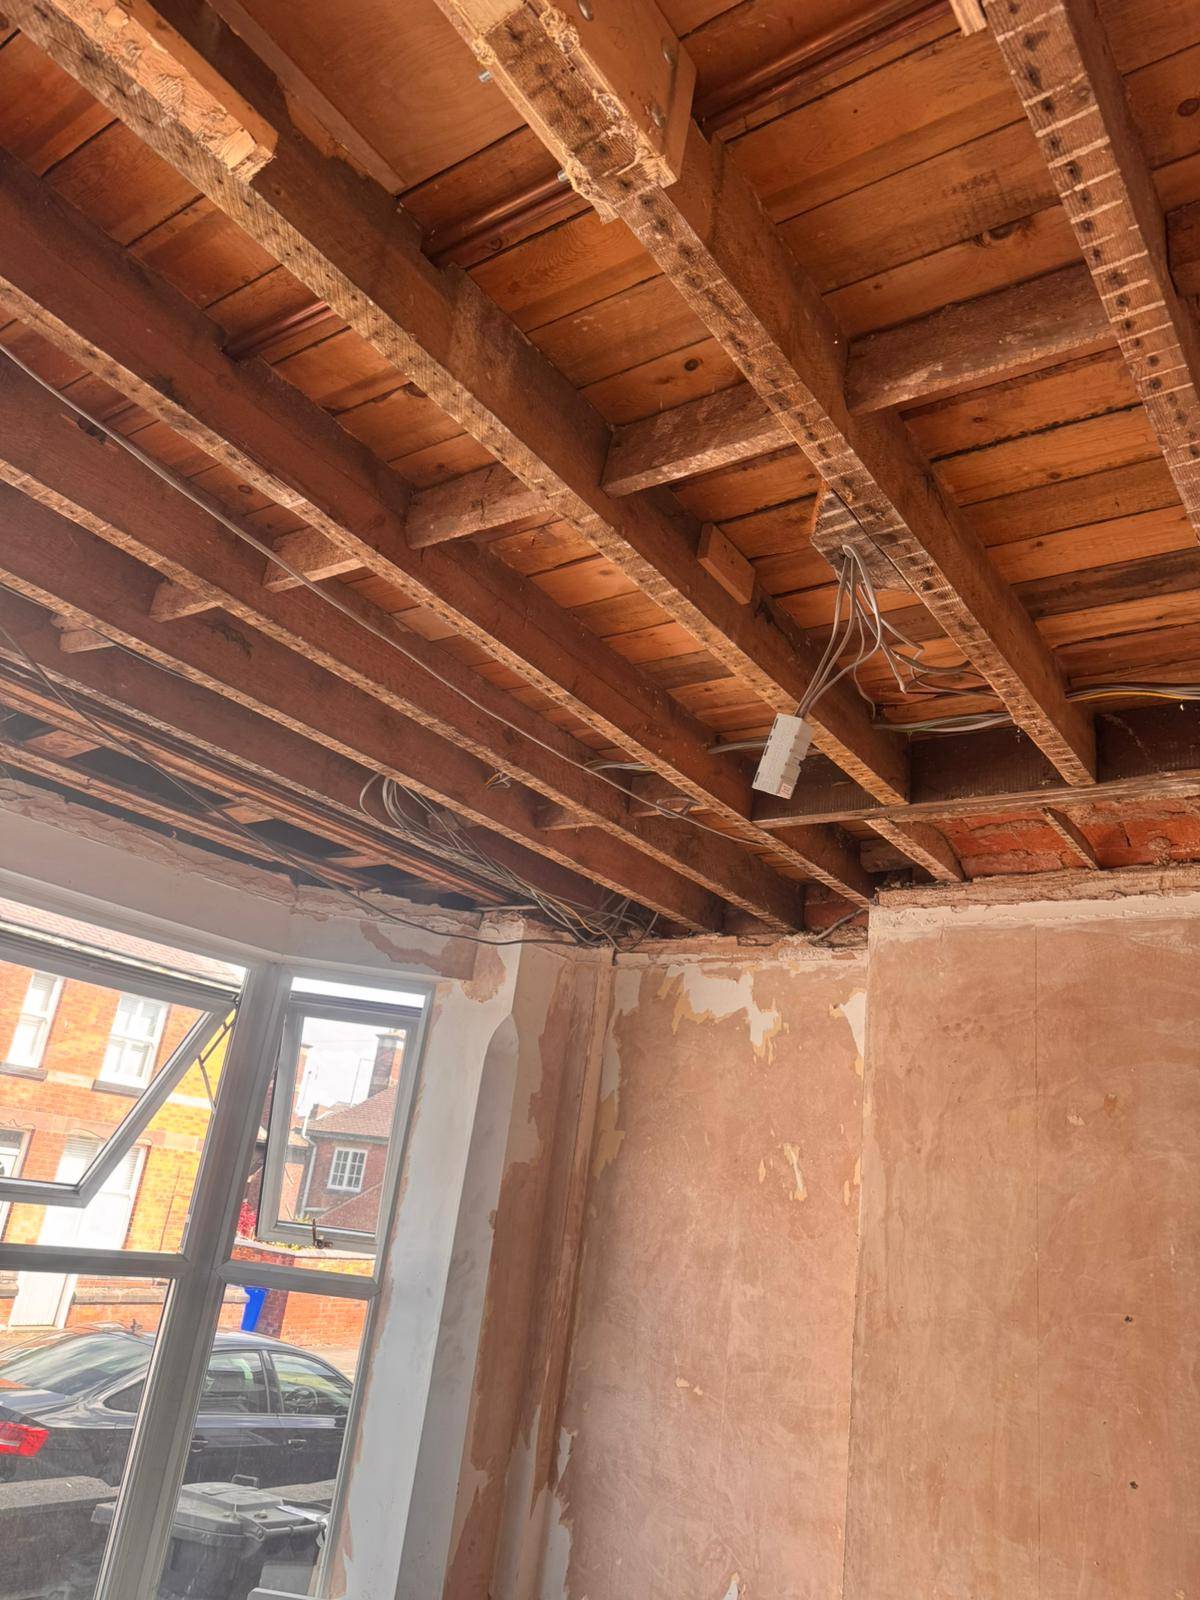
We have completely cleared out the old lath and plaster ceilings and stripped the walls back to the original brickwork. This allows us to inspect the structural integrity of the home. As you can see from our first on-site photos, we have already reinforced the ceiling joists with heavy-duty timber splicing and bolted structural plates to ensure the upper floors are level and secure for the next century.

JDP electrical fitted a new consumer unit for us
New consumer unit to replace the existing 2

2. Comprehensive Insulation & Energy Efficiency

Older solid-wall terrace houses can be difficult to keep warm, leading to massive heating bills. By stripping the ceilings back int he bedroom we have fitted Super Foil SF19 X Foil which has an Roof Thermal Resistance : 2.54R (m2K/W) and is LABC approved. A standard cavity wall in the UK is between 2.3-4.5 so for a very small loss of head height 25mm your adding a huge amount of insulation.

By choosing SuperFOIL insulation you can save yourself Space, Time & Money over traditional forms of insulation. SuperFOIL is dedicated to improving Sustainbility of our products as well as our business as a whole. Our multifoil products are produced using up to 40% recycled materials. This helps save the equivalent of approx. 80 million plastic bottles from ending up in land fill every year! Because SuperFOIL consists of multiple layers of radiant barrier foil, it can protect against heat loss through radiation that non-foil insulation’s offer no protection against. Additionally, by installing as a continuous layer and sealing fully with SuperFOIL Tape, SuperFOIL insulation provides an effective air and vapour barrier. Controlling air leakage such as draughts is paramount to the achieve high levels of energy efficiency. Useful Links: SuperFOIL Brochure-2022

This simple step will make a significant difference to warmth in the bedrooms of this 1920s house into a cozy, energy-efficient home that retains heat and decreases monthly utility costs.

3. Professional Plastering

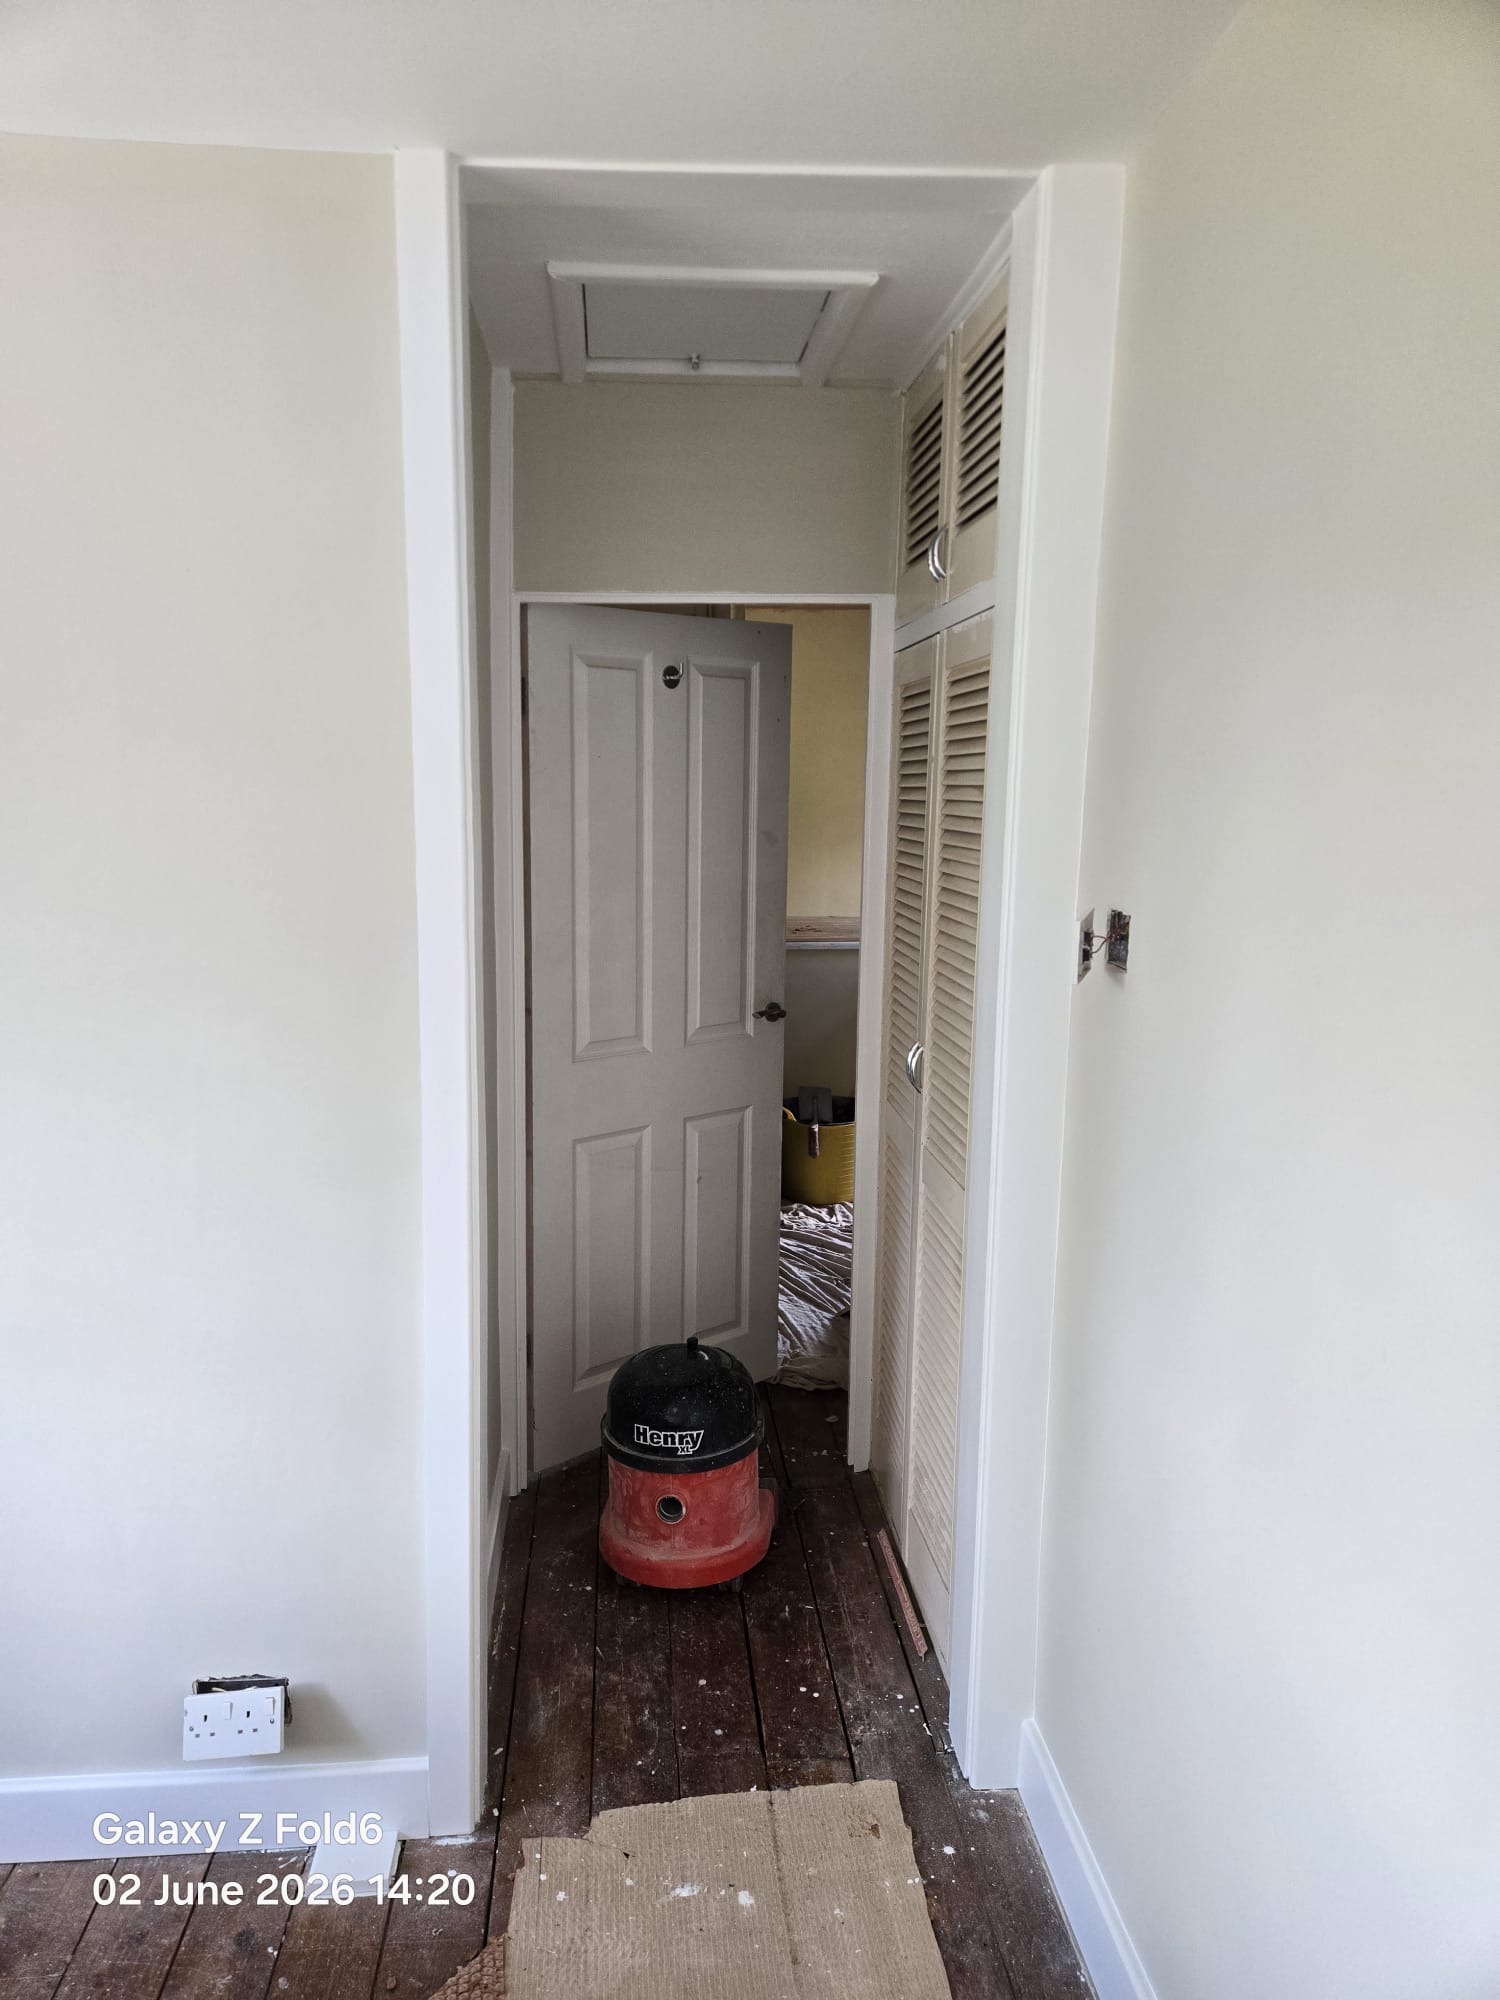
With the structural work done and insulation in place, our team is getting to work on the boarding and plastering. We use premium finishes (like the British Gypsum BoardFinish ready to go on-site) to achieve perfectly smooth, flawless walls that provide the ultimate foundation for decorating.

4. The Grand Finale: A Bespoke Media Wall

Once the room is plastered and modern flooring is laid, we will be constructing a fully custom, bespoke media wall. This will seamlessly integrate a modern widescreen TV, integrated mood lighting, hidden cabling, and a contemporary fireplace—proving that you can enjoy cutting-edge modern luxury without losing the cozy soul of a traditional terrace.

Progress Photos: Stage 1 (The Strip Out)

Take a look at the raw potential we are working with! These initial photos show the property right after the teardown phase, highlighting the exposed joists, stripped chimney breast, and the starting point of our plastering prep.

Categories
Renovation

Room refurbishment, Ruddington, NG11, Nottinghamshire

Categories
Brickwork

Garden brick walls. Ng9, Beeston

Neat brickwork in Forterra Hampton rural blend, the bricklayers like these bricks because they pick up the moisture at a steady rate.

They are classed as engineering bricks so can be used in the ground.

Small brick wall using Hampton Rural blend bricks.
Engineering Brick Coping: Durability and Cost
 
For finishing the top of the wall, we used engineering bricks on edgeThis is a detail often employed due to the brick’s high durability and low water absorption, making it excellent for capping walls or for demanding structural applications like the blue engineering brick upstands we utilize below the DPC level for porch structures.
 
It is essential to remember that for structural integrity and a clean stop-end, the final end needs to be solid. The going rate for a solid engineering brick to be approximately £2.25.

Hampton Rural Blend

Benefits of Hampton Rural Blend The Ecostock range is manufactured using the latest technology in sustainability and production efficiency. Forterra produce three kinds of this soft mud brick at their state-of-the-art factory in Measham, Leicestershire: stock pressed with a smooth, sand faced finish; stock thrown, which have a traditional handmade appearance; and waterstruck, which have a smooth but irregular surface. Ecostock bricks are available in wide selection of red, buff and yellow colours.

Categories
Roofing

Fascia & Soffit replacement

We replaced the fascia and soffits on a property. We used white plastic over boards (this works out at a lower cost to the customer of a full replacement), dry verges. Black guttering and downpipes.

Categories
External Fencing Groundwork

Hedge removal and new fence installation.

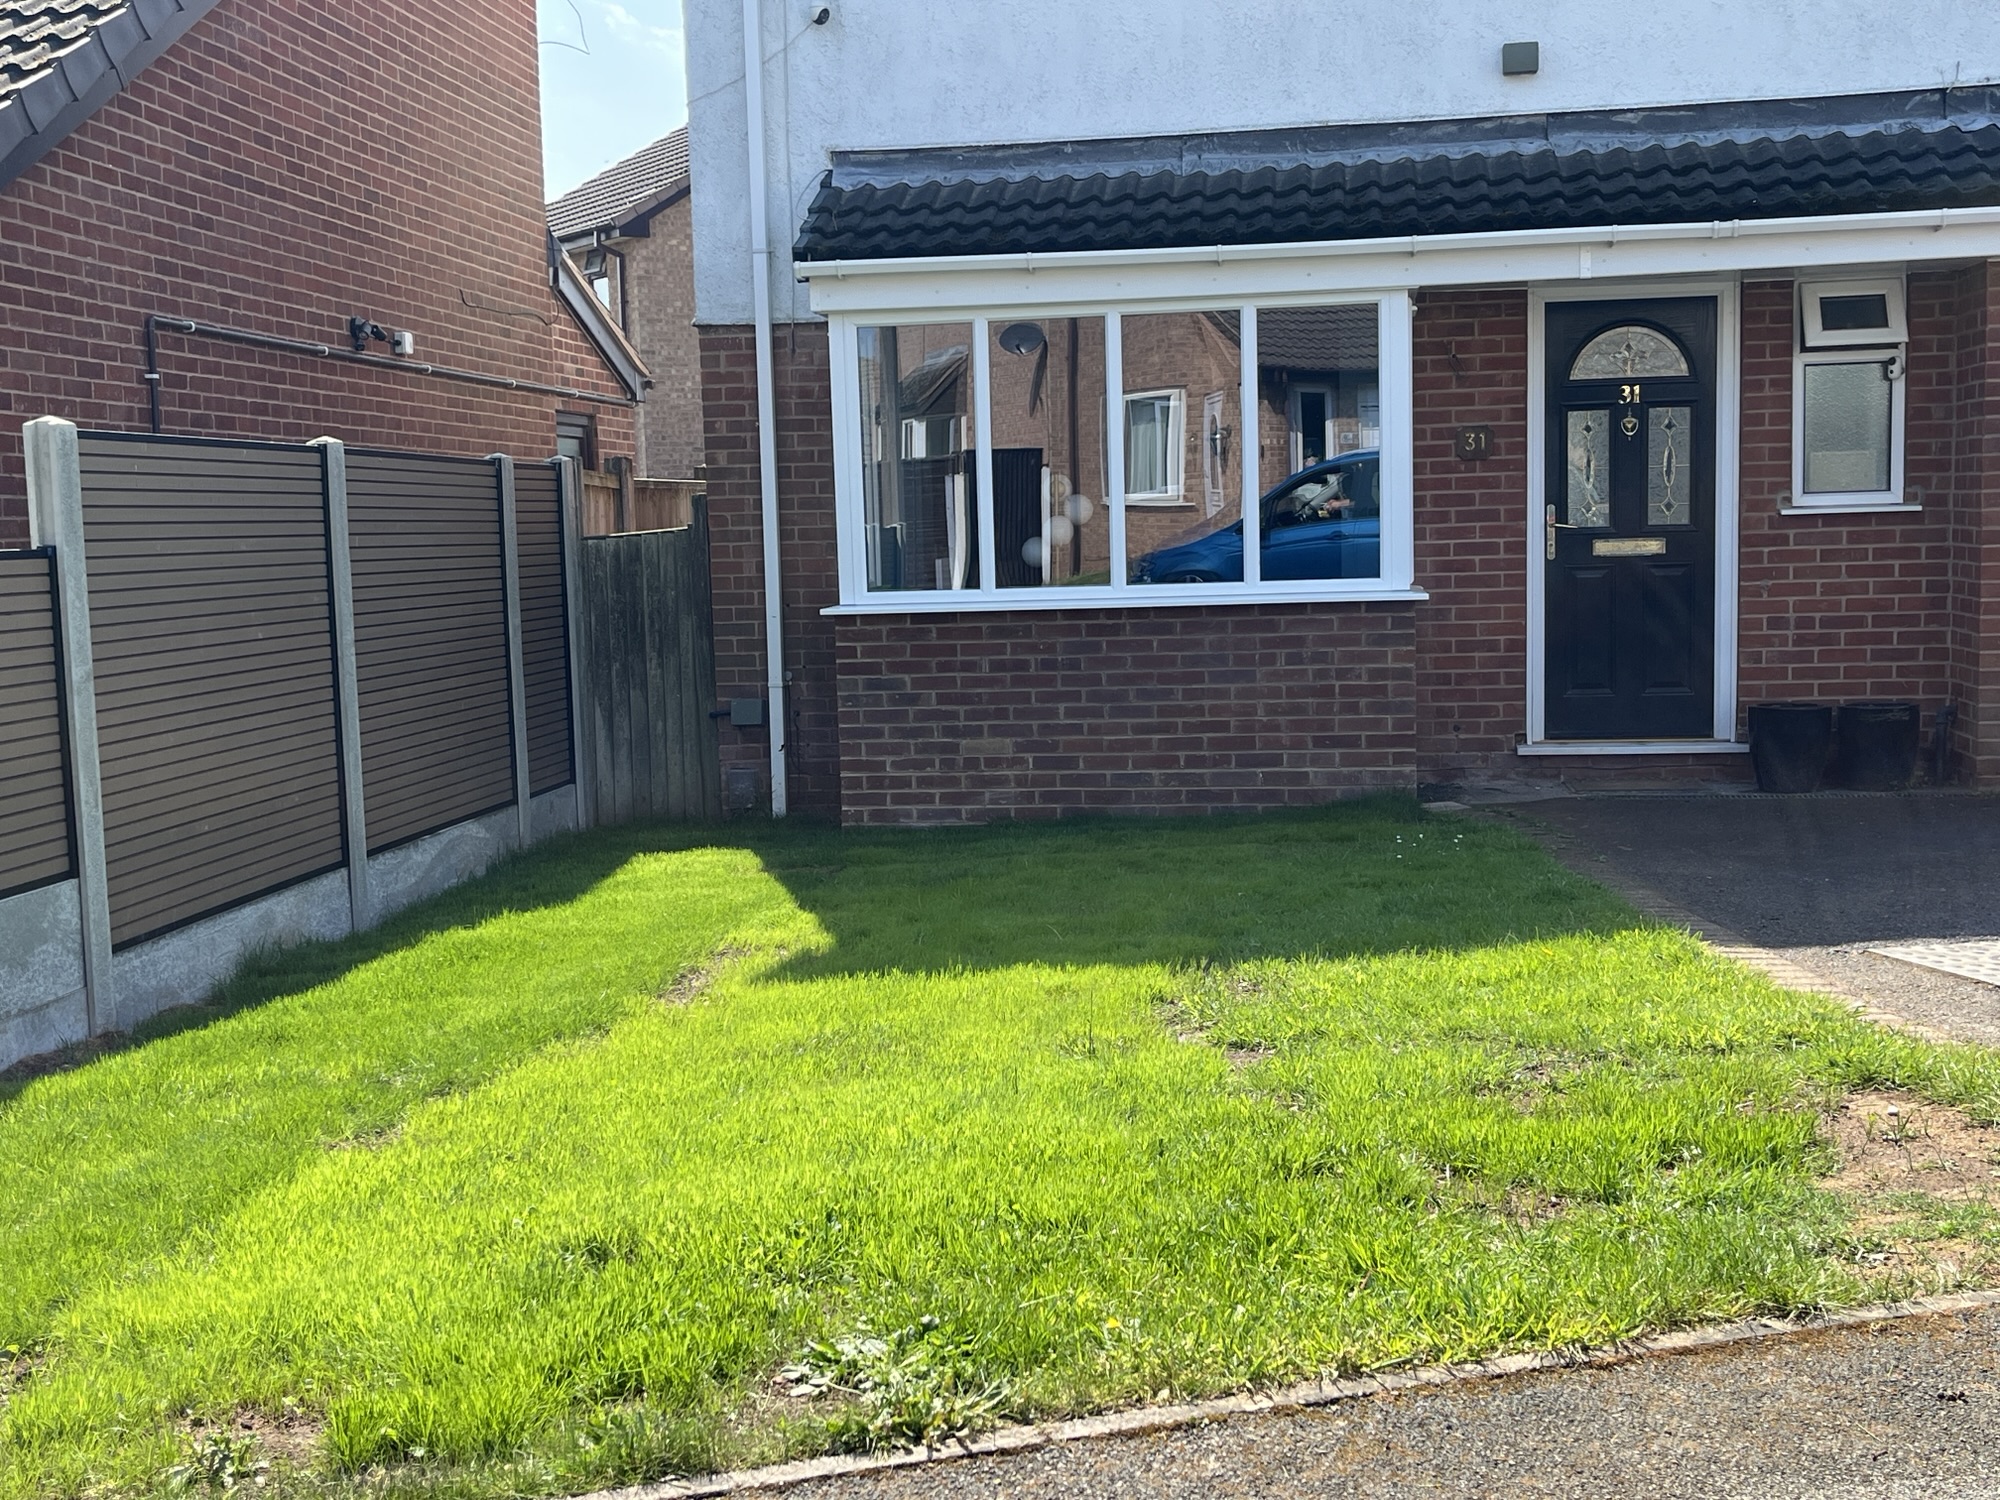
We removed a conifer hedge back in February for the customer before the start of the bird nesting season. Pruning trees or bushes after the 1st of April without appropriate ecological supervision could get a builder like ourselves into trouble.

The customer chose composite fence panels from Charles and Ivy.

We installed these into concrete posts and gravel boards for longevity.

The last eight weeks have been very dry. It is is very important to water newly laid turf regularly if it is not raining frequently. Here is a guide to looking after your new turf.

The first few weeks after laying new turf are crucial for root establishment. Here is detailed advice for caring for your new lawn, focusing on watering, traffic, and mowing:1. Watering (The Most Critical Step)The first few weeks after laying new turf are crucial for root establishment. Here is detailed advice for caring for your new lawn, focusing on watering, traffic, and mowing:
 
1. Watering (The Most Critical Step)
  • Initial Watering (First 1-3 Weeks): New turf is a living plant that needs consistent moisture to root deeply.
    • Frequency: Water the entire lawn evenly and thoroughly every day, especially during hot or dry weather. Some advice suggests watering at least twice a day for the first seven days.
    • Technique: Use a sprinkler to ensure even coverage. The water must soak down through the turf to moisten the soil below.
    • Timing: Water early in the morning or early evening to allow the water to reach the roots before the sun causes it to evaporate.
    • Watch for Edges: Concrete edging, posts, and paving slabs absorb water quickly, so be sure to water areas near them more often.
  • Avoid Overwatering: While the turf needs water, ensure the ground is moist but not waterlogged or soggy, as this can starve the roots of oxygen and make the grass turn yellow or die.
  • Reducing Frequency: As the turf starts to knit together (around 3 to 4 weeks), reduce watering frequency. It is better to water thoroughly every two to three days than to water a little bit every day.
2. Traffic and Compaction
  • Keep Off: Avoid walking on the new turf as much as possible for the first few weeks, ideally three to four weeks. Walking on it can cause soil compaction, create dents and divots, and disrupt root formation.
  • Necessary Access: If you must cross the lawn (e.g., for watering), place wooden planks or boards down to use as a walkway to distribute your weight.
  • Pets and Play: Keep pets and children’s play equipment off the lawn until it is fully established and settled.
  • Frost: Avoid walking on the lawn during frosty weather as this can damage the grass blades.
3. Mowing
  • When to Start: Do not mow until the turf has rooted well and the blades of grass are at least 25mm high. This is typically around three weeks after laying.
  • Check Rooting: To check if it’s ready, gently tug on a few blades of grass. If the turf lifts, wait a few more days. If the turf feels stuck, the roots have started to take and it is ready for its first cut.
  • First Cut: Use the highest setting on your lawnmower and ensure the blades are sharp for a clean cut. Only cut off about a quarter to no more than one-third of the grass length at one time.
  • Ongoing Mowing: When the grass is growing, cut “a little and often” rather than cutting it once a week, as frequent light trimming prevents the coarse grass from dominating the lawn.
4. Fertilising and General Care
  • Fertiliser: Your new turf is usually pre-fertilised, so it generally will not require additional fertiliser for at least three months, or a minimum of six weeks after laying. Phosphorous is considered the most crucial nutrient during this establishment phase to encourage root growth.
  • Cuttings: Collect the clippings using a grass box or rake them up and remove them to ensure sunlight reaches the turf.
  • Brown Patches: If your turf is turning yellow or brown, it is likely due to insufficient water during a dry or hot spell. Increasing your watering will usually return the lawn to a healthy state.
Categories
Uncategorised

The small jobs….

Friday was spent ticking lots of little jobs off for a customer in Edwalton who was moving to a new property.

  • Fit extension lead through cupboard
  • Shorten pendant light fittings
  • Wire up an electric oven using 4mm cable
  • Fit a dummy alarm box with integral flashing light
  • Extend the TV into the bedroom
  • Remove handrails and seat from the bathroom
  • Swap which side the fridge opens
  • Take apart and store galvanised handrail using a large size hexagonal tool fitted on a wrench

Thorough preparation meant that we arrived prepared and managed to tick all the “to do” items off of our customers list apart from staining the front fence. We cleared the rubbish in the garden and took it to Beeston tip.

Overall a very satisfying day.

The customer gave us a really good testimonial

Absolutely brilliant, even though Rob’s company is a highly regarded “proper” building firm, he was more than happy to accommodate my small but important to me list of works. I am so grateful I found such a good, honest and hard working professional.

Categories
Bathroom

Bathroom remodel

Case Study: Bathroom Reconfiguration and Specialist Upgrades

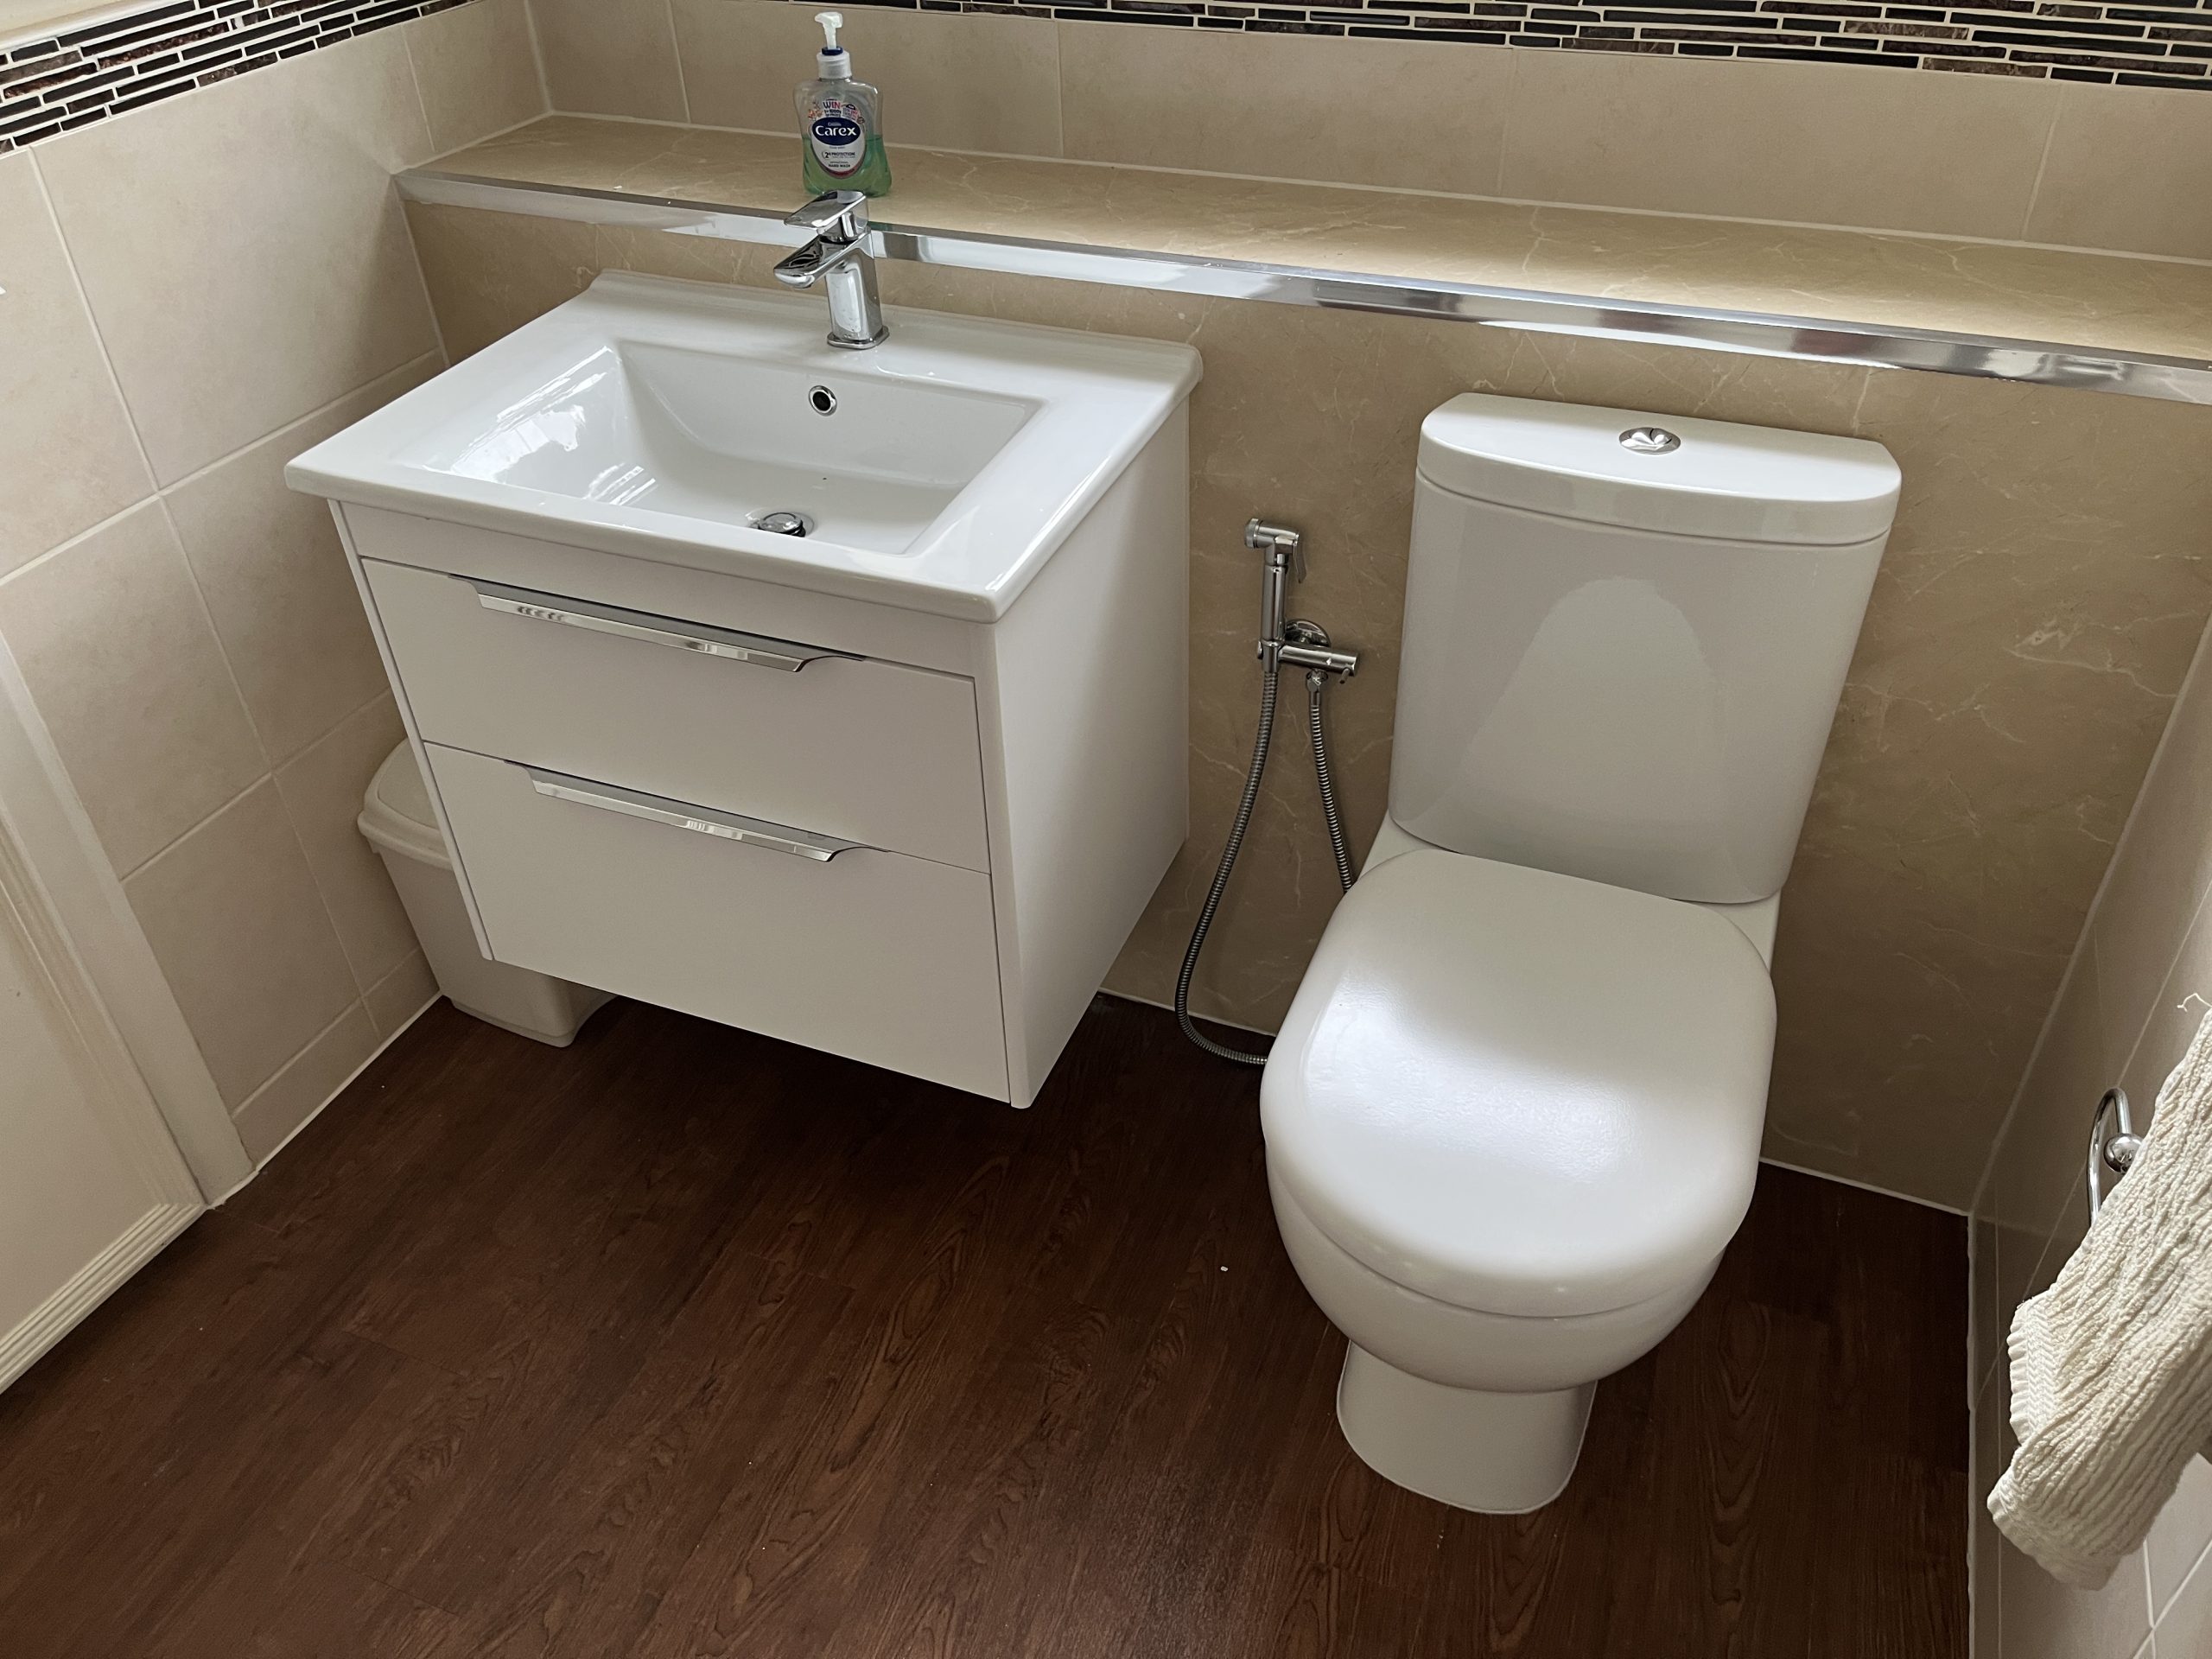
This project focused on a comprehensive bathroom refurbishment, involving plumbing & electrical modifications to resolve functional issues and enhance the client’s living space. Providing a private bathroom for a family member and a separate space to store shoes that cog up the hallway.

Project Scope and Functional Redesign

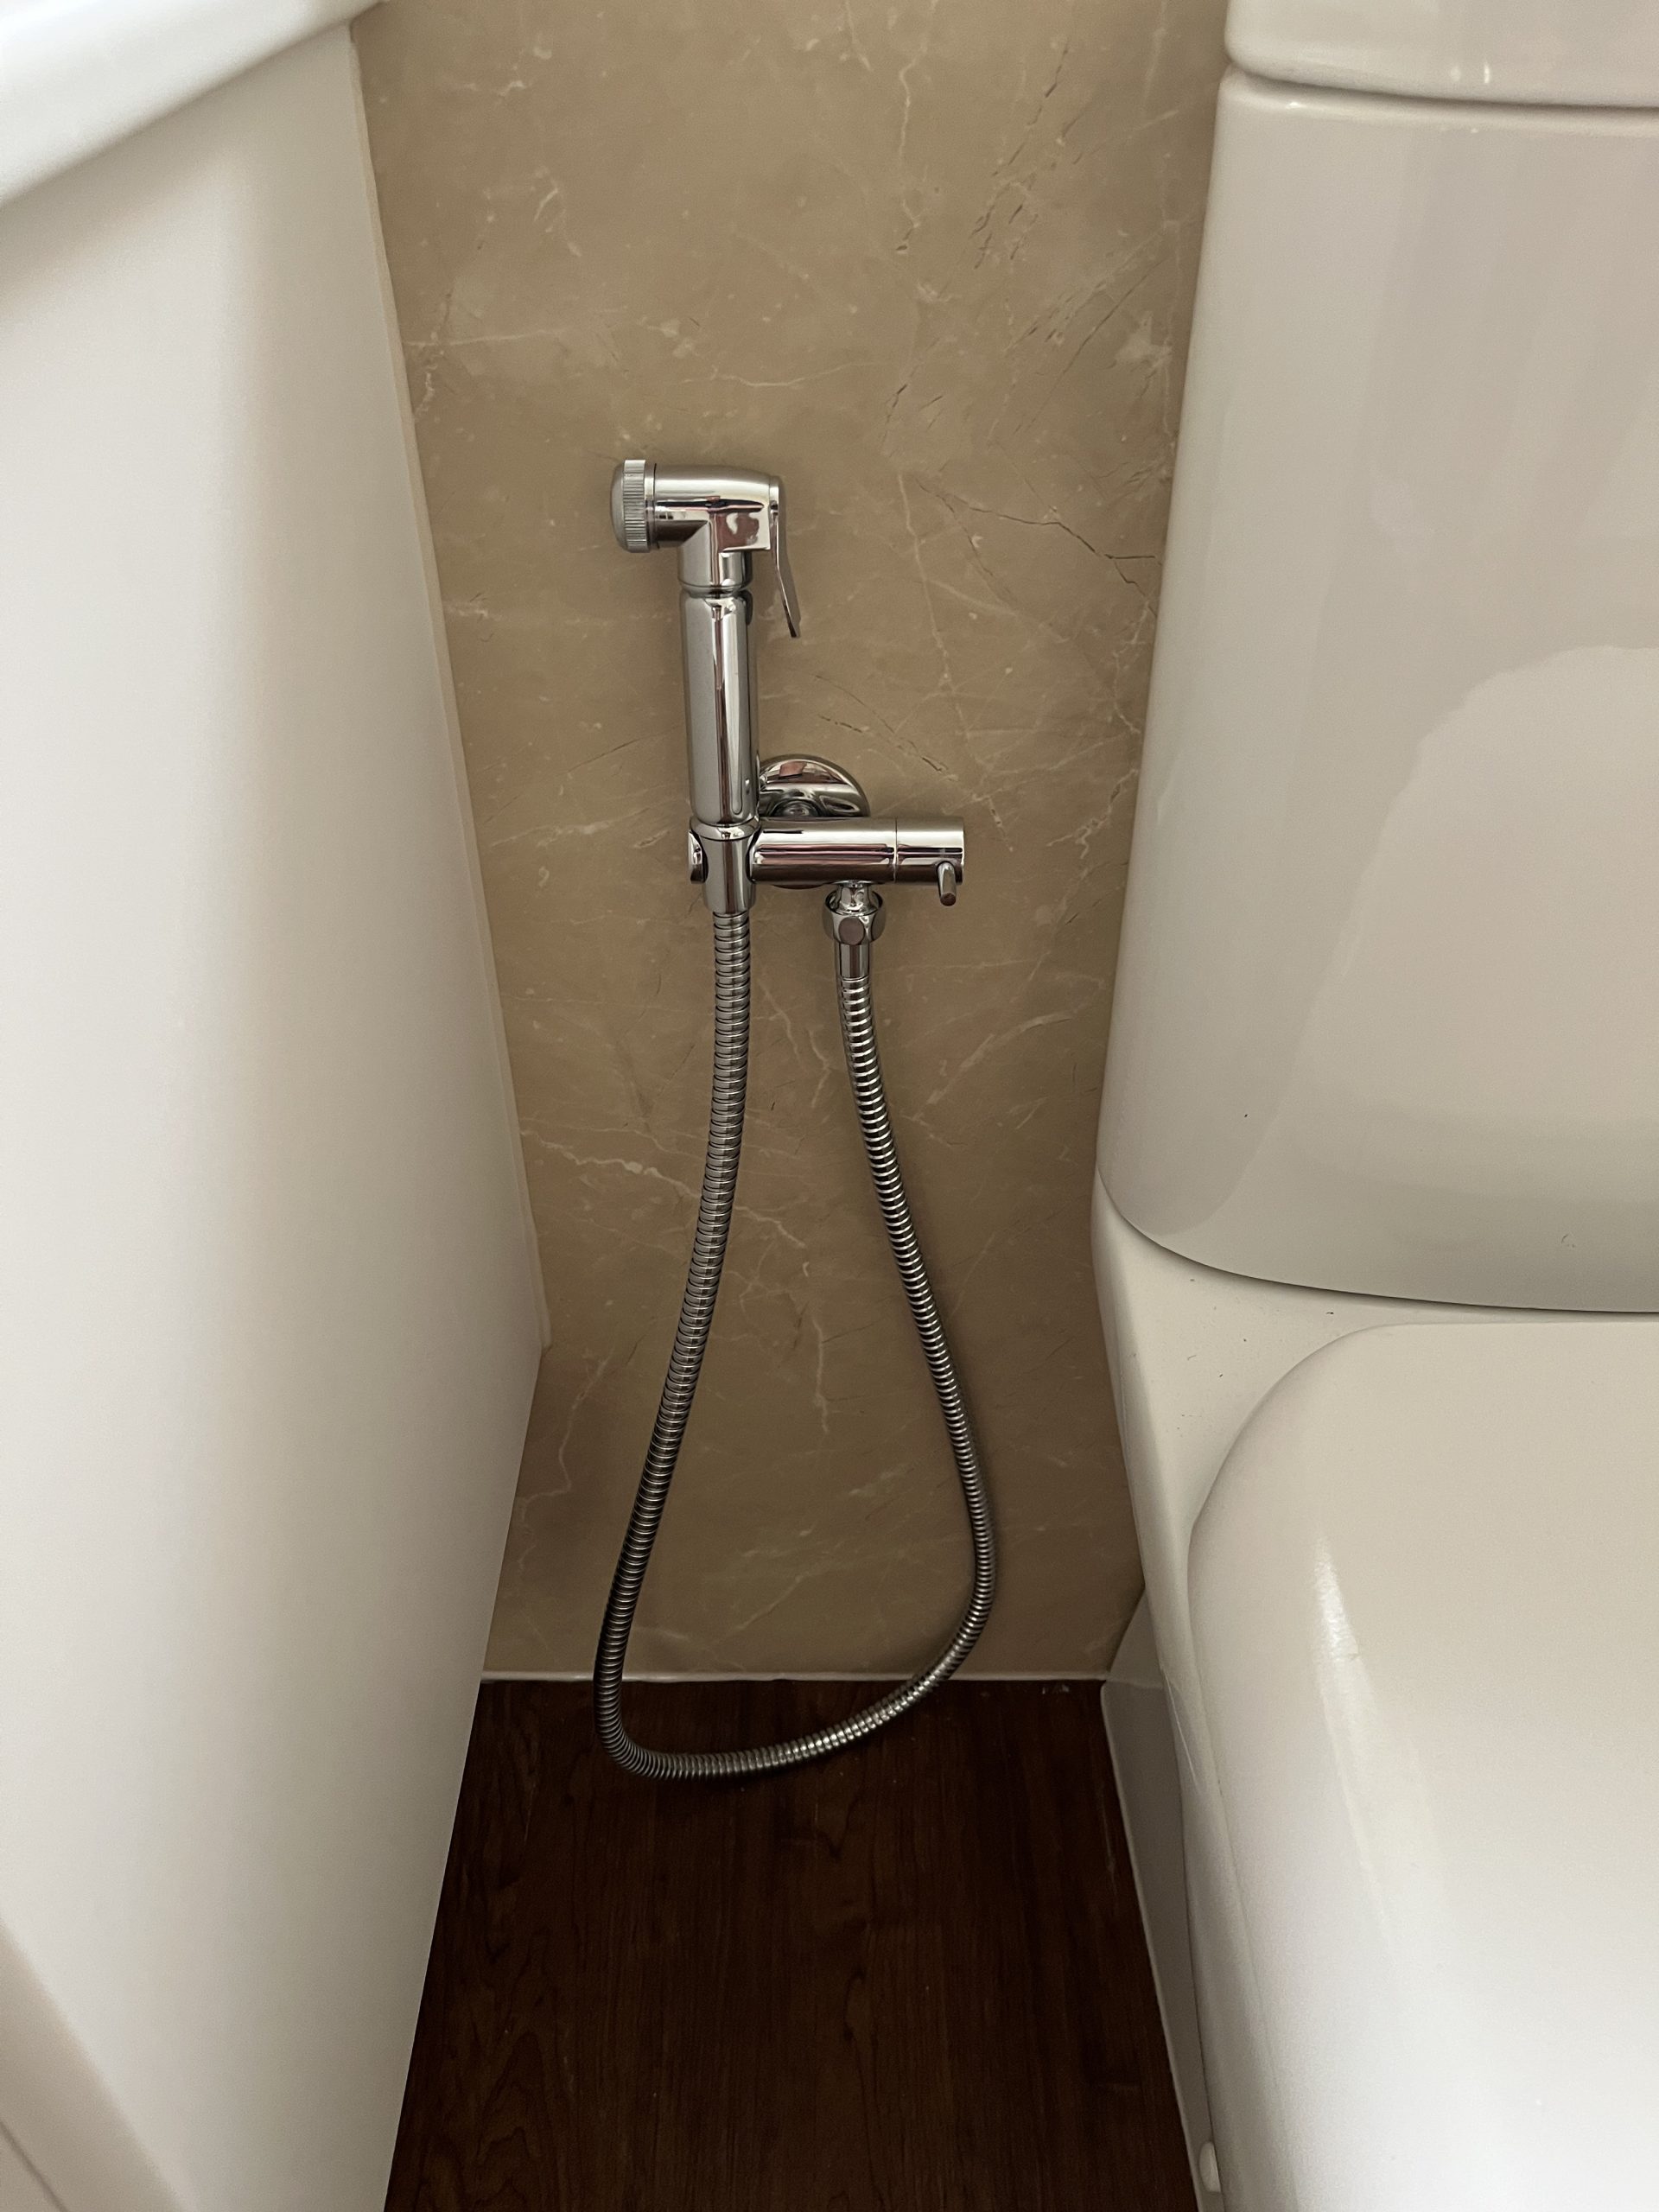
The primary drivers for this renovation were to remedy a leak in the shattaf/shower douche unit and to improve the home’s utility by removing the ‘Jack and Jill’ dual-access feature. By eliminating the second doorway, we successfully partitioned the space to create a dedicated cloakroom/shoe cupboard and a more private, functional single bathroom. This reconfiguration maximized the available floorplan to deliver a new, tailored storage solution.

IMG_6102
previous arrow
next arrow

Electrical and Plumbing Upgrades

The renovation included complex electrical work to ensure safety and regulatory compliance. The existing lighting system was consolidated into a single circuit controlled by dual switches. Our team expertly isolated and divided this legacy system to establish two individual, independent lighting circuits—one for the main bathroom and a separate circuit for the new cloakroom. This precise re-wiring ensures full compliance with modern electrical standards and provides independent control for the segregated areas.

In the plumbing specification, client safety and ease-of-use were paramount. The isolation valve on the shattaf unit was required to be highly accessible and simple to operate. We rejected the original unit and procured a replacement featuring a superior, ergonomic handle. The new isolation valve was installed in line with industry best practice for functionality, correctly positioned on the right-hand side of the toilet.

Finishing Solutions: Efficiency and Aesthetic Integration

To meet the client’s preference for minimal disruption and to avoid the cost and time associated with full re-tiling, we deployed high-quality shower panels. This method provided a seamless, waterproof finish that was selected to harmoniously integrate with the existing tiling, delivering a premium look with enhanced project efficiency.

Project Metrics: Delivery and Investment

This comprehensive refurbishment was executed with controlled precision, demonstrating our ability to deliver complex projects efficiently:

  • Timeline: The project was completed in approximately one week from start to finish.
  • Cost Breakdown (Excluding VAT):
    • Materials: £1,200
    • Labour: £2,800
    • Electrics (including lights and extractor fan): £400
    • Plastering: £300
    • Joinery: £300
    • Total Project Investment (Excluding VAT): £5,000
Categories
Groundwork Paving

Paving concrete stairs

We need to make the concrete steps more attractive so we cut and installed 20mm porcelain slabs. it is possible to use internal tiles which are much easier to cut but we as they are normally less than 10 mm and afford to get underneath with the frost they can crack.

The main challenge with 20 mil slabs is cutting them because a large bench saw with a diamond blade is needed to cut them. The stairs also have a small nosing on them to give additional traction in the wet.

We will need to add a handrail to the stairs, we are using a system from FH bundle that bolts onto the side of the concrete step underneath.

Categories
Uncategorised

Resin bonded gravel landscaping & path

We laid a landscape plan for a customer with products from the Resin Mill The The customer wanted a base for a shed and a base for a breeze house. We used block paving bricks to make a boundary to the lawn, then made a pathway. the base for the breeze house was laid in Concrete with Bullnose kerbs laid in a circle.
A base layer is put down to hold the final gravel layer in place. Resin bonded gravel is permeable to water so the substructure underneath 
Categories
Internal fit out Windows

Window hinge replacement

This customer got in contact through the Bark app. We use it if we have surplus labour availability and for small jobs which keep the bank account ticking over.
The 8 year old hinge had broken. The fix was 10 inch replacement from eBay for £9.20 for a pair. The total bill was under £100 including labour and Vat
 
The new hinge is installed in just 10 minutes.
Categories
Groundwork Uncategorised

Fire hydrant commissioning and drain cover install.

We needed to expose the fire hydrant valve which had been tarmacked over, we the approximate area from the plans. Cut out a square of tarmac, exposed hydrant valve. Fitted the correct sheathing around it & lid, then backfilled with cold lay tarmac.


Whilst installing the manholes we also installed 2 new drain covers over the rainwater gulleys.

When the work was complete we added cold lay tarmac, its ideal for low traffic use area’s or temporary repairs as long as it is suitably compacted.

Categories
Brickwork Renovation

Brick wall repointing

The wall had been in place for approximately 130 years and needed some TLC. We removed the Staffordshire blue the coping  stones, repointed the wall and refitted the coping stones.

We used standard cement and yellow building sand, a few of the bricks could have been replaced but the client wished to patch up the wall to minimise expenditure. The work took 2 days for one of our skilled bricklayers to complete.

various bricks are blowing, but the customer wanted to minimise the spend so we simply patched up as best we could. Sometimes it is possible to chop out a blown brick and then use the other inward facing side on the outside. however in practice if the face of a brick has blown then when extracting the brick from the wall it tends to break up and can’t be reused.